

Quick Recipe Summary
| Detail | Information |
|---|---|
| Prep Time | 20 minutes |
| Cook Time | 15 minutes |
| Total Time | 35 minutes |
| Servings | 4 |
| Cuisine | American |
| Course | Main Course |
| Difficulty | Easy |
| Calories | Approximately 620 kcal |
Table of Contents
- Introduction
- Why This Recipe Works
- Why You’ll Love This Recipe
- Ingredient Notes
- Kitchen Equipment
- Preparation Information
- Step-by-Step Instructions
- Expert Tips
- Common Mistakes
- Recipe Variations
- What to Serve With This Recipe
- Make Ahead Tips
- Meal Prep Tips
- Storage Instructions
- Reheating Instructions
- Nutritional Information
- Frequently Asked Questions
- Final Thoughts
Introduction
A Cheesy Chicken Sandwich is the perfect combination of juicy chicken, melted cheese, toasted bread, and flavorful seasonings. Whether you’re making lunch for the family or looking for a satisfying dinner, this recipe delivers crispy, golden bread with a rich, gooey cheese filling that everyone will love.
The best part is that it’s quick to prepare using simple ingredients you probably already have in your kitchen.
Why This Recipe Works
This sandwich balances crispy texture, juicy chicken, and perfectly melted cheese. Toasting the bread creates a crunchy exterior while keeping the inside soft and cheesy. The combination of herbs, vegetables, and creamy sauces adds layers of flavor without making the sandwich overly complicated.
Why You’ll Love This Recipe
- Ready in about 35 minutes
- Crispy outside with a gooey cheese center
- Family-friendly recipe
- Great for lunch or dinner
- Easy to customize
- Perfect for meal prep
- Budget-friendly ingredients
- Freezer-friendly chicken filling
Ingredient Notes
- 2 chicken breasts, cooked and shredded
- 1 tablespoon olive oil
- 1 teaspoon garlic powder
- 1 teaspoon onion powder
- 1 teaspoon paprika
- Salt and black pepper to taste
- 1 cup shredded mozzarella cheese
- ½ cup cheddar cheese
- 2 tablespoons mayonnaise
- 1 tablespoon ketchup
- 1 teaspoon mustard
- 1 small onion, finely chopped
- ½ green bell pepper, diced
- 8 sandwich bread slices or burger buns
- Butter for toasting
- Fresh parsley for garnish

Kitchen Equipment
- Frying pan
- Cutting board
- Knife
- Mixing bowl
- Spatula
- Cheese grater
- Measuring spoons
Preparation Information
Prep Time: 20 minutes
Cook Time: 15 minutes
Total Time: 35 minutes
Servings: 4 sandwiches
Step-by-Step Instructions
Step 1 – Prepare the Chicken
Season the shredded chicken with garlic powder, onion powder, paprika, salt, and black pepper.
Cook in a lightly oiled skillet until heated through and lightly browned.
Why this matters: Browning develops deeper flavor.
Step 2 – Cook the Vegetables
Add chopped onions and green peppers to the skillet.
Cook until softened but still slightly crisp.
The vegetables should become fragrant without losing their freshness.
Step 3 – Mix the Filling
Combine the cooked chicken with mayonnaise, ketchup, and mustard.
Mix until every piece is coated evenly.
Fold in half of the cheese.
Step 4 – Assemble the Sandwich
Butter one side of each bread slice.
Spread the chicken mixture evenly.
Top generously with mozzarella and cheddar cheese.
Cover with another slice of bread.
Step 5 – Toast
Cook over medium heat for 3–4 minutes per side.
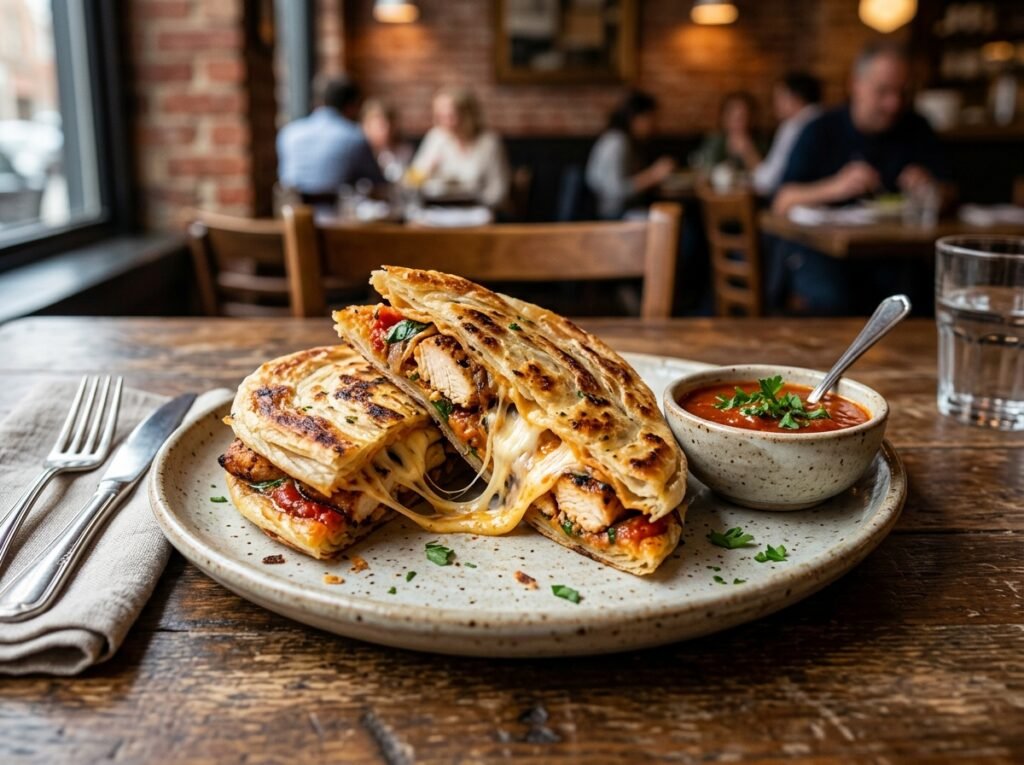
The bread should become golden brown while the cheese melts completely.
Avoid high heat, which can burn the bread before the cheese melts.
Step 6 – Slice and Serve
Allow the sandwich to rest for one minute before slicing.
Garnish with chopped parsley and serve immediately.
The cheese should be stretchy and the bread beautifully crisp.
Expert Tips
- Grate your own cheese for better melting.
- Cook over medium heat.
- Butter the bread evenly.
- Let the sandwich rest before cutting.
- Don’t overfill the sandwich.
Common Mistakes
- Cooking over high heat
- Using too much filling
- Skipping the butter
- Cutting immediately after cooking
- Overcooking the chicken

Recipe Variations
- Spicy Jalapeño Chicken Sandwich
- BBQ Chicken Sandwich
- Buffalo Chicken Sandwich
- Extra Cheesy Version
- Mushroom Chicken Sandwich
- Healthy Whole Wheat Version
- Low-Carb Lettuce Wrap
- Vegetarian version with grilled mushrooms and vegetables
What to Serve With This Recipe
- French fries
- Potato wedges
- Coleslaw
- Tomato soup
- Caesar salad
- Garlic dip
- Ranch dressing
- Pickles
- Fresh lemonade
- Iced tea
Make Ahead Tips
Prepare the chicken filling up to two days in advance and refrigerate it. Assemble and toast the sandwiches just before serving for the best texture.
Meal Prep Tips
Cook a large batch of the chicken filling and portion it into airtight containers. Assemble fresh sandwiches throughout the week.
Storage Instructions
Refrigerator: Store for up to 3 days.
Freezer: Freeze the chicken filling for up to 2 months.
Reheating Instructions
Oven: 350°F (175°C) for 8–10 minutes.
Air Fryer: 350°F for 4–5 minutes.
Microwave: 1–2 minutes (bread will soften).
Stovetop: Toast in a skillet until heated through.
Nutritional Information (Approximate)
- Calories: 620
- Protein: 38g
- Carbohydrates: 34g
- Fat: 34g
- Fiber: 3g
- Sugar: 5g
- Sodium: 780mg
Frequently Asked Questions
Can I use rotisserie chicken?
Yes, it’s a great time-saving option.
Which cheese melts best?
Mozzarella, cheddar, Monterey Jack, and provolone.
Can I make it spicy?
Yes, add jalapeños or hot sauce.
Can I freeze it?
Freeze the filling rather than the assembled sandwich.
Can I use an air fryer?
Absolutely. Air fry until golden and crispy.
What bread works best?
Thick sandwich bread, sourdough, or brioche.
Can I use leftover chicken?
Yes, leftover roasted or grilled chicken works perfectly.
How do I keep the bread crispy?
Cook over medium heat and avoid covering the pan.
Final Thoughts
This Cheesy Chicken Sandwich is an easy, satisfying recipe that combines crispy toasted bread, flavorful chicken, and perfectly melted cheese into every bite. It’s versatile enough for lunch, dinner, or even a quick weekend meal, and you can easily customize it with your favorite vegetables, sauces, or cheeses. Serve it fresh with fries, salad, or soup for a complete meal. If you try this recipe, leave a comment and rating to let others know how it turned out and share your favorite variations.