
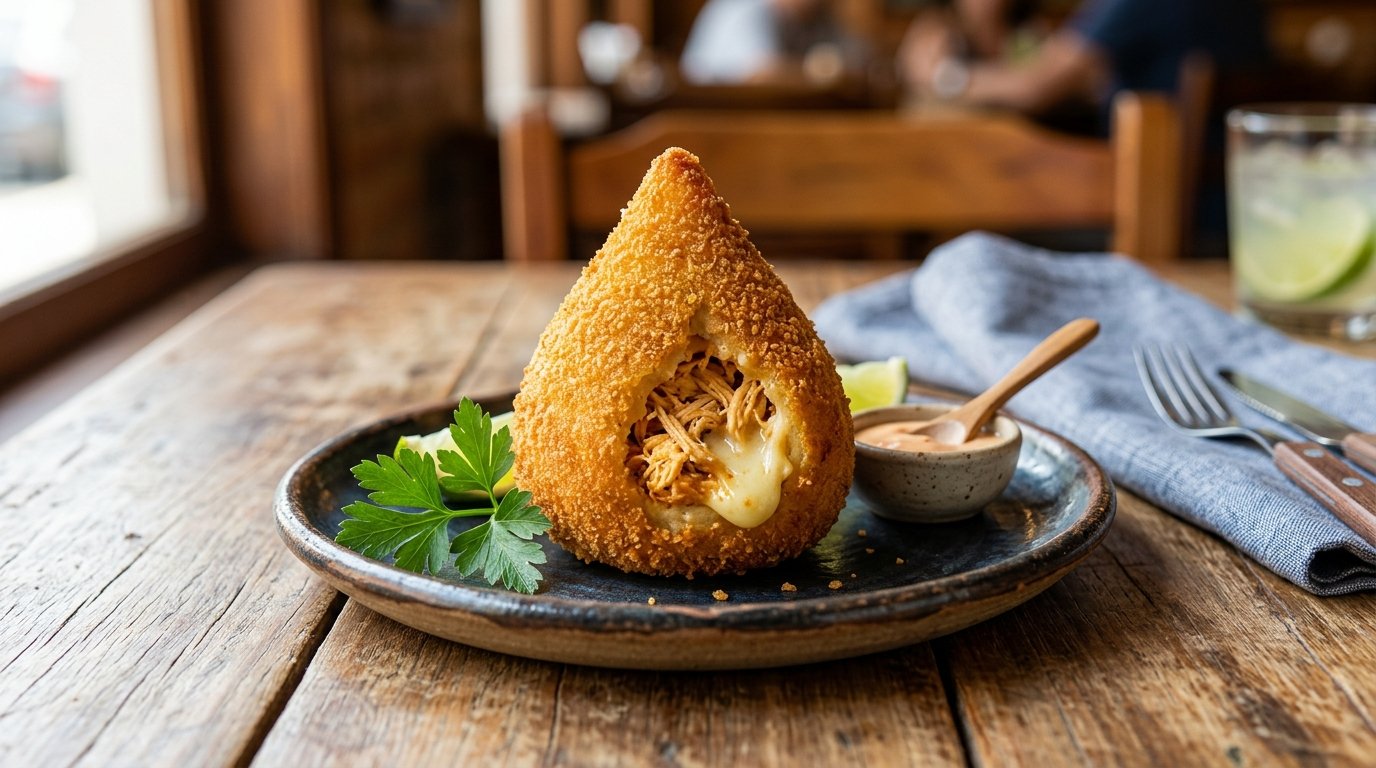
Crispy on the outside, creamy and savory on the inside — this Brazilian classic is pure comfort food. Coxinha de frango com catupiry combines a soft potato dough, shredded chicken filling, and a generous pocket of catupiry cheese, all shaped like a little chicken drumstick and deep-fried until golden. One bite and you’ll understand why it’s a favorite at parties, bakeries, and home kitchens across Brazil.
Quick Recipe Summary
| Prep Time | Cook Time | Total Time | Servings | Cuisine | Course | Difficulty | Calories (approx.) |
|---|---|---|---|---|---|---|---|
| 40 minutes | 25 minutes | 1 hour 5 minutes | 12–15 pieces | Brazilian | Appetizer / Snack | Intermediate | 180–220 per piece |
This recipe walks you through every stage — from mashing the potatoes into a pliable dough, to shaping the iconic teardrop form, breading, and frying to golden perfection. The result is a crisp shell that gives way to creamy catupiry and flavorful chicken in every bite.
Table of Contents
| Section |
|---|
| Introduction |
| Why This Recipe Works |
| Why You’ll Love This Recipe |
| Ingredient Notes |
| Kitchen Equipment |
| Preparation Information |
| Step-by-Step Instructions |
| Expert Tips |
| Common Mistakes |
| Recipe Variations |
| What to Serve With This Recipe |
| Make-Ahead Tips |
| Meal Prep Tips |
| Storage Instructions |
| Reheating Instructions |
| Nutritional Information |
| Troubleshooting Guide |
| Frequently Asked Questions |
| Final Thoughts |
Introduction
Coxinha de frango com catupiry is one of Brazil’s most beloved street-food snacks. The name “coxinha” means “little thigh,” a nod to its classic drumstick shape. What makes this version special is the combination of a tender potato-based dough, seasoned shredded chicken, and a melting center of catupiry — Brazil’s iconic soft, mild cream cheese. The contrast between the crunchy golden exterior and the creamy, savory interior is what keeps people coming back for more. Whether you’re hosting a gathering or simply craving something indulgent, this homemade coxinha delivers bakery-quality results with clear, achievable steps.
Why This Recipe Works
The potato dough is cooked and mashed while still hot so it becomes smooth and elastic, making it easy to shape without cracking. Seasoning the dough lightly with paprika (or a similar mild chili powder) adds color and a subtle savory note that complements the filling. Catupiry is placed first so it stays protected by the chicken, reducing the chance of leaking during frying. A thorough coating of breadcrumbs creates the signature crunch, and frying at the right temperature ensures the dough cooks through while the outside turns evenly golden.
Why You’ll Love This Recipe
- Authentic Brazilian flavor with a creamy catupiry center
- Crisp exterior that stays crunchy after frying
- Dough that is easy to handle and shape
- Freezer-friendly for make-ahead parties
- Crowd-pleasing appetizer or snack
- Customizable filling options
Ingredient Notes
For the dough
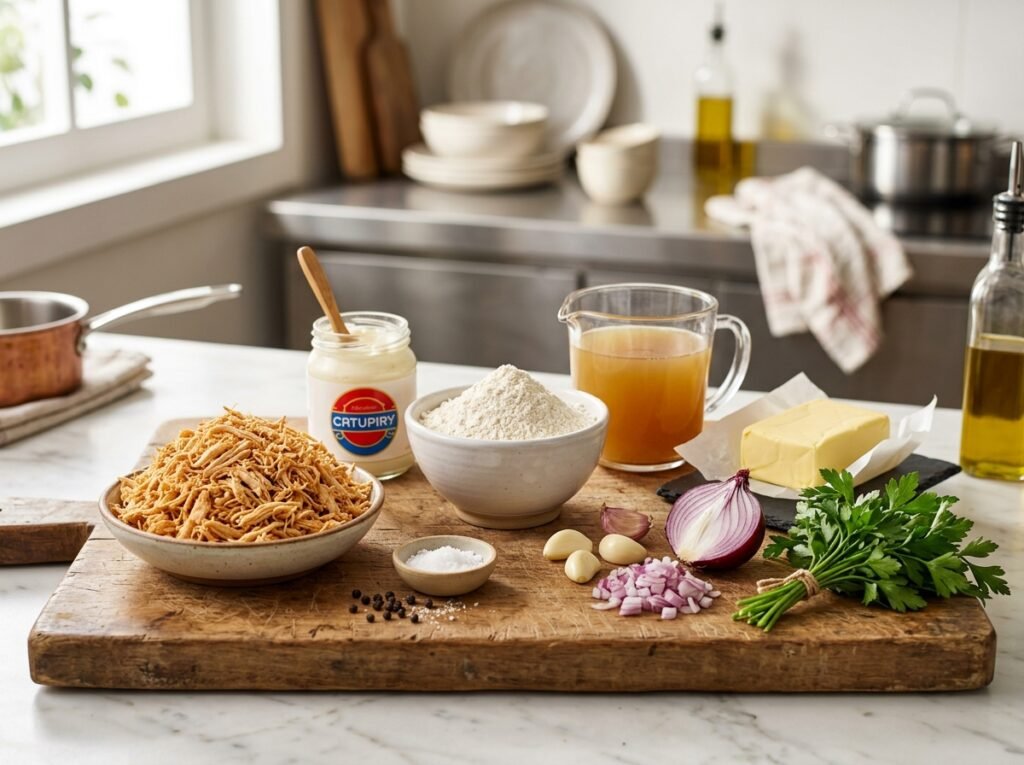
- Potatoes (about 500–600 g / 1.1–1.3 lb): Yukon Gold or similar waxy potatoes give the best texture — creamy yet firm enough to hold shape. Purpose: form the dough base. Substitutions: sweet potatoes for a slightly sweeter version (adjust liquid if needed). Buying tip: choose firm, unblemished potatoes. Storage: keep in a cool, dark place.
- Butter or oil (1–2 tbsp): helps create a smooth, pliable dough.
- Paprika or mild red chili powder (½–1 tsp): adds color and gentle flavor.
- Salt: to taste.
For the filling
- Cooked shredded chicken (about 250–300 g / 9–10 oz): use leftover roasted or poached chicken. Purpose: savory protein base. Substitutions: leftover turkey or plant-based chicken alternatives.
- Catupiry or Brazilian cream cheese (about 150–200 g / 5–7 oz): the star creamy element. Substitutions: cream cheese mixed with a little heavy cream or requeijão. Buying tip: look for authentic Brazilian brands if available; otherwise use a soft, mild cream cheese. Storage: refrigerate and use within a few days of opening.
- Fresh herbs (parsley or cilantro, chopped): brightens the filling.
- Optional seasonings: a pinch of garlic powder, onion powder, or black pepper.
For breading and frying
- Breadcrumbs or panko (about 1–1½ cups): creates the crunchy coating. Panko gives extra lightness.
- Oil for deep frying (neutral oil such as canola, vegetable, or sunflower).
Kitchen Equipment
- Large non-stick skillet or frying pan
- Potato masher
- Wooden spoon or spatula
- Mixing bowls
- Cutting board
- Slotted spoon or spider strainer
- Deep frying thermometer (recommended)
- Paper towels for draining
Optional: food processor for shredding chicken, cookie scoop for portioning dough.
Preparation Information
- Prep Time: 40 minutes (includes mashing, kneading, filling, and shaping)
- Cook Time: 25 minutes (dough cooking + frying)
- Total Time: approximately 1 hour 5 minutes
- Servings: 12–15 medium coxinhas
Step-by-Step Instructions
Cook and Mash the Potatoes
Place peeled and roughly chopped potatoes in a skillet with a little water or stock if needed, or simply cook them until soft. Once tender, mash thoroughly while still hot using a potato masher. Work the mixture until almost no lumps remain. The heat helps the starches gelatinize, creating a dough that is smooth and easy to shape later.
Season and Cook the Dough
Add a small amount of butter or oil and a light sprinkle of paprika (or mild red chili powder). Stir continuously over medium heat until the mixture comes together into a cohesive, slightly sticky dough that pulls away from the sides of the pan. The color will deepen slightly from the paprika. Remove from heat and let cool just enough to handle comfortably.
Knead the Dough
Transfer the warm dough to a clean wooden board or countertop. Knead gently for 1–2 minutes until it becomes smooth, elastic, and no longer sticky. Proper kneading develops the structure so the dough can stretch around the filling without tearing.
Portion and Flatten
Divide the dough into equal portions (roughly golf-ball size). Flatten each piece into a thin disk in the palm of your hand, creating a slight well in the center.
Fill the Coxinhas
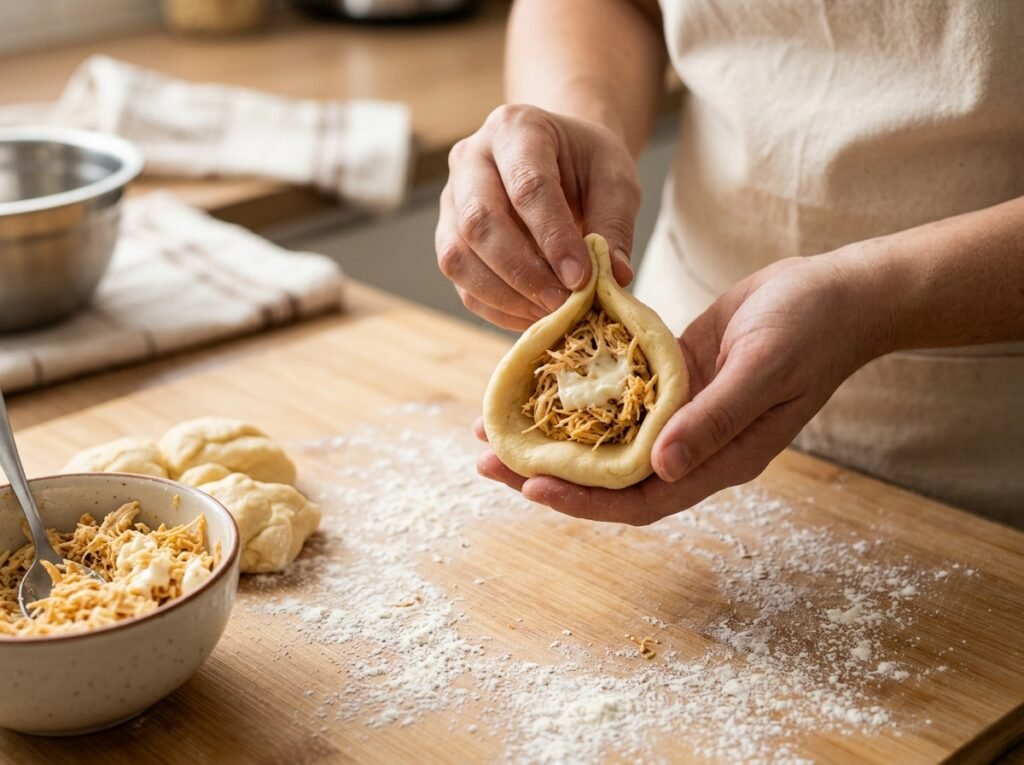
Spoon a small amount of catupiry into the center of each disk, then top with a spoonful of seasoned shredded chicken mixed with chopped herbs. Keep the filling modest so the dough can close completely.
Shape into the Classic Teardrop
Bring the edges of the dough up and over the filling, pinching firmly to seal. Gently mold the sealed ball into the traditional elongated teardrop (or drumstick) shape, tapering one end slightly. Smooth any seams with your fingers so no filling is exposed.
Bread the Coxinhas
Roll each shaped coxinha thoroughly in breadcrumbs or panko until fully coated. Press lightly so the crumbs adhere well. Proper coating is key to the signature crunch.
Fry Until Golden
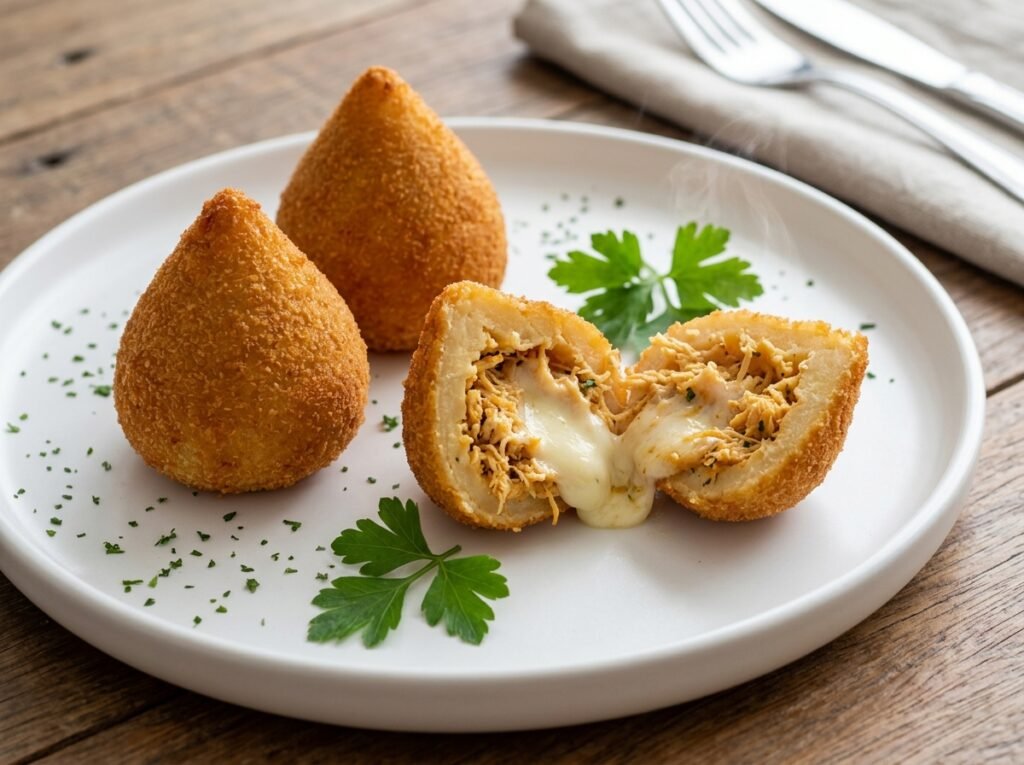
Heat oil to 170–180 °C (340–355 °F). Fry the coxinhas in batches, turning occasionally, until they are deep golden brown and crisp on all sides (usually 3–5 minutes). Remove with a slotted spoon and drain on paper towels. The exterior should be evenly colored with no pale spots.
Expert Tips
- Mash the potatoes while hot for the smoothest dough.
- Keep the filling cool and the dough slightly warm for easier sealing.
- Do not overfill — a modest amount of catupiry and chicken prevents bursting.
- Seal the dough completely; any gaps will cause oil to enter or cheese to leak.
- Maintain oil temperature; too low makes the coating greasy, too high burns the outside before the inside heats through.
- Fry in small batches so the oil temperature stays stable.
Common Mistakes
- Dough too wet or sticky → cook a little longer or add a small amount of flour if needed (use sparingly).
- Filling leaking during frying → seal more carefully and avoid overfilling.
- Uneven browning → maintain consistent oil temperature and turn the pieces regularly.
- Soggy coating → make sure the oil is hot enough before adding the coxinhas and drain well after frying.
Recipe Variations
- Spicy: add finely chopped chili or a pinch of cayenne to the chicken filling.
- Extra cheesy: increase the catupiry or mix in a little mozzarella.
- Vegetarian: replace chicken with sautéed mushrooms, corn, or hearts of palm.
- Healthier: bake at 200 °C (400 °F) for 20–25 minutes, turning halfway, or air-fry at 180 °C (360 °F) for 12–15 minutes.
- Low-carb: use a cauliflower-based dough (results will differ in texture).
- High-protein: increase the chicken-to-dough ratio.
What to Serve With This Recipe
Serve hot with a simple green salad, Brazilian vinaigrette (vinagrete), hot sauce, or a mild garlic mayonnaise. They pair well with cold beer, caipirinha, or iced tea. For a full spread, offer alongside other Brazilian snacks such as pastel or bolinho de bacalhau.
Make-Ahead Tips
Shape and bread the coxinhas, then refrigerate for up to 24 hours before frying. Alternatively, freeze them uncooked on a tray, then transfer to a freezer bag for up to 2 months. Fry from frozen, adding 1–2 extra minutes to the cooking time.
Meal Prep Tips
Cook the chicken and prepare the dough a day ahead. Store components separately in the refrigerator, then assemble and fry just before serving for maximum crispness.
Storage Instructions
Leftover fried coxinhas keep in an airtight container in the refrigerator for 2–3 days. For longer storage, freeze in a single layer, then transfer to a freezer-safe bag for up to 1 month.
Reheating Instructions
- Oven: 180 °C (350 °F) for 8–10 minutes until heated through and crisp.
- Air fryer: 170 °C (340 °F) for 5–7 minutes.
- Microwave: not recommended (makes the coating soft).
- Stovetop: reheat gently in a dry skillet over medium heat, turning often.
Nutritional Information (approximate per piece)
- Calories: 180–220
- Protein: 8–10 g
- Carbohydrates: 15–18 g
- Fat: 10–12 g
- Fiber: 1–2 g
- Sugar: 1 g
- Sodium: 250–350 mg
Values vary depending on exact portion size, oil absorption, and ingredients used.
Troubleshooting Guide
- Dough cracks while shaping → dough is too cold or too dry; warm slightly or knead a little longer.
- Cheese leaks during frying → seal more carefully and keep filling modest.
- Coating falls off → press breadcrumbs firmly and ensure the surface is slightly damp.
- Greasy texture → oil temperature was too low; drain thoroughly on paper towels.
- Pale or uneven color → oil not hot enough or pieces overcrowded.
Frequently Asked Questions
What is catupiry? Catupiry is a soft, mild Brazilian cream cheese with a slightly tangy, creamy texture. It melts beautifully and is the classic choice for coxinha.
Can I use regular cream cheese instead of catupiry? Yes. Soften it slightly and, if desired, mix with a spoonful of heavy cream or milk for a closer texture.
Can I bake the coxinhas instead of frying? Yes. Brush with oil and bake at 200 °C (400 °F) for 20–25 minutes, turning halfway, until golden.
How do I keep the shape from falling apart? Seal the dough tightly, avoid overfilling, and chill the shaped pieces for 15–20 minutes before breading if the dough feels soft.
Can I freeze uncooked coxinhas? Absolutely. Freeze on a tray until solid, then store in a freezer bag. Fry directly from frozen.
Why is my dough sticky? It may still contain excess moisture. Cook it a bit longer over medium heat while stirring until it firms up.
What oil is best for frying? Any neutral oil with a high smoke point (canola, sunflower, vegetable, or peanut oil).
How many coxinhas does this recipe make? Approximately 12–15 medium-sized pieces, depending on how large you shape them.
Final Thoughts
Coxinha de frango com catupiry is the kind of recipe that turns an ordinary afternoon into something special. The combination of crispy exterior, tender potato dough, seasoned chicken, and that unmistakable creamy catupiry center is pure Brazilian comfort. Once you master the shaping and sealing technique, you’ll find yourself making these for every gathering. Give the recipe a try, share your results, and let me know how they turned out — a rating or comment is always appreciated!