
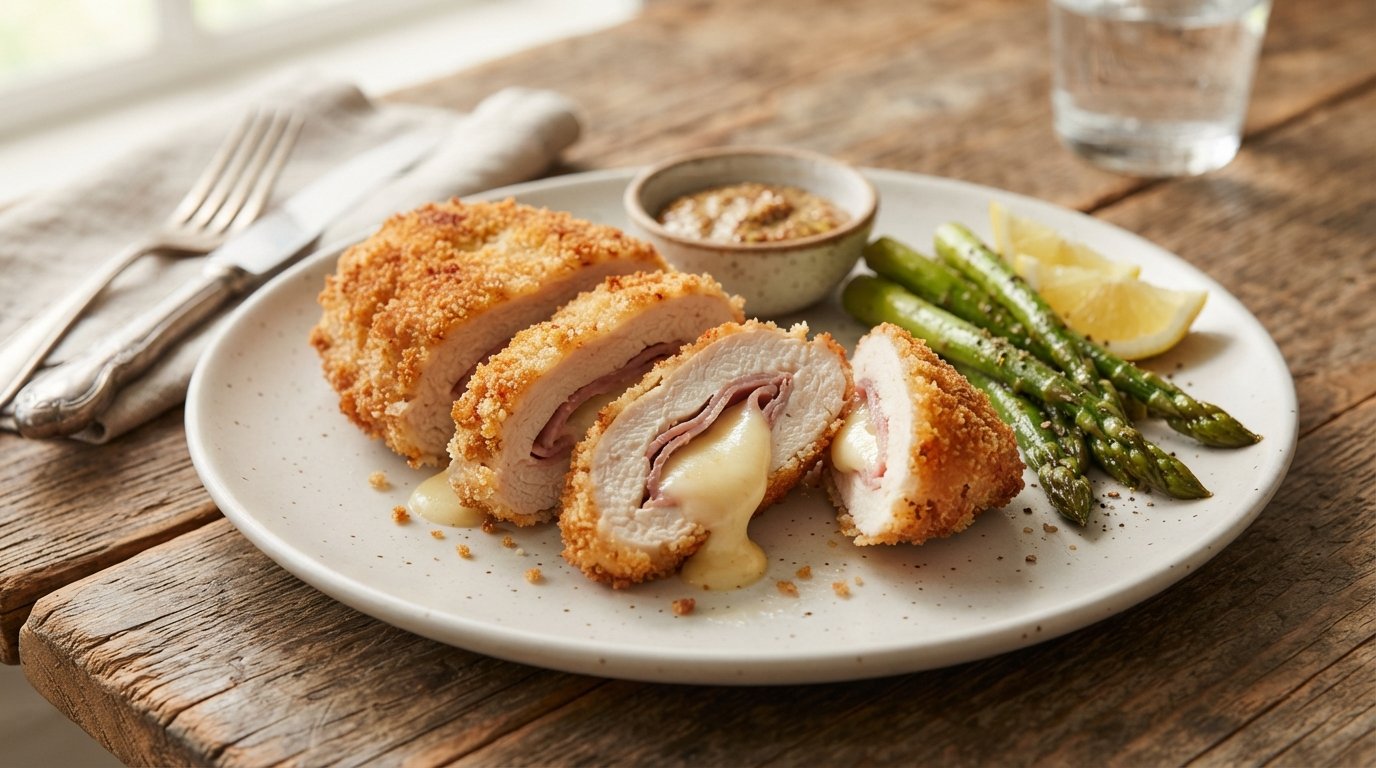
There’s something deeply satisfying about cutting into a golden, crisp chicken roll and watching melted cheese stretch while a silky sauce pools around it. This chicken cordon bleu recipe delivers exactly that restaurant-quality experience at home—tender pounded chicken, savory ham, gooey cheese, and a light cream sauce that ties everything together.
Quick Recipe Summary
| Prep Time | Cook Time | Total Time | Servings | Cuisine | Course | Difficulty | Calories |
|---|---|---|---|---|---|---|---|
| 25 minutes | 30 minutes | 55 minutes | 4 | French-American | Main Course | Intermediate | ~520 kcal |
This classic chicken cordon bleu features thinly pounded chicken breasts filled with ham and Swiss-style cheese, rolled, breaded, and finished with a creamy sauce. The dual cooking method of a quick pan sear followed by oven baking keeps the exterior crisp while ensuring the inside stays juicy and the cheese melts perfectly.
Table of Contents
| Section |
|---|
| Introduction |
| Why This Recipe Works |
| Why You’ll Love This Recipe |
| Ingredient Notes |
| Kitchen Equipment |
| Preparation Information |
| Step-by-Step Instructions |
| Expert Tips |
| Common Mistakes |
| Recipe Variations |
| What to Serve With This Recipe |
| Make Ahead Tips |
| Meal Prep Tips |
| Storage Instructions |
| Reheating Instructions |
| Nutritional Information |
| Troubleshooting Guide |
| Frequently Asked Questions |
| Final Thoughts |
Introduction
Chicken cordon bleu is one of those dishes that looks impressive yet relies on simple techniques anyone can master. The name may sound fancy, but the method is straightforward: pound chicken thin, layer ham and cheese, roll, bread, and cook until golden. This version stays true to the classic while adding a quick cream sauce that elevates every bite. Whether you’re cooking for a weeknight dinner or weekend guests, the combination of crispy coating, savory filling, and melted cheese never fails to impress.
Why This Recipe Works
The success of this chicken cordon bleu comes down to three key elements. First, pounding the chicken to an even thickness ensures it cooks uniformly and rolls easily without tearing. Second, wrapping the filled chicken tightly and chilling briefly helps the roll hold its shape during breading and cooking. Third, a combination of shallow frying for color and oven finishing for thorough cooking produces a crisp exterior without drying out the meat. The light cream sauce, made while the chicken finishes in the oven, adds richness without overpowering the classic ham-and-cheese flavor.
Why You’ll Love This Recipe
- Crispy golden crust with a juicy, tender interior
- Melty cheese and savory ham in every slice
- Restaurant-quality results using everyday ingredients
- Creamy sauce that comes together in minutes
- Easy to customize with different cheeses or seasonings
- Impressive presentation with minimal extra effort
- Make-ahead friendly for stress-free entertaining
Ingredient Notes
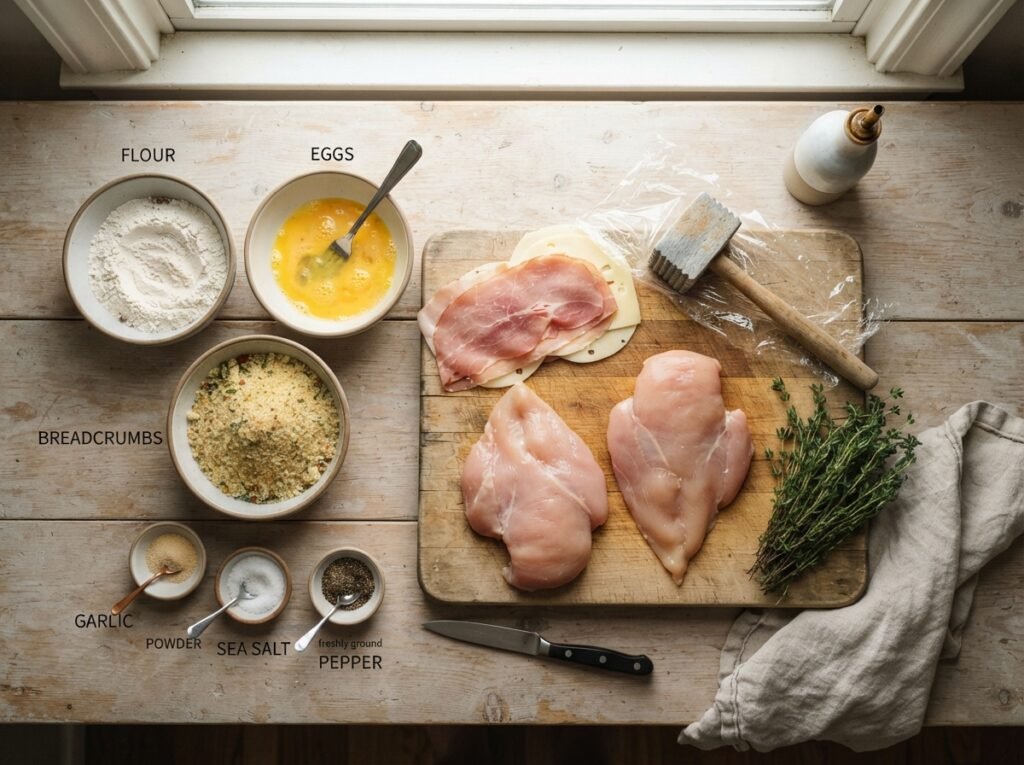
Chicken breasts Boneless, skinless chicken breasts form the base. Choose medium-sized breasts (about 6–8 oz each) for easier pounding and rolling. Purpose: provides a mild, lean canvas that wraps the filling. Substitutions: chicken cutlets or thinly sliced turkey breast. Buying tip: look for plump, evenly sized pieces. Storage: keep refrigerated and use within 1–2 days of purchase or freeze up to 3 months.
Ham Thin slices of deli ham or Black Forest ham work best. Purpose: adds salty, savory depth that complements the cheese. Substitutions: prosciutto, turkey ham, or smoked chicken slices. Buying tip: choose thinly sliced for easy layering. Storage: refrigerate and use within the package date.
Cheese Shredded Swiss, Gruyère, or a mild melting cheese (such as mozzarella or a Swiss blend) is ideal. Purpose: creates the signature stretchy, creamy center. Substitutions: provolone, cheddar, or Monterey Jack. Buying tip: shred your own for better melting; pre-shredded often contains anti-caking agents. Storage: keep refrigerated in an airtight container.
Seasonings Salt, black pepper, and a light dusting of paprika or garlic powder enhance the chicken without competing with the filling. Purpose: builds foundational flavor. Substitutions: Italian seasoning or a pinch of cayenne for mild heat.
Breading station All-purpose flour, beaten eggs, and seasoned breadcrumbs (panko preferred for extra crunch). Purpose: creates a crisp, golden coating that seals in the filling. Substitutions: gluten-free flour and breadcrumbs or crushed cornflakes for extra texture.
Sauce ingredients Butter, flour, milk (or half-and-half), and a touch of Dijon or shredded cheese for a quick cream sauce. Purpose: balances the richness of the fried chicken with a smooth, lightly tangy finish. Substitutions: chicken broth for a lighter version or heavy cream for extra indulgence.
Fresh parsley Chopped flat-leaf parsley for garnish. Purpose: adds color and a fresh herbal note. Substitutions: chives or a light sprinkle of dried parsley.
Kitchen Equipment
Required
- Sharp chef’s knife
- Cutting board
- Plastic wrap or parchment
- Meat mallet or rolling pin
- Three shallow bowls or plates for breading
- Large skillet or sauté pan
- Tongs
- Baking sheet or wire rack
- Whisk and small saucepan for sauce
Optional but helpful
- Kitchen twine or toothpicks for securing rolls
- Instant-read thermometer
- Fine-mesh strainer for smoother sauce
Preparation Information
- Prep Time: 25 minutes
- Cook Time: 30 minutes
- Total Time: 55 minutes
- Servings: 4
Step-by-Step Instructions
Prepare and Pound the Chicken
Place each chicken breast on a cutting board. Using a sharp knife, carefully butterfly or slice horizontally if needed so the pieces can open flat. Cover with plastic wrap and pound gently with a rolling pin or meat mallet until the chicken is about ¼-inch thick and roughly rectangular. Even thickness is essential—thicker spots will cook unevenly, and thinner edges risk tearing when rolled. Season both sides lightly with salt and pepper.
Layer the Filling
Lay the pounded chicken flat. Place one or two thin slices of ham centered on the chicken, leaving a small border. Top the ham with a generous handful of shredded cheese. The cheese should sit in the middle so it stays contained when rolled. Avoid overfilling; excess cheese can leak during cooking and cause the breading to separate.
Roll and Secure
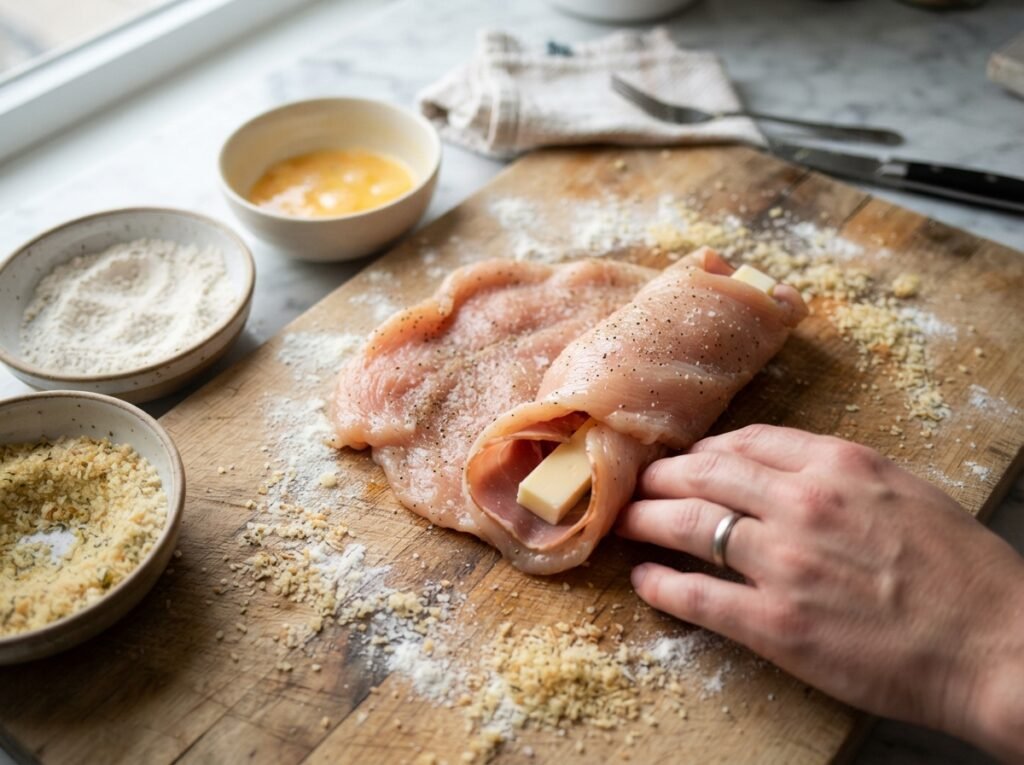
Starting from the longer side, roll the chicken tightly around the filling, tucking in the sides as you go to form a neat cylinder. The plastic wrap can help keep everything compact. If the roll feels loose, secure it with a couple of toothpicks or a piece of kitchen twine. Chill the rolls in the refrigerator for 10–15 minutes. This firms the meat and helps the filling stay in place during breading and cooking.
Set Up the Breading Station
Prepare three shallow dishes: one with flour seasoned with a pinch of salt and pepper, one with beaten eggs, and one with seasoned breadcrumbs or panko mixed with a little Parmesan if desired. Working one roll at a time, dredge in flour (shake off excess), dip in egg, then coat thoroughly in breadcrumbs, pressing gently so the crumbs adhere. A complete, even coating is key to a crisp crust that doesn’t fall off.
Pan-Sear for Color
Heat about ½ inch of neutral oil (vegetable, canola, or light olive oil) in a large skillet over medium heat until shimmering. Carefully place the breaded rolls in the hot oil using tongs. Sear for 2–3 minutes per side until the coating turns deep golden brown. Do not crowd the pan—work in batches if needed. This step builds flavor and color; the interior will finish cooking in the oven.
Finish in the Oven
Transfer the seared rolls to a wire rack set over a baking sheet (or directly onto a lightly oiled sheet). Bake in a preheated 375°F (190°C) oven for 15–20 minutes, or until the internal temperature reaches 165°F (74°C) and the cheese is melted and beginning to ooze slightly. The residual heat continues cooking the chicken gently while the crust stays crisp.
Make the Cream Sauce
While the chicken bakes, prepare a quick sauce. In a small saucepan, melt a tablespoon of butter over medium heat. Whisk in an equal amount of flour and cook for 1 minute to form a light roux. Gradually pour in warm milk, whisking constantly to avoid lumps. Simmer until the sauce thickens slightly, then stir in a small handful of shredded cheese or a teaspoon of Dijon mustard for extra flavor. Season with salt and pepper. The sauce should be smooth and pourable—not too thick.
Rest, Slice, and Serve
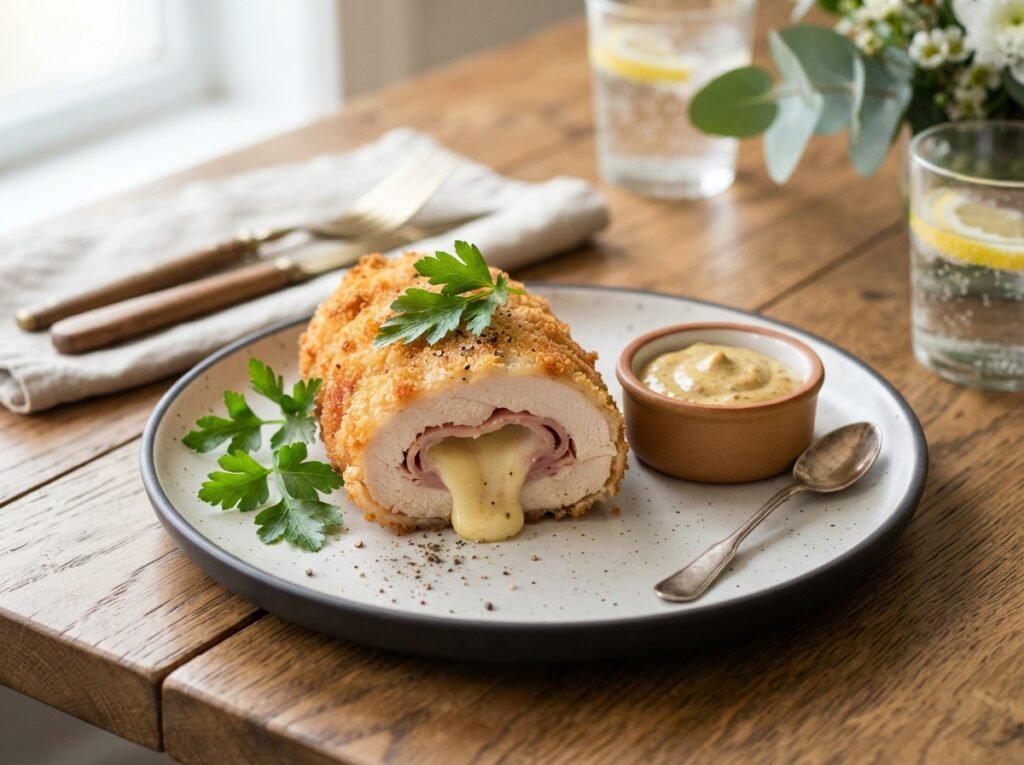
Remove the chicken from the oven and let it rest 3–5 minutes. This allows the juices to redistribute and the cheese to set slightly so it doesn’t run out completely when sliced. Using a sharp knife, cut each roll into thick rounds on a slight diagonal to show off the spiral of ham and cheese. Arrange on plates, spoon the warm cream sauce over the top, and finish with a sprinkle of chopped fresh parsley.
Expert Tips
Pound the chicken evenly but don’t overwork it—aggressive pounding can tear the meat. Chill the rolled chicken before breading; cold rolls hold their shape better. Use panko breadcrumbs for superior crunch compared with fine dried breadcrumbs. Keep the oil temperature steady; too hot and the crust burns before the inside cooks. Rest the finished rolls before slicing so the cheese stays contained in neat spirals. If cheese begins to leak during baking, it’s normal—those golden, crispy cheese bits are delicious.
Common Mistakes
Uneven pounding Thick spots stay undercooked while thin edges dry out. Solution: take your time and aim for consistent ¼-inch thickness.
Overfilling Too much cheese or ham causes the roll to burst. Use modest amounts and leave a clean border.
Skipping the chill Warm rolls fall apart during breading. A short refrigerator rest firms everything up.
Crowding the pan Lowers the oil temperature and leads to greasy, pale crust. Cook in batches if necessary.
Cutting too soon Cheese runs out and the coating softens. Always rest a few minutes before slicing.
Recipe Variations
Spicy Add a pinch of cayenne to the breading or layer thin slices of pickled jalapeño with the ham.
Extra Cheesy Mix two cheeses (Swiss + mozzarella) or add a thin slice of cheese on the outside of the roll before breading.
Healthier Bake only (skip the pan sear) after a light spray of oil, or use whole-wheat breadcrumbs and reduced-fat cheese.
Low-Carb Coat with crushed pork rinds or almond flour instead of breadcrumbs.
High-Protein Serve larger portions or add a side of Greek yogurt-based sauce.
Gluten-Free Use gluten-free flour and breadcrumbs; the rest of the recipe remains unchanged.
Herb-Infused Mix dried thyme or rosemary into the breadcrumbs for extra aroma.
What to Serve With This Recipe
Classic pairings include buttery mashed potatoes, roasted asparagus, or a simple green salad with vinaigrette. Steamed broccoli or sautéed green beans add color and freshness. For a complete meal, serve with garlic bread or crusty baguette to soak up the sauce. A crisp white wine or sparkling water with lemon complements the richness nicely. Finish with a light dessert such as lemon sorbet or fresh berries.
Make Ahead Tips
Pound, fill, and roll the chicken up to 24 hours ahead. Keep tightly wrapped in the refrigerator. Bread just before cooking for the crispest results. The cream sauce can be made a day ahead and gently reheated with a splash of milk.
Meal Prep Tips
Cook a full batch, slice, and portion into containers with a little sauce on the side. The breaded rolls also freeze well before cooking—place on a tray until solid, then transfer to a freezer bag. Bake from frozen, adding a few extra minutes.
Storage Instructions
Store leftover cooked chicken cordon bleu in an airtight container in the refrigerator for up to 3 days. Freeze fully cooled portions for up to 2 months; wrap individually to prevent freezer burn. Sauce keeps separately in the fridge for 3–4 days.
Reheating Instructions
Oven (best method): 350°F for 12–15 minutes until heated through and the crust re-crisps. Air Fryer: 350°F for 6–8 minutes. Microwave: Use short bursts at medium power; the coating will soften. Stovetop: Warm gently in a covered skillet with a splash of water or broth.
Nutritional Information
Approximate values per serving (1 roll with sauce):
- Calories: 520
- Protein: 42 g
- Carbohydrates: 22 g
- Fat: 28 g
- Fiber: 1 g
- Sugar: 3 g
- Sodium: 780 mg
Values will vary based on exact ingredients and portion size.
Troubleshooting Guide
Cheese leaking excessively Roll more tightly and chill longer. A little leakage is normal and creates delicious crispy bits.
Soggy coating Oil wasn’t hot enough or the chicken was overcrowded. Ensure the oil shimmers before adding the rolls.
Dry chicken Overcooked or pounded too thin. Use a thermometer and pull at 165°F.
Rolls falling apart Insufficient chilling or overfilling. Secure with toothpicks if needed and remove before serving.
Sauce too thick or thin Adjust with a splash of milk or a few more minutes of simmering. Whisk constantly for smoothness.
Frequently Asked Questions
Can I make chicken cordon bleu without frying? Yes. After breading, spray lightly with oil and bake at 400°F for 25–30 minutes, flipping once.
What cheese works best? Swiss or Gruyère are traditional for their nutty flavor and excellent melt. Mozzarella gives more stretch.
How do I keep the filling from falling out? Pound evenly, don’t overfill, roll tightly, and chill before breading and cooking.
Can I use chicken thighs? Boneless, skinless thighs can work but are harder to pound into an even rectangle. Breasts are preferred.
Is it possible to freeze the uncooked rolls? Yes. Bread them, freeze on a tray, then store in a freezer bag. Cook from frozen, adding extra time.
What can I use instead of breadcrumbs? Crushed crackers, panko, or gluten-free alternatives all work well.
How do I know when the chicken is done? An instant-read thermometer inserted into the center should read 165°F. The juices should run clear.
Can I make the sauce ahead? Absolutely. Reheat gently over low heat, thinning with a little milk if needed.
Why is my coating not crispy? The oil may have been too cool, or the chicken rested too long after frying before baking. Serve promptly after the oven step.
Can this recipe be doubled? Yes. Use two pans or cook in batches so the oil temperature stays consistent.
Final Thoughts
This chicken cordon bleu recipe proves that classic comfort food can be both impressive and approachable. With a few careful steps—pounding evenly, rolling tightly, and finishing with a simple cream sauce—you’ll produce golden, cheese-filled rolls that look and taste like they came from a bistro kitchen. Once you’ve mastered the basic technique, the variations are endless. Give it a try this week, then come back and share how it turned out. A quick rating or comment helps other home cooks know what to expect, and I always love hearing about your kitchen successes.