
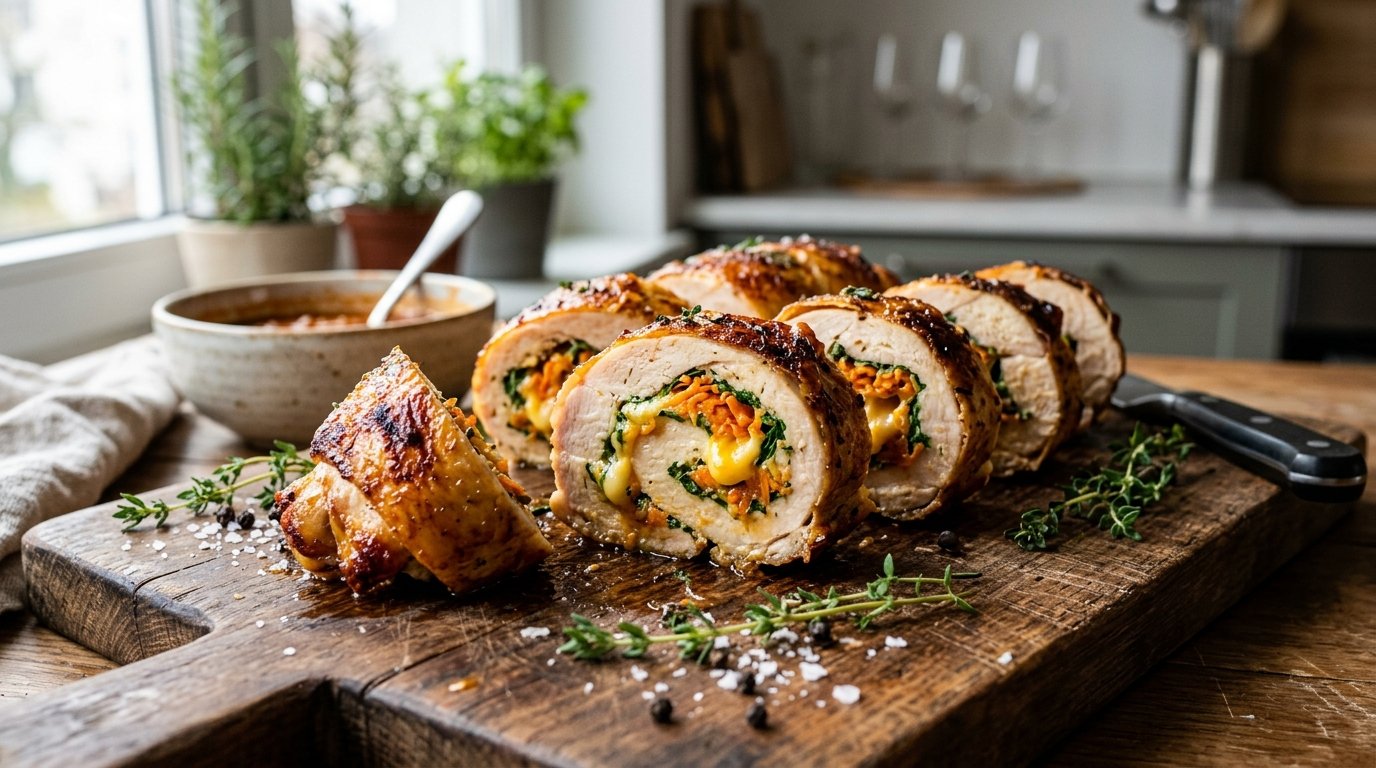
Tender chicken breast slices pounded thin, filled with a creamy mixture of grated cheese, carrot, and fresh parsley, then rolled, baked until juicy, and finished under a blanket of melted mozzarella. These stuffed chicken rolls deliver restaurant-quality results with simple ingredients and a bright fresh salad on the side.
Quick Recipe Summary
| Prep Time | Cook Time | Total Time | Servings | Cuisine | Course | Difficulty | Calories |
|---|---|---|---|---|---|---|---|
| 25 minutes | 40 minutes | 65 minutes | 4 | European / Home-style | Main Course | Easy | ~420 per serving |
Juicy chicken breast rolls filled with a savory cheese-carrot-parsley mixture, baked until golden and topped with extra melted mozzarella. Served with a crisp lemon-dressed salad of lettuce, cucumber, tomato, and red onion for a complete, balanced meal.
Table of Contents
| Section |
|---|
| Introduction |
| Why This Recipe Works |
| Why You’ll Love This Recipe |
| Ingredient Notes |
| Kitchen Equipment |
| Preparation Information |
| Step-by-Step Instructions |
| Expert Tips |
| Common Mistakes |
| Recipe Variations |
| What to Serve With This Recipe |
| Make Ahead Tips |
| Meal Prep Tips |
| Storage Instructions |
| Reheating Instructions |
| Nutritional Information |
| Troubleshooting Guide |
| Frequently Asked Questions |
| Final Thoughts |
Introduction
These stuffed chicken rolls turn everyday chicken breast into an elegant yet approachable main dish. Thinly sliced and pounded chicken is seasoned, filled with a creamy mixture of grated cheese, sweet carrot, and fresh parsley bound with yogurt, then rolled tightly and baked. A final layer of mozzarella melts into a golden, stretchy topping. Paired with a simple fresh salad, the result is light, flavorful, and satisfying without feeling heavy.
Why This Recipe Works
Pounding the chicken creates an even thickness so the rolls cook uniformly and stay tender. The yogurt in the filling keeps the interior moist while the grated carrot adds subtle sweetness and texture. Baking first sets the rolls, then the second bake with mozzarella creates a glossy, cheesy crust that seals in juices. The bright lemon-dressed salad cuts through the richness and balances the plate.
Why You’ll Love This Recipe
- Moist, flavorful chicken that never turns dry
- Creamy, colorful filling with minimal effort
- Golden melted mozzarella topping
- Complete meal with the included fresh salad
- Easy enough for weeknights yet impressive for guests
- Naturally gluten-free
Ingredient Notes
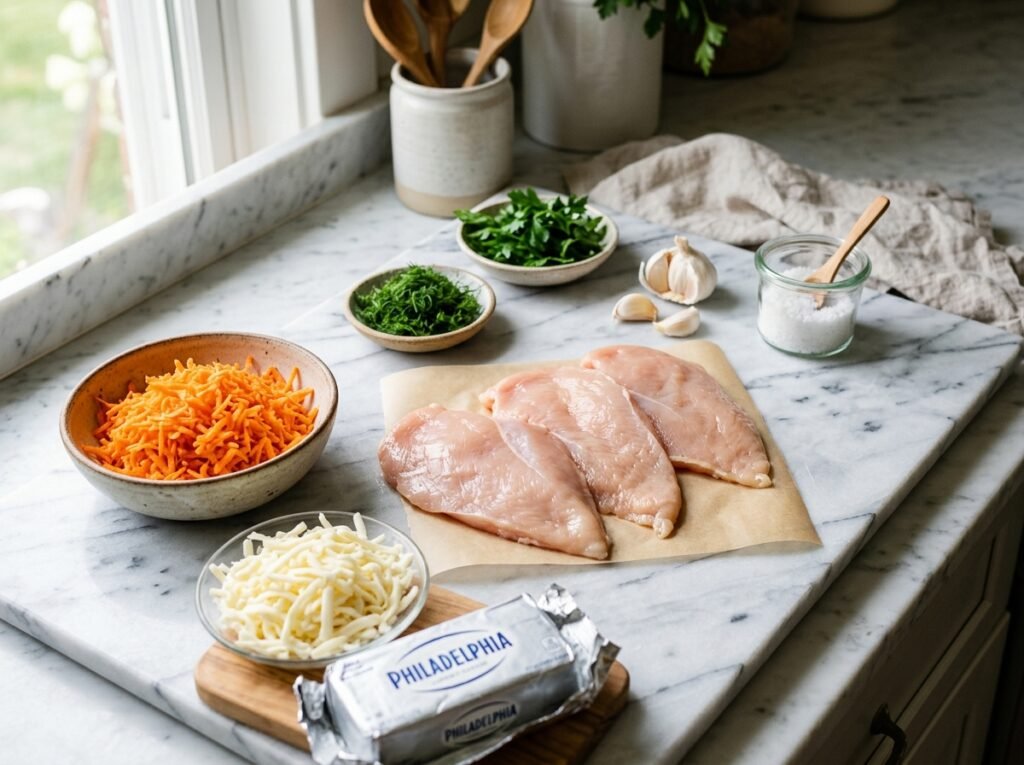
Chicken breast (approximately 600–700 g / 1.3–1.5 lb) Choose large, even breasts so you can cut consistent thin slices. Look for pale pink meat with no strong odor. Store in the coldest part of the refrigerator and use within 1–2 days of purchase. Boneless, skinless thighs can substitute but will have a richer flavor.
Salt and black pepper Season both sides of the chicken thoroughly. Freshly ground black pepper gives the best aroma.
Cheese for filling (about 150–200 g / 5–7 oz) A mild melting cheese such as mozzarella, mild cheddar, or a semi-hard white cheese works well when grated on the coarse side of a box grater. Freshly grated melts more evenly than pre-shredded.
Carrot (1 medium) Grated on the same coarse grater as the cheese. Adds natural sweetness, color, and moisture. Choose firm, bright-orange carrots.
Fresh parsley (30 g / 1.1 oz) Finely chopped. Provides freshness and a clean herbal note. Flat-leaf or curly both work; discard tough stems.
Yogurt (approximately 100–150 g / ½–⅔ cup) Plain full-fat or Greek yogurt binds the filling and keeps it creamy. Sour cream can be used as a substitute.
Mozzarella for topping (about 100–150 g / 1–1½ cups grated) Creates the final melted cheese layer. Low-moisture mozzarella browns nicely.
Salad ingredients
- Lettuce (50 g / 1.8 oz) – torn into bite-size pieces
- Cucumbers (100 g / 3.5 oz) – sliced
- Cherry tomatoes – halved
- Red onion (1 small) – thinly sliced into half-rings
- Lemon (1) – juiced
- Vegetable oil – for dressing
- Salt – to taste
Use the freshest produce possible for the brightest flavor and crunch.
Kitchen Equipment
- Sharp chef’s knife
- Meat mallet or rolling pin
- Plastic wrap or parchment
- Box grater
- Mixing bowls
- Baking pan or oven-safe skillet (round or rectangular)
- Spoon or spatula
- Oven mitts
Optional: citrus juicer, kitchen scale.
Preparation Information
- Prep Time: 25 minutes
- Cook Time: 40 minutes (30 + 10)
- Total Time: 65 minutes
- Servings: 4 (2 rolls each)
Step-by-Step Instructions
Prepare the Chicken
Cut the chicken breasts into thin, even slices (roughly 8 pieces). Place the slices between sheets of plastic wrap or parchment and pound gently with a meat mallet until they are about ¼-inch (5–6 mm) thick and roughly uniform in size. Even thickness ensures the rolls cook at the same rate and remain tender rather than tough in thicker spots.
Season the Chicken
Season both sides of each slice generously with salt and freshly ground black pepper. The seasoning penetrates the thin meat and flavors every bite of the finished roll.
Make the Filling
Grate the cheese on the coarse side of a box grater and place it in a bowl. Grate the carrot on the same grater and add it to the cheese. Finely chop the parsley and add it along with the yogurt and a pinch of salt. Mix until everything is evenly combined and the mixture holds together. The yogurt binds the ingredients while the carrot and parsley keep the filling light and flavorful.
Fill and Roll
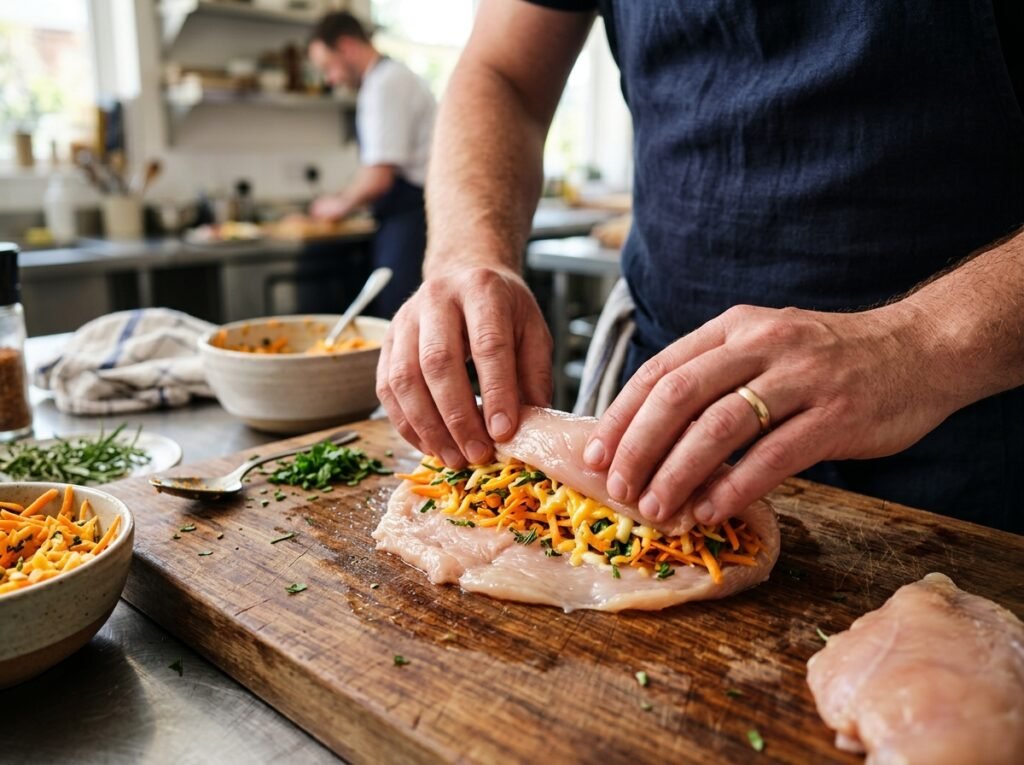
Place about one tablespoon of the filling near one end of each chicken slice. Roll the chicken tightly around the filling, tucking in the sides if needed to enclose the mixture. Place the rolls seam-side down in a lightly oiled baking pan so they hold their shape during baking.
First Bake
Bake the rolls in a preheated oven at 180–190°C (350–375°F) for 30 minutes. The chicken should turn opaque and firm, and the filling should be heated through. This initial bake sets the structure of the rolls before the cheese topping is added.
Add Cheese and Finish Baking
Remove the pan from the oven and sprinkle the grated mozzarella evenly over the tops of the rolls. Return to the oven for another 10 minutes until the cheese is fully melted, bubbling, and lightly golden in spots. The final bake creates a glossy, stretchy cheese crust while the chicken stays juicy inside.
Prepare the Salad
While the rolls bake, tear the lettuce into a bowl. Slice the cucumbers, halve the cherry tomatoes, and cut the red onion into thin half-rings. Add everything to the bowl, drizzle with fresh lemon juice and a little vegetable oil, season with salt, and toss gently. The bright, acidic salad balances the rich, cheesy chicken perfectly.
Serve
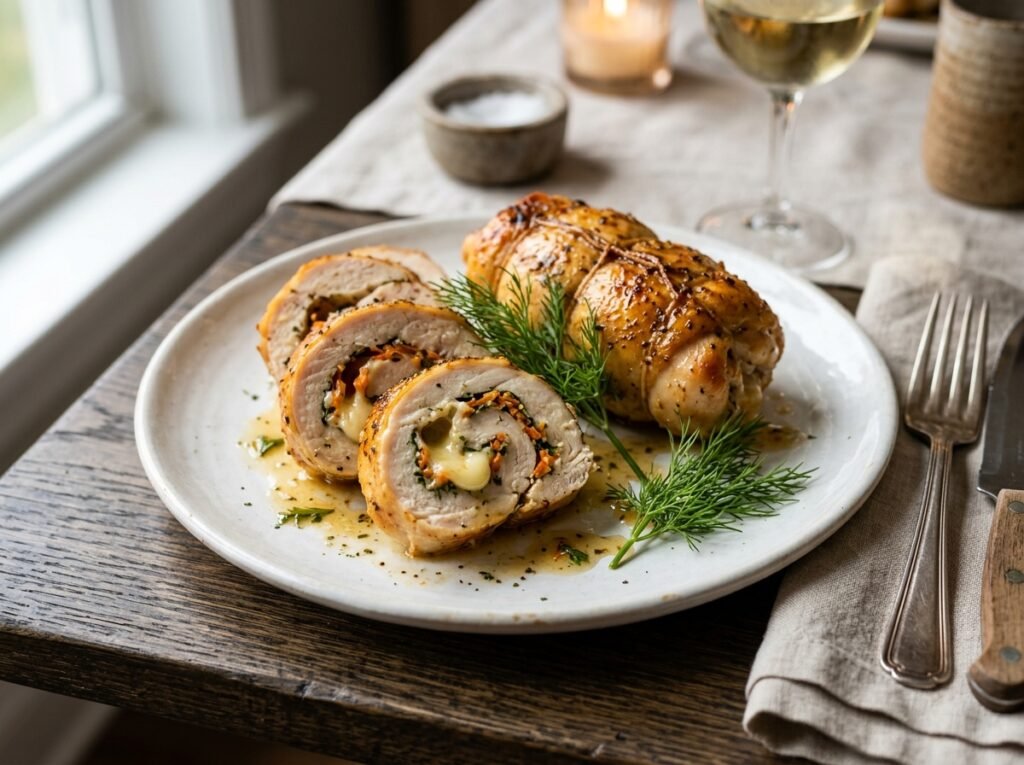
Serve the stuffed chicken rolls hot, straight from the pan, alongside the fresh salad. The combination of creamy filling, melted mozzarella, and crisp vegetables is especially satisfying.
Expert Tips
- Pound the chicken evenly so every roll cooks at the same speed.
- Do not overfill the slices; one tablespoon is enough to keep the rolls neat.
- Place rolls seam-side down so they stay closed without toothpicks.
- Let the rolls rest 2–3 minutes after the final bake so the juices redistribute.
- Use freshly grated cheese for the best melt and flavor.
- Taste the filling before rolling and adjust salt if needed.
Common Mistakes
- Uneven pounding – Results in some parts overcooked and others underdone. Take time to flatten evenly.
- Overfilling – Causes the filling to leak and the rolls to open. Stick to one tablespoon per slice.
- Skipping the first bake – Adding cheese too early can make the topping overbrown before the chicken is cooked.
- Under-seasoning the chicken – The thin slices need salt and pepper on both sides for full flavor.
- Cutting the salad vegetables too far ahead – They lose crispness; prepare just before serving.
Recipe Variations
- Spicy – Add a pinch of chili flakes or finely chopped jalapeño to the filling.
- Extra Cheesy – Mix a second cheese into the filling or use more mozzarella on top.
- Herb-forward – Replace part of the parsley with dill or chives.
- Low-Carb / Keto – Already naturally low in carbohydrates; serve with extra salad.
- High-Protein – Use Greek yogurt in the filling for an extra protein boost.
- Vegetable-packed – Add finely grated zucchini (squeezed dry) to the filling.
- Different protein – Thin turkey cutlets work as a substitute for chicken.
What to Serve With This Recipe
- The included lemon-dressed salad of lettuce, cucumber, tomato, and red onion
- Steamed green beans, asparagus, or broccoli
- Lightly buttered rice or quinoa
- Roasted baby potatoes
- A simple yogurt-garlic sauce or extra lemon wedges
- Sparkling water with lemon or a crisp white wine
Make Ahead Tips
Pound and season the chicken up to 4 hours ahead and keep covered in the refrigerator. The filling can be mixed several hours in advance. Assemble the rolls just before baking for the best texture.
Meal Prep Tips
Bake the rolls completely, cool, and portion with the salad components stored separately. Reheat the chicken gently and dress the salad just before eating so everything stays fresh.
Storage Instructions
Cool leftover rolls completely, then store in an airtight container in the refrigerator for up to 3 days. The salad is best eaten the same day but will keep 1 day if undressed. Cooked rolls can be frozen (without salad) for up to 1 month; thaw overnight in the refrigerator before reheating.
Reheating Instructions
- Oven: 160°C (325°F) for 10–12 minutes until heated through. Cover loosely with foil to prevent the cheese from over-browning.
- Air Fryer: 160°C (320°F) for 5–7 minutes.
- Microwave: Short bursts at medium power, though the texture will be softer.
- Stovetop: Not ideal for whole rolls; slice and warm gently in a covered pan with a splash of water.
Nutritional Information
Approximate values per serving (2 rolls + salad): Calories: 420 | Protein: 42 g | Carbohydrates: 12 g | Fat: 22 g | Fiber: 3 g | Sugar: 5 g | Sodium: 680 mg
Values vary depending on exact cheese and yogurt used.
Troubleshooting Guide
- Rolls opening during baking – Place seam-side down and avoid overfilling.
- Dry chicken – Do not overbake; check at the 30-minute mark. The yogurt filling also helps retain moisture.
- Filling leaking – Use a thicker yogurt or slightly less liquid, and roll tightly.
- Cheese not melting evenly – Grate it fresh and distribute in an even layer.
- Salad watery – Dress just before serving and use firm cucumbers.
Frequently Asked Questions
Can I use chicken thighs instead of breast? Yes. Boneless, skinless thighs work well and stay even juicier, though the flavor will be richer.
Do I need toothpicks to hold the rolls? No. Placing them seam-side down is usually sufficient if they are rolled tightly.
Can I make these ahead and freeze them? Assemble and freeze uncooked rolls on a tray, then transfer to a freezer bag. Bake from frozen, adding extra time as needed. Or freeze fully cooked rolls and reheat later.
What can I use instead of yogurt? Sour cream or a thick crème fraîche works well as a binder.
Is the salad mandatory? No, but it provides a refreshing contrast. Any simple green salad or steamed vegetables pair nicely.
How do I know the chicken is cooked through? The rolls should feel firm and the internal temperature should reach 74°C (165°F). The juices should run clear.
Can I add other vegetables to the filling? Yes. Finely grated zucchini (squeezed dry) or a little finely diced bell pepper can be mixed in.
Why bake in two stages? The first bake cooks the chicken and sets the rolls. The second bake melts the mozzarella without overcooking the meat.
Final Thoughts
These stuffed chicken rolls with cheese, carrot, and herb filling are a reliable way to turn simple chicken breast into something special. The creamy interior, golden mozzarella topping, and bright accompanying salad create a balanced, satisfying plate that works for both casual dinners and company. Once you try the method, you will find it easy to adapt with different cheeses or herbs. Give the recipe a go and share how it turned out in the comments—your feedback helps other home cooks succeed.