
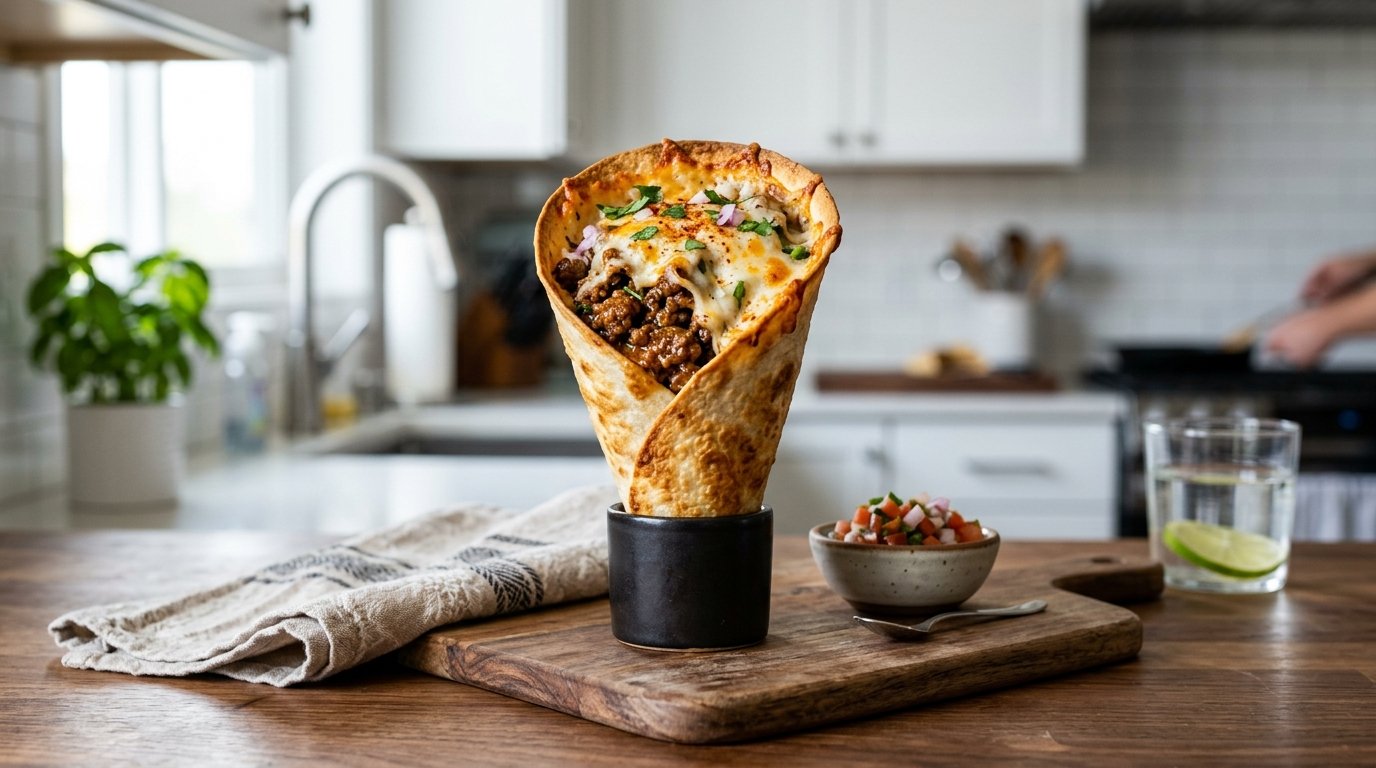
Crispy golden flour-tortilla cones filled with seasoned ground beef, colorful vegetables, and melted mozzarella make an irresistible handheld bite. These conitos rellenos deliver bold flavor, stretchy cheese, and a perfect crunch, especially when dipped in a bright green creamy sauce.
Quick Recipe Summary
| Prep Time | Cook Time | Total Time | Servings | Cuisine | Course | Difficulty | Calories |
|---|---|---|---|---|---|---|---|
| 25 minutes | 20 minutes | 45 minutes | 8–10 cones | Mexican-inspired | Appetizer / Main | Easy | ~280 per cone |
Flour tortillas shaped into cones, sealed, and filled with savory ground-beef mixture and mozzarella, then fried (or baked/air-fried) until golden and crisp. Served with a fresh cilantro-lime green sauce and lime wedges for a fun, shareable meal or party snack.
Table of Contents
| Section |
|---|
| Introduction |
| Why This Recipe Works |
| Why You’ll Love This Recipe |
| Ingredient Notes |
| Kitchen Equipment |
| Preparation Information |
| Step-by-Step Instructions |
| Expert Tips |
| Common Mistakes |
| Recipe Variations |
| What to Serve With This Recipe |
| Make Ahead Tips |
| Meal Prep Tips |
| Storage Instructions |
| Reheating Instructions |
| Nutritional Information |
| Troubleshooting Guide |
| Frequently Asked Questions |
| Final Thoughts |
Introduction
These ground beef and cheese tortilla cones turn everyday flour tortillas into crispy, handheld vessels packed with seasoned meat, peppers, and gooey mozzarella. The cones are shaped, sealed with a simple edible paste, filled in layers, and fried until golden. A quick microwave step helps the cheese set so it stays inside during cooking. Paired with a creamy green dipping sauce, they are perfect for casual dinners, game day, or entertaining.
Why This Recipe Works
Sautéing the aromatics and vegetables first builds a flavorful base before the ground beef is added. Tomato paste deepens the savory notes, while fresh cilantro finishes the filling with brightness. Layering cheese both under and over the meat creates a molten core that holds everything together. Shaping the tortillas into cones and sealing them properly keeps the filling secure, and a short microwave blast melts the cheese just enough to prevent leaks during frying. High-heat frying (or oven/air-fryer alternatives) delivers the signature crisp exterior.
Why You’ll Love This Recipe
- Crispy exterior with a cheesy, savory interior
- Easy to customize with different proteins or heat levels
- Fun presentation that works as appetizer or main
- Can be fried, baked, or air-fried
- Kid-friendly and crowd-pleasing
- Comes with a bright homemade green sauce
Ingredient Notes
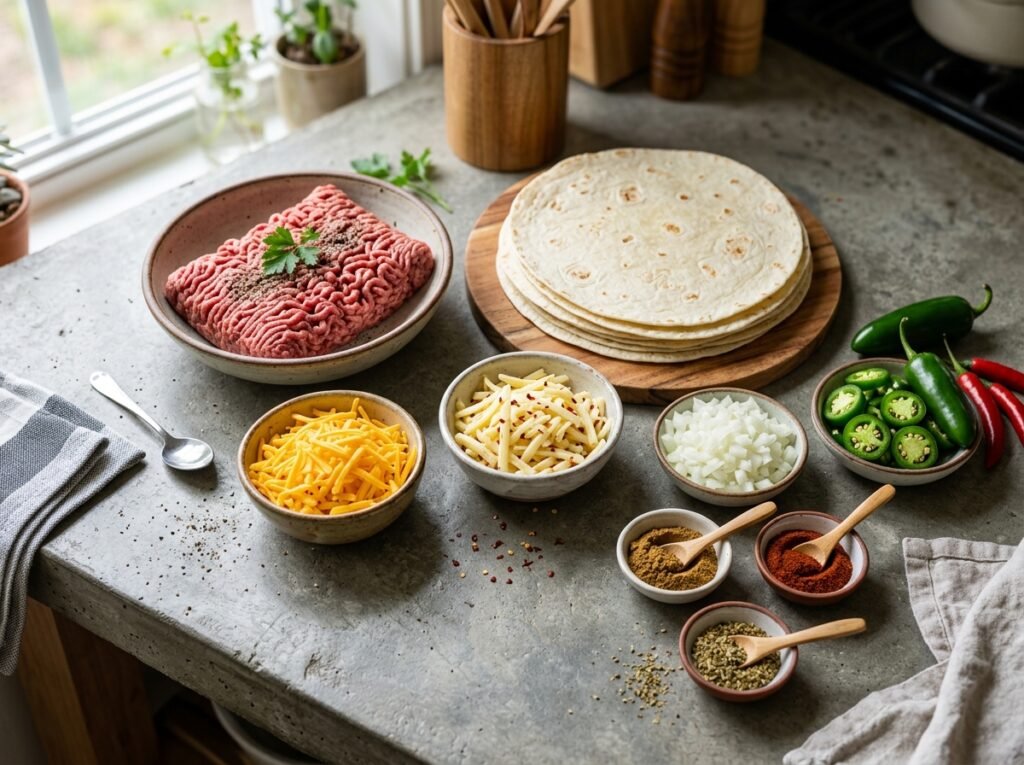
Flour tortillas (medium size, about 8–10) Soft flour tortillas fold easily into cones without cracking. Choose fresh ones; if they feel stiff, warm them briefly. Corn tortillas are more brittle and not ideal for this shape.
Ground beef (about 400–500 g / 1 lb) Lean or regular both work. The fat helps keep the filling moist. Ground turkey, chicken, or plant-based meat can substitute.
Onion (½ medium) Finely diced. Provides sweetness and aroma when sautéed.
Garlic (2 cloves) Minced. Adds depth; add after the onion softens so it does not burn.
Bell pepper (1, any color) Diced small. Red gives sweetness and color; green or yellow also work.
Celery (1 stalk) Diced. Adds subtle freshness and texture.
Tomato paste (2 tablespoons) Concentrated flavor. Tomato sauce can replace it in a pinch (use a bit more and cook longer to reduce).
Spices Black pepper, oregano, and a mild chili powder or paprika to taste. Adjust heat as desired.
Fresh cilantro (small bunch) Chopped and stirred in at the end for brightness. Reserve some for the sauce.
Mozzarella cheese (shredded, about 200–250 g) Melts smoothly and gives the classic cheese pull. Freshly shredded melts better than pre-shredded.
Oil for frying Neutral oil with a high smoke point (vegetable, canola, or avocado).
Edible seal (flour + water paste) A thick slurry of flour and water acts as glue to hold the cone shape.
Green sauce ingredients Cilantro, garlic, a creamy base (mayonnaise, yogurt, or sour cream), lime juice, and salt. Blended until smooth and vibrant green.
Kitchen Equipment
- Large skillet or frying pan
- Cutting board and sharp knife
- Wooden spoon or spatula
- Small bowl for the flour-water paste
- Pastry brush
- Tongs
- Blender or food processor (for the sauce)
- Paper towels for draining
Optional: air fryer or baking sheet if not frying.
Preparation Information
- Prep Time: 25 minutes
- Cook Time: 20 minutes
- Total Time: 45 minutes
- Servings: 8–10 cones
Step-by-Step Instructions
Prepare the Vegetables
Finely dice half an onion, one bell pepper, one celery stalk, and mince two garlic cloves. Chop a small bunch of cilantro and set aside. Uniform small pieces ensure everything cooks evenly and fits neatly inside the cones.
Cook the Filling
Heat a little oil in a large skillet over medium heat. Add the onion and cook until translucent, then stir in the garlic for about 30 seconds until fragrant. Add the diced pepper and celery and cook a few minutes until they begin to soften. Push the vegetables aside, add the ground beef, and season with black pepper, oregano, and your preferred chili powder or paprika. Break up the meat and cook until browned. Stir in two tablespoons of tomato paste (or sauce) and cook until the mixture is well combined and most of the liquid has evaporated. Turn off the heat and stir in the chopped cilantro. Taste and adjust seasoning. Let the filling cool slightly so it is easier to handle.
Shape the Tortilla Cones
Cut the flour tortillas if needed to achieve the desired cone size. Roll each piece into a cone shape, overlapping the edges. Mix a thick paste of flour and water. Brush the overlapping edge with the paste and press firmly to seal. Hold for a few seconds until it holds. A good seal prevents the cones from opening during filling and frying.
Fill the Cones
Spoon a little shredded mozzarella into the bottom of each cone, followed by a generous amount of the cooled meat mixture, then top with more mozzarella. Do not overfill. Place the filled cones upright and microwave them for about 30 seconds. This quick step melts the cheese slightly so it acts as a barrier and reduces leaking when the cones hit the hot oil.
Cook the Cones
Heat about 1 cm (½ inch) of oil in a skillet over medium heat. Carefully place the cones in the oil (seam side down if possible) and fry, turning as needed, until all sides are deep golden and crisp, about 2–4 minutes total. Work in batches so the oil temperature stays steady. Transfer to paper towels to drain. Alternatively, bake at 200°C (400°F) or air-fry at 180°C (360°F) until golden, brushing lightly with oil first.
Make the Green Sauce
In a blender combine fresh cilantro, a clove of garlic, a creamy base (mayonnaise, yogurt, or sour cream), lime juice, and a pinch of salt. Blend until smooth and bright green. Adjust consistency with a little water or more lime if needed. The sauce should be pourable yet thick enough to cling to the cones.
Serve
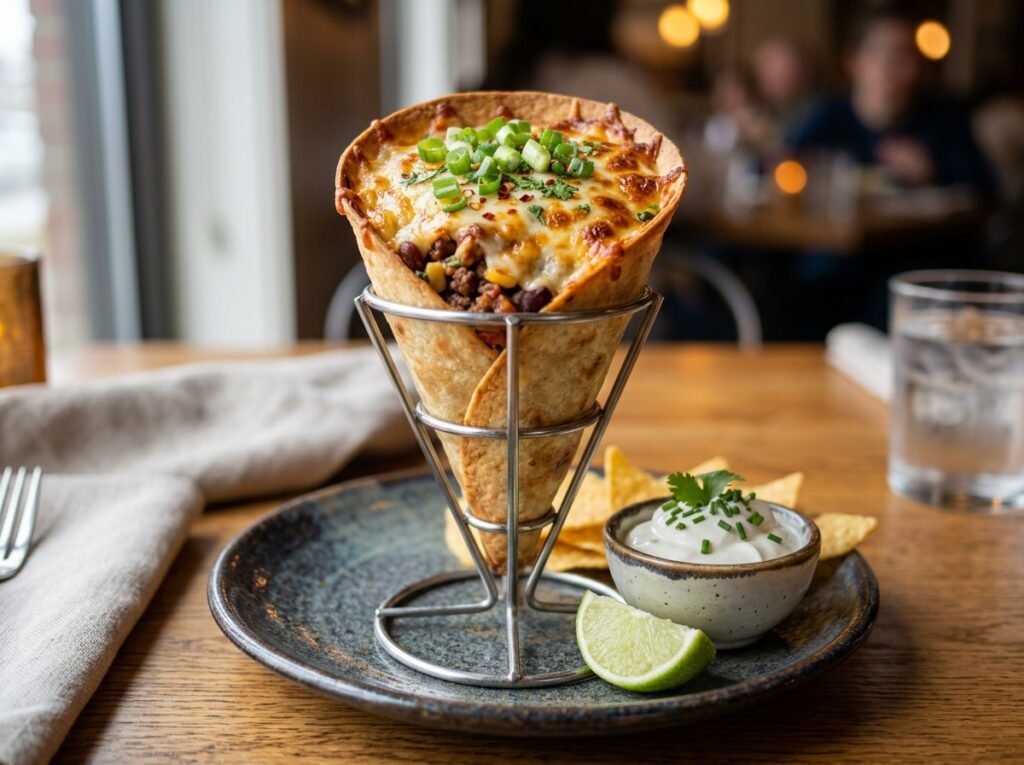
Arrange the hot cones on a platter with the green sauce and lime wedges. Serve immediately while the exterior is still crisp and the cheese is stretchy.
Expert Tips
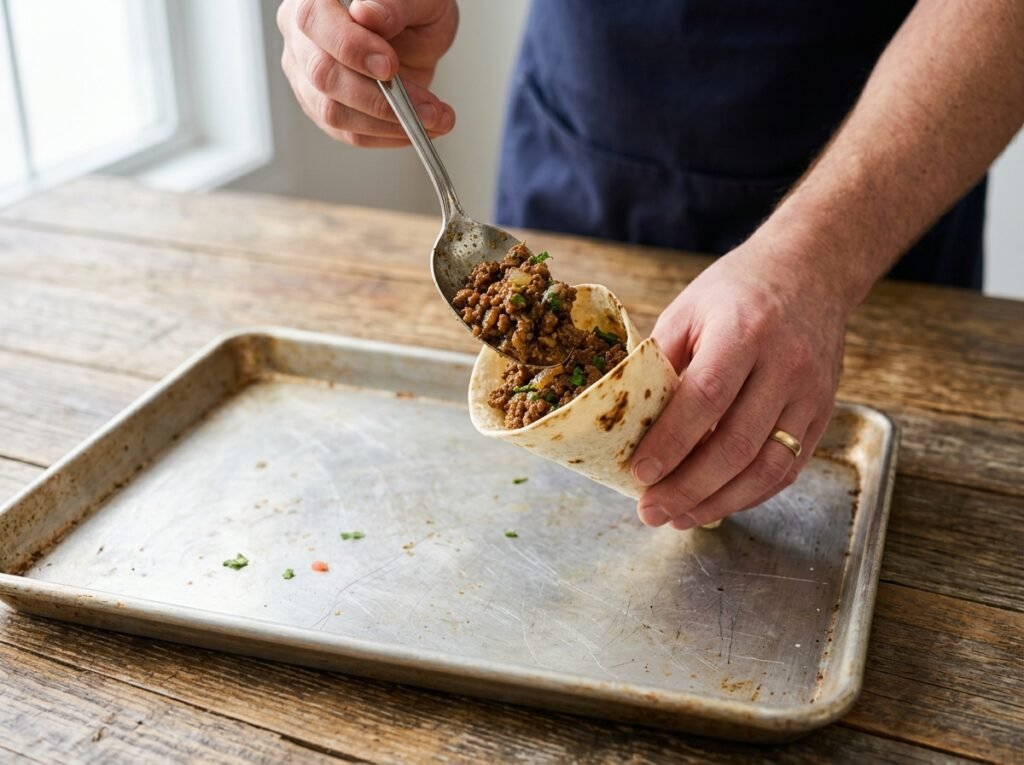
- Cool the filling before stuffing so the tortillas do not become soggy.
- The flour-water paste should be thick like glue; too thin and it will not hold.
- Microwave the filled cones briefly—this is the key to keeping cheese inside.
- Maintain steady medium heat when frying; too hot and the outside burns before the inside is hot.
- Drain well on paper towels for maximum crispness.
- Make the sauce while the cones cook so everything is ready at the same time.
Common Mistakes
- Overfilling the cones – Causes leaks and difficulty sealing. Leave a little space at the top.
- Skipping the microwave step – Cheese is more likely to escape during frying.
- Oil too hot or too cool – Results in greasy or pale cones. Test with a small scrap of tortilla first.
- Not sealing the cone well – The shape opens and filling falls out. Press the paste-sealed edge firmly.
- Adding cilantro too early – It loses its fresh flavor; stir it in at the end.
Recipe Variations
- Spicy – Add chopped jalapeño or extra chili powder to the meat.
- Chicken or turkey – Swap the ground beef for ground poultry.
- Vegetarian – Use seasoned lentils, black beans, or plant-based ground.
- Extra Cheesy – Add a third layer of cheese or mix cheeses (cheddar + mozzarella).
- Healthier – Bake or air-fry instead of deep-frying and use lean meat.
- Low-Carb – Serve the filling in lettuce cups or low-carb tortillas if available.
- Breakfast style – Add scrambled egg to the filling.
What to Serve With This Recipe
- The creamy green cilantro-lime sauce
- Extra lime wedges
- Simple guacamole or pico de gallo
- Mexican rice or refried beans
- Fresh green salad
- Cold beer, agua fresca, or sparkling water with lime
Make Ahead Tips
Cook the meat filling up to 2 days ahead and refrigerate. Shape the empty cones a few hours ahead and keep covered. Fill and cook just before serving for the best texture. The green sauce can be made a day in advance.
Meal Prep Tips
Prepare a double batch of filling and portion it. Shape and fill cones as needed throughout the week, then fry or air-fry fresh. Store sauce separately.
Storage Instructions
Cool completely, then store leftover cones in an airtight container in the refrigerator for up to 3 days. The sauce keeps 3–4 days refrigerated. Freezing is possible but the tortilla softens; freeze unfilled cones or the filling alone for best results.
Reheating Instructions
- Oven: 180°C (350°F) for 8–10 minutes until crisp and heated through.
- Air Fryer: 170°C (340°F) for 4–6 minutes.
- Stovetop: Brief re-fry in a little oil.
- Microwave: Not recommended (softens the exterior); use only if necessary.
Nutritional Information
Approximate values per cone (based on 10 cones): Calories: 280 | Protein: 14 g | Carbohydrates: 22 g | Fat: 15 g | Fiber: 2 g | Sugar: 2 g | Sodium: 420 mg
Values vary with exact ingredients and frying oil absorption.
Troubleshooting Guide
- Cones opening while frying – Seal more carefully with thicker paste and press firmly.
- Cheese leaking – Do not skip the short microwave step and avoid overfilling.
- Soggy exterior – Oil temperature is too low or cones were crowded; drain thoroughly.
- Filling too dry – Add a splash of water or extra tomato paste while cooking the meat.
- Sauce too thick or thin – Adjust with lime juice or a spoonful of the creamy base.
Frequently Asked Questions
Can I bake these instead of frying? Yes. Brush with oil and bake at 200°C (400°F) for 12–15 minutes, turning once, until golden.
Can I use corn tortillas? Flour tortillas are more flexible and seal better. Corn tortillas tend to crack when shaped into cones.
How do I keep the cones from unrolling? Use a thick flour-water paste and press the seam firmly for several seconds.
Is the microwave step necessary? It greatly reduces cheese leakage. If you skip it, expect more filling to escape during cooking.
Can I make them ahead for a party? Prepare the filling and shape empty cones ahead. Fill and cook shortly before guests arrive so they stay crisp.
What can I use instead of mozzarella? Any good melting cheese such as Oaxaca, Monterey Jack, or a Mexican blend works well.
How spicy are these? Mild as written. Increase the chili powder or add fresh chili for more heat.
Can I air-fry them? Yes. Lightly oil the cones and air-fry at 180°C (360°F) for 6–8 minutes, shaking halfway.
Final Thoughts
These ground beef and cheese tortilla cones (conitos rellenos) combine crispy texture, savory seasoned meat, and stretchy melted cheese in a fun, handheld form. The simple green sauce adds freshness that balances every bite. Once you master shaping and sealing the cones, the recipe becomes an easy go-to for weeknights or gatherings. Try them, then leave a comment or rating to share how they turned out—your experience helps other cooks succeed with this crowd-pleasing dish.