

Coxinha de frango is the ultimate Brazilian comfort snack. Soft dough wraps a savory filling of shredded chicken and creamy cheese, then gets shaped into the classic teardrop form. After an egg wash and breadcrumb coating, the croquettes fry to a deep golden crisp. The contrast of crunchy exterior and molten, stretchy center is pure magic. These handheld bites disappear fast at any gathering and are worth every minute of shaping.
Another reader favorite: Crispy Italian Focaccia Sandwich Recipe
Why you’ll love this recipe
These Brazilian chicken croquettes deliver crispy exteriors and creamy, savory centers in every bite.
- Classic teardrop shape looks impressive and fun
- Shredded chicken and cheese create perfect filling
- Deep golden crust stays crunchy and light
- Ideal party snack or casual appetizer
Ingredients
These ingredients create authentic coxinha with a soft dough, savory chicken filling, and golden crisp coating.
- 2 cups dough
- 1 1/2 cups shredded chicken
- 1/2 cup creamy cheese
- 2 eggs
- 1 1/2 cups breadcrumbs
- Oil for frying
- Salt to taste
- Fresh herbs
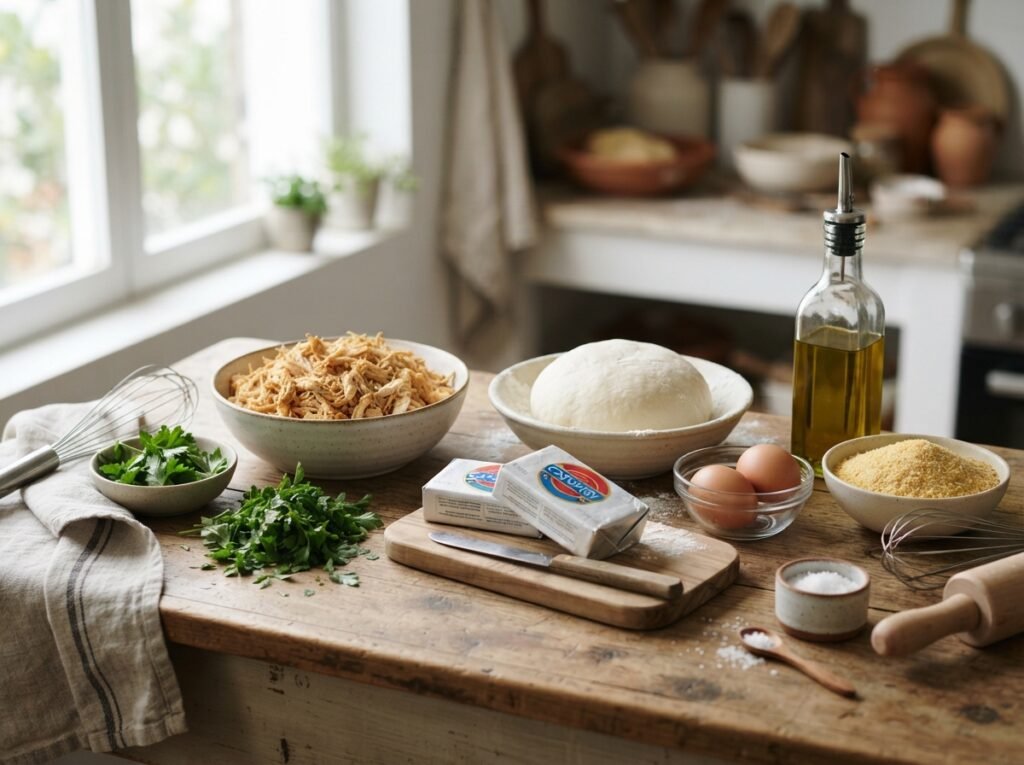
The dough is typically a cooked potato or flour mixture seasoned with herbs. Use leftover shredded chicken or rotisserie chicken for convenience. Catupiry, cream cheese, or a mild melting cheese works well for the creamy layer. Fresh breadcrumbs give a lighter crust than packaged ones. Season the filling generously for best flavor.
Worth trying next: Slow Cooker Shredded Ham Recipe
Step-by-step instructions
These steps guide you from filling the dough to frying golden, crispy Brazilian chicken croquettes.
Step 1: Prepare the filling
Mix the shredded chicken with the creamy cheese until evenly combined. Taste and adjust seasoning with salt so the filling is flavorful.
Step 2: Portion the dough
Divide the prepared dough into equal portions. Flatten each piece into a small disc on a clean surface, ready for filling.
Step 3: Add the filling
Place a spoonful of the chicken and cheese mixture in the center of each dough disc. Keep the filling compact so it stays contained.
Step 4: Shape into teardrops
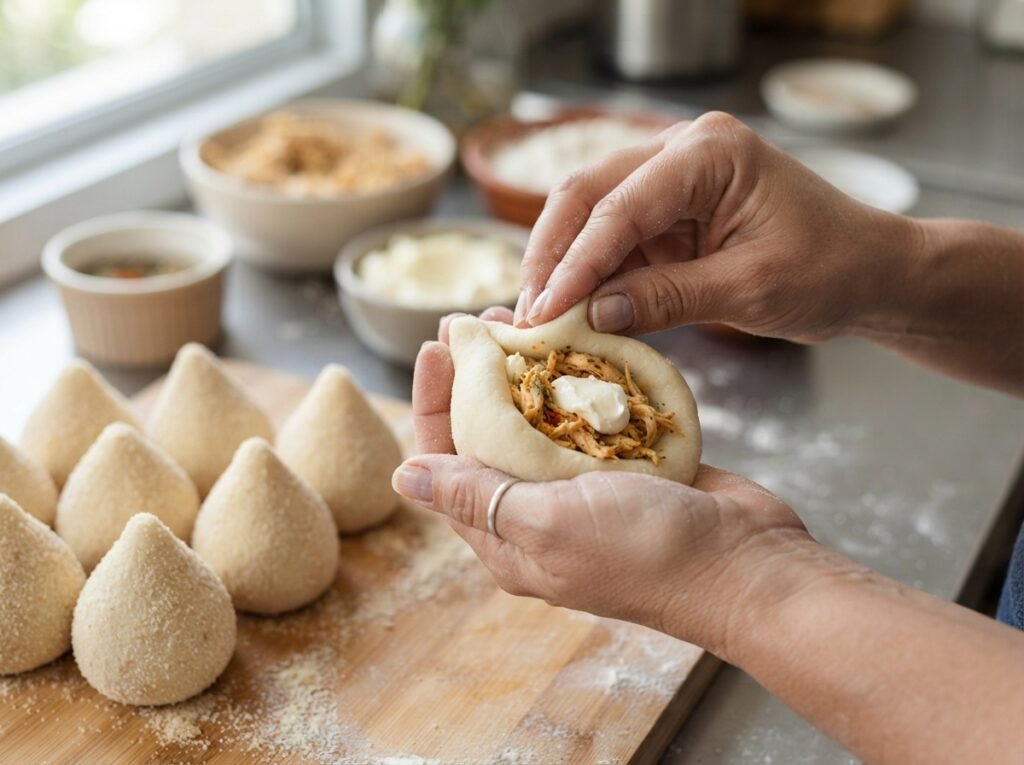
Carefully bring the edges of the dough up and around the filling. Pinch to seal and mold into the classic pointed teardrop shape.
Step 5: Apply egg wash
Beat the eggs in a shallow bowl. Dip each shaped coxinha fully into the egg wash so the surface is evenly coated.
Step 6: Coat with breadcrumbs
Roll the egg-washed coxinhas in breadcrumbs, pressing gently so the crumbs adhere. Ensure full coverage for a crisp crust.
Step 7: Heat the oil
Pour oil into a deep pot and heat to medium-high. The oil should be hot enough that a small piece of dough sizzles on contact.
Step 8: Fry until golden
Carefully lower the coxinhas into the hot oil in batches. Fry until deep golden brown on all sides, then drain on paper towels.
Tips & common mistakes
A few key details help the coxinhas hold their shape and fry up evenly golden every time.
- Seal the dough tightly to prevent filling leaks
- Keep oil temperature steady for even browning
- Do not overcrowd the pot when frying
- Drain well so the crust stays crisp

Coxinha de Frango
Equipment
- 1 Mixing bowls
- 1 | Deep pot or fryer |
- 1 | Slotted spoon |
- 1 | Paper towels | for draining
Ingredients
- 2 | cups | dough | potato or flour-based with herbs
- 1 1/2 | cups | shredded chicken | cooked
- 1/2 | cup | creamy cheese | catupiry or cream cheese
- 2 | | eggs | beaten
- 1 1/2 | cups | breadcrumbs |
- 1 | | oil | for frying
- 1 | | salt | to taste
- 1 | | fresh herbs | optional in dough
Instructions
- Mix shredded chicken with creamy cheese and season to taste.
- Divide dough into equal portions and flatten each into a disc.
- Place filling in the center of each disc.
- Seal the dough and shape into a teardrop form.
- Dip each coxinha in beaten egg.
- Coat thoroughly in breadcrumbs.
- Heat oil to medium-high in a deep pot.
- Fry in batches until deep golden brown and drain.
- Tip: Seal the dough tightly and avoid overcrowding the oil for best results.
Notes
Fry from frozen by adding 1–2 extra minutes to cooking time.
Drain well on paper towels to keep the crust crisp.
Reheat leftovers in an oven or air fryer for best texture.
Recipe variations
Simple changes let you customize these Brazilian chicken croquettes to different tastes or ingredients.
- Add diced peppers or corn to the chicken filling
- Mix herbs or garlic into the dough for extra flavor
- Bake instead of fry for a lighter version
- Swap chicken for shredded turkey or plant-based filling
What to serve with this recipe
These pairings complement the crispy, savory coxinhas for a complete Brazilian-style snack spread.
- Spicy mayonnaise or garlic aioli for dipping
- Fresh lime wedges for brightness
- Simple green salad on the side
- Cold beer or guaraná soda
While you’re at it: Fresh Fruit Vanilla Layer Cake
Frequently asked questions
Here are clear answers to common questions about making coxinha de frango at home.
Can I make the dough ahead of time?
Yes, prepare the dough and filling a day in advance. Store both covered in the refrigerator and shape the coxinhas just before coating and frying.
Why did my coxinhas open while frying?
The dough may not have been sealed tightly enough. Press the seams firmly and chill the shaped pieces briefly before frying to help them hold.
Can I freeze uncooked coxinhas?
Absolutely. Shape and bread them, then freeze on a tray before transferring to a bag. Fry from frozen, adding a minute or two to the cooking time.
What oil is best for frying?
A neutral oil with a high smoke point such as vegetable, canola, or sunflower oil works best. Maintain a steady medium-high temperature for even results.
Final thoughts

Coxinha de frango brings the best of Brazilian street food right into your kitchen. The crispy golden shell, savory chicken, and stretchy cheese make every bite satisfying. Shape a batch for your next gathering or quiet night in and enjoy the process. Try the recipe soon and leave a comment or rating below to share how your coxinhas turned out.