
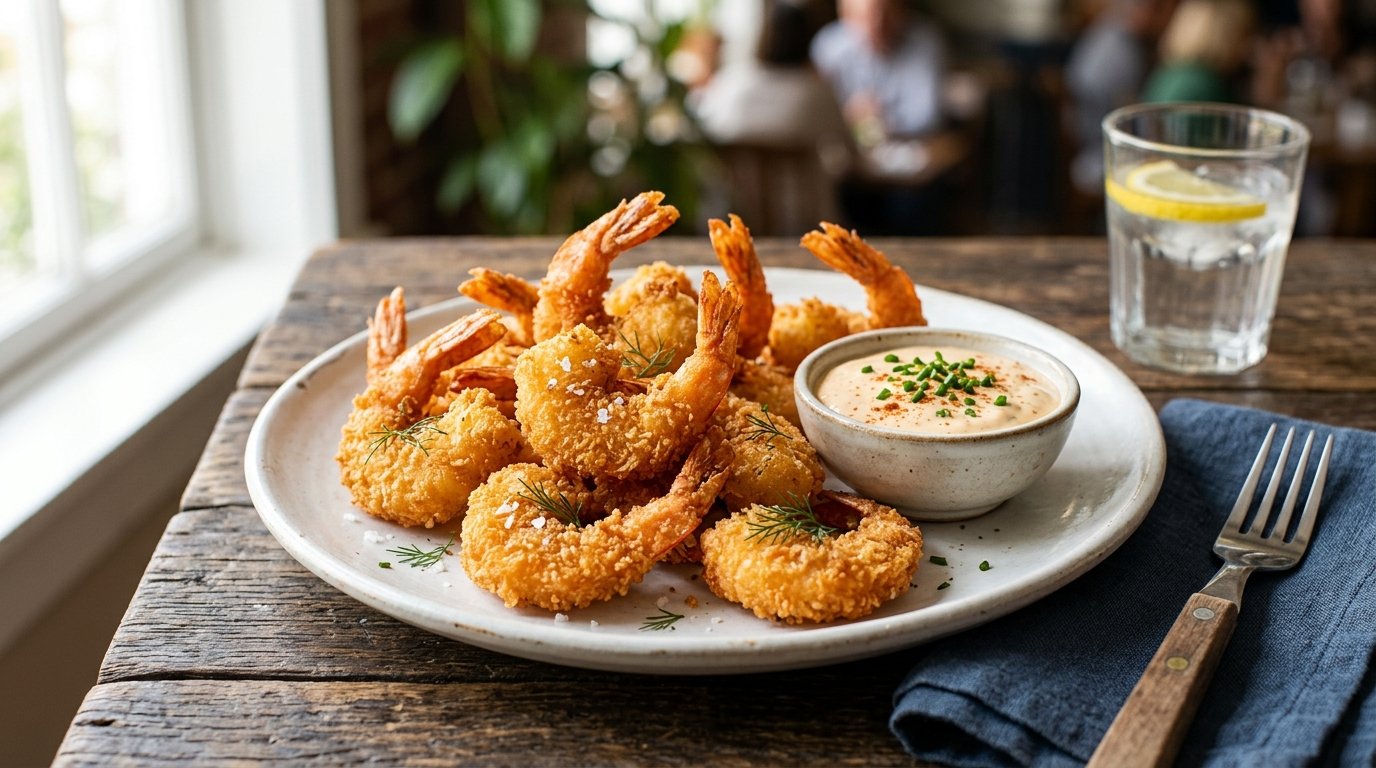
Quick Recipe Summary
| Prep Time | 20 Minutes |
|---|---|
| Cook Time | 10 Minutes |
| Total Time | 30 Minutes |
| Servings | 4 (as appetizer) |
| Cuisine | American / Southern Comfort |
| Course | Appetizer / Main Course |
| Difficulty | Medium |
| Calories | ~380 kcal per serving |
Table of Contents
- Introduction
- Why This Recipe Works
- Why You’ll Love This Recipe
- Ingredient Notes
- Kitchen Equipment
- Step-by-Step Instructions
- Expert Tips for Maximum Crunch
- Common Mistakes to Avoid
- Recipe Variations
- What to Serve With This Recipe
- Make Ahead & Meal Prep Tips
- Storage & Reheating Instructions
- Nutritional Information
- Troubleshooting Guide
- Frequently Asked Questions
- Final Thoughts
Introduction
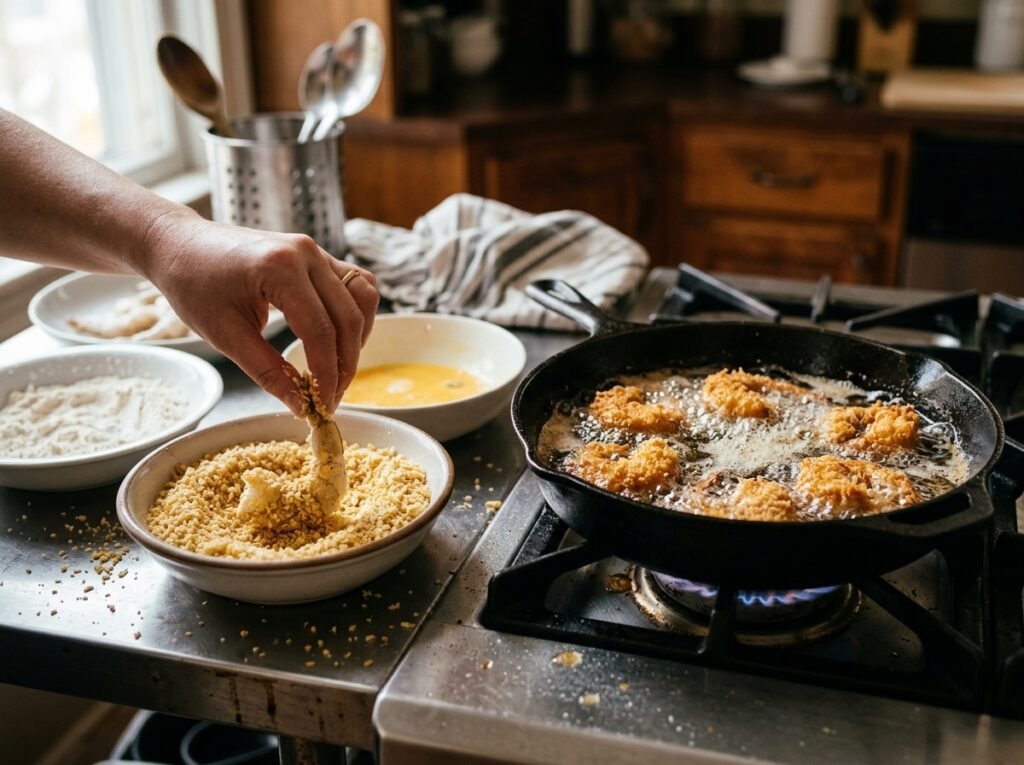
There is a specific auditory cue that signals perfection in the kitchen: the aggressive, rhythmic sizzle of shrimp hitting hot oil, followed by the satisfying crunch when you bite into a golden-brown crust. These Perfectly Crispy Fried Shrimp are not just an appetizer; they are a textural masterpiece that elevates seafood from simple protein to indulgent comfort food. Whether you are hosting a summer cookout, preparing a holiday feast, or simply craving something salty and crunchy on a Friday night, this recipe delivers restaurant-quality results right at home.
The secret to achieving that elusive shatteringly crisp exterior while keeping the interior succulent lies in technique, not just ingredients. It requires understanding moisture control, oil temperature management, and the science of breading adhesion. Unlike soggy, pale fried shrimp found at some casual eateries, this method ensures every piece emerges with a lacy, golden armor that protects the delicate meat inside. By mastering these fundamentals, you transform a potentially tricky cooking process into a reliable, repeatable skill that will impress guests and satisfy cravings for years to come.
Why This Recipe Works
This recipe succeeds because it addresses the three primary enemies of good frying: moisture, temperature fluctuation, and poor adhesion. Shrimp are naturally high in water content. When wet shrimp hit hot oil, the surface moisture instantly vaporizes, creating steam that pushes the breading away from the meat, leading to peeling and sogginess. Our preparation protocol includes thorough drying and a specific dredging sequence that creates a “glue” layer, ensuring the crust bonds permanently to the protein.
Furthermore, we utilize a dual-starch coating system. Flour provides structure and initial browning via the Maillard reaction, while cornstarch inhibits gluten formation and promotes a lighter, crispier texture that stays crunchy longer. Maintaining oil temperature between 350°F and 375°F is equally critical. Too cool, and the shrimp absorb oil like a sponge; too hot, and the exterior burns before the interior cooks. By monitoring heat and frying in small batches, we ensure consistent thermal transfer, resulting in uniformly cooked shrimp with a professional-grade finish that rivals any coastal seafood shack.
Why You’ll Love This Recipe
- Unbeatable Texture: The double-dredge technique guarantees a crust that shatters audibly, contrasting perfectly with tender, juicy shrimp.
- Versatile Application: Works beautifully as a standalone appetizer, atop salads, in po’ boys, or alongside pasta.
- Quick Cooking Time: Shrimp cook in under 3 minutes, making this ideal for last-minute entertaining or weeknight treats.
- Customizable Flavor Base: The neutral breading serves as a perfect canvas for spicy, herby, or citrusy seasoning variations.
- Crowd-Pleasing Appeal: Universally loved by adults and children alike, bridging the gap between fancy dining and comfort food.
- Visual Perfection: Uniform golden-brown color and intact tails make for stunning presentation without elaborate plating.
- Cost-Effective Luxury: Shrimp offer a premium dining experience at a fraction of the cost of lobster or crab, especially when bought frozen in bulk.
Ingredient Notes
Large Shrimp (16/20 or 21/25 count)
- Purpose: Primary protein. Size matters for frying; smaller shrimp overcook before crust browns, while jumbo shrimp may remain raw inside.
- Substitutions: Prawns, langoustines, or even firm white fish strips. Avoid tiny salad shrimp; they lack substance for this breading ratio.
- Buying Tips: Choose wild-caught if possible for superior texture and flavor. If buying frozen, select IQF (individually quick frozen) bags to avoid clumping. Check for “chemical-free” or “no additives” labels to prevent mushy texture from sodium tripolyphosphate (STP).
- Storage Tips: Thaw overnight in refrigerator, never at room temperature. Pat completely dry before use. Use within 24 hours of thawing for best quality.
All-Purpose Flour & Cornstarch
- Purpose: Flour provides structure and browning; cornstarch creates lightness and extended crispness. Together, they form the ideal batter matrix.
- Substitutions: Rice flour (extra crispy/gluten-free), potato starch (similar to cornstarch), or self-rising flour (adds leavening for puffier crust). Avoid cake flour; too little protein for structural integrity.
- Buying Tips: Ensure both are fresh and lump-free. Sift together before use to aerate and distribute evenly. Store in cool, dry place to prevent rancidity.
- Storage Tips: Keep in airtight containers. Flour lasts 6-8 months; cornstarch indefinitely. Discard if musty smell develops.
Eggs & Milk/Buttermilk Wash
- Purpose: Acts as adhesive binder. Proteins coagulate upon heating, locking breading to shrimp. Acid in buttermilk tenderizes slightly and adds tang.
- Substitutions: Buttermilk preferred for flavor/tenderizing. Regular milk + 1 tsp vinegar works. Aquafaba (chickpea water) for vegan option. Water alone lacks binding power.
- Buying Tips: Fresh eggs essential for strong protein network. Buttermilk should smell tangy, not spoiled. Shake carton well before measuring.
- Storage Tips: Refrigerate wash mixture until ready to use. Discard after contact with raw shrimp; do not reuse.
Neutral Oil (Vegetable, Canola, or Peanut)
- Purpose: Heat transfer medium. Must have high smoke point (>400°F) to withstand frying temps without burning or imparting off-flavors.
- Substitutions: Avocado oil (highest smoke point), grapeseed oil. Avoid olive oil (low smoke point, strong flavor), coconut oil (flavor clash), or butter (burns instantly).
- Buying Tips: Choose refined oils, not unfiltered. Check expiration date; rancid oil ruins entire batch. Peanut oil adds subtle nuttiness prized in Southern frying.
- Storage Tips: Store in cool, dark place. Filter and reuse up to 3 times if strained properly. Discard if dark, foamy, or acrid-smelling.
Seasonings (Salt, Pepper, Paprika, Garlic Powder)
- Purpose: Flavor foundation. Salt enhances natural sweetness; paprika adds color and mild earthiness; garlic powder provides savory depth without burning.
- Substitutions: Cajun blend, Old Bay, lemon pepper, or cayenne for heat. Fresh herbs burn in fryer; stick to dried spices in breading. Finish with fresh herbs post-fry.
- Buying Tips: Buy whole spices and grind fresh for maximum potency. Pre-ground loses volatile oils within 6 months. Store away from heat/light.
- Storage Tips: Label with purchase date. Replace annually. Taste before using; stale spices taste dusty, not aromatic.
Kitchen Equipment
- Deep Fryer or Heavy-Bottomed Pot/Dutch Oven: Essential for maintaining stable oil temperature. Cast iron retains heat best; stainless steel responds quickly. Avoid thin aluminum pots that cause temp swings.
- Fry Thermometer: Non-negotiable for safety and quality. Visual cues are unreliable. Digital probe gives instant reading; dial thermometers require calibration check.
- Spider Strainer or Slotted Spoon: For safe removal of shrimp. Fine mesh prevents small crumbs from falling back into oil. Long handle keeps hands away from splatter.
- Wire Cooling Rack: Superior to paper towels for draining. Allows air circulation underneath, preventing steam buildup that softens crust. Place over baking sheet to catch drips.
- Three-Shallow Dredging Stations: Wide bowls or pie plates for flour, egg wash, and second flour coat. Prevents cross-contamination and ensures even coating.
- Tongs: For handling raw shrimp safely. Silicone-tipped protects non-stick surfaces; metal grips better. Never use fingers near hot oil.
- Paper Towels: For patting shrimp dry pre-fry and blotting excess oil post-fry (if no rack available). Use unbleached to avoid chemical transfer.
Step-by-Step Instructions
H3: Step 1 – Prep & Dry the Shrimp
Peel and devein shrimp, leaving tails intact for handling. Rinse briefly under cold water. Place on clean kitchen towels or paper towels. Pat thoroughly dry, pressing gently to remove all surface moisture. Let sit 5 minutes to air-dry further.
- Why this matters: Surface moisture is enemy #1 of crispiness. Water creates steam barrier, causing breading to slide off and oil to splatter violently. Dry shrimp = adherent crust + safer frying.
- Visual Cue: Shrimp surface should look matte, not glossy or wet. No visible water droplets. Flesh feels tacky, not slimy.
- Texture Cue: Firm, springy flesh. Not mushy or waterlogged. Tail shell dry and brittle.
- Aroma Cue: Clean, briny ocean scent. No ammonia or sour notes indicating spoilage.
- Common Mistake: Rushing the drying process. Fix: Use multiple towel layers. Change towels if saturated. Air-drying time is non-negotiable.
- Professional Tip: Chill dried shrimp 10 mins in fridge before breading. Cold shrimp hit hot oil better, reducing initial moisture release and promoting crisp set.
H3: Step 2 – Set Up Dredging Station
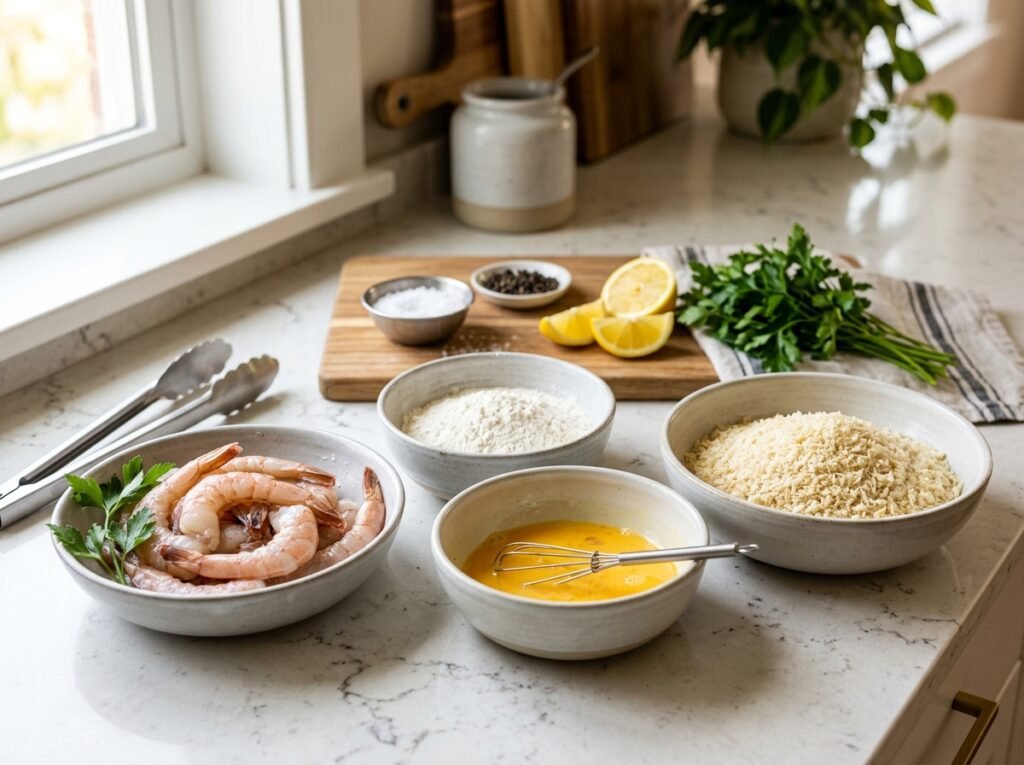
In three shallow dishes, arrange: (1) 1 cup flour + ½ cup cornstarch + seasonings, whisked; (2) 2 eggs + ¼ cup milk/buttermilk, beaten smooth; (3) Remaining flour-cornstarch mix. Ensure stations are wide enough to lay shrimp flat without overlapping.
- Why this matters: Organized workflow prevents cross-contamination and ensures consistent coating. Whisking eliminates lumps that create bare spots. Separate stations maintain dry/wet/dry sequence integrity.
- Visual Cue: Flour mixture uniform pale beige with speckled spices. Egg wash smooth, no white streaks. No clumps in any station.
- Texture Cue: Flour fine and powdery. Egg wash viscous but pourable. Not gloopy or separated.
- Common Mistake: Using deep bowls instead of shallow dishes. Shrimp pool at bottom, coating unevenly. Fix: Pie plates or rimmed baking sheets work best.
- Professional Tip: Add 1 tbsp cornstarch to egg wash. Creates stronger bond between layers. Keeps wash from becoming too thin during use.
H3: Step 3 – Double-Dredge with Precision
Hold shrimp by tail. Dip into flour mixture, shaking off excess. Submerge completely in egg wash, letting drip fall back. Return to flour mixture, pressing gently to adhere. Shake off loose crumbs. Place on wire rack. Repeat for all shrimp.
- Why this matters: First flour layer absorbs residual moisture and provides tooth for egg wash. Egg acts as glue. Second flour layer builds thickness and creates craggy surface for maximum crunch. Pressing ensures adhesion; shaking prevents gummy coating.
- Visual Cue: Even, opaque coating. No translucent spots. Crumbs fall freely, not clumped. Tail remains clean for handling.
- Texture Cue: Coating feels dry and powdery, not damp or sticky. Adheres firmly when touched lightly.
- Aroma Cue: Mild wheat/spice scent. No raw egg odor dominating.
- Common Mistake: Overloading stations or reusing contaminated flour. Wet flour becomes paste, creating thick, doughy crust. Fix: Refresh flour frequently. Use one hand for wet, one for dry to prevent clumping.
- Professional Tip: Let breaded shrimp rest 5-10 mins on rack before frying. Hydration allows coating to hydrate and bond, reducing fallout during fry.
H3: Step 4 – Fry to Golden Perfection
Heat oil to 350°F (175°C) in heavy pot/fryer. Test with thermometer. Carefully lower 4-6 shrimp into oil using tongs/spider. Do not overcrowd. Fry 2-3 minutes, turning once halfway, until deep golden brown and internal temp reaches 120°F (49°C). Remove immediately to wire rack.
- Why this matters: Correct temp ensures rapid crust set before oil absorption. Small batches maintain temp stability. Turning ensures even color. Internal temp 120°F accounts for carryover cooking to safe 145°F (63°C) without rubbery texture. Wire rack drainage preserves crispness.
- Visual Cue: Vigorous bubbling around shrimp (not violent splashing). Color progresses from pale to amber to deep gold. Bubbles subside when done.
- Texture Cue: Crust hardens visibly. Shrimp curl into tight “C” shape. Tail turns bright orange-red.
- Aroma Cue: Nutty, toasted oil and sweet seafood scent. Burnt smell = temp too high; remove immediately.
- Common Mistake: Overcrowding pot. Temp drops, shrimp steam instead of fry, become greasy/soggy. Fix: Fry in batches. Wait for oil to recover to 350°F between batches.
- Professional Tip: Skim floating crumbs between batches with spider. Burnt crumbs darken oil and impart bitter flavor to next batch.
Expert Tips for Maximum Crunch
- Vodka in Batter (Optional): Replace 2 tbsp milk with vodka. Alcohol evaporates faster than water, creating micro-bubbles in crust for extra crispness. Flavorless in final product. Science-backed trick used by pros.
- Double-Fry Method: For ultimate crunch, fry at 325°F for 2 mins (cook through), drain 5 mins, then refry at 375°F for 30 secs (crisp exterior). Mimics Korean fried chicken technique. Worth effort for special occasions.
- Oil Depth Matters: Oil should be at least 2 inches deep. Shallow oil causes uneven cooking and temp fluctuations. Deep oil surrounds shrimp, cooking uniformly from all angles.
- Season Post-Fry: Salt draws moisture; adding pre-fry can soften crust. Toss hot shrimp with flaky salt immediately after draining. Heat helps salt adhere without compromising crunch.
- Thermometer Calibration: Test thermometer in boiling water (212°F/100°C) before use. Inaccurate readings lead to burnt or greasy shrimp. Adjust accordingly.
- Rest Before Serving: 2-3 minute rest on rack allows internal steam to escape. Prevents soggy bottom when plated. Crust sets fully during this brief window.
Common Mistakes to Avoid
- Wet Shrimp: Causes breading failure and dangerous splattering. Fix: Pat dry meticulously. Air-dry 5 mins. Chill before breading.
- Overcrowding Pot: Drops oil temp, creates soggy/greasy shrimp. Fix: Fry 4-6 at a time. Monitor temp constantly. Recover between batches.
- Wrong Oil Temp: Too low = greasy; too high = burnt outside/raw inside. Fix: Use thermometer. Adjust heat dynamically. Never guess.
- Single Dredge: Thin coating falls off, lacks crunch. Fix: Always double-dredge. Press gently. Rest before frying.
- Draining on Paper Towels: Traps steam, softens crust. Fix: Use wire rack over baking sheet. Air circulation is key.
- Reusing Contaminated Flour: Wet flour = gummy paste coating. Fix: Refresh flour station frequently. Use separate hands for wet/dry steps.
- Overcooking: Rubber-textured shrimp. Fix: Pull at 120°F internal. Carryover cooking finishes job. Pink/opaque = done.
Recipe Variations
- Spicy Cajun Kick: Add 1 tbsp Cajun seasoning + ½ tsp cayenne to flour mix. Serve with remoulade sauce. Bold, fiery Southern classic.
- Coconut Crusted: Replace ½ cup flour with shredded unsweetened coconut. Adds tropical sweetness and unique texture. Pair with mango salsa.
- Panko Japanese Style: Substitute second flour coat with panko breadcrumbs. Lighter, airier crunch. Traditional tempura-inspired variation.
- Gluten-Free Adaptation: Use rice flour + tapioca starch blend. Ensure all seasonings certified GF. Texture nearly identical to wheat version.
- Lemon-Herb Brightness: Add 1 tbsp dried parsley + 1 tsp lemon zest to flour. Finish with fresh dill. Refreshing, summery profile.
- Old Bay Classic: Replace standard spices with 2 tbsp Old Bay seasoning. Iconic Maryland flavor. Serve with cocktail sauce.
- Vegan Cauliflower “Shrimp”: Use cauliflower florets instead of shrimp. Same breading/frying method. Plant-based alternative with similar texture.
- Extra Cheesy Interior: Stuff shrimp with cream cheese before breading. Rich, gooey surprise inside crunchy shell. Indulgent appetizer upgrade.
What to Serve With This Recipe
Balance the rich, fried shrimp with acidic, fresh, or creamy accompaniments:
- Classic Cocktail Sauce: Horseradish-ketchup-chili-lemon blend. Tangy heat cuts through richness. Essential traditional pairing.
- Remoulade Sauce: Mayo-mustard-pickle-caper emulsion. Creamy, briny contrast. Louisiana staple.
- Garlic Aioli: Roasted garlic-mayo-lemon. Rich, savory dip. Complements crispy texture beautifully.
- Coleslaw: Vinegar-based or creamy. Crunchy, acidic counterpoint. Cleanses palate between bites.
- Hush Puppies: Cornmeal fritters. Southern BBQ tradition. Sweet-savory carb companion.
- French Fries or Wedges: Salty, starchy side. Classic pub-style pairing. Dust with Old Bay.
- Sparkling Wine or Lager: Effervescent acidity cuts fat. Crisp beer complements fried foods perfectly.
- Key Lime Pie: Tart, creamy dessert. Citrus finish balances savory meal. Perfect coastal ending.
Make Ahead & Meal Prep Tips
- Bread Ahead: Dredge shrimp up to 4 hours ahead. Store uncovered on rack in fridge. Coating sets further, improving adhesion. Do not freeze breaded raw shrimp; coating becomes soggy upon thawing.
- Pre-Mix Dry Ingredients: Combine flour, cornstarch, spices up to 1 week ahead. Store in airtight container. Saves active prep time. Shake before use to redistribute settled spices.
- Egg Wash Prep: Beat eggs/milk up to 24 hours ahead. Refrigerate. Bring to room temp before use. Cold wash shocks shrimp, affecting coating.
- Oil Management: Filter and store used oil in sealed container. Reuse up to 3 times if clear and odorless. Label with date/use count. Saves money and waste.
- Sauce Prep: Make dipping sauces 2-3 days ahead. Flavors meld and improve. Store in squeeze bottles for easy service.
Storage & Reheating Instructions
Storage
- Refrigerator: Store cooled shrimp in single layer on rack in airtight container up to 2 days. Stacking traps steam, destroying crispness. Separate from sauces.
- Freezer: Freeze cooked shrimp on baking sheet until solid. Transfer to freezer bag up to 1 month. Thaw in fridge before reheating. Texture softens slightly; best for salads/pastas.
Reheating
- Oven (Best): 375°F (190°C) on wire rack 8-10 mins. Restores crispness effectively. Avoid direct contact with pan.
- Air Fryer: 375°F (190°C) 3-5 mins. Excellent revival method. Shake basket halfway. Spray lightly with oil if dried out.
- Stovetop: Skillet over medium heat 2-3 mins per side. Revives some crunch. Watch closely to prevent burning.
- Microwave (Avoid): Steams shrimp, making crust soggy and rubbery. Only use if texture irrelevant (e.g., for pasta toss).
Nutritional Information
Estimates per serving (4-5 shrimp):
- Calories: 380 kcal
- Protein: 24g
- Carbohydrates: 28g
- Fat: 18g
- Fiber: 1g
- Sugar: 1g
- Sodium: 520mg
Note: Values vary based on shrimp size, oil absorption, and seasoning sodium. Always check labels for precise tracking.
Troubleshooting Guide
| Problem | Cause | Solution |
|---|---|---|
| Breading Falls Off | Shrimp too wet or insufficient dredge. | Pat dry thoroughly. Double-dredge properly. Rest before frying. Ensure oil at correct temp. |
| Soggy/Greasy Crust | Oil too cool or overcrowded pot. | Maintain 350-375°F. Fry small batches. Drain on wire rack, not paper towels. |
| Burnt Outside, Raw Inside | Oil too hot or shrimp too large. | Reduce temp to 350°F. Use correct size shrimp (16/20). Cook longer at lower temp. |
| Pale, Bland Crust | Under-seasoned or oil too cool. | Season flour generously. Ensure oil reaches 350°F before frying. Extend fry time slightly. |
| Rubbery Texture | Overcooked. | Pull at 120°F internal. Carryover cooking finishes. Shrimp cook fast; watch closely. |
| Oil Splatters Violently | Shrimp not dried or water in oil. | Pat shrimp bone-dry. Never add wet items to hot oil. Use splatter screen if needed. |
Frequently Asked Questions
1. Can I use frozen shrimp directly? No. Frozen shrimp release excessive water, causing dangerous splattering and soggy coating. Thaw completely in fridge overnight. Pat extremely dry. Treat as fresh after thawing.
2. Why leave tails on? Tails serve as natural handles for eating and dipping. They also protect tail meat from overcooking. Remove only if serving in salad/pasta where handling isn’t needed.
3. How do I know oil is ready without thermometer? Drop 1-inch bread cube into oil. Should bubble vigorously and turn golden in 60 seconds. If sinks/no bubbles = too cool. If browns instantly = too hot. Thermometer strongly recommended for accuracy.
4. Can I bake instead of fry? Yes, but texture differs significantly. Bake at 425°F on oiled rack 10-12 mins, flipping halfway. Spray generously with oil. Crispness won’t match deep-fry but offers lighter alternative.
5. Why does my coating taste oily? Oil temp too low during fry. Shrimp absorb oil instead of sealing crust. Maintain 350-375°F strictly. Drain properly on wire rack. Use fresh oil if old/dark.
6. Can I reuse frying oil? Yes, 2-3 times if filtered and stored properly. Strain through cheesecloth/fine mesh. Store in cool, dark place. Discard if dark, foamy, or rancid-smelling. Never mix old/new oil.
7. What’s the best shrimp size for frying? 16/20 or 21/25 count (large/jumbo). Smaller shrimp overcook before crust browns. Larger may stay raw inside. Consistent size ensures even cooking.
8. How to prevent sticking to pot? Use heavy-bottomed pot. Ensure oil covers shrimp fully. Don’t move shrimp first 60 seconds; crust needs to set. Use spider strainer for gentle removal. Non-stick pots not recommended for deep frying.
Final Thoughts
Mastering Perfectly Crispy Fried Shrimp is about respecting the process and embracing precision. The sizzle of hot oil, the golden transformation, the audible crunch—these sensory rewards are earned through attention to detail, not luck. This recipe proves that exceptional fried seafood is achievable at home with patience, proper technique, and quality ingredients.