
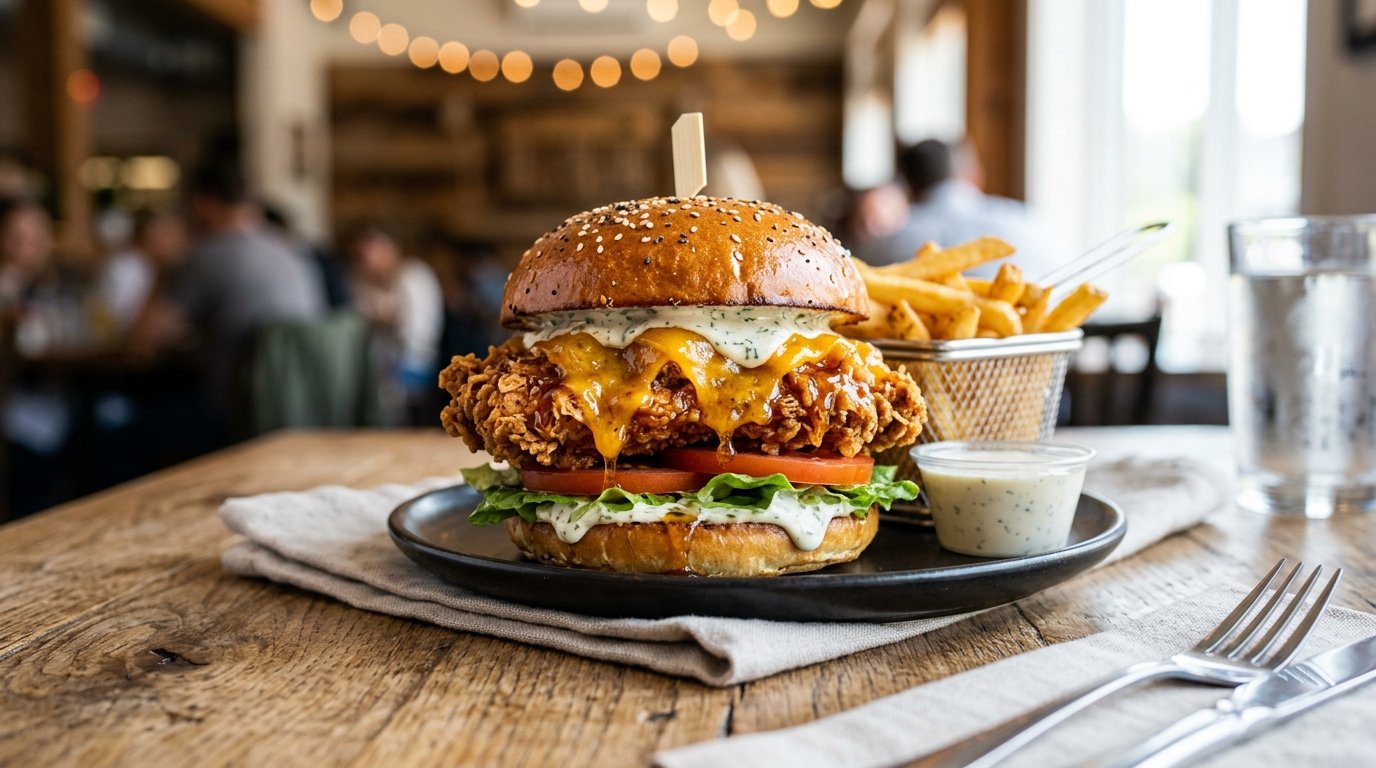
Quick Recipe Summary
| Prep Time | 20 Minutes |
|---|---|
| Cook Time | 15 Minutes |
| Total Time | 35 Minutes |
| Servings | 4 Burgers |
| Cuisine | American Fusion / Southern Comfort |
| Course | Main Course / Dinner |
| Difficulty | Easy |
| Calories | ~680 kcal per burger |
Table of Contents
- Introduction
- Why This Recipe Works
- Why You’ll Love This Recipe
- Ingredient Notes
- Kitchen Equipment
- Step-by-Step Instructions
- Expert Tips for the Perfect Smash
- Common Mistakes to Avoid
- Recipe Variations
- What to Serve With This Recipe
- Make Ahead & Meal Prep Tips
- Storage & Reheating Instructions
- Nutritional Information
- Troubleshooting Guide
- Frequently Asked Questions
- Final Thoughts
Introduction
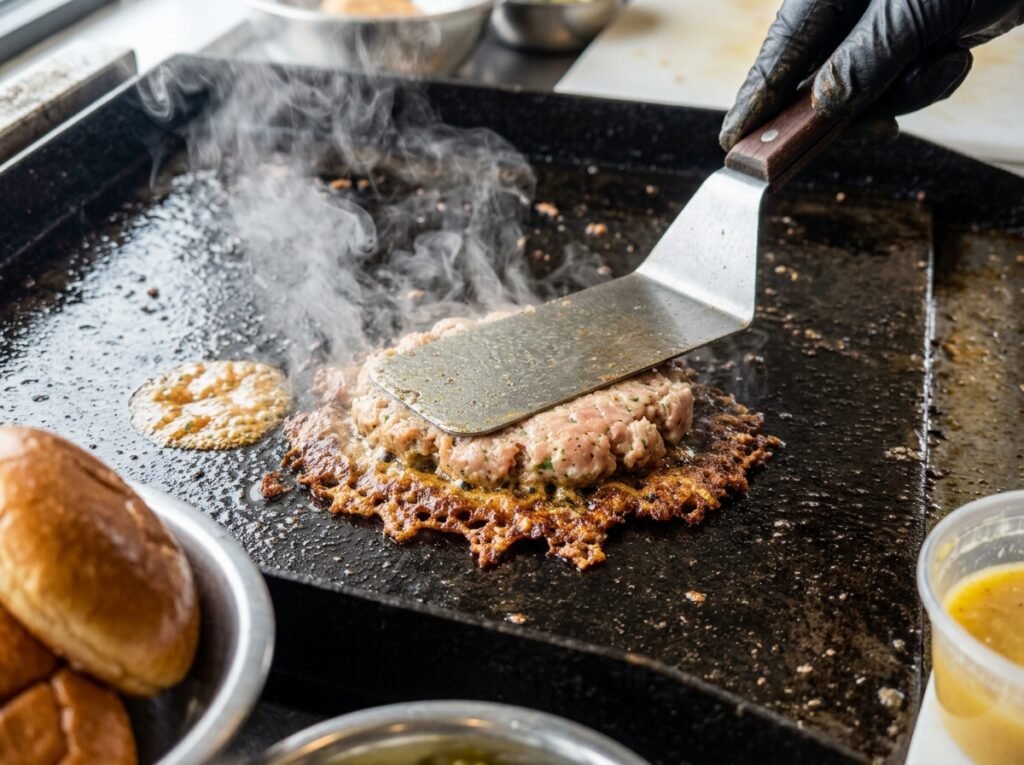
There is a specific moment in cooking when you realize that a burger isn’t just a sandwich—it’s a textural experience defined by the contrast between shatteringly crisp edges and juicy, tender meat. These Hot Honey Ranch Chicken Smashburgers capture that magic perfectly, combining the viral smashburger technique with the addictive sweet-heat flavor profile of hot honey and the cooling creaminess of ranch. Unlike traditional thick chicken burgers that can sometimes be dry or bland, this method uses ground chicken formed into loose balls and smashed thin against a screaming hot skillet. This creates maximum surface area for the Maillard reaction, resulting in an irreproducible crust that locks in moisture and flavor.
The genius of this recipe lies in its balance. Ground chicken is leaner than beef, making it prone to dryness if overcooked, but the smash technique mitigates this by ensuring rapid, even cooking. The hot honey glaze, brushed on during the final seconds of cooking, caramelizes slightly without burning, adding a sticky, spicy-sweet layer that cuts through the richness of the melted cheese. Topped with cool ranch, crisp lettuce, and fresh tomato on a toasted sesame bun, every bite offers a symphony of temperatures and textures. Whether you are hosting a summer cookout, looking for a weeknight dinner that feels special, or simply craving something bold and satisfying, this recipe delivers restaurant-quality results right at home.
Why This Recipe Works
This recipe succeeds because it leverages food science to overcome the inherent challenges of cooking ground poultry. Chicken lacks the intramuscular fat of beef, which means it doesn’t self-baste during cooking. By smashing the meat ball into a thin patty, we increase the surface-area-to-volume ratio dramatically. This allows heat to penetrate quickly, cooking the patty through before the interior has time to dry out. Simultaneously, the direct contact with the hot metal creates a fond (browned bits) and a crispy crust that adds savory depth often missing in chicken dishes.
Furthermore, the timing of the hot honey application is critical. Honey contains sugars that caramelize rapidly; adding it too early causes burning and bitterness. By brushing it on only after flipping and melting the cheese, we utilize residual heat to warm and set the glaze without scorching it. The ranch dressing serves a dual purpose: it provides necessary fat and acidity to balance the sweetness of the honey and the savoriness of the seared meat, while also acting as a moisture barrier that prevents the bottom bun from becoming soggy. This intentional layering ensures structural integrity and flavor harmony in every bite.
Why You’ll Love This Recipe
- Unbeatable Texture: The smash technique guarantees crispy, lacy edges that contrast beautifully with the juicy interior—a texture impossible to achieve with pre-formed patties.
- Flavor Bomb: The combination of savory seared chicken, salty cheese, spicy-sweet honey, and tangy ranch hits every taste receptor.
- Quick & Efficient: From ball to bun in under 15 minutes of active cooking time, making it perfect for busy weeknights.
- Leaner Protein Option: Ground chicken offers a lighter alternative to beef without sacrificing satisfaction or indulgence.
- Customizable Heat: Control the spice level by adjusting the red pepper flakes in the honey or choosing mild vs. hot ranch.
- Visual Appeal: The glossy amber glaze dripping over melted cheddar and vibrant greens makes for stunning food photography and presentation.
- Crowd-Pleasing: Familiar flavors elevated to gourmet status; appeals to both kids and adults alike.
Ingredient Notes
Ground Chicken (85/15 or 90/10)
- Purpose: Primary protein. Higher fat content (15%) is crucial for juiciness in smashburgers. Leaner blends (93/7 or 99/1) will result in dry, crumbly patties.
- Substitutions: Ground turkey (similar texture, slightly gamier), ground pork (richer, fattier), or a 50/50 chicken-pork blend for optimal moisture.
- Buying Tips: Check the label for fat percentage. Avoid “extra lean.” Freshly ground from a butcher is ideal, but store-packaged works if handled gently. Keep cold until ready to cook.
- Storage Tips: Refrigerate immediately; use within 1-2 days of purchase. Freeze in portioned bags up to 3 months. Thaw overnight in fridge before shaping.
Hot Honey (Honey + Red Pepper Flakes)
- Purpose: Sweet-heat glaze that caramelizes on the patty. Balances savory meat and salty cheese.
- Substitutions: Store-bought hot honey (convenient, consistent heat), maple syrup + cayenne (vegan option), or agave + chili oil. Adjust spice to taste.
- Buying Tips: If making homemade, use mild honey (clover, wildflower) so spice shines. Crushed red pepper flakes preferred over powder for texture. Infuse 10 mins minimum before using.
- Storage Tips: Homemade keeps 2 weeks refrigerated. Store-bought lasts months. Warm gently before brushing if crystallized.
American Cheese or Cheddar Slices
- Purpose: Melting agent that binds patty to bun. American melts smoothly due to emulsifying salts; cheddar offers sharper flavor but may separate.
- Substitutions: Provolone (mild melt), Pepper Jack (spicy kick), Swiss (nutty). Avoid pre-shredded cheese; anti-caking agents inhibit smooth melting.
- Buying Tips: For ultimate melt, use deli-sliced American or high-quality block cheddar sliced thin. Pre-sliced processed cheese melts most reliably for smashburgers.
- Storage Tips: Keep refrigerated. Bring to room temp 5 mins before cooking for faster, even melt.
Ranch Dressing
- Purpose: Cooling, creamy element that balances heat and adds moisture. Prevents dry mouthfeel from lean chicken.
- Substitutions: Blue cheese dressing (funkier), garlic aioli (richer), tzatziki (lighter/fresher), or spicy mayo. Homemade ranch preferred for freshness.
- Buying Tips: Full-fat ranch has better texture and flavor than light versions. Check ingredient list; avoid those with excessive gums/thickeners.
- Storage Tips: Refrigerate. Shake/stir before using. Use within expiration date. Discard if separated or sour-smelling.
Sesame Seed Buns
- Purpose: Structural vessel. Soft, pillowy texture contrasts with crispy patty. Sesame seeds add nutty flavor and visual appeal.
- Substitutions: Brioche buns (richer/sweeter), potato rolls (softer), ciabatta (chewier/crustier). Avoid dense artisan breads that overwhelm delicate chicken.
- Buying Tips: Choose buns labeled “burger” or “hamburger” size. Should be squishy, not firm. Toasting is non-negotiable for structural integrity.
- Storage Tips: Keep sealed at room temperature. Freeze extras. Toast just before assembly to prevent sogginess.
Kitchen Equipment
- Cast Iron Skillet or Carbon Steel Pan: Essential for retaining high heat needed for proper smash. Non-stick pans cannot achieve same level of crust. Seasoned cast iron is ideal.
- Heavy-Duty Burger Press or Spatula: Flat-bottomed press ensures even thickness. Sturdy spatula needed for scraping fond. Avoid flimsy tools that bend under pressure.
- Parchment Paper Squares: Prevents sticking during smash. Allows easy release of patty from press. Cut to 6×6 inches beforehand.
- Instant-Read Thermometer: Crucial for chicken safety. Visual cues unreliable for poultry. Ensures 165°F internal temp without overcooking.
- Basting Brush: Silicone brush for applying hot honey evenly without shedding bristles. Heat-resistant up to 500°F.
- Tongs: For handling buns and toppings safely. Long handles keep hands away from heat.
- Mixing Bowls: Small bowl for hot honey; medium for mixing chicken seasoning. Glass or ceramic preferred.
Step-by-Step Instructions
H3: Step 1 – Prepare Hot Honey & Season Chicken
In small glass bowl, combine ½ cup honey and 1 tsp red pepper flakes. Stir well. Let sit 10 minutes to infuse. Meanwhile, place 1 lb ground chicken in medium bowl. Add 1 tsp salt, ½ tsp black pepper, ½ tsp garlic powder, ½ tsp onion powder. Mix GENTLY with hands just until combined. Do NOT overwork. Divide into 4 equal portions (approx. 4 oz each). Roll into LOOSE balls. Do NOT pack tightly.
- Why this matters: Infusing honey allows spice to hydrate and distribute evenly. Gentle mixing preserves fat pockets; overworking develops protein bonds that make patties tough/dense. Loose balls ensure even smash and juicy interior.
- Visual Cue: Honey should have visible red flecks suspended throughout. Chicken mixture looks marbled, not homogeneous paste. Balls hold shape loosely but crack slightly when pressed.
- Texture Cue: Chicken feels soft, pliable, slightly tacky. Not sticky or elastic. Honey viscous but pourable.
- Aroma Cue: Sweet floral honey with subtle chili warmth. Raw chicken scent masked by garlic/onion powder. No ammonia or sour notes.
- Common Mistake: Packing meat balls tightly like meatballs. Creates dense, rubbery patty. Fix: Handle minimally. Form gently. Think “loose snowball,” not “golf ball.”
- Professional Tip: Chill formed balls 15 mins before cooking. Cold fat renders slower, staying in patty longer. Prevents shrinkage during smash.
H3: Step 2 – Heat Skillet & Smash Patties
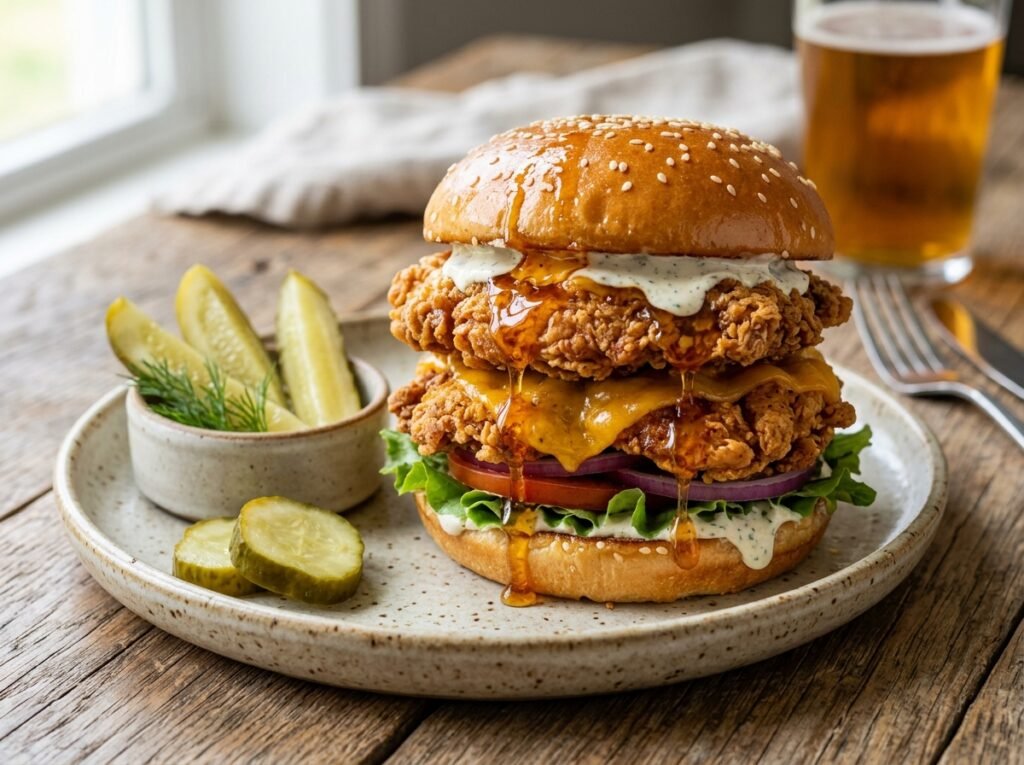
Place cast iron skillet over HIGH heat. Add 1 tbsp neutral oil (canola/avocado). Heat until shimmering and lightly smoking (approx. 3-4 mins). Place parchment square on skillet. Set chicken ball on parchment. Immediately press down HARD with burger press/spatula until approx. ¼-inch thick. Hold 5-10 seconds. Remove parchment carefully. Cook UNDISTURBED 2-3 minutes until deep brown crust forms and edges look crispy.
- Why this matters: Screaming hot pan triggers Maillard reaction instantly. Parchment prevents sticking during initial smash. Hard press maximizes surface contact for crust. Undisturbed cooking allows fond development; moving prematurely tears crust.
- Visual Cue: Oil shimmers, wisps of smoke rise. Patty spreads to edges of press. Bottom turns golden-brown to dark amber. Edges appear lacy/frilled. Steam rises steadily.
- Texture Cue: Patty adheres firmly to pan. Crust feels rigid when tapped with spatula. Edges crisp, center still soft.
- Aroma Cue: Intense searing/meaty smell. Nutty, toasted notes. Burnt odor = pan too hot; reduce heat slightly.
- Common Mistake: Moving patty before crust sets. Tears meat, ruins crust. Fix: Wait full 2-3 mins. Test edge with spatula; if it releases easily, it’s ready.
- Professional Tip: Wipe skillet between batches if fond burns. Excess carbon imparts bitter flavor. Re-oil lightly before next batch.
H3: Step 3 – Flip, Cheese & Glaze
Scrape under patty firmly with spatula to release crust. Flip decisively. IMMEDIATELY place cheese slice on patty. Cover pan with lid or dome for 30-60 seconds to melt cheese. Uncover. Brush top of patty generously with hot honey. Cook 30-60 seconds more until honey bubbles slightly and cheese fully melted. Internal temp should reach 165°F. Remove from pan.
- Why this matters: Flipping exposes unseared side to heat. Cheese melts fastest under cover (steam assists). Honey applied post-flip avoids burning; brief cook warms/glazes without scorching. Lid traps heat for efficient melting without overcooking chicken.
- Visual Cue: Cheese softens, then melts completely, draping over edges. Honey glistens, bubbles gently at edges. Patty surface glossy amber. No white/raw spots.
- Texture Cue: Cheese gooey, stretchy. Honey tacky, not hard. Patty yields to spatula pressure but holds shape.
- Aroma Cue: Caramelizing sugar scent mixes with cheesy aroma. Savory, sweet, spicy blend. Acrid smell = honey burning; remove immediately.
- Common Mistake: Adding honey before cheese melts. Honey burns while waiting for cheese. Fix: Melt cheese FIRST, then glaze. Timing is everything.
- Professional Tip: Use thermometer probe inserted sideways into patty center. Accuracy prevents guesswork. Chicken MUST reach 165°F for safety.
H3: Step 4 – Toast Buns & Assemble
While patties rest 1 minute, toast bun halves cut-side down in same skillet (or separate pan) with butter/oil until golden. Spread 1 tbsp ranch on bottom bun. Layer lettuce, tomato slice. Place patty (cheese-side up) on veggies. Drizzle extra hot honey if desired. Top with remaining ranch on crown bun. Serve IMMEDIATELY.
- Why this matters: Toasted bun provides structural barrier against sogginess. Ranch on bottom bun protects bread from patty juices. Lettuce/tomato add crunch/freshness. Immediate service preserves crispness and temperature contrast. Resting patty 1 min allows juices to redistribute.
- Visual Cue: Bun golden-brown, not pale or burnt. Ranch creamy white. Lettuce vibrant green. Tomato red, juicy. Patty glossy, cheese draped. Sauce drips enticingly.
- Texture Cue: Bun crisp outside, soft inside. Lettuce crunchy. Tomato yielding. Patty juicy, crust crisp. Cheese molten.
- Aroma Cue: Toasted bread, fresh veg, savory meat, sweet-spicy honey. Complex, inviting bouquet.
- Common Mistake: Assembling on cold/untoasted bun. Soggy bottom guaranteed. Fix: ALWAYS toast. Butter/oil enhances flavor and crispness.
- Professional Tip: Build burger on plate, not cutting board. Easier to serve. Wipe rim clean before presenting. Presentation matters!
Expert Tips for the Perfect Smash
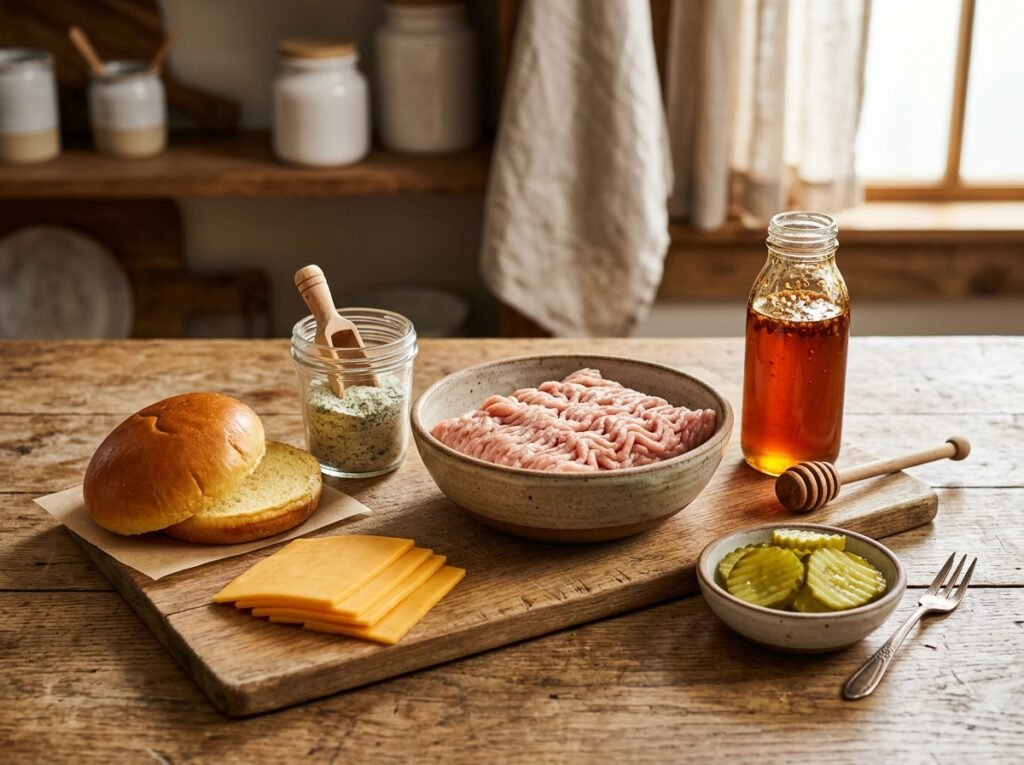
- Pan Temperature is Everything: Cast iron must be SCREAMING hot before smashing. Test with water droplet; it should dance and evaporate instantly. Cold pan = steamed, gray patty. Preheat 5+ mins on high.
- Parchment is Non-Negotiable: Raw chicken sticks aggressively to metal. Parchment allows clean release and even pressure distribution. Reuse same square for multiple smashes if intact.
- Don’t Salt Meat Directly Before Cooking: Salt draws out moisture, creating steam barrier that inhibits browning. Season gently during mixing; additional salt unnecessary due to seasoned crust and salty cheese/ranch.
- One Flip Only: Multiple flips destroy crust and release juices. Commit to the flip. Scrape firmly underneath to preserve fond. Second side cooks faster; monitor closely.
- Rest PATTY, Not Just Steak: 1-minute rest allows internal temperature to equalize and juices to settle. Cutting/biting immediately releases precious moisture onto plate. Patience = juicier burger.
- Toast BUNS in Burger Fat: After removing patties, skillet contains flavorful rendered fat/chicken essence. Toast buns in this liquid gold for unmatched flavor. Wipe excess if too greasy.
Common Mistakes to Avoid
- Overworking the Meat: Creates tough, dense patties. Fix: Mix gently. Form loose balls. Handle minimally. Think “fluffy,” not “compact.”
- Insufficient Pan Heat: Results in pale, steamed patties lacking crust. Fix: Preheat cast iron 5+ mins on high. Oil should shimmer/smoke lightly.
- Moving Patty Too Soon: Tears crust, ruins texture. Fix: Wait 2-3 mins undisturbed. Test release with spatula. Patience builds crust.
- Adding Honey Too Early: Burns, becomes bitter. Fix: Apply ONLY after flipping and melting cheese. Brief cook warms/glazes without scorching.
- Skipping Bun Toasting: Leads to soggy, structurally weak burger. Fix: Always toast cut-side down with fat. Creates moisture barrier and flavor boost.
- Using Lean Chicken: Dry, crumbly patties. Fix: Use 85/15 or 90/10 fat ratio. Fat = juice. Don’t fear it.
- Overcooking Chicken: Rubber-textured, dry meat. Fix: Use thermometer. Pull at 165°F. Carryover heat finishes cooking. Trust the tool.
Recipe Variations
- Spicy Sriracha-Honey: Replace red pepper flakes with 1 tbsp sriracha in honey. Adds garlicky heat. Pair with pickled jalapeños. Fiery, complex flavor.
- BBQ Ranch Twist: Swap hot honey for smoky BBQ sauce. Use smoked cheddar. Adds hickory depth. Classic Americana variation.
- Vegan Adaptation: Use plant-based ground “chicken” (e.g., Beyond/Impossible). Vegan cheese slices. Cashew-based ranch. Maple-chili glaze. Surprisingly similar texture/flavor.
- Mediterranean Style: Season chicken with oregano, lemon zest, garlic. Use feta instead of cheddar. Tzatziki instead of ranch. Olive oil-honey glaze. Bright, herbaceous profile.
- Breakfast Burger: Add fried egg on top of cheese. Use maple-bacon hot honey. Arugula instead of lettuce. Brunch masterpiece.
- Low-Carb/Keto: Skip bun. Serve patty on large lettuce cups or portobello mushroom caps. Sugar-free hot honey. Full-fat ranch. Verify net carbs.
- Extra Cheesy Pull: Use double cheese slice. Add cream cheese dollop under top cheese. Molten core explosion. Indulgent upgrade.
- Korean-Inspired: Glaze with gochujang-honey mixture. Kimchi instead of lettuce. Sesame-ginger ranch. Umami bomb with funky heat.
What to Serve With This Recipe
Balance the rich, sweet-savory burger with acidic, crunchy, or refreshing sides:
- Classic French Fries: Salty, crispy counterpart. Dust with Old Bay or truffle salt. Essential pairing.
- Vinegar Coleslaw: Tangy, crunchy slaw cuts through richness. Cleanses palate between bites. Traditional Southern accompaniment.
- Pickles & Onions: Dill pickle spears and raw red onion rings add acid/crunch. Contrast fatty patty perfectly.
- Sweet Potato Wedges: Earthy sweetness complements hot honey. Bake or air-fry for crisp exterior.
- Sparkling Lemonade: Citrus acidity balances sweet-spicy flavors. Refreshing, palate-cleansing beverage.
- Corn on the Cob: Grilled or boiled with butter. Summer staple. Sweet kernels echo honey notes.
- Ice Cream Sandwich: Cool, creamy dessert contrasts warm, spicy burger. Perfect ending to indulgent meal.
Make Ahead & Meal Prep Tips
- Pre-Mix Meat: Combine ground chicken and seasonings up to 24 hours ahead. Store covered in fridge. Flavors meld. Form balls just before cooking for best texture.
- Infuse Honey Ahead: Make hot honey up to 1 week ahead. Refrigerate. Flavors deepen over time. Warm gently before using. Saves active prep time.
- Pre-Toast Buns: Toast buns up to 4 hours ahead. Store in paper bag at room temp. Retains crispness better than plastic. Re-toast 30 sec if needed.
- Prep Toppings: Wash/dry lettuce, slice tomatoes, portion ranch up to 2 days ahead. Store separately in airtight containers. Assembly line efficiency.
- Freeze Meat Balls: Form and freeze chicken balls on baking sheet. Transfer to freezer bag up to 3 months. Thaw overnight in fridge before cooking. Convenient for future meals.
Storage & Reheating Instructions
Storage
- Refrigerator: Store cooked patties separately from buns/toppings in airtight container up to 3 days. Prevents sogginess. Store sauces separately.
- Freezer: Freeze cooked patties (no bun/sauce) wrapped individually in foil, then bagged up to 2 months. Thaw overnight in fridge before reheating. Texture softens slightly.
Reheating
- Skillet (Best): Medium heat in cast iron. Reheat patty 2-3 mins per side to restore crispness. Add splash water, cover briefly to re-melt cheese if needed.
- Air Fryer: 375°F for 3-4 mins. Revives crust effectively. Spray lightly with oil if dried out. Watch closely to prevent burning honey.
- Oven: 350°F on wire rack 8-10 mins. Even heating. Less crisp than skillet/air fryer but acceptable. Avoid microwave.
- Microwave (Avoid): Steams patty, destroys crust, makes bun soggy. Only use if texture irrelevant (e.g., for salad topping).
Nutritional Information
Estimates per burger (with bun, cheese, sauce, honey):
- Calories: 680 kcal
- Protein: 38g
- Carbohydrates: 52g
- Fat: 34g
- Fiber: 2g
- Sugar: 18g (mostly from honey/bun)
- Sodium: 980mg
Note: Values vary based on chicken fat %, cheese type, bun brand, and sauce amount. Always check labels for precise tracking.
Troubleshooting Guide
| Problem | Cause | Solution |
|---|---|---|
| Patty Sticks to Pan | Pan not hot enough or no parchment. | Preheat properly. ALWAYS use parchment for smash. Scrape firmly with thin spatula. |
| Dry/Tough Patty | Overworked meat or overcooked. | Mix gently. Use thermometer. Pull at 165°F. Rest 1 min. |
| Burnt Honey | Applied too early or heat too high. | Apply AFTER cheese melts. Reduce heat slightly. Brush thinly. |
| Soggy Bun | Untoasted bun or excess sauce. | ALWAYS toast. Apply ranch to bottom bun as barrier. Drain tomatoes. |
| Cheese Doesn’t Melt | Pan too cool or wrong cheese. | Cover pan to trap steam. Use American/provolone. Bring cheese to room temp first. |
| Pale/Gray Patty | Pan not hot enough or moved too soon. | Preheat 5+ mins. Don’t move patty 2-3 mins. Ensure oil shimmers. |
Frequently Asked Questions
1. Can I use ground turkey instead of chicken? Yes, but turkey is often leaner. Choose 85/15 or 90/10 fat ratio. May need 30-60 sec longer cook time. Flavor slightly gamier; adjust seasoning accordingly. Texture similar when smashed properly.
2. Why does my honey burn even when added late? Pan retains intense heat after flipping. Residual heat can scorch honey. Fix: Remove pan from heat source briefly before brushing. Or brush honey on plate after removing patty. Residual patty heat warms glaze sufficiently.
3. Can I make these on a grill? Smashburgers require flat, solid surface for proper crust. Grill grates create gaps, preventing even smash and crust formation. Use cast iron griddle ON grill grate. Direct flame underneath mimics stovetop. Achieves similar results outdoors.
4. Is 165°F safe for chicken? Won’t it be dry? Yes, 165°F is USDA safe temp. Dryness comes from overcooking BEYOND 165°F or overworking meat. Proper smash technique + resting ensures juiciness AT safe temp. Trust thermometer, not color. Pink near bone unsafe; opaque/juicy at 165°F perfect.
5. Can I prep the hot honey ahead? Absolutely. Infused honey improves with time. Store refrigerated up to 1 week. Warm gently before using. Crystalization normal; warm to reliquefy. Saves active prep time.
6. What if I don’t have cast iron? Carbon steel pan excellent alternative. Heavy-bottomed stainless steel works but requires higher heat/more oil. Non-stick NOT recommended; cannot achieve proper crust. Invest in cast iron; worth every penny for smashburgers.
7. Can I freeze assembled burgers? Not recommended. Bun becomes soggy upon thawing/reheating. Lettuce wilts. Sauce separates. Freeze patties only. Assemble fresh when ready to eat. Quality preserved.
8. How do I prevent cross-contamination with raw chicken? Use separate cutting board/tools for raw chicken. Wash hands thoroughly after handling. Sanitize surfaces. Never reuse marinade/honey that touched raw meat. Cook to 165°F kills pathogens. Safety first.
Final Thoughts
Mastering Hot Honey Ranch Chicken Smashburgers is about embracing technique over tradition. The smash method transforms humble ground chicken into something extraordinary—crispy, juicy, and deeply flavorful. The hot honey glaze adds a modern twist that elevates this beyond ordinary fare, while ranch provides comforting familiarity. Together, they create a burger experience that satisfies cravings and impresses guests.