
Quick Recipe Summary
| Feature | Details |
|---|---|
| Prep Time | 45 Minutes (plus rising time) |
| Cook Time | 20 Minutes |
| Total Time | 2 Hours 30 Minutes |
| Servings | 8–10 Buns |
| Cuisine | Asian Fusion / Street Food Style |
| Course | Snack, Appetizer, or Light Meal |
| Difficulty | Intermediate |
| Calories | ~320 kcal per bun |
Table of Contents
- Introduction
- Why This Recipe Works
- Why You’ll Love This Recipe
- Ingredient Notes
- Kitchen Equipment
- Preparation Information
- Step-by-Step Instructions
- Expert Tips
- Common Mistakes
- Recipe Variations
- What to Serve With This Recipe
- Make Ahead & Meal Prep Tips
- Storage & Reheating Instructions
- Nutritional Information
- Troubleshooting Guide
- Frequently Asked Questions
- Final Thoughts
Introduction
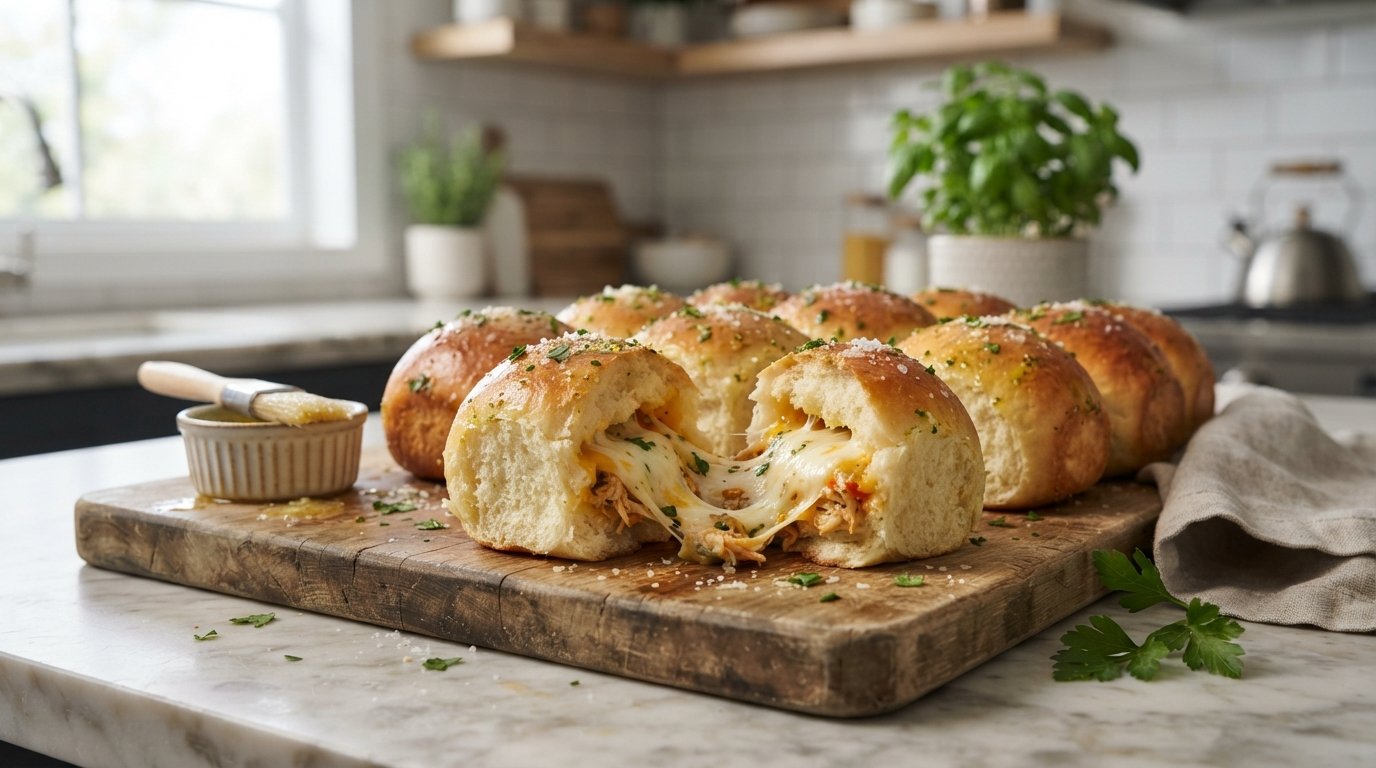
It is 2:59 AM. The house is silent, the fridge light is humming, and a sudden, undeniable craving hits. You don’t want a salad. You don’t want cereal. You want something warm, savory, and impossibly cheesy that feels like a hug from the inside out. Enter the cheesy chicken stuffed bun—the ultimate late-night hero that has taken social media by storm for good reason.
These aren’t just buns; they are edible pockets of joy featuring a pillowy, milk-enriched dough wrapped around a spicy, sautéed chicken filling and molten cheese. When you bite into one, the bread gives way to a cascade of stretchy cheese and tender, seasoned meat. Whether you are actually awake at an ungodly hour or simply planning a show-stopping snack for your next gathering, this recipe delivers on every level. It combines the comfort of fresh-baked bread with the excitement of street food, all in a handheld package that is as fun to make as it is to eat. Let’s get baking (and frying).
Why This Recipe Works
The magic of these cheesy chicken stuffed buns lies in three distinct components working in harmony. First, the dough uses a high hydration ratio with milk and egg, creating a soft, enriched crumb that stays tender even after frying. Unlike water-based doughs, the fat and protein in milk and egg retard gluten formation slightly, resulting in a cake-like softness rather than a chewy bagel texture.
Second, the filling is cooked before stuffing. Sautéing the chicken with onions, peppers, and spices ensures the moisture content is controlled. If you were to stuff raw chicken inside, the steam released during frying would make the dough soggy and potentially unsafe. By pre-cooking, we concentrate flavors and ensure food safety.
Finally, the double-cheese strategy is non-negotiable. Melting cheese slices into the hot filling creates a creamy binder, while the solid cheese block added during assembly provides the structural “pull” that defines this dish. The breadcrumbs on the exterior add a crucial textural contrast—a shatteringly crisp shell protecting the soft interior.
Why You’ll Love This Recipe
- The Cheese Pull Factor: The combination of melted slice cheese and mozzarella creates a stretch that is visually stunning and texturally satisfying.
- Savory-Spicy Balance: The chili powder and flakes in the filling cut through the richness of the fried dough and cheese, preventing palate fatigue.
- Versatile Timing: Perfect for late-night cravings, lunchbox surprises, or as an impressive appetizer at parties.
- Customizable Heat: The spice level is easily adjustable. Make it mild for kids or crank up the chili for heat seekers.
- Freezer Friendly: These buns freeze beautifully, making them an excellent meal prep option for future hungry moments.
Ingredient Notes
For the Dough
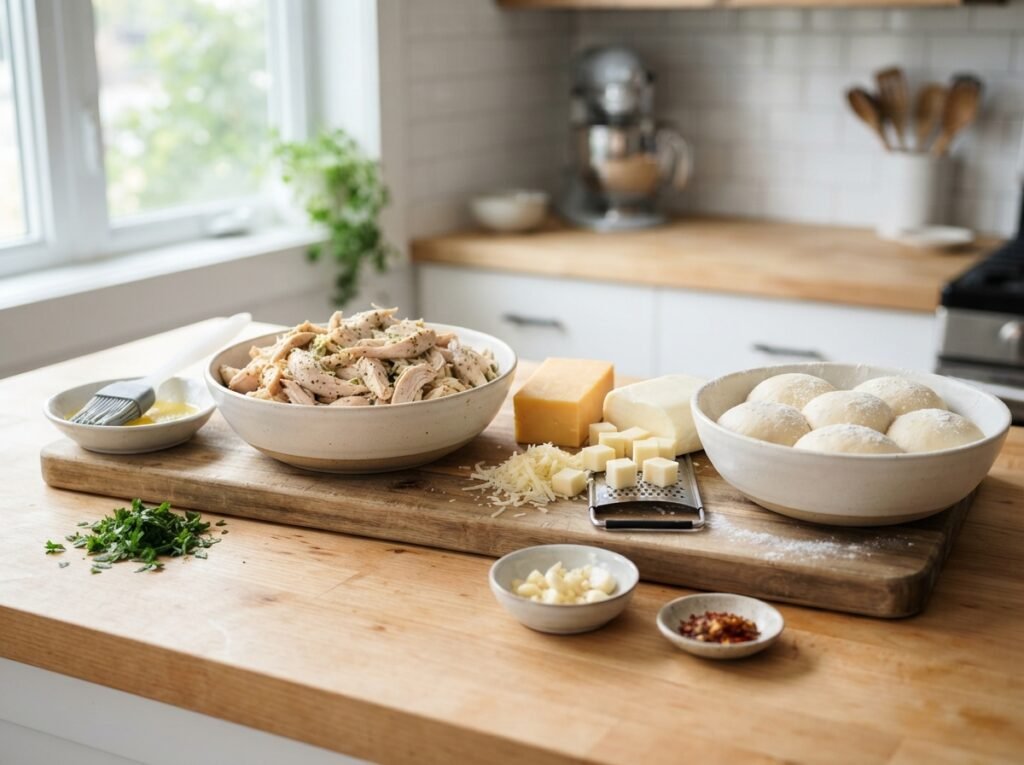
- All-Purpose Flour: Provides the structure. Bread flour can be used for a chewier texture, but AP flour yields the signature softness seen in the video.
- Milk (200ml): Adds richness, color, and tenderness. Warm it to about 110°F (43°C) to activate the yeast without killing it.
- Yeast (2 ½ tsp): Instant yeast is preferred for ease, but active dry works if proofed in the warm milk first. Freshness matters—check the expiration date.
- Sugar (1 tbsp): Feeds the yeast and aids browning during frying. Don’t skip it; it balances the savory filling.
- Egg (1): Adds fat and protein for a richer crumb and golden color.
For the Filling
- Chicken Breast/Thigh: Cut into small, uniform cubes (½ inch). Thighs are juicier and more forgiving if overcooked slightly.
- Vegetables (Onion, Green Bell Pepper, Tomato): Diced finely. They add moisture control, sweetness, and freshness. Tomatoes should be deseeded to prevent sogginess.
- Spices (Chili Powder, Chili Flakes): Adjust to taste. Kashmiri chili powder gives great color without excessive heat; regular paprika + cayenne is a good sub.
- Cheese Slices: Processed cheese slices melt smoothly and act as a binder. Use full-fat versions for best flavor.
- Mozzarella Block: Shred your own! Pre-shredded cheese has anti-caking agents that inhibit melting. This provides the stretch.
For Assembly & Frying
- Breadcrumbs: Panko or fine Japanese-style breadcrumbs work best for a crispy, non-greasy crust.
- Oil for Frying: Neutral oil with a high smoke point (vegetable, canola, or peanut). Avoid olive oil as it burns at frying temps.
Kitchen Equipment
- Large Mixing Bowl: For dough preparation.
- Non-Stick Skillet: Essential for cooking the filling without sticking or burning.
- Rolling Pin: For flattening dough discs evenly.
- Deep Fryer or Heavy-Bottomed Pot: For maintaining consistent oil temperature. A Dutch oven is ideal.
- Slotted Spoon or Spider Strainer: For safely removing buns from hot oil.
- Thermometer: Highly recommended for checking oil temp (350°F/175°C is the sweet spot).
- Wire Rack: For draining excess oil while keeping bottoms crisp.
Preparation Information
- Prep Time: 45 Minutes (Dough mixing, filling prep, assembly)
- Rising Time: 1 Hour (First rise) + 15 Minutes (Second rise)
- Cook Time: 20 Minutes (Filling + Frying)
- Total Time: ~2 Hours 30 Minutes
- Servings: 8–10 Buns
Step-by-Step Instructions
H3: Activate Yeast and Mix Dough
Warm 200ml milk to 110°F (43°C). In a large bowl, combine warm milk, 1 egg, 2 ½ tsp yeast, and 1 tbsp sugar. Let sit for 5 minutes until foamy. Gradually add 3 ½ cups AP flour, mixing until a shaggy dough forms. Knead for 8-10 minutes until smooth and elastic.
- Why it matters: Foaming yeast confirms viability. Proper kneading develops gluten for structure.
- Visual Cue: Dough should pass the “windowpane test”—stretch a small piece thin enough to see light through without tearing.
- Texture Cue: Smooth, tacky but not sticky. Add flour 1 tbsp at a time if too wet.
- Pro Tip: Cover bowl with damp cloth or plastic wrap. Rise in a warm spot (turned-off oven with light on) for 1 hour or until doubled.
H3: Prepare the Spicy Chicken Filling
While dough rises, heat 1 tbsp oil in a skillet over medium-high heat. Add diced chicken, 1 tsp chili powder, and 1 tsp chili flakes. Cook 5-6 minutes until browned. Add diced onion, green pepper, and tomato. Sauté 3-4 minutes until veggies soften but retain bite. Remove from heat. Immediately place cheese slices on top of hot mixture; stir until melted and creamy. Cool completely.
- Why it matters: Cooking filling first prevents soggy buns. Melting cheese slices into hot filling creates a cohesive, creamy base.
- Aroma Cue: Savory, spicy, slightly caramelized chicken smell.
- Critical Step: Cool filling completely before stuffing. Hot filling will melt dough prematurely and cause leaks during frying.
- Visual Cue: Veggies should be vibrant, not mushy. Cheese should be fully incorporated, not stringy yet.
H3: Assemble the Buns
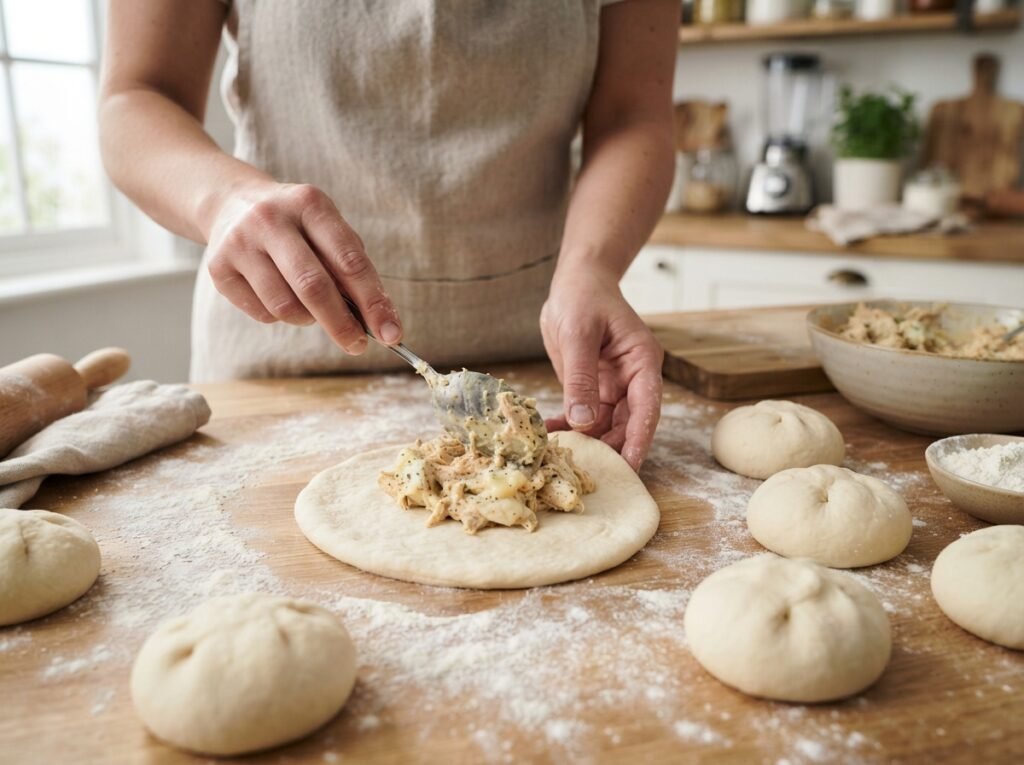
Punch down risen dough. Divide into 8-10 equal portions. Roll each into a 4-inch disc. Place 1-2 tbsp cooled chicken filling in center. Top with a cube of mozzarella (about 1 inch). Fold edges up and pinch tightly to seal. Roll gently between palms to form a smooth ball. Place seam-side down on parchment-lined tray.
- Why it matters: Tight sealing prevents cheese leakage during frying. Mozzarella cube provides the signature pull.
- Visual Cue: No visible seams or cracks. Surface should be taut and smooth.
- Common Mistake: Overstuffing leads to bursting. Leave ½ inch border around filling.
- Pro Tip: Rest assembled buns 15 minutes covered. This relaxes gluten, making them puffier when fried.
H3: Bread and Fry to Golden Perfection
Heat 2 inches of oil to 350°F (175°C). Gently roll each bun in breadcrumbs, coating evenly. Carefully lower 2-3 buns into oil (don’t overcrowd). Fry 2-3 minutes per side, turning once, until deep golden brown. Drain on wire rack.
- Why it matters: Correct oil temp ensures crisp crust without greasiness. Wire rack prevents steam-soggy bottoms.
- Visual Cue: Uniform golden-brown color, not pale or dark brown. Bubbles should be steady, not violent.
- Temperature Cue: Oil should hiss gently when bun enters. Too hot = burnt outside/raw inside. Too cool = greasy, pale buns.
- Safety Note: Never leave frying unattended. Keep lid nearby to smother flames if needed.
Expert Tips
- Seal Like Your Life Depends On It: The #1 failure point is leaking cheese. Pinch seams firmly, then roll the sealed ball between your palms to reinforce the seal. Any crack = cheese explosion in oil.
- Cool Filling is Non-Negotiable: I cannot stress this enough. Warm filling melts dough from inside, creating weak spots. Chill filling 10 mins in fridge if rushed.
- Oil Thermometer is Your Best Friend: Guessing oil temp leads to inconsistent results. 350°F is the gold standard for fried dough.
- Don’t Skip the Second Rise: Those 15 minutes of rest after shaping make the difference between dense hockey pucks and airy pillows.
- Shred Your Own Mozzarella: Bagged cheese contains cellulose that prevents proper melting. Buy a block and grate it yourself for maximum stretch.
Common Mistakes
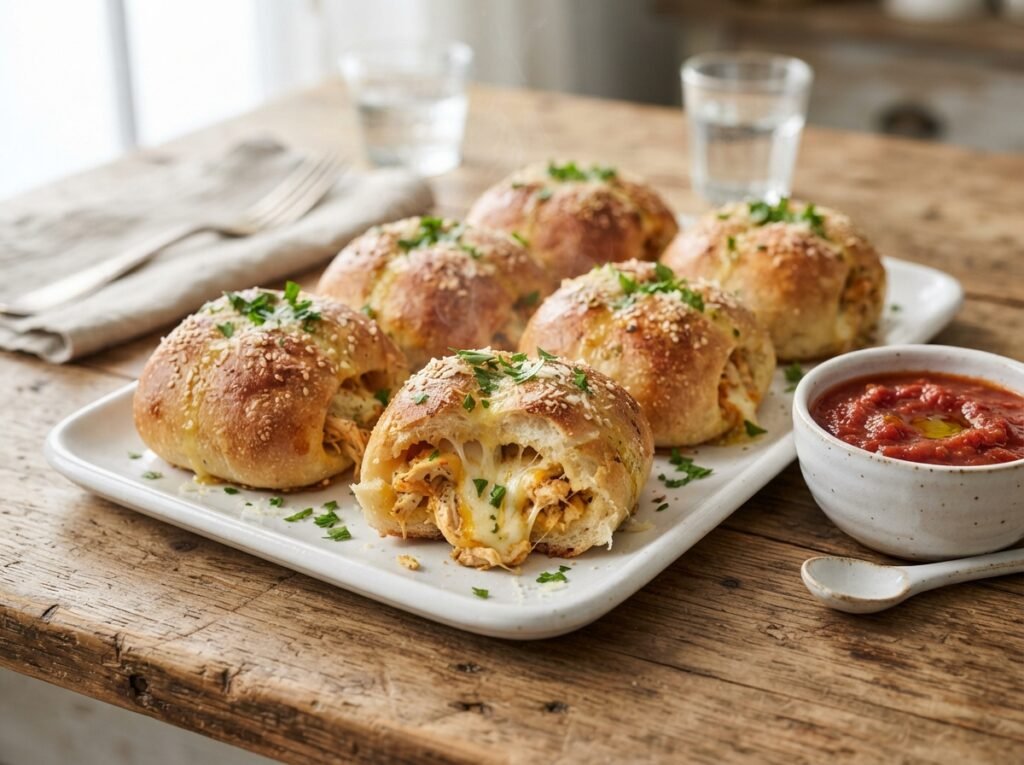
- Leaking Cheese During Frying: Caused by poor sealing or overstuffing. Fix: Ensure tight pinch seal, leave adequate dough border, and don’t overfill. Patch any visible holes with extra dough before frying.
- Greasy, Pale Buns: Oil temperature too low. Fix: Use thermometer. Maintain 350°F. Fry fewer buns at once to prevent temp drop.
- Burnt Outside, Raw Inside: Oil too hot or buns too large. Fix: Lower temp to 325°F. Reduce bun size. Cover loosely with foil if browning too fast.
- Dense, Tough Dough: Over-kneading or insufficient rise time. Fix: Knead just until smooth. Allow full rise time. Don’t skip second rest.
- Soggy Bottoms: Draining on paper towels instead of wire rack. Fix: Always use wire rack. Paper traps steam, making bottoms soft.
- Filling Too Wet: Undrained tomatoes or undercooked veggies. Fix: Deseed tomatoes. Cook filling until liquid evaporates. Cool thoroughly.
Recipe Variations
- Extra Cheesy: Add cream cheese to filling mixture. It adds tang and extra creaminess that complements mozzarella perfectly.
- Spicy Kick: Increase chili flakes to 2 tsp. Add diced jalapeños to filling. Use pepper jack cheese instead of mozzarella.
- Vegetarian: Replace chicken with mushrooms + paneer or tofu. Sauté mushrooms until deeply browned for umami depth.
- Beef Version: Use ground beef instead of chicken. Brown well, drain excess fat. Season with cumin and oregano for taco-inspired buns.
- Seafood Twist: Use shrimp + crab meat. Reduce cooking time to 2-3 mins. Add Old Bay seasoning. Delicate—handle gently when stuffing.
- Low-Carb/Keto: Use fathead dough (mozzarella + almond flour + cream cheese) instead of yeast dough. Bake at 375°F for 15-18 mins instead of frying.
- Sweet Version: Fill with Nutella + banana + mini marshmallows. Omit savory spices. Dust with powdered sugar after frying. Dessert buns!
- Herb Garden: Add fresh basil, parsley, and garlic to filling. Use fontina cheese for nutty, herbal notes.
What to Serve With This Recipe
- Spicy Mayo Dip: Mix mayo + sriracha + lime juice. The creamy heat complements the savory bun perfectly.
- Tangy Slaw: Vinegar-based coleslaw cuts through the richness of fried dough and cheese.
- Pickled Vegetables: Quick-pickled radishes or carrots add crunch and acidity.
- Iced Tea or Lemonade: Refreshing, slightly sweet drinks balance the salty, savory buns.
- Tomato Soup: For a cozy meal, serve buns alongside warm tomato soup for dipping.
- Garlic Aioli: Roasted garlic blended with mayo and lemon. Elegant and flavorful.
Make Ahead & Meal Prep Tips
- Dough Ahead: Make dough up to 24 hours ahead. Refrigerate overnight for slow fermentation (develops better flavor). Bring to room temp 30 mins before shaping.
- Filling Ahead: Cook filling up to 3 days ahead. Store airtight in fridge. Reheat briefly to melt cheese slices, then cool again before stuffing.
- Assemble Ahead: Shape and stuff buns, then freeze unbaked/unfried on parchment-lined tray. Once frozen solid, transfer to bags. Fry directly from frozen, adding 1-2 mins to cook time.
- Breadcrumbs Station: Set up breadcrumb coating station before frying. Keeps workflow efficient when handling multiple buns.
Storage & Reheating Instructions
Storage
- Room Temp: Best consumed within 4 hours of frying. Crispness fades quickly.
- Refrigerator: Store in airtight container up to 3 days. Expect softer crust.
- Freezer: Freeze cooked buns in single layer, then bag. Up to 2 months.
Reheating
- Air Fryer (Best): 350°F for 3-4 mins. Restores crispness beautifully. Check frequently to prevent burning.
- Oven: 375°F on wire rack for 8-10 mins. Avoid direct contact with baking sheet to prevent sogginess.
- Stovetop: Dry skillet over medium-low heat, 2-3 mins per side. Gentle reheating preserves texture.
- Microwave (Last Resort): 15-20 secs only. Will be soft/chewy, not crisp. Use only if no other option.
Nutritional Information
Estimates per bun (based on 10 buns):
- Calories: 320
- Protein: 14g
- Carbohydrates: 32g
- Fat: 16g
- Fiber: 1.5g
- Sugar: 3g
- Sodium: 420mg
Note: Values vary based on oil absorption, cheese type, and bun size.
Troubleshooting Guide
| Problem | Cause | Solution |
|---|---|---|
| Cheese leaking during fry | Poor seal or overstuffing | Reinforce seal with extra dough. Leave ½” border. Chill filling before stuffing. |
| Buns too dense | Insufficient rise or over-kneading | Allow full rise time. Knead just until smooth. Don’t skip second rest. |
| Pale, greasy buns | Oil temp too low | Use thermometer. Maintain 350°F. Fry fewer at once. |
| Burnt outside, raw inside | Oil too hot or buns too big | Lower temp to 325°F. Reduce size. Cover loosely if browning fast. |
| Filling too wet/soggy | Undrained veggies or undercooked | Deseed tomatoes. Cook filling until dry. Cool completely before stuffing. |
| Dough won’t rise | Dead yeast or cold environment | Test yeast in warm milk first. Rise in warm spot (oven with light on). |
| Breadcrumbs falling off | Dough too dry or not pressed firmly | Brush buns lightly with water/milk before breading. Press crumbs firmly. |
Frequently Asked Questions
1. Can I bake these instead of frying? Yes! Brush with egg wash, bake at 375°F (190°C) for 18-22 minutes until golden. Texture will be softer, less crisp than fried version. Air fry at 370°F for 12-15 mins for a middle-ground option.
2. Why did my cheese leak out during frying? Usually due to incomplete sealing or overstuffing. Ensure you pinch seams tightly and leave adequate dough border. Chilling stuffed buns 10 mins before frying also helps firm up the seal.
3. Can I use active dry yeast instead of instant? Absolutely. Dissolve active dry yeast in warm milk with sugar first. Let sit 5-10 mins until foamy before adding flour. Instant yeast can be mixed directly with flour.
4. How do I know when the oil is ready without a thermometer? Drop a small piece of dough into oil. If it sinks and does nothing, oil is too cold. If it browns instantly, too hot. Ideal: dough floats to surface and bubbles steadily around edges, turning golden in 30-45 seconds.
5. Can I make the dough in a bread machine? Yes! Use the “dough” cycle. Add ingredients in order specified by your machine’s manual. Proceed with rising, shaping, and frying as directed.
6. What cheese melts best for the pull? Low-moisture, whole-milk mozzarella is ideal. Provolone and fontina also melt beautifully. Avoid pre-shredded cheese—it contains anti-caking agents that inhibit melting.
7. Can I freeze the dough before shaping? Yes. After first rise, punch down, divide into portions, wrap tightly in plastic, and freeze up to 1 month. Thaw overnight in fridge, then bring to room temp before shaping and stuffing.
8. Why are my buns tough instead of soft? Over-kneading develops too much gluten, creating chewiness. Knead just until smooth and elastic (8-10 mins by hand). Also ensure adequate rise time—under-risen dough bakes/fries dense.
9. Can I add vegetables to the dough itself? Not recommended for this recipe. Vegetables release moisture during frying, compromising dough structure. Keep veggies in filling only. Herb-infused oils or spices can be added to dough safely.
10. How do I reheat without losing crispness? Air fryer or conventional oven on wire rack is best. Microwave steams the crust, making it soft. If using microwave, finish in toaster oven or air fryer for 1-2 mins to restore crispness.
Final Thoughts
These cheesy chicken stuffed buns are more than just a recipe—they’re an experience. The anticipation of that first bite, the dramatic cheese pull, the contrast of crisp exterior and pillowy interior… it’s comfort food elevated to art. Whether you’re satisfying a 3 AM craving or impressing guests at a party, these buns deliver unforgettable flavor and texture.