
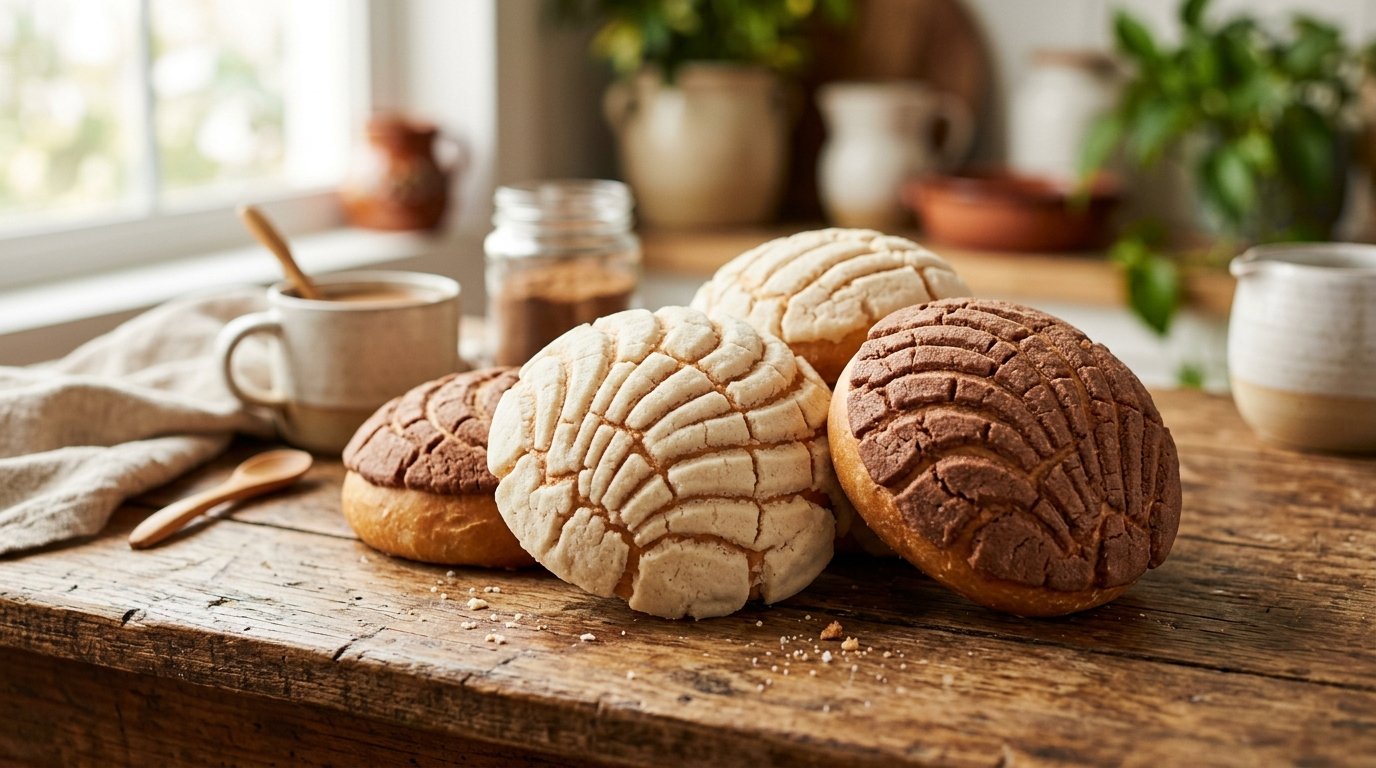
Quick Recipe Summary
| Feature | Details |
|---|---|
| Prep Time | 45 Minutes (plus rising time) |
| Cook Time | 18-20 Minutes |
| Total Time | 3 Hours 30 Minutes |
| Servings | 12 Conchas |
| Cuisine | Mexican / Pan Dulce |
| Course | Breakfast / Dessert / Snack |
| Difficulty | Intermediate |
| Calories | ~320 kcal per concha |
Table of Contents
- Introduction
- Why This Recipe Works
- Why You’ll Love This Recipe
- Ingredient Notes
- Kitchen Equipment
- Step-by-Step Instructions
- Expert Tips for Bakery-Quality Results
- Common Mistakes to Avoid
- Recipe Variations
- What to Serve With This Recipe
- Make Ahead and Meal Prep Tips
- Storage Instructions
- Reheating Instructions
- Nutritional Information
- Troubleshooting Guide
- Frequently Asked Questions
- Final Thoughts
Introduction
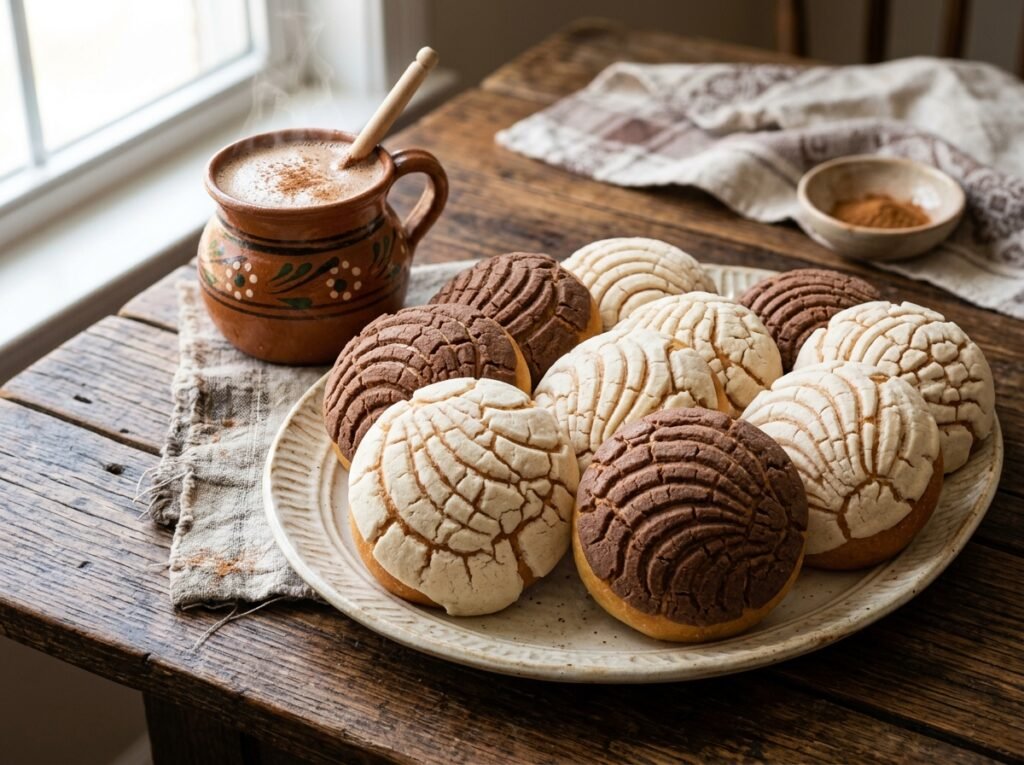
There is a specific, comforting nostalgia associated with walking into a traditional Mexican panadería and being greeted by the warm, yeasty aroma of freshly baked bread. At the heart of this experience lies the authentic conchas, perhaps the most iconic of all Mexican sweet breads. Named for their shell-like appearance, these soft, pillowy buns are crowned with a crisp, sugary topping that cracks beautifully when you bite into them, revealing a tender, enriched crumb beneath. Whether filled with strawberry jam, chocolate paste, or simply enjoyed plain with a cup of café de olla, mastering this recipe brings the soulful tradition of Mexican baking directly to your home kitchen.
Unlike standard dinner rolls, conchas require a unique two-component approach: a rich, buttery yeast dough and a separate sugar-based paste that is applied before baking. The magic happens in the oven, where the heat causes the topping to crack and expand while the bread rises, creating that signature mosaic pattern. While professional bakers often use wood-fired ovens to achieve the perfect crust, this recipe adapts those techniques for a standard home oven without sacrificing texture or flavor. If you have ever wanted to recreate the taste of a Sunday morning at your favorite neighborhood bakery, learning to make authentic conchas is the delicious first step.
Why This Recipe Works
The success of a great concha relies on the distinct contrast between its two main components. The bread dough is an enriched dough, meaning it contains significant amounts of fat (butter), sugar, eggs, and milk. These ingredients tenderize the gluten structure, resulting in a crumb that is soft, moist, and cake-like rather than chewy or crusty like artisan sourdough. The fat also coats the flour proteins, slowing gluten development just enough to ensure a delicate bite that melts in your mouth.
Simultaneously, the topping is essentially a shortbread cookie dough made from flour, sugar, and fat. When placed on top of the proofed bun, it acts as a barrier that restricts expansion in specific areas. As the yeast activates during the final bake, the dough pushes upward against the rigid sugar crust, causing it to fracture in a controlled, decorative pattern. By chilling the topping before application, we ensure it holds its shape during scoring and doesn’t melt prematurely into the dough. This precise interplay of temperature, hydration, and timing is what transforms simple ingredients into the beloved cultural icon known as the concha.
Why You’ll Love This Recipe
- Iconic Visual Appeal: The distinctive shell pattern makes these buns instantly recognizable and incredibly photogenic.
- Perfect Texture Contrast: Experience the satisfying crunch of the sugary crust giving way to an impossibly soft, fluffy interior.
- Versatile Flavor Base: The mild sweetness of the bread pairs perfectly with jams, creams, Nutella, or even savory fillings like ham and cheese.
- Cultural Connection: Baking conchas connects you to centuries of Mexican culinary heritage and the vibrant panadería culture.
- Customizable Colors: Easily dye the topping pink, yellow, brown, or green to match holidays, parties, or personal preference.
- Freezer Friendly: The dough and topping can be prepared ahead and frozen, making fresh-baked conchas accessible anytime.
- Aromatic Experience: The smell of baking yeast, vanilla, and caramelizing sugar fills your home with warmth and comfort.
Ingredient Notes
All-Purpose Flour
- Purpose: Provides the structure for both the bread and the topping. For the bread, it creates a tender crumb; for the topping, it binds the sugar and fat into a moldable paste.
- Substitutions: Bread flour can be used for a slightly chewier texture, but may make the bread less “cake-like.” Cake flour will make the bread too fragile. For the topping, pastry flour works well for a more delicate crunch.
- Buying Tips: Use unbleached flour for better flavor and fewer additives. Ensure it is fresh; old flour can affect yeast activity and rise.
- Storage Tips: Store in an airtight container in a cool, dark place. Freeze for long-term storage to prevent rancidity and pest issues.
Active Dry Yeast
- Purpose: The leavening agent that creates air pockets, giving the conchas their light, airy texture.
- Substitutions: Instant yeast can be used (mix directly with dry ingredients, no blooming needed). Fresh yeast requires triple the weight of active dry. Sourdough starter is possible but changes flavor/texture significantly.
- Buying Tips: Check expiration dates carefully. Dead yeast = flat bread. Store opened packets in the fridge or freezer to extend viability.
- Storage Tips: Keep sealed tightly away from moisture and heat. Freezing extends shelf life up to a year. Always proof in warm water/sugar mixture first to verify activity.
Unsalted Butter
- Purpose: Adds richness, tenderness, and flavor to the dough. In the topping, it provides the fat necessary for the cookie-like texture.
- Substitutions: Margarine or vegetable shortening can be used but will alter flavor and mouthfeel. Vegan butter works for dairy-free versions but may change browning.
- *Buying Tips: Use high-fat European-style butter (82%+ fat) for best results. Lower fat content means more water, which can make dough sticky and topping greasy. Always unsalted to control sodium.
- *Storage Tips: Refrigerate until ready to use. For dough, butter should be softened (pliable but not melting). For topping, butter should be cold/firm to maintain paste consistency.
Granulated Sugar & Brown Sugar
- Purpose: Sweetens the dough and feeds the yeast. Brown sugar adds molasses notes and moisture to the topping, enhancing color and chewiness.
- Substitutions: Coconut sugar or palm sugar work but change flavor profile. Powdered sugar in topping makes it finer/smoother but less crunchy.
- *Buying Tips: Fine-grain sugar dissolves faster in dough. Pack brown sugar firmly when measuring. Avoid clumpy/hardened brown sugar; microwave briefly to soften if needed.
- *Storage Tips: Store sugar in airtight containers. Add terra cotta disc to brown sugar to prevent hardening. Keep away from humidity.
Eggs & Milk
- Purpose: Eggs add structure, color, and richness. Milk hydrates the flour and adds lactose for browning and tenderness.
- *Substitutions: Water can replace milk (lighter texture, less rich). Egg yolks only = richer/yellower crumb. Non-dairy milks (oat/almond) work but may affect browning/rise slightly.
- *Buying Tips: Use room temperature eggs/milk for dough to prevent shocking yeast/butter. Whole milk preferred for richness; skim makes drier bread.
- *Storage Tips: Refrigerate eggs/milk until use. Warm gently before adding to dough (100-110°F ideal). Never hot (>120°F kills yeast).
Vanilla Extract & Orange Zest
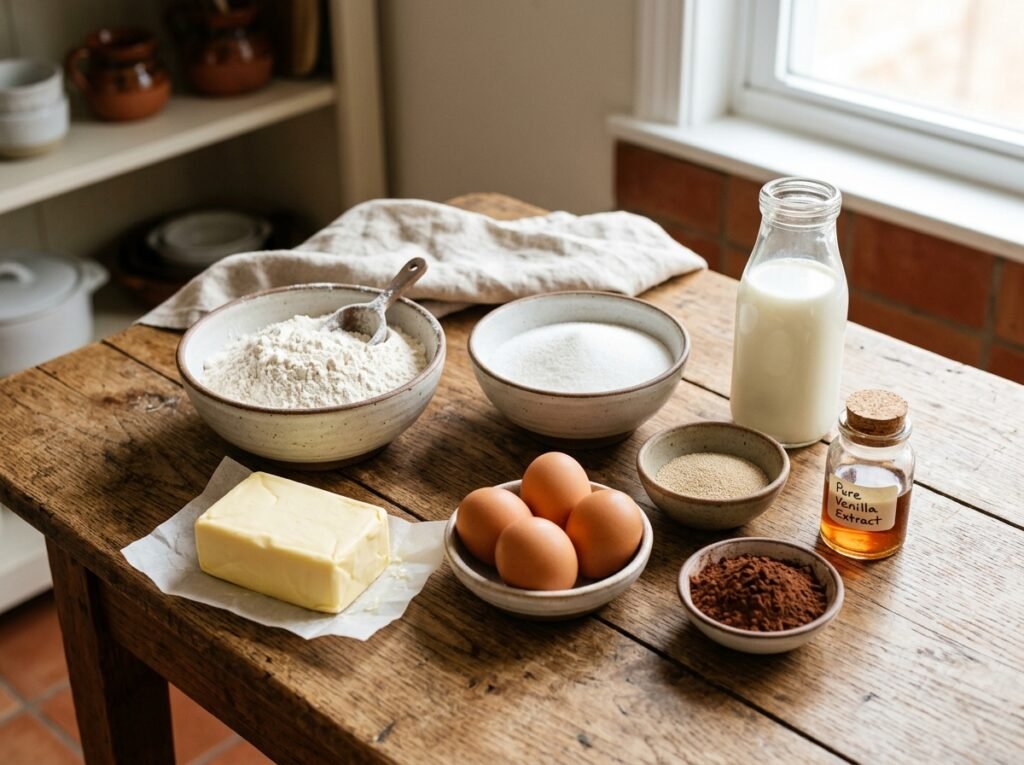
- *Purpose: Classic flavorings for authentic concha taste. Vanilla enhances sweetness; orange zest adds bright citrus note that cuts richness.
- *Substitutions: Almond extract (use sparingly), lemon/lime zest, or cinnamon. Avoid imitation vanilla; real extract has complex flavor compounds essential here.
- *Buying Tips: Pure vanilla extract only. Fresh organic oranges for zest (avoid waxed/conventional if possible). Zest before juicing.
- *Storage Tips: Store vanilla in cool/dark place. Freeze zest in small portions for future batches. Discard white pith (bitter).
Kitchen Equipment
- Stand Mixer with Dough Hook: Highly recommended for kneading enriched dough. Hand-kneading is possible but labor-intensive due to sticky/high-hydration nature.
- Digital Scale: Precision matters in baking. Volume measurements (cups) are unreliable for flour/sugar. Grams ensure consistent hydration and rise.
- Concha Mold (Optional): Traditional tool for imprinting shell pattern. Can score manually with knife/pizza cutter if unavailable. Plastic molds last longer than metal.
- Rolling Pin: For flattening topping paste into discs. Marble/wood preferred; non-stick helpful for sticky sugar paste.
- Baking Sheets + Parchment Paper: Prevents sticking and ensures even browning. Dark sheets may over-brown bottoms; light-colored preferred.
- Pastry Brush: For egg wash (if desired) or brushing melted butter post-bake for shine/softness.
- Instant-Read Thermometer: Verifies liquid/milk temperature for yeast safety. Critical for successful fermentation.
- Plastic Wrap/Damp Towels: For covering dough during proofing to prevent drying/crust formation.
- Offset Spatula: For spreading/scoring topping evenly without deflating proofed dough.
Preparation Information
- Prep Time: 45 Minutes (active) + 2 Hours (rising/proofing)
- Cook Time: 18-20 Minutes
- Total Time: 3 Hours 30 Minutes
- Servings: 12 Standard Conchas
Step-by-Step Instructions
Making the Yeasted Dough
- Activate the Yeast: Warm ¾ cup whole milk to 105-110°F (40-43°C). Stir in 1 packet (2¼ tsp) active dry yeast and 1 tsp sugar. Let sit 5-10 minutes until foamy/bubbly.
- Why this matters: Proofing verifies yeast is alive. No foam = dead yeast = dense brick. Temperature critical: too cold = slow activation; too hot (>120°F) = kills yeast.
- Visual Cue: Thick tan foam layer forms on surface. Bubbles actively breaking. Sour/yeasty aroma develops.
- Common Mistake: Using milk straight from fridge or boiling. Always thermometer-check. Lukewarm bath method safest for beginners.
- Mix Wet Ingredients: In stand mixer bowl, combine activated yeast mixture, ½ cup granulated sugar, 2 large eggs (room temp), 1 tsp vanilla extract, and zest of 1 orange. Mix briefly on low.
- Why room temp? Cold eggs shock yeast/butter, slowing rise. Room temp integrates smoothly, emulsifying fats properly.
- Aroma Cue: Bright citrus-vanilla fragrance. No alcohol/sour smell (indicates over-proofed/stale ingredients).
- Add Flour & Knead: Gradually add 4 cups all-purpose flour while mixing on low. Once shaggy dough forms, switch to dough hook. Knead 8-10 minutes on medium-low until smooth, elastic, passes windowpane test.
- Windowpane Test: Stretch small piece thin enough to see light through without tearing. Indicates proper gluten development. Under-kneaded = tears/crumbles; over-kneaded = tough/dense.
- Texture Cue: Dough should be tacky but not sticky. Pulls cleanly from bowl sides. Soft, supple feel like earlobe.
- Professional Tip: Enriched doughs take longer to develop gluten due to fat interference. Be patient. Scrape bowl periodically. If too sticky, add flour 1 tbsp at a time. Too dry = add milk 1 tsp.
- Incorporate Butter: Add ½ cup softened unsalted butter (cut into cubes) one piece at a time while kneading. Continue 5-7 minutes until fully incorporated and dough is smooth/glossy again.
- Why gradual? Dumping all butter at once breaks emulsion = greasy/separated dough. Slow addition allows fat to integrate into gluten matrix properly.
- Visual Cue: Dough initially looks curdled/shiny as butter incorporates. Returns to smooth/matte finish when done. Shouldn’t leave grease streaks on bowl.
- Temperature Note: Butter should be pliable (65-70°F), not melted/oily. Melted butter leaks out during bake = heavy/greasy crumb.
- First Rise (Bulk Fermentation): Place dough in greased bowl. Cover tightly with plastic wrap/damp towel. Rise in warm spot (75-80°F) 1-1.5 hours until doubled in size.
- Why covered? Prevents surface drying/crust formation which inhibits rise. Traps humidity for optimal yeast activity.
- Doneness Test: Poke finger ½ inch deep. Indentation remains slowly filling back = ready. Springs back instantly = under-risen. Collapses = over-risen.
- Pro Tip: Oven with light on = perfect proofing box. Bowl of hot water inside boosts humidity/temp. Don’t exceed 85°F or butter melts/yeast dies.
Preparing the Sugar Paste Topping
- Cream Fat & Sugars: In separate bowl, beat ½ cup softened butter, ¾ cup granulated sugar, and ½ cup packed brown sugar until light/fluffy (3-4 mins).
- Why cream? Incorporates air = lighter topping. Dissolves sugar partially = smoother texture. Under-creamed = grainy/heavy topping.
- Visual Cue: Pale yellow color increase. Fluffy/cloud-like texture. Ribbons form when lifted with beater.
- Temperature: Butter same softness as dough butter. Too cold = won’t incorporate sugar; too warm = greasy soup.
- Add Flour & Flavor: Mix in 1½ cups flour, ½ tsp salt, and optional food coloring/vanilla. Mix until just combined into cohesive paste. Do NOT overmix.
- Why minimal mix? Overworking develops gluten in topping = tough/chewy instead of crisp/crumbly. Stop when no dry streaks remain.
- Texture Cue: Play-Doh consistency. Holds shape when rolled. Not sticky/wet; not crumbly/dry. Adjust with flour/sugar as needed.
- Color Tip: Gel food coloring preferred over liquid (doesn’t alter hydration). Start small; intensifies during bake. Pink/red needs more dye than expected.
- Chill Firmly: Divide paste into portions (one per concha). Flatten each into disc between parchment. Refrigerate 30+ minutes until firm but pliable.
- Why chill? Warm paste melts onto dough during assembly/scoring = messy/no pattern. Chilled holds shape for clean impressions.
- Test: Should indent with thumb pressure but not stick. If rock-hard, warm hands briefly. If sticky, re-chill.
- Storage: Can freeze discs wrapped individually up to 3 months. Thaw in fridge overnight before use.
Shaping and Assembling
- Divide & Shape Dough: Punch down risen dough gently. Divide into 12 equal pieces (~70g each). Roll into tight smooth balls by tucking edges underneath. Place on parchment-lined sheet.
- Why tight balls? Surface tension helps upward rise vs. spreading sideways. Loose shaping = flat/irregular conchas.
- Technique: Cup hand over ball, rotate on counter applying gentle downward pressure. Seam should be hidden underneath.
- Spacing: Leave 2 inches between balls for expansion. Crowding = misshapen/merged conchas.
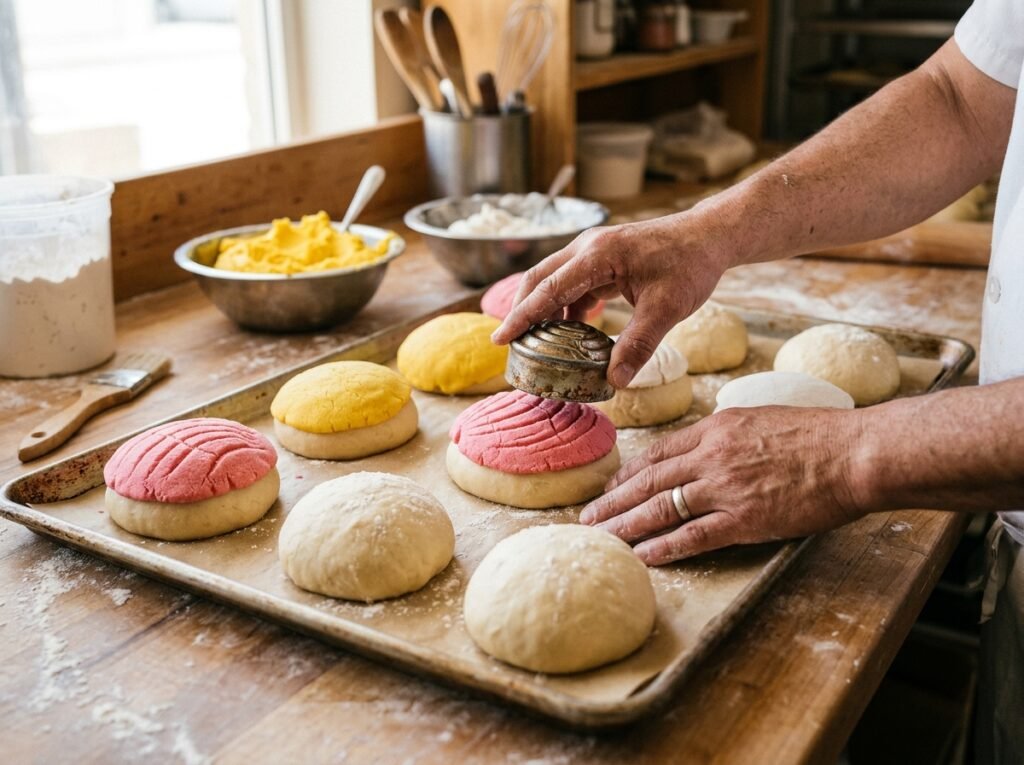
- Apply Topping: Place chilled paste disc centered on each dough ball. Press gently to adhere. Edges should cover ~⅔ of bun surface.
- Why centered? Ensures even coverage during rise. Off-center = bare spots/exposed dough.
- Pressure: Firm enough to stick but don’t deflate dough. Gentle palm press suffices. Fingers leave unwanted marks.
- Edge Management: Paste shouldn’t touch pan directly. Gap allows dough to rise freely underneath edges.
Scoring the Signature Pattern
- Score the Shell Design: Using concha mold or sharp knife/pizza cutter, press/cut concentric curved lines radiating from center outward. Mimic seashell ridges. Depth: ⅛-¼ inch into paste only, NOT through to dough.
- Why score? Creates weak points for controlled cracking during bake. Unscored = random ugly splits or no pattern.
- Tool Choice: Mold gives uniform professional look. Knife allows artistic variation. Pizza wheel excellent for clean curves.
- Depth Critical: Too shallow = pattern disappears during rise. Too deep (into dough) = topping separates/falls off. Aim for paste-only incision.
- Pattern Variations: Traditional spiral, crosshatch, sunburst, or freeform. Consistency within batch looks best. Practice on spare paste first.
- Second Rise (Proofing): Cover assembled conchas loosely. Rise 45-60 minutes until puffy and topping cracks slightly at scores. Should spring back slowly when poked.
- Why second rise? Relaxes gluten stretched during shaping. Allows final volume increase. Skipping = dense/small conchas.
- Visual Cue: Noticeable size increase (~50%). Topping appears stretched/taut. Scores open slightly showing dough beneath.
- Timing Flexibility: Depends on ambient temp/humidity. Trust visual cues over clock. Over-proofed = collapses in oven. Under-proofed = tough/dense.
Baking to Golden Perfection
- Preheat & Bake: Preheat oven to 375°F (190°C). Bake conchas 18-20 minutes until golden brown on top AND bottom. Internal temp should reach 190°F (88°C).
- Why preheat fully? Cold oven = slow rise = dense/greasy texture. Proper heat triggers oven spring (rapid initial rise) before crust sets.
- Position: Middle rack for even browning. Top rack = burnt tops/raw bottoms. Bottom rack = dark bottoms/pale tops.
- Doneness Signs: Deep golden color (not pale). Crisp topping sounds hollow when tapped. Internal thermometer most reliable indicator.
- Cool Properly: Transfer to wire rack immediately. Cool completely before serving/storing. Minimum 30 minutes.
- Why wire rack? Air circulation prevents steam buildup = soggy bottoms. Direct contact with pan/tray traps moisture.
- Cooling Importance: Hot conchas continue cooking internally. Cutting/serving hot = gummy/crumbly texture. Patience yields perfect crumb.
- Storage Timing: Only store when COMPLETELY cool. Warmth in container = condensation = mold/sogginess.
Expert Tips for Bakery-Quality Results
- Yeast Vitality is Non-Negotiable: Always proof yeast separately. Old/dead yeast ruins entire batch. Buy small packets; use within weeks of opening. Store remainder frozen.
- Dough Hydration Balance: Enriched doughs are stickier than lean doughs. Resist adding excess flour! Sticky ≠ wet. Properly hydrated dough = softer crumb. Use bench scraper, not extra flour, to handle.
- Topping Temperature Control: Chill topping thoroughly before assembly. Warm paste = disaster. Work quickly in cool kitchen. If paste softens during scoring, re-chill 5 minutes.
- Oven Spring Maximization: Fully preheated oven + proper proofing = maximum rise. Steam injection (pan of water on bottom rack) first 5 minutes enhances crust/color. Remove water after.
- Scoring Depth Precision: Practice makes perfect. Too deep = separation; too shallow = invisible. Aim for ⅛ inch into paste only. Sharp tools essential; dull knives drag/tear.
- Flavor Development: Overnight cold ferment (refrigerate dough 12-24 hours after first rise) develops complex flavors and improves texture. Bring to room temp before shaping/topping.
- Butter Quality Matters: High-fat European butter = richer flavor/tender crumb. American butter (80% fat) has more water = potentially tougher texture. Worth the investment for special batches.
- Humidity Awareness: Dry climates = faster dough drying. Increase covering/humidity during rises. Humid climates = stickier dough/topping. Reduce liquid slightly; chill topping longer.
Common Mistakes to Avoid
- Killing the Yeast: Liquid >120°F destroys yeast. Fix: Always thermometer-check. Lukewarm = baby bottle temp. If unsure, err cooler; slower rise beats dead yeast.
- Over-Flouring Dough: Sticky dough tempts flour addition. Fix: Oil hands/bench instead. Proper hydration = soft crumb. Excess flour = dry/dense bread. Trust the process.
- Under-Proofing: Rushing rise = dense bricks. Fix: Watch dough, not clock. Doubled size + slow spring-back = ready. Warm environment accelerates; cool slows. Patience rewarded.
- Melting Topping During Assembly: Warm paste = messy failure. Fix: Chill thoroughly. Work fast. Re-chill if softening. Cool kitchen essential. Summer baking challenging; plan accordingly.
- Scoring Into Dough: Knife goes too deep = topping falls off. Fix: Light touch. Paste-only incision. Practice on scrap paste first. Sharp blade glides; dull blade digs.
- Serving Hot: Gummy/crumbly texture. Fix: Cool completely on wire rack. Resist temptation! Perfect texture requires patience. Warm briefly before serving if desired.
- Storing Warm: Condensation = sogginess/mold. Fix: Cool COMPLETELY before storing. Touch-test: no warmth whatsoever. Airtight only when cold.
- Using Low-Fat Butter/Milk: Compromises richness/texture. Fix: Full-fat ingredients essential for authentic conchas. Substitutions alter fundamental character. Accept trade-offs or commit to tradition.
Recipe Variations
- Chocolate Conchas: Add ¼ cup cocoa powder to topping paste. Brown color classic. Optional: chocolate chips in dough. Richer/more indulgent. Pairs beautifully with coffee.
- Strawberry Jam Filled: Inject 1 tbsp strawberry jam into cooled concha bottom/side. Traditional filling. Sweet/tart contrast to sweet bread. Use thick jam; thin runs out.
- Vegan Conchas: Replace butter with vegan butter/coconut oil. Eggs with flax eggs/applesauce. Dairy milk with oat/almond milk. Texture slightly different but delicious. Label clearly for allergens.
- Cheese-Stuffed (Conchas de Queso): Enclose cube of panela/Oaxaca cheese in dough before shaping. Salty/savory surprise inside sweet bread. Iconic variation. Cheese melts gooey when warm.
- Piloncillo-Cinnamon Topping: Replace white sugar with grated piloncillo + cinnamon. Deeper/molasses flavor. Traditional rustic variation. Darker color; richer taste.
- Matcha Green Tea: Add 1 tbsp matcha powder to topping. Vibrant green color. Earthy/bitter contrast to sweet bread. Modern fusion twist. Sift matcha to prevent lumps.
- Low-Sugar Version: Reduce sugar in dough/topping 25-30%. Use monk fruit/erythritol blend. Less sweet; highlights yeast/butter flavors. Texture may differ slightly. Test small batch first.
- Whole Wheat Blend: Substitute 25-50% whole wheat flour for AP. Nuttier/heavier texture. More fiber/nutrients. Increase hydration slightly. Dense but wholesome. Good for breakfast.
- Filled with Cajeta/Dulce de Leche: Inject caramel sauce into cooled concha. Ultra-indulgent. Sticky/sweet mess worth it. Warm slightly before serving for oozy center.
- Savory Ham & Cheese: Omit sugar in dough/topping. Fill with ham/cheese before baking. Breakfast sandwich style. Completely different profile. Still technically “concha” shape/method.
What to Serve With This Recipe
Conchas are versatile beyond standalone snacking:
- Café de Olla: Traditional spiced Mexican coffee with cinnamon/piloncillo. Perfect pairing. Warm/spiced complements sweet bread. Cultural authenticity maximized.
- Hot Chocolate (Chocolate Caliente): Thick Mexican-style drinking chocolate. Dip concha into cup. Ultimate comfort combo. Especially magical on cold mornings.
- Fresh Fruit Platter: Berries, melon, citrus cut richness. Acidic/bright contrast. Healthy balance to sweet pastry. Beautiful presentation together.
- Yogurt Parfait: Layer crumbled concha with Greek yogurt/honey/granola. Textural contrast. Protein boost. Creative breakfast use. Reduces waste of stale conchas.
- Ice Cream Sandwich: Slice concha horizontally; fill with vanilla/mango ice cream. Frozen treat upgrade. Summer perfection. Messy but glorious.
- Jam & Butter Spread: Split warm concha; spread butter/jam. Simple classic. Enhances rather than competes. Strawberry/guava/apricot jams ideal.
- Tea Service: Earl Grey/chamomile/mint teas. Lighter than coffee. Afternoon snack elegance. British-Mexican fusion charm. Delicate pairing.
- Dessert Platter: Alongside flan, tres leches, churros. Fiesta finale. Variety showcases Mexican pastry range. Celebratory abundance.
Make Ahead and Meal Prep Tips
- Dough Advance Prep: Make dough through first rise. Refrigerate 12-24 hours (cold ferment). Develops flavor/improves texture. Bring to room temp 1 hour before shaping. Saves morning time.
- Topping Freeze: Prepare paste discs; freeze individually wrapped up to 3 months. Thaw in fridge overnight. Ready-to-use convenience. Batch prep during downtime.
- Shape & Freeze Raw: Assemble conchas (dough + topping); freeze unbaked on tray. Transfer to bags once solid. Bake from frozen +3-5 minutes. Fresh-baked anytime. Ultimate meal prep.
- Bake & Freeze Cooked: Cool completely; freeze airtight up to 2 months. Thaw at room temp or warm in oven. Texture slightly less perfect but convenient. Great for emergencies.
- Component Stations: Pre-measure all ingredients; organize mise en place. Streamlines process. Reduces errors/rushing. Especially helpful for enriched doughs requiring attention.
- Double Batch Efficiency: Make 24+ conchas simultaneously. Same effort; double yield. Freeze extras. Economical use of oven/time. Share with neighbors/friends.
Storage Instructions
- Room Temperature: Store completely cooled conchas in airtight container/bag up to 3 days. Paper towel lining absorbs excess moisture. Best texture within 24 hours.
- Refrigerator: NOT recommended. Accelerates staling/retrogradation. Dries out crumb rapidly. Only if humid climate/mold risk. Bring to room temp before eating.
- Freezer (Baked): Wrap individually in plastic + foil. Airtight bag/container. Up to 2 months. Thaw at room temp 1-2 hours or warm in oven. Quality declines after 1 month.
- Freezer (Unbaked): Freeze assembled raw conchas on tray until solid. Bag airtight. Up to 3 months. Bake from frozen +3-5 minutes. Superior to freezing baked.
- Signs of Spoilage: Mold (fuzzy spots), sour/off smell, excessive hardness/staleness. Discard immediately. Moisture = mold risk. Proper cooling/storage prevents.
- Reviving Stale Conchas: Sprinkle with water; warm in 300°F oven 5-7 minutes. Steam refreshes crumb temporarily. Not permanent fix but salvageable. Better than wasting.
Reheating Instructions
Note: Conchas best fresh/day-of. Reheating restores some qualities but never matches fresh-baked.
- Oven (Best Method): 300°F (150°C) for 5-7 minutes. Restores crisp topping/soft interior. Wrap in foil if preventing over-browning. Unwrap last 2 minutes for crispness. Closest to fresh.
- Air Fryer: 300°F for 3-4 minutes. Faster than oven. Crisp topping excellently. Watch closely; burns easily. Small batches only. Convenient for single servings.
- Microwave (Last Resort): 10-15 seconds ONLY. Makes soft but soggy/chewy. Topping loses crispness permanently. Acceptable compromise for speed. Never re-crisps.
- Toaster Oven: Similar to regular oven. Good for 1-2 conchas. Even heating. Monitor closely. Better than microwave for texture preservation.
- Avoid Repeated Reheating: Each cycle degrades quality further. Reheat only what you’ll eat immediately. Plan portions wisely. Fresh > reheated always.
Nutritional Information
Per concha (approximate, plain):
- Calories: 320
- Protein: 6g
- Carbohydrates: 48g
- Fat: 12g
- Fiber: 2g
- Sugar: 22g
- Sodium: 280mg
- Calcium: 4% DV
- Iron: 10% DV
Note: Values vary by size, topping thickness, filling additions. Jam-filled adds ~30 cal/8g sugar. Cheese-stuffed adds protein/fat. Enjoy as occasional treat. Balance with protein/fiber-rich meals.
Troubleshooting Guide
| Problem | Cause | Solution |
|---|---|---|
| Dough didn’t rise | Dead yeast, too cold, old flour | Proof yeast next time. Warm environment (75-80°F). Fresh ingredients. Discard; restart with verified active yeast. |
| Topping fell off | Scored too deep, under-proofed, wet dough | Score paste only next time. Ensure proper second rise. Chill topping thoroughly. Press firmly during assembly. |
| Dense/heavy crumb | Under-kneaded, under-proofed, too much flour | Knead until windowpane. Full proofing time. Measure flour by weight. Avoid excess flour during shaping. |
| Burnt bottoms | Oven too hot, dark pan, low rack | Reduce temp 25°F. Light-colored pans. Middle rack. Parchment paper insulates. Check early. |
| Pale/no color | Oven too cool, under-baked, low sugar | Increase temp 25°F. Bake longer. Check internal temp (190°F). Sugar aids browning; don’t reduce excessively. |
| Cracked unevenly | Uneven scoring, inconsistent topping thickness | Practice scoring depth. Uniform paste discs. Center topping precisely. Sharp tools essential. |
| Dry/stale quickly | Over-baked, low fat/sugar, improper storage | Reduce bake time slightly. Ensure adequate butter/sugar. Store airtight when cool. Freeze if not eating soon. |
| Sticky/unmanageable dough | Too much liquid, warm kitchen, insufficient kneading | Add flour 1 tbsp at a time. Chill workspace. Knead longer for gluten development. Oil hands/bench instead of flour. |
Frequently Asked Questions
1. Can I make conchas without a stand mixer? Yes, but prepare for arm workout. Hand-knead enriched dough 15-20 minutes minimum. It’s sticky/tacky initially; resist adding excess flour. Gluten develops slower by hand. Windowpane test still applies. Possible but labor-intensive. Stand mixer strongly recommended for consistency/ease.
2. Why did my topping melt into the dough? Topping was too warm during assembly/scoring. Chill thoroughly before use. Work in cool environment. If paste softens, re-chill 5-10 minutes. Warm paste = integration failure. Patience with temperature control is key. Summer baking particularly challenging.
3. Can I use instant yeast instead of active dry? Absolutely. Skip proofing step; mix directly with dry ingredients. Reduce liquid slightly (instant absorbs differently). Rise times may be faster. Monitor visually, not by clock. Both yeasts work; adjust technique accordingly. Instant more convenient; active dry more traditional.
4. How do I get the shell pattern without a mold? Use sharp paring knife, pizza cutter, or small spoon handle. Score concentric curved lines manually. Practice on scrap paste first. Freehand patterns charmingly rustic. Consistency improves with practice. Mold guarantees uniformity but isn’t mandatory. Creativity welcomed.
5. Can I make conchas gluten-free? Challenging but possible. Use GF flour blend designed for yeast breads (with xanthan gum). Hydration needs adjustment. Texture differs significantly (less chewy/more crumbly). Topping works fine GF. Manage expectations; won’t replicate wheat version exactly. Experimentation required.
6. Why are my conchas flat/spread sideways? Under-proofed, weak gluten, or too warm during second rise. Ensure full bulk fermentation. Knead adequately for strength. Cooler second rise (70-75°F) maintains shape. Tight shaping helps. Oven spring requires proper structure. Diagnose based on specific symptoms.
7. Can I fill conchas before baking? Traditional conchas aren’t pre-filled. Post-bake injection preserves texture. Pre-filling risks leakage/sogginess during bake. If desired, enclose small amount of stable filling (cheese/chocolate) inside dough ball before shaping. Jam/custard better added after cooling. Technique varies by filling type.
8. How long does dough take to rise? Varies wildly by temperature/humidity/yeast vitality. Typically 1-1.5 hours bulk; 45-60 min proof. BUT trust visual cues over time. Doubled size + slow spring-back = ready. Warm = faster; cool = slower. Clock is guideline; dough tells truth. Learn to read signs.
9. Can I reduce sugar in the recipe? Yes, but affects texture/rise/browning. Sugar feeds yeast, tenderizes crumb, aids browning. Reduce max 25% safely. Below that, expect denser/paler results. Compensate with longer rise/lower bake temp. Taste adjusts gradually. Don’t eliminate entirely; structural role critical.
10. What’s the best way to store leftover conchas? Airtight container at room temp 2-3 days max. Freeze for longer storage. NEVER refrigerate (accelerates staling). Revive stale ones with brief oven warming. Freshness window short; plan consumption accordingly. Sharing prevents waste. Freeze extras proactively.
Final Thoughts
Baking authentic conchas is more than following a recipe—it’s participating in a living tradition that has brought joy to generations. The rhythmic kneading, the patient waiting for dough to rise, the careful scoring of each shell pattern—these meditative actions connect you to countless bakers who perfected this craft over centuries. When you finally pull that tray from the oven, inhaling the intoxicating aroma of caramelized sugar and warm yeast, you’ll understand why these humble buns hold such cherished place in Mexican culture.