Quick Recipe Summary
| Prep Time | Cook Time | Total Time | Servings |
|---|---|---|---|
| 45 Minutes | 35-40 Minutes | 1 Hour 20 Mins (+ Rise) | 1 Large Loaf (6-8 Slices) |
| Cuisine | Course | Difficulty | Calories (Est.) |
|---|---|---|---|
| Artisan / Fusion | Bread / Appetizer | Intermediate | 380 kcal per slice |
Table of Contents
- Introduction
- Why This Recipe Works
- Why You’ll Love This Recipe
- Ingredient Notes
- Kitchen Equipment
- Step-by-Step Instructions
- Expert Tips for the Perfect Pull
- Common Mistakes to Avoid
- Recipe Variations
- What to Serve With This Recipe
- Make Ahead & Meal Prep Tips
- Storage & Reheating Instructions
- Nutritional Information
- Troubleshooting Guide
- Frequently Asked Questions
- Final Thoughts
Introduction

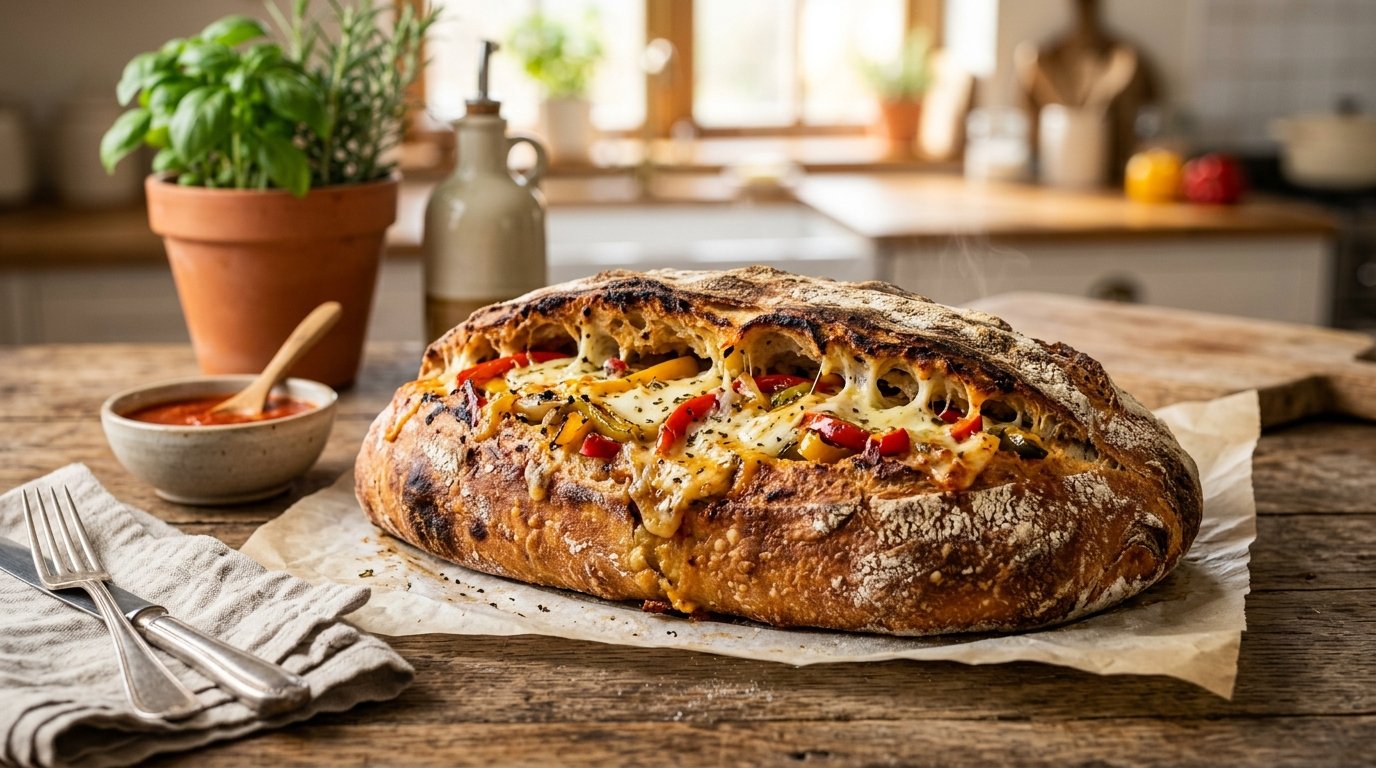
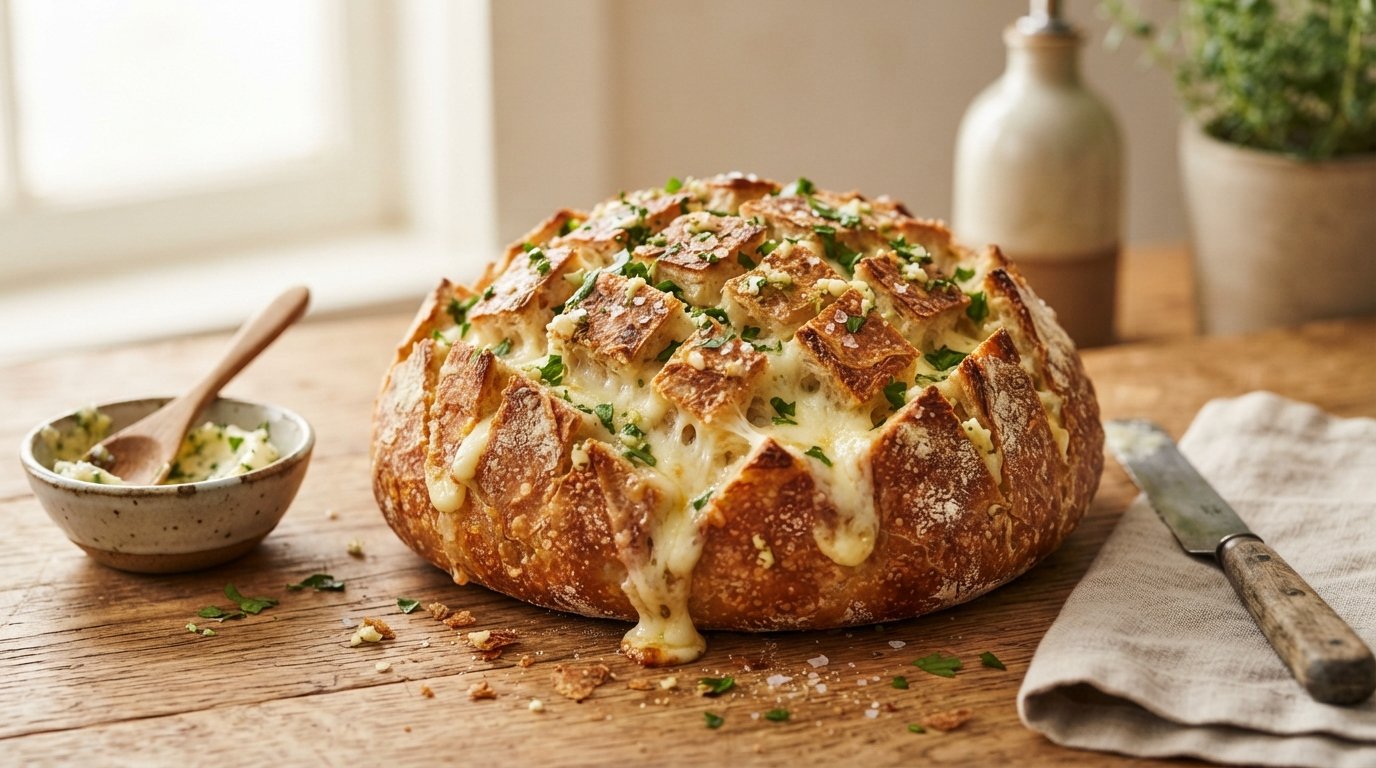
There is a moment in baking that separates good bread from legendary bread. It’s not just about the crumb or the crust; it’s about the surprise inside. If you are looking for a recipe that combines the rustic satisfaction of artisan sourdough with the indulgent, viral-worthy appeal of melted cheese, this Ultimate Cheese-Stuffed Sourdough Bread is your new obsession. Imagine tearing open a warm, crackling loaf to reveal a molten core of cheddar and mozzarella stretching into infinity. It is comfort food elevated to an art form.
This recipe isn’t just about stuffing cheese into dough; it’s about engineering a loaf that holds its structure while delivering maximum gooeyness. We use a specific layering technique—slices at the base, shreds at the peak—to ensure every bite has a different texture. Whether you are a seasoned baker or a curious beginner, mastering this cheese-stuffed sourdough will make you the hero of your next dinner party. Let’s get our hands dirty and create something spectacular.
Why This Recipe Works
The success of this recipe lies in the strategic distribution of cheese types. By using solid slices of cheddar and provolone at the bottom, we create a “floor” of flavor that melts slowly and coats the interior crumb without leaking out prematurely. The mountain of shredded mozzarella on top provides the structural integrity needed for that famous cheese pull; its high moisture content and elasticity are unmatched.
Furthermore, the shaping technique shown—folding the dough over the cheese mound like a parcel—is crucial. This creates tension in the gluten network, allowing the bread to rise upward rather than spreading outward. The result is a tall, domed loaf with a crispy, blistered crust that acts as a protective shell for the molten treasure inside. The final roll in shredded cheese before baking adds a third textural dimension: a savory, crunchy exterior that contrasts beautifully with the soft, airy crumb.
Why You’ll Love This Recipe
- Viral-Worthy Cheese Pull: Engineered specifically to produce long, dramatic strands of melted cheese when torn apart.
- Dual Texture Experience: Combines the chewy, tangy bite of sourdough with the creamy richness of melted dairy.
- Visual Spectacle: The golden-brown crust dusted with toasted cheese shards makes for stunning presentation.
- Versatile Serving: Works as a standalone snack, a side to soup, or the centerpiece of a charcuterie board.
- Aromatic Heaven: The smell of baking bread mixed with toasting cheese is arguably the best scent in the culinary world.
Ingredient Notes
Quality ingredients define the outcome. Here is what you need and why specifics matter.
For the Dough
- Sourdough Starter (Active & Bubbly): Must be at peak activity (doubled in size, passes float test). A weak starter won’t provide enough lift to support the heavy cheese filling, leading to a dense brick.
- Bread Flour: High protein content (12-14%) is essential. The extra gluten strength is required to hold the weight of the cheese during the second rise and bake. All-purpose flour may tear under the stress.
- Water: Room temperature. Hydration should be around 70-75% for this enriched-style loaf to remain manageable during shaping.
- Salt: Fine sea salt. Strengthens gluten and regulates fermentation. Do not skip; unsalted cheese bread tastes flat.
For the Filling
- Sharp Cheddar Slices: Provides the primary savory, tangy flavor profile. Slices melt more evenly than blocks and create distinct layers. Avoid pre-shredded bagged cheddar; the anti-caking agents prevent proper melting.
- Provolone or Mozzarella Slices: Adds creaminess and mildness to balance the sharp cheddar. Provolone has excellent meltability and stretch.
- Shredded Mozzarella (Low Moisture): The engine of the cheese pull. Low-moisture whole milk mozzarella stretches better than fresh mozzarella balls, which release too much water and can make the dough gummy.
- Extra Shredded Cheese (for coating): Use a mix of parmesan and cheddar for the exterior roll. This creates the crispy, savory crust seen in the video.
Kitchen Equipment
- Digital Scale: Baking is chemistry. Precision ensures consistent hydration and rise.
- Large Mixing Bowl: For bulk fermentation.
- Bench Scraper: Essential for handling sticky dough and dividing portions cleanly.
- Banneton (Proofing Basket): Round or oval, lined with rice flour. Supports the loaf’s shape during the final rise.
- Dutch Oven or Combo Cooker: Traps steam for the first 20 minutes of baking, creating the signature oven spring and blistered crust.
- Parchment Paper: Prevents sticking during transfer to the hot pot.
- Lame or Sharp Razor: For scoring the dough.
- Food-Safe Gloves: Highly recommended for handling the cheese filling to maintain hygiene and prevent dough from sticking to bare hands.
Preparation Information
- Prep Time: 45 Minutes (Active)
- Cook Time: 35-40 Minutes
- Total Time: 1 Hour 20 Minutes Active + 4-6 Hours Fermentation
- Servings: 1 Large Loaf (6-8 Generous Slices)
Step-by-Step Instructions
Follow these steps carefully to achieve the structural integrity and melt shown in the video.
H3: Mix and Bulk Ferment the Dough

- Autolyse: Mix flour and water. Let rest for 1 hour. This hydrates the gluten proteins before adding salt and starter, making the dough easier to work with later.
- Add Starter & Salt: Incorporate active starter and salt. Mix until no dry bits remain.
- Bulk Fermentation: Let dough rise at room temperature (75-78°F) for 3-4 hours. Perform coil folds every 30 minutes for the first 2 hours.
- Visual Cue: Dough should look bubbly, jiggly, and have increased in volume by 50-75%. It should pass the windowpane test (stretch thin without tearing).
- Why this matters: Proper fermentation develops flavor and gas structure. Under-fermented dough will be dense; over-fermented dough will collapse under the cheese weight.
H3: Pre-Shape and Rest
- Turn Out: Gently turn dough onto a lightly floured surface. Do not degas aggressively; preserve those bubbles!
- Pre-Shape: Fold edges into the center to form a loose round. Flip seam-side down.
- Bench Rest: Cover with a towel and let rest for 20-30 minutes. This relaxes the gluten, making the final shaping with the heavy filling possible without tearing.
H3: Layer the Cheese Filling
- Flatten Gently: Press the rested dough into a rough rectangle or square, about 1/2 inch thick. Be gentle to keep gas pockets intact.
- Base Layer: Arrange slices of sharp cheddar and provolone across the surface, leaving a 1-inch border clear on all sides.
- Why leave a border? This clean edge is essential for sealing the dough. Cheese in the seam prevents adhesion and causes leaks.
- The Mountain: Pile shredded mozzarella generously in the center, on top of the slices. Create a distinct mound. The height of this mound determines the size of your cheese pocket.
H3: Shape and Seal the Loaf
- Fold Over: Lift one side of the dough and fold it over the cheese mound. Repeat with opposite sides, then top and bottom, creating a parcel or envelope shape.
- Seal Tightly: Pinch seams firmly. Any gap here is a potential leak point. Flip the loaf seam-side down.
- Create Tension: Cup your hands behind the loaf and drag it gently toward you against the counter surface. This tightens the skin, ensuring the loaf rises up, not out.
- Professional Tip: If the dough resists, let it rest 5 minutes and try again. Forcing it will tear the gluten.
H3: Final Proof and Coat
- Prepare Basket: Line banneton heavily with rice flour (rice flour doesn’t burn or stick like wheat flour).
- Transfer: Place loaf seam-side UP into the basket. The seam becomes the bottom during baking.
- Cold Retard (Optional but Recommended): Refrigerate for 12-24 hours. Cold dough scores cleaner, has better oven spring, and develops complex sour flavor.
- Cheese Roll: Just before baking, turn loaf out onto parchment. Brush lightly with water or egg wash. Roll the entire surface in extra shredded cheese. Press gently so it adheres.
- Visual Cue: The loaf should feel taut and spring back slowly when poked.
H3: Score and Bake

- Preheat: Place Dutch oven inside oven. Heat to 450°F (230°C) for at least 45 minutes. The pot must be screaming hot.
- Score: Use a lame to make one deep slash (or cross) across the top. Cut at a 45-degree angle, about 1/2 inch deep.
- Why score? This directs the expansion. Without a score, the bread will burst randomly, likely through the cheese-filled seams.
- Bake Covered: Lower pot into oven. Lid ON. Bake 20 minutes. Steam traps heat and keeps crust flexible for maximum rise.
- Bake Uncovered: Remove lid. Reduce temp to 425°F (220°C). Bake 15-20 more minutes.
- Doneness Cues: Crust should be deep golden brown. Internal temperature should reach 205-210°F (96-99°C). The cheese inside needs this higher temp to fully melt and bubble.
Expert Tips for the Perfect Pull
- Cheese Temperature Matters: Use cold cheese straight from the fridge. Warm cheese melts too fast during shaping and can compromise the dough structure. Cold cheese stays solid until the oven hits it.
- The Border Rule: Never skimp on the 1-inch border when layering. This is the most common failure point. If cheese gets into the seal, the loaf will explode sideways instead of rising.
- Rice Flour is Non-Negotiable: Wheat flour in the proofing basket will fuse with the wet dough and ruin the crust. Rice flour creates a non-stick barrier that burns off cleanly.
- Patience with the Slice: Let the bread cool for at least 45 minutes before cutting. Hot cheese is liquid; slicing immediately causes it to run out. Cooling allows the cheese to set slightly, creating that perfect pull rather than a puddle.
- Steam is Your Friend: If not using a Dutch oven, place a pan of lava rocks or ice cubes on the bottom rack. Steam delays crust formation, allowing the loaf to expand fully before setting.
Common Mistakes to Avoid
| Mistake | Why It Happens | How to Fix/Prevent |
|---|---|---|
| Cheese Leaking Everywhere | Poor sealing; cheese in seams; overfilling. | Leave 1″ border. Pinch seams tightly. Don’t exceed dough capacity. |
| Dense, Heavy Loaf | Weak starter; over-handling; insufficient bulk ferment. | Ensure starter peaks. Handle gently. Wait for 50-75% rise. |
| Burnt Cheese Crust | Oven too hot; cheese roll too thick. | Reduce temp after lid removal. Use moderate amount for coating. |
| Gummy Interior | Under-baked; sliced too hot. | Bake to 210°F internal. Cool completely before slicing. |
| Flat Loaf | Over-proofed; lack of shaping tension. | Watch dough, not clock. Create tight surface tension during shaping. |
Recipe Variations
Customize this cheese-stuffed sourdough to suit your palate.
- Jalapeño Cheddar Explosion: Add diced pickled jalapeños and green onions to the cheese pile. The acid cuts the fat perfectly.
- Bacon & Gruyère: Swap cheddar for Gruyère and add crispy bacon bits. A French onion soup-inspired twist.
- Pesto Mozzarella: Spread a thin layer of basil pesto on the dough before adding cheese slices. Adds herbaceous brightness.
- Spicy Pepper Jack: Replace provolone with pepper jack and add red pepper flakes to the dough. Heat lovers’ dream.
- Vegan Version: Use high-quality vegan cheddar and mozzarella shreds. Note: Vegan cheese melts differently; may require longer bake time.
- Everything Bagel Style: Mix sesame, poppy, garlic, and onion seeds into the exterior cheese roll for added crunch and flavor.
- Sun-Dried Tomato & Basil: Add oil-packed sun-dried tomatoes and fresh basil leaves to the filling. Mediterranean flair.
What to Serve With This Recipe
This bread is rich and salty. Pair it with contrasting flavors.
- Tomato Basil Soup: The classic pairing. Acidic tomato cuts through the cheesy richness.
- Charcuterie Board: Serve alongside cured meats, olives, and pickles. The bread acts as both carb and cheese component.
- Arugula Salad: Peppery greens with lemon vinaigrette provide necessary freshness.
- Roasted Garlic Butter: For dipping. Double down on the savory notes.
- Craft Beer: An IPA or amber ale complements the sharp cheddar and sourdough tang.
- Honey: Drizzle warm honey over a slice. Sweet-salty contrast is addictive.
Make Ahead & Meal Prep Tips
- Dough Prep: Complete bulk fermentation and shaping. Freeze the shaped, unproofed loaf (wrapped tightly) for up to 1 month. Thaw overnight in fridge, then proof and bake.
- Cheese Prep: Slice and shred cheese up to 3 days ahead. Store separately in airtight containers. Pre-measuring speeds up assembly day.
- Starter Maintenance: Feed starter 8-12 hours before mixing to ensure peak activity. Plan your bake schedule around your starter’s rhythm.
- Par-Bake Option: Bake loaf covered for 20 mins, then freeze. Finish baking from frozen when ready to serve. Great for meal prep.
Storage & Reheating Instructions
Refrigerator
Store cut-side down on cutting board or in bread box for up to 3 days. Avoid plastic bags; they trap moisture and soften the crust.
Freezer
Slice cooled loaf. Wrap individual slices in foil, then bag. Freeze up to 3 months.
Reheating Methods
- Oven (Best): 350°F for 10-15 minutes wrapped in foil. Restores crisp crust and re-melts cheese perfectly.
- Air Fryer: 320°F for 3-5 minutes. Quick and effective for single slices.
- Stovetop: Slice and toast in buttered skillet. Creates a grilled-cheese-like exterior.
- Microwave (Avoid): Makes crust rubbery and cheese oily. Only use if desperate, and finish in toaster oven.
Nutritional Information
Approximate values per slice (based on 8 slices):
- Calories: 380 kcal
- Protein: 16g
- Carbohydrates: 42g
- Fat: 18g
- Fiber: 2g
- Sugar: 1g
- Sodium: 620mg
Note: Values vary based on cheese quantity and flour type.
Troubleshooting Guide
Problem: Dough tears during shaping with cheese. Solution: Gluten wasn’t relaxed enough. Bench rest longer (up to 45 mins). Next time, increase hydration slightly or use stronger flour. Handle with oiled hands if sticking persists.
Problem: Cheese didn’t melt fully. Solution: Oven temp too low or bake time too short. Cheese needs sustained high heat. Ensure internal temp reaches 210°F. Use low-moisture cheeses; fresh cheeses release water instead of melting smoothly.
Problem: Bottom crust soggy. Solution: Steam trapped underneath. Always bake on preheated surface (stone/steel/Dutch oven). Cool on wire rack, never flat surface.
Problem: Loaf spread sideways instead of rising. Solution: Insufficient shaping tension or over-proofing. Create tighter surface tension during final shape. Reduce bulk ferment time if dough feels slack.
Frequently Asked Questions
1. Can I use store-bought yeast instead of sourdough starter? Yes. Substitute with 7g instant yeast and reduce water slightly. Bulk ferment will take only 1-2 hours. Flavor will be less complex, but texture remains excellent.
2. Why did my cheese leak out during baking? Usually caused by cheese touching the seam or insufficient sealing. Always leave a clean border. Pinch seams firmly. If leakage occurs, it’s still delicious—just messier!
3. Can I add meat to the filling? Absolutely. Cooked, cooled bacon, ham, or sausage work well. Avoid raw meats; they won’t cook through in the bread’s bake time. Keep total filling weight reasonable to avoid collapsing the loaf.
4. How do I know when bulk fermentation is done? Look for 50-75% volume increase, visible bubbles on surface/sides, and jiggly texture. Dough should feel aerated, not dense. Time is a guideline; observation is key.
5. Can I make mini loaves instead of one large one? Yes! Divide dough and cheese proportionally. Reduce bake time to 25-30 minutes. Mini loaves actually have better cheese-to-bread ratio and are great for parties.
6. Why use rice flour in the banneton? Rice flour contains no gluten, so it doesn’t bond with wet dough. Wheat flour absorbs moisture and sticks, ruining the crust. Rice flour creates a perfect non-stick barrier.
7. My crust is pale. How do I darken it? Extend uncovered bake time by 5-minute increments. Ensure oven is truly at 425°F+ after lid removal. Steam inhibits browning; removing lid allows Maillard reaction to proceed.
8. Can I freeze the baked loaf? Yes. Cool completely, wrap tightly in foil + plastic, freeze up to 3 months. Thaw at room temp, then refresh in 350°F oven for 10 mins.
Final Thoughts
Creating this Ultimate Cheese-Stuffed Sourdough Bread is more than following a recipe; it’s an exercise in patience, technique, and reward. The moment you tear into that warm, crackling crust and witness the molten cheese cascade is worth every minute of fermentation and shaping. It represents the beautiful intersection of artisan baking and pure, unadulterated comfort.