
Quick Recipe Summary
| Feature | Details |
|---|---|
| Prep Time | 20 Minutes |
| Cook Time | 15 Minutes |
| Total Time | 35 Minutes |
| Servings | 2-4 (depending on breast size) |
| Cuisine | Japanese / Yōshoku |
| Course | Main Course |
| Difficulty | Intermediate |
| Calories | ~450 kcal per serving |
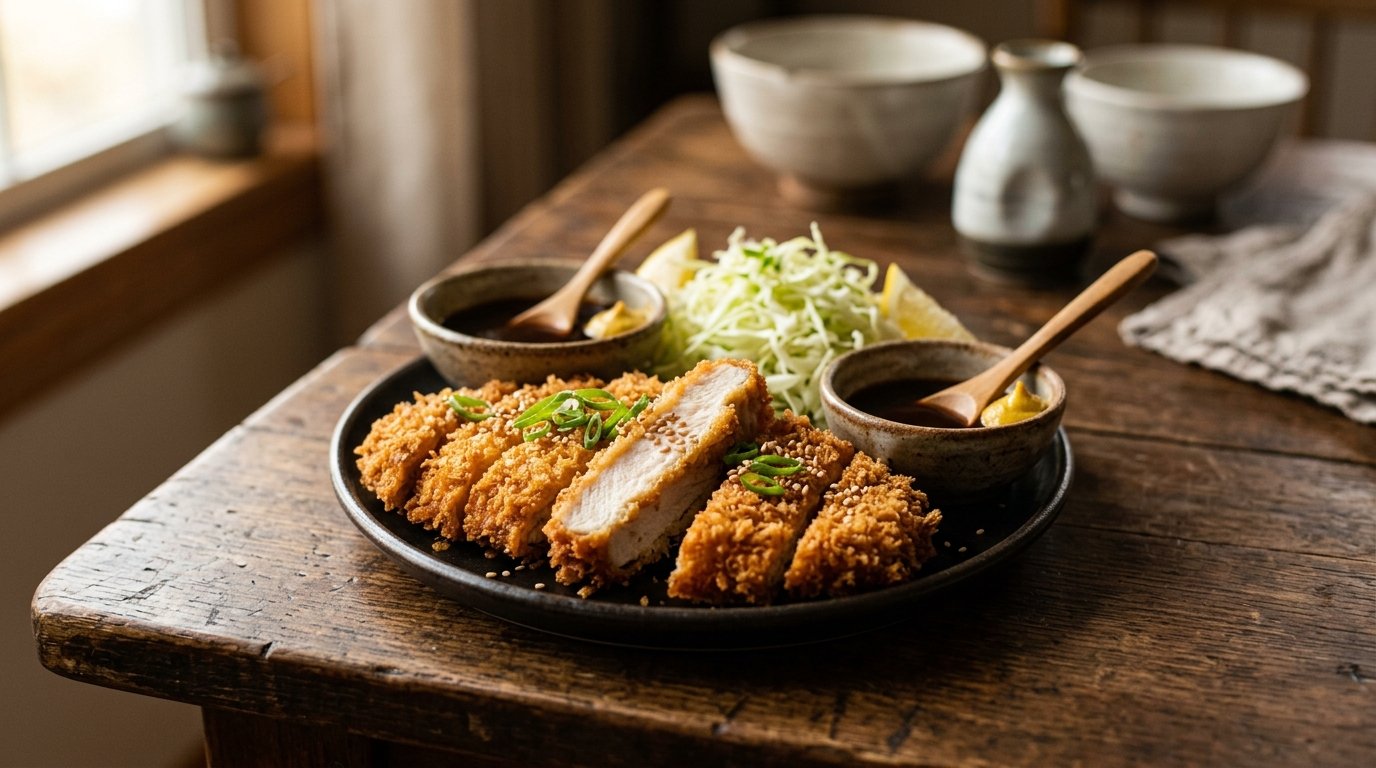
This recipe focuses on the essential mechanics of frying: uniform thickness for even cooking and the specific breadcrumb structure that creates superior crispness. Unlike standard breadcrumbs, panko flakes are larger and airier, resulting in a coating that stays crunchy longer and absorbs less oil. Combined with the traditional flour-egg-panko dredging station, this method ensures a crust that adheres perfectly to the meat, creating that iconic “so crispy” experience shown in every authentic katsu video.
Table of Contents
- Introduction
- Why This Recipe Works
- Why You’ll Love This Recipe
- Ingredient Notes
- Kitchen Equipment
- Preparation Information
- Step-by-Step Instructions
- Expert Tips
- Common Mistakes
- Recipe Variations
- What to Serve With This Recipe
- Make Ahead & Meal Prep Tips
- Storage Instructions
- Reheating Instructions
- Nutritional Information
- Troubleshooting Guide
- Frequently Asked Questions
- Final Thoughts
Introduction
If you have ever been disappointed by soggy, heavy breading on homemade fried chicken, you know exactly why technique matters more than ingredients. Chicken Katsu is not just about frying; it is a lesson in structural integrity and moisture management. The process begins long before the oil heats up, starting with the careful preparation of the chicken itself. Butterflying the breast and pounding it to an even quarter-inch thickness is non-negotiable; this ensures the meat cooks through in the same time it takes for the exterior to achieve that deep amber hue, preventing dry edges or raw centers.
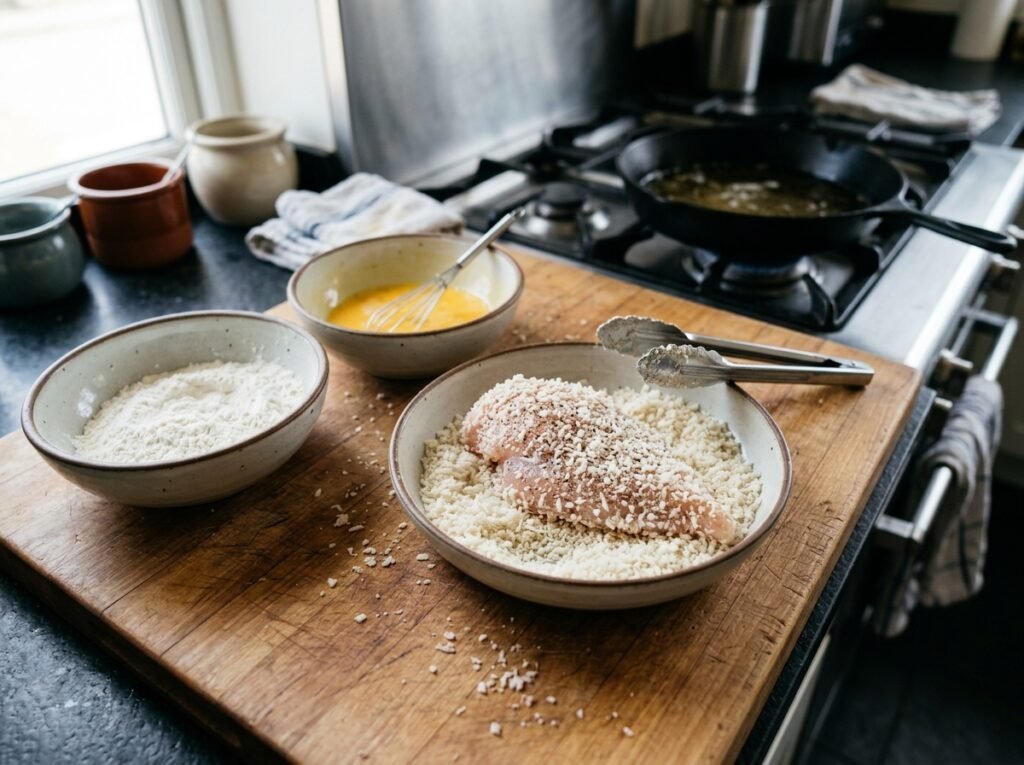
The magic truly happens during the breading phase. The video demonstrates the classic three-step dredge—flour, egg, panko—but the way you apply them makes all the difference. Pressing the panko firmly into the egg wash creates a mechanical bond that survives the violent bubbling of hot oil. When done correctly, the result is a cutlet that sings when sliced, revealing steaming white meat encased in a lattice of golden shards. It is comfort food elevated to an art form, accessible to any home cook willing to pay attention to detail.
Why This Recipe Works
From a culinary science perspective, this recipe succeeds because of the unique properties of panko breadcrumbs. Unlike Western-style fine crumbs, panko is made from bread baked with electrical current, which creates a crustless loaf with an airy, flaky texture. These larger flakes create more surface area and trap air pockets, acting as insulation that keeps the chicken juicy while providing a rigid structure that resists sogginess.
Furthermore, the pounding step serves a dual purpose beyond just thinning the meat. It physically breaks down muscle fibers and connective tissue, resulting in a more tender bite. It also increases the surface-area-to-volume ratio, allowing heat to penetrate quickly and evenly. This rapid cooking minimizes moisture loss, ensuring the interior remains succulent even as the exterior reaches temperatures high enough to trigger the Maillard reaction—the chemical process responsible for that irresistible golden color and savory flavor.
Why You’ll Love This Recipe
- Unmatched Crunch: Panko breadcrumbs provide a lighter, crispier texture that stays crunchy longer than traditional coatings.
- Juicy Interior: Pounding the chicken ensures even cooking, eliminating the risk of dry, overcooked edges.
- Versatile Base: Perfect for katsu curry, katsu sando sandwiches, or simply served with rice and shredded cabbage.
- Visual Appeal: The uniform golden-brown color and neat slicing make for stunning presentation.
- Customizable Thickness: You control the cutlet size, making it easy to adjust for different appetites or sandwich styles.
- Restaurant Quality at Home: Achieves professional results with basic pantry staples and minimal equipment.
Ingredient Notes
Chicken Breasts
- Purpose: The protein foundation. Must be boneless, skinless, and fresh.
- Buying Tips: Look for plump, pink breasts with no gray spots or slimy texture. Avoid “plumped” chicken injected with saline solution, as it can release excess water during frying.
- Substitutions: Chicken thighs (boneless/skinless) work beautifully and are harder to overcook due to higher fat content. Pork loin is traditional for tonkatsu.
- Storage Tips: Use within 1-2 days of purchase. If freezing, thaw slowly in the refrigerator overnight to maintain texture.
All-Purpose Flour
- Purpose: Creates a dry base layer for the egg wash to adhere to. Absorbs surface moisture on the chicken.
- Substitutions: Cake flour (lighter coating), rice flour (extra crispy/gluten-free option), or cornstarch (very crisp, less browning).
- Tips: Season the flour lightly with salt and pepper. This is your first chance to flavor the meat directly.
- Storage Tips: Store in a cool, dry place. Sift before use to prevent clumps in the dredging station.
Eggs
- Purpose: The binding agent. Proteins coagulate during frying, gluing the panko to the flour layer.
- Tips: Beat eggs thoroughly until uniform yellow. Strain through a sieve if you want a smoother coating without chalaza bits.
- Substitutions: Buttermilk or yogurt can work but may create a thicker, batter-like coating rather than a crisp shell. For vegan options, use aquafaba or flax egg.
- Why it matters: Too little egg = bare spots. Too much egg = thick, doughy crust. Aim for a thin, even film.
Panko Breadcrumbs
- Purpose: The textural star. Provides the signature airy crunch.
- Buying Tips: Japanese brands (like Kikkoman or Shirakiku) often have larger, flakier crumbs than domestic versions. Avoid fine, sand-like crumbs labeled “panko style.”
- Substitutions: Homemade panko (pulse stale white bread in processor), crushed crackers (different texture), or tempura flakes.
- Storage Tips: Keep sealed tightly. Stale panko loses its crispness potential. Freeze for long-term storage.
Neutral Oil (Vegetable, Canola, or Peanut)
- Purpose: Heat transfer medium for deep/shallow frying.
- Buying Tips: Choose oils with high smoke points (>400°F/200°C). Avoid olive oil or butter, which burn at frying temperatures.
- Quantity: You need enough to submerge the cutlet halfway (shallow fry) or fully (deep fry). Approx. 1-2 cups depending on pan size.
- Safety: Never leave hot oil unattended. Use a thermometer to monitor temperature.
Kitchen Equipment
- Sharp Chef’s Knife: Essential for clean butterflying. A dull knife tears meat and creates uneven thickness.
- Meat Mallet or Rolling Pin: For pounding chicken evenly. Wrap mallet head in plastic wrap if using textured side to prevent tearing.
- Plastic Wrap: Crucial for hygienic pounding and preventing cross-contamination. Also keeps cutting board clean.
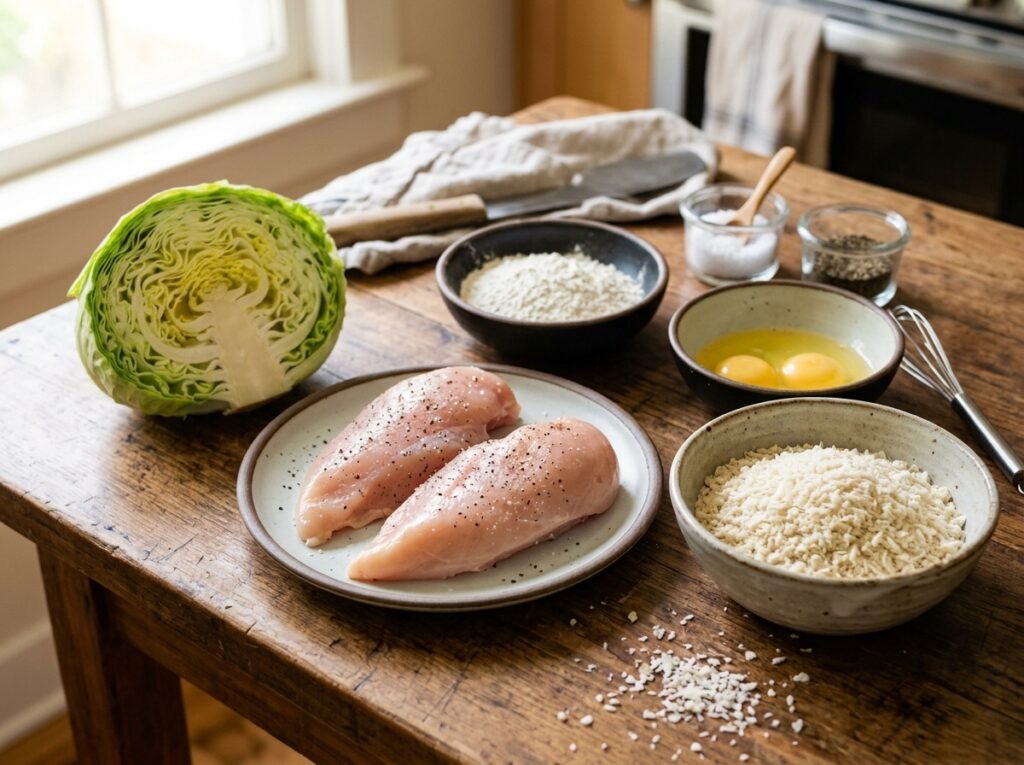
- Three Shallow Dishes: For the dredging station (flour, egg, panko). Pie plates or rimmed baking sheets work best.
- Heavy-Bottomed Skillet or Dutch Oven: Retains heat stability. Cast iron or stainless steel preferred over thin non-stick.
- Instant-Read Thermometer: Non-negotiable for oil temperature and doneness checking. Guesswork leads to failure.
- Wire Rack: For draining fried cutlets. Prevents sogginess caused by steam trapped under paper towels.
- Tongs: For safely handling hot cutlets in oil.
Preparation Information
- Prep Time: 20 Minutes
- Cook Time: 15 Minutes
- Total Time: 35 Minutes
- Servings: 2-4
Step-by-Step Instructions
H3: Butterfly and Pound the Chicken
Place chicken breast flat on cutting board. Hold steady with one hand. Using sharp knife, slice horizontally through the thickest part, stopping 1/2 inch from the opposite edge. Open like a book. Cover with plastic wrap. Pound gently with mallet to uniform 1/4-inch thickness.
- Why it matters: Uniform thickness = uniform cooking. Butterfly increases surface area for breading. Pounding tenderizes and ensures the cutlet fits your pan.
- Visual Cue: Meat should be translucent at edges when held to light. No thick ridges remaining.
- Texture Cue: Smooth, even surface. Not torn or ragged.
- Common Mistake: Cutting all the way through. If this happens, treat as two separate pieces and pound individually.
- Pro Tip: Chill pounded chicken for 15 minutes before breading. Cold meat firms up proteins, reducing shrinkage during frying.
H3: Set Up Dredging Station
Arrange three shallow dishes in assembly line order: flour (seasoned), beaten eggs, panko. Place wire rack next to panko for finished cutlets. Keep one hand “wet” (egg/panko) and one hand “dry” (flour/chicken) to prevent clumping.
- Why it matters: Organization prevents cross-contamination and messy fingers. Dedicated hands keep flour dry and panko fluffy.
- Visual Cue: Each station has ample space. No overflow between dishes.
- Tip: Add 1 tbsp water to egg wash. Thinner egg coats more evenly and prevents gloopy crust.
H3: Bread the Cutlets
Dredge chicken in flour, shaking off excess. Dip in egg wash, letting excess drip off. Press firmly into panko, ensuring full coverage. Flip and press again. Transfer to wire rack. Repeat for remaining cutlets.
- Why it matters: Flour absorbs moisture for egg adhesion. Egg binds panko. Pressing ensures no bare spots. Wire rack prevents bottom sogginess.
- Visual Cue: Even, opaque coating. No pink meat visible. Panko stands upright, not flattened.
- Texture Cue: Coating feels dry and rough, not wet or pasty.
- Mistake to Avoid: Skipping the shake-off step. Excess flour creates gummy patches. Excess egg creates thick batter.
H3: Fry to Golden Perfection
Heat 1/2 inch oil in skillet to 350°F (175°C). Carefully lay cutlets in oil away from you. Fry 3-4 minutes per side until deep golden brown. Adjust heat to maintain temperature. Transfer to clean wire rack. Rest 2 minutes before slicing.
- Why it matters: Correct oil temp seals crust instantly. Too cool = greasy/soggy. Too hot = burnt outside/raw inside. Resting redistributes juices.
- Visual Cue: Bubbles are vigorous but not violent. Color transitions from pale to rich amber.
- Aroma Cue: Nutty, toasted breadcrumb smell. Burnt odor means oil too hot.
- Doneness Check: Internal temp should reach 165°F (74°C). Juice runs clear when pierced.
- Safety: Oil splatters. Use splatter screen if needed. Never add water to hot oil.
Expert Tips
- Oil Temperature is King: Invest in a clip-on thermometer. Visual cues (bread test) are unreliable. Maintain 340-360°F throughout frying.
- Don’t Crowd the Pan: Fry one cutlet at a time if pan is small. Overcrowding drops oil temp drastically, leading to soggy katsu.
- Press Panko Gently: Aggressive pressing crushes flakes, defeating their purpose. Use flat palm, not fingertips, for even pressure.
- Rest on Rack, Not Paper: Paper towels trap steam against the crust. Wire rack allows air circulation, preserving crunch.
- Slice Against Grain: After resting, slice perpendicular to muscle fibers. This shortens fiber length, making each bite more tender.
- Season Every Layer: Salt in flour, pinch in egg, tiny bit in panko. Layered seasoning penetrates deeper than surface-only salting.
Common Mistakes
- Soggy Bottom: Caused by resting on paper towels or oil too cool. Fix: Always use wire rack. Verify oil temp before frying.
- Bare Spots/Crust Falling Off: Insufficient pressing or wet chicken surface. Fix: Pat chicken dry before flouring. Press panko firmly. Ensure egg wash isn’t too thick.
- Burnt Outside/Raw Inside: Oil too hot or cutlet too thick. Fix: Lower heat to 340°F. Pound to exact 1/4″ thickness. Finish in 325°F oven if needed.
- Tough/Dry Meat: Overcooked or not pounded. Fix: Use thermometer (pull at 160°F, carryover to 165°F). Pound evenly. Don’t over-fry.
- Clumpy Breading: Wet hands during flouring or overcrowded dredge station. Fix: Use dedicated dry/wet hands. Keep stations organized. Shake off excess at each step.
Recipe Variations
- Pork Katsu (Tonkatsu): Substitute pork loin cutlets. Slightly thicker (1/2″), fry at 340°F for 4-5 mins/side. Traditional pairing with tonkatsu sauce and shredded cabbage.
- Spicy Katsu: Add cayenne or gochugaru to flour and panko. Serve with spicy mayo or sriracha-ketchup blend.
- Katsu Sando: Slice cooked katsu into strips. Layer with tonkatsu sauce, shredded cabbage, and buttered milk bread. Press lightly, slice diagonally.
- Gluten-Free: Use rice flour + GF panko (or crushed rice crackers). Ensure all seasonings are GF-certified.
- Air Fryer Katsu: Spray breaded cutlets generously with oil. Air fry at 375°F for 12-15 mins, flipping halfway. Lighter but slightly less crisp than fried.
- Cheese-Stuffed Katsu: Place slice of provolone/mozzarella between two pounded cutlets. Seal edges tightly with egg wash before breading. Fry carefully to prevent leakage.
- Curry Katsu: Serve sliced katsu over Japanese curry rice. The crispy texture contrasts beautifully with thick, savory curry sauce.
What to Serve With This Recipe
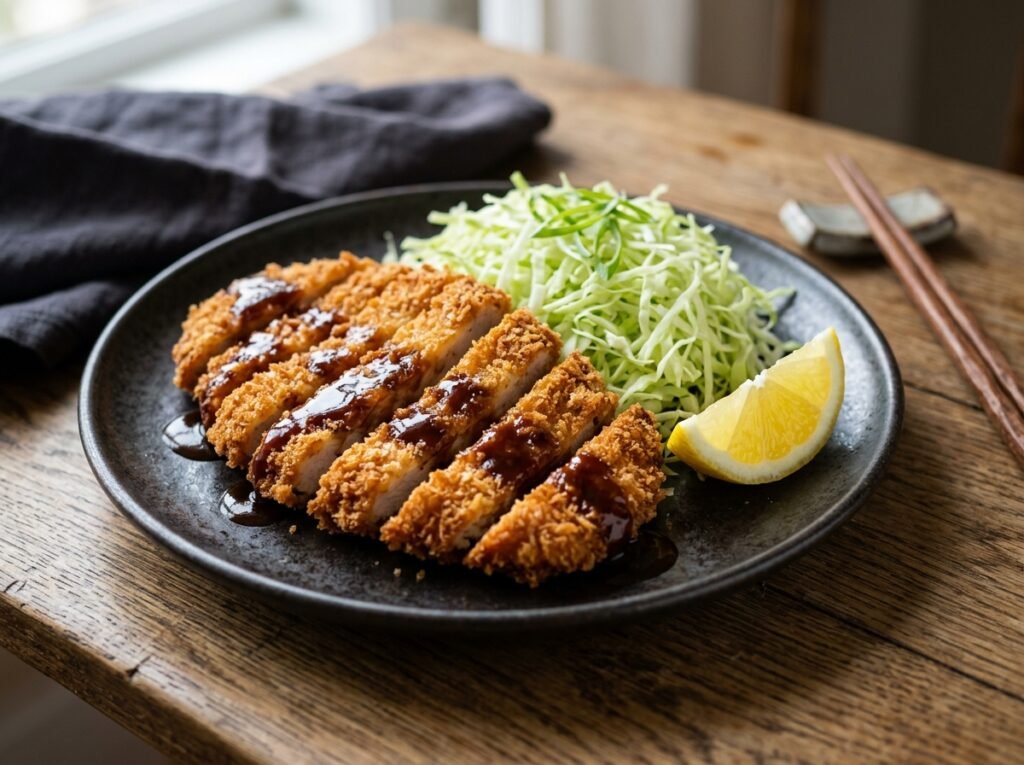
- Classic Sides: Shredded green cabbage with sesame dressing, steamed short-grain rice, miso soup.
- Sauces: Tonkatsu sauce (Worcestershire-based), karashi mustard, lemon wedges, spicy mayo.
- Salads: Sunomono (cucumber salad), seaweed salad, or simple mixed greens with ginger dressing.
- Drinks: Japanese lager (Asahi/Sapporo), green tea, ramune soda, or crisp white wine.
- Dessert: Matcha ice cream, mochi, or light fruit parfait to balance richness.
- Pickles: Fukujinzuke or rakkyo (Japanese pickles) provide acidic contrast to cut grease.
Make Ahead & Meal Prep Tips
- Bread Ahead: Bread cutlets up to 4 hours ahead. Refrigerate uncovered on wire rack to dry surface slightly (helps crispness). Fry just before serving.
- Freeze Unfried: Freeze breaded cutlets on tray until solid, then bag. Fry from frozen at 325°F, adding 2-3 mins. Great for meal prep.
- Prep Components: Pound/butterfly chicken and set up dredge station day-of. Saves active cooking time.
- Sauce Prep: Make tonkatsu sauce or curry base ahead. Flavors improve overnight. Reheat gently before serving.
Storage Instructions
- Refrigerator: Store cooked katsu in airtight container up to 3 days. Separate from sauces/cabbage to prevent sogginess.
- Freezer: Cooked katsu freezes well up to 2 months. Wrap individually. Thaw in fridge before reheating.
- Avoid: Storing hot katsu sealed (steam = soggy). Cool completely on rack first. Don’t refrigerate with sauce already applied.
- Quality Note: Crispness diminishes over time. Reheating properly is key to restoration.
Reheating Instructions
- Oven (Best): 375°F on wire rack over baking sheet. 8-10 mins. Restores crispness effectively.
- Air Fryer (Excellent): 350°F for 4-6 mins. Quick, efficient, maintains texture. Spray lightly with oil if dried out.
- Stovetop: Skillet over medium-low heat, 2-3 mins/side. Good for single pieces. Watch closely to prevent burning.
- Microwave (Avoid): Makes crust rubbery/soggy. Only if desperate; place on paper towel, heat 30-sec intervals. Expect texture loss.
- Toaster Oven: Similar to oven method. Ideal for small portions. Use foil tent if browning too fast.
Nutritional Information
Per serving (approximate, based on 6oz breast + 1/4 cup oil absorption):
- Calories: 450
- Protein: 38g
- Carbohydrates: 22g
- Fat: 24g
- Fiber: 1g
- Sugar: 1g
- Sodium: 480mg
Note: Values vary based on oil absorption, cutlet size, and specific panko brand. Sodium primarily from seasoned flour and natural chicken sodium.
Troubleshooting Guide
| Problem | Cause | Solution |
|---|---|---|
| Soggy crust | Oil too cool / Rested on paper | Verify 350°F oil. Always rest on wire rack. |
| Crust falling off | Wet chicken / No press | Pat dry before flouring. Press panko firmly. |
| Burnt outside/raw inside | Oil too hot / Thick cutlet | Lower to 340°F. Pound to 1/4″. Finish in oven. |
| Tough/dry meat | Overcooked / Not pounded | Use thermometer (165°F). Pound evenly. |
| Clumpy breading | Wet hands / Crowded station | Dedicated dry/wet hands. Organize stations. |
| Greasy katsu | Oil too cool / Overcrowded | Maintain 350°F. Fry one at a time. |
Frequently Asked Questions
1. Can I use chicken thighs instead of breasts? Yes! Thighs are actually more forgiving due to higher fat content. They stay juicier and are harder to overcook. Butterfly and pound to same 1/4″ thickness. Cooking time may increase by 1-2 minutes.
2. Why is my panko coating pale/not golden? Oil temperature too low or insufficient frying time. Maintain 350°F. Don’t remove prematurely. If browning too fast but inside raw, lower heat slightly and extend time. Ensure panko isn’t old/stale.
3. Can I bake katsu instead of frying? You can, but texture differs significantly. Bake at 400°F on oiled rack for 20-25 mins, flipping halfway. Spray generously with oil. Won’t achieve true fried crispness. Air fryer is better alternative.
4. How do I prevent oil splattering? Pat chicken VERY dry before breading. Moisture + hot oil = splatter. Use splatter screen. Lower cutlets gently into oil away from you. Don’t overcrowd pan.
5. What’s the best oil for frying katsu? Neutral oils with high smoke points: vegetable, canola, peanut, or grapeseed. Avoid olive oil (low smoke point, strong flavor) or butter (burns). Fresh oil produces cleaner taste than reused.
6. Can I reuse frying oil? Yes, 2-3 times if filtered and stored properly. Cool completely, strain through cheesecloth/coffee filter, store in dark bottle. Discard if dark, foamy, or smells rancid. Never mix old/new oil.
7. Why did my katsu shrink during frying? Not pounded evenly or overcooked. Pounding breaks muscle fibers, reducing shrinkage. Pull at 160°F internal temp; carryover cooking reaches 165°F. Overcooking contracts proteins excessively.
8. Is katsu the same as schnitzel? Similar technique, different traditions. Schnitzel (German/Austrian) typically uses veal/pork, finer breadcrumbs, thinner cutlets. Katsu (Japanese) uses panko, thicker cutlets, often served with tonkatsu sauce. Both delicious!
Final Thoughts
Mastering Chicken Katsu is a rewarding journey that teaches fundamental frying techniques applicable to countless other dishes. The satisfaction of hearing that audible crunch as you slice into a perfectly golden cutlet is unmatched. Remember, great katsu isn’t about complexity—it’s about respecting the process: uniform pounding, proper breading technique, and precise temperature control. Each attempt refines your skills, bringing you closer to that ideal balance of crisp and juicy. We encourage you to experiment with sauces, sides, and variations to make this recipe your own. Share your creations, ask questions, and rate the recipe below—your feedback helps our community grow. Now go forth and fry with confidence!