| Prep Time | Cook Time | Total Time | Servings | Cuisine | Course | Difficulty | Calories (approx. per serving) |
|---|---|---|---|---|---|---|---|
| 10 minutes | 25 minutes | 35 minutes | 4–6 | International | Main Course / Lunch or Dinner | Easy | 380–420 |
Table of Contents
- Why This Recipe Works
- Why You’ll Love This Recipe
- Ingredient Notes
- Kitchen Equipment
- Preparation Information
- Step-by-Step Instructions
- Expert Tips
- Common Mistakes
- Recipe Variations
- What to Serve With This Recipe
- Make-Ahead Tips
- Meal Prep Tips
- Storage Instructions
- Reheating Instructions
- Nutritional Information
- Troubleshooting Guide
- Frequently Asked Questions
- Final Thoughts
Introduction
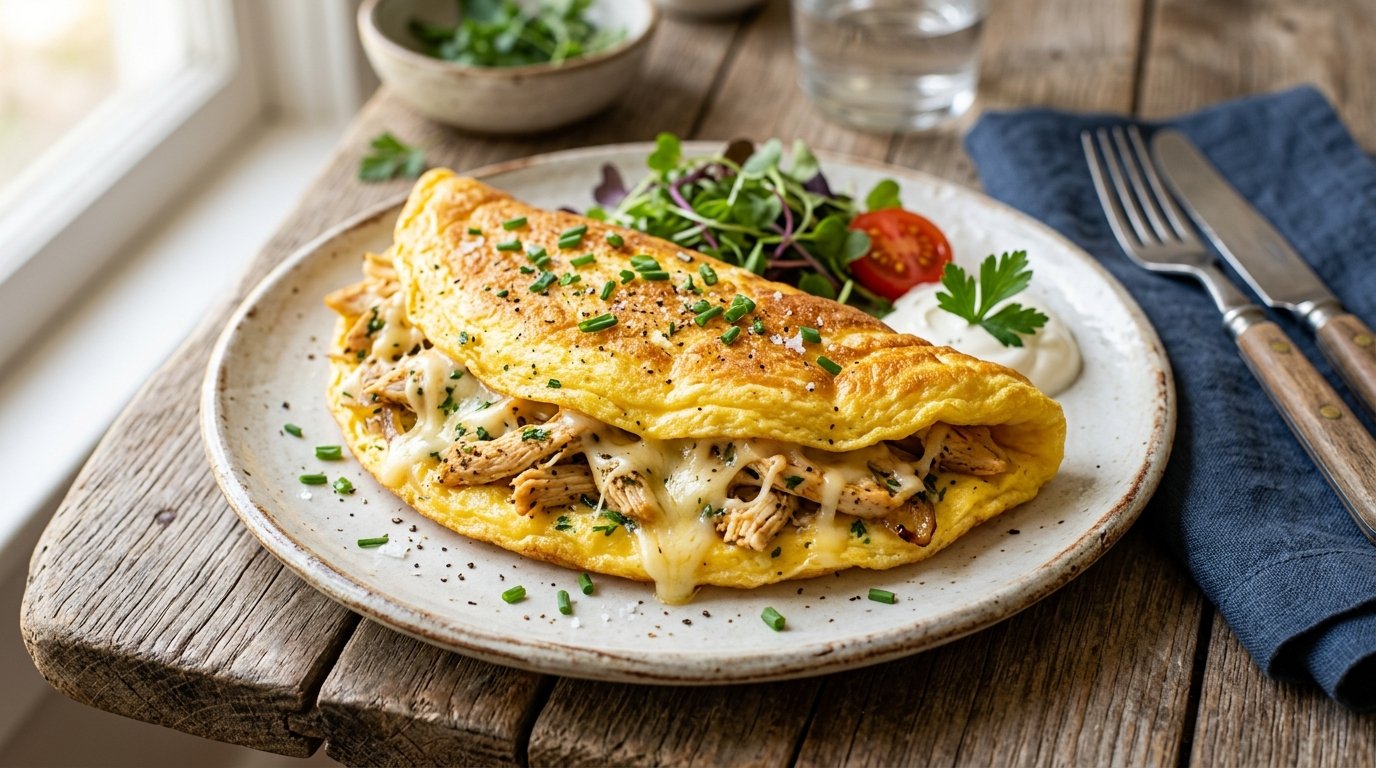
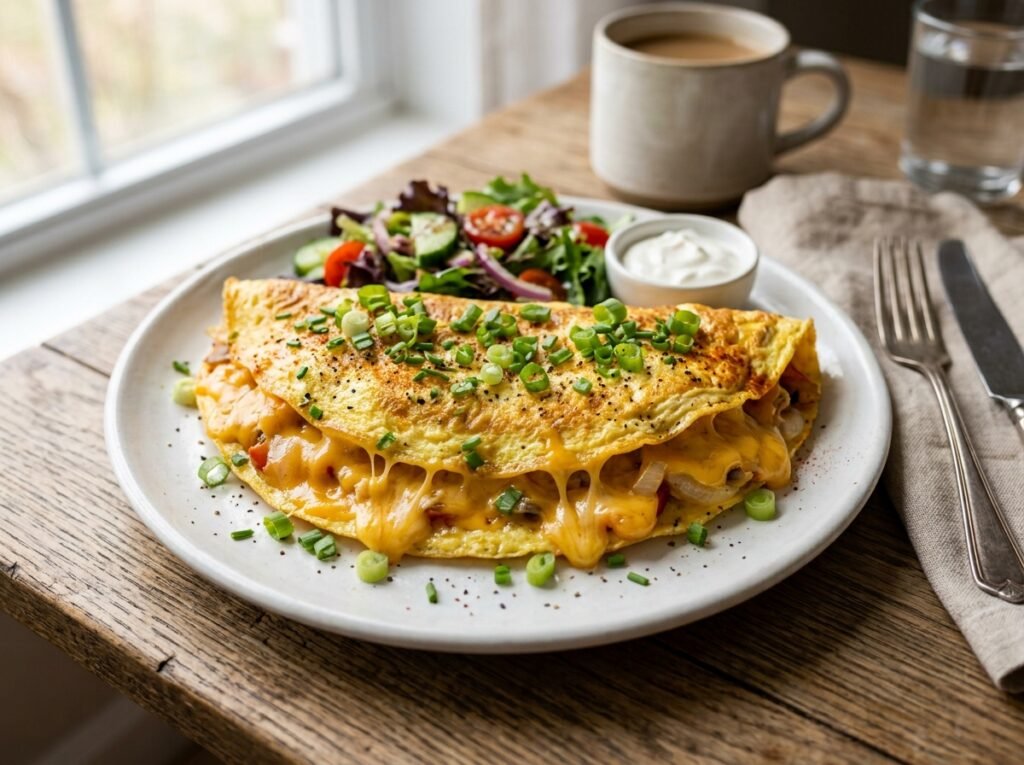
This cheesy chicken egg omelette turns everyday ingredients into a satisfying, protein-packed skillet meal that feels far more special than the effort required. Cubed chicken breast cooks gently with beaten eggs, mozzarella, parsley, a touch of cream, and a little flour that helps the mixture set into a golden, sliceable omelette. Finished with an extra blanket of melted cheese, it delivers a creamy, savory bite that works equally well for a quick lunch or simple dinner. The method is straightforward, the results are consistent, and the finished dish looks impressive when cut into wedges and served hot.
Why This Recipe Works
Cooking the chicken directly in the eggs allows the meat to stay tender while absorbing seasoning. The small amount of flour binds the mixture so it holds together when flipped, creating a sturdy yet soft texture similar to a thick omelette or frittata. Heavy cream adds richness without making the eggs heavy. Mozzarella melts into stretchy pockets throughout and forms a golden, gooey topping. Covering the pan traps steam, ensuring even cooking on both sides without drying out the eggs or chicken. The result is a complete one-pan meal with balanced protein, mild flavor, and crowd-pleasing cheese pull.
Why You’ll Love This Recipe
- Uses basic pantry and fridge staples most people already have
- One-pan cooking means minimal cleanup
- High in protein and filling enough for a full meal
- Ready in about 35 minutes from start to finish
- Easily customizable with different cheeses or herbs
- Slices cleanly for neat plating and leftovers that reheat well
Ingredient Notes
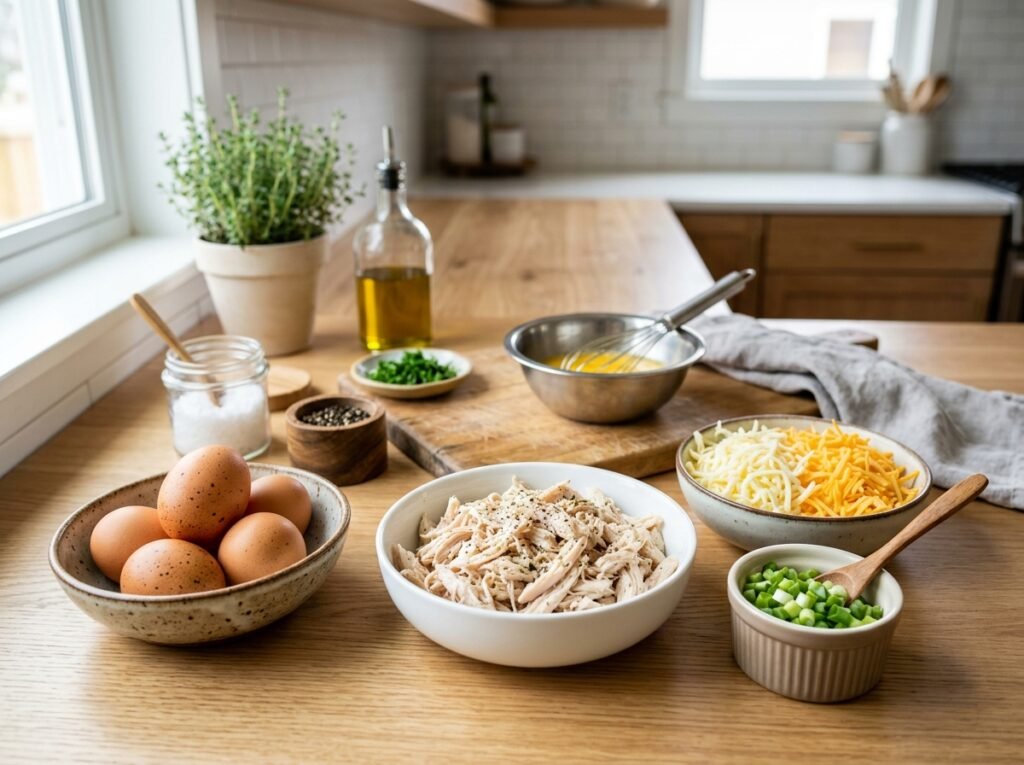
Eggs (8 large) Form the base of the omelette and provide structure and richness. Use fresh eggs at room temperature for the most even texture.
Substitutions: 6 large eggs plus 2 egg whites lighten the dish slightly.
Buying & storage tips: Choose eggs with clean, uncracked shells. Store in the refrigerator and use within the date on the carton.
Chicken breast (1, about 200–250 g) Cut into small cubes so it cooks quickly and distributes evenly. Boneless, skinless breast keeps the dish lean.
Substitutions: Thigh meat adds more flavor and moisture; leftover cooked chicken can be used (add it later so it does not overcook).
Buying tips: Look for plump, pink meat without excess liquid in the package.
Salt (1 teaspoon) and black pepper (1 teaspoon) Season the chicken and eggs from the start so every bite is flavorful.
Mozzarella cheese (200 g plus extra for topping) Melts into creamy strands and creates the signature cheesy finish. Low-moisture mozzarella works best for clean melting.
Substitutions: A mix of mozzarella and cheddar, provolone, or a sprinkle of Parmesan adds depth.
Storage tips: Keep shredded or block mozzarella tightly wrapped in the refrigerator.
Fresh parsley (to taste) Brightens the rich eggs and cheese with a fresh herbal note. Flat-leaf or curly both work.
Substitutions: Chives, dill, or a pinch of dried oregano can replace parsley.
Heavy cream (2 tablespoons) Adds silkiness and helps the eggs stay tender.
Substitutions: Whole milk or half-and-half can be used, though the texture will be slightly less rich.
Wheat flour (4 tablespoons) Acts as a light binder so the omelette sets firmly enough to flip and slice.
Substitutions: All-purpose flour is ideal; a gluten-free blend works if needed.
Kitchen Equipment
- Nonstick skillet or well-seasoned frying pan (25–28 cm / 10–11 inch works well)
- Spatula (silicone or heat-resistant)
- Mixing spoon or spatula for stirring
- Plate slightly larger than the pan (for flipping)
- Knife and cutting board
- Measuring spoons and cups
- Lid or cover for the pan
Preparation Information
Prep Time: 10 minutes Cook Time: 25 minutes Total Time: 35 minutes Servings: 4–6 wedges
Step-by-Step Instructions
Prepare the Chicken and Eggs
Crack 8 eggs into a nonstick skillet over medium heat (or crack them into a bowl first if preferred). Add the chicken breast cut into small, even cubes. Sprinkle with 1 teaspoon salt and 1 teaspoon black pepper. Using a spatula, gently mix the chicken into the eggs so the seasoning coats everything evenly.
Why this matters: Seasoning at the beginning ensures the chicken is flavorful throughout rather than only on the surface. Small cubes cook at the same rate as the eggs, preventing dry or undercooked pieces.
Add Cheese, Herbs, and Cream
Scatter 200 g shredded mozzarella and a generous handful of chopped parsley over the egg-chicken mixture. Stir briefly to distribute. Pour in 2 tablespoons heavy cream and mix again until the cream is incorporated and the mixture looks uniform.
Visual cue: The eggs will still be mostly liquid with visible chicken pieces and melting cheese strands. The cream gives the mixture a slightly richer, glossier appearance.
Incorporate the Flour
Sprinkle 4 tablespoons wheat flour evenly over the surface. Stir thoroughly until no dry flour remains and the mixture thickens slightly into a cohesive batter-like consistency. Continue cooking over medium heat, stirring occasionally, until the eggs begin to set around the edges.
Texture cue: The flour prevents the omelette from being too fragile when flipped. The mixture should look thick but still spreadable, not stiff.
Cook the First Side
Cover the pan with a lid and reduce heat to medium-low. Cook for about 15 minutes, or until the bottom is golden and the center is mostly set. Place a large plate over the pan, carefully invert the omelette onto the plate, then slide it back into the pan so the uncooked side is down.
Why this works: Covering traps heat and steam for even cooking. Flipping ensures both sides develop color and the eggs cook through without burning.
Top with Cheese and Finish
Sprinkle additional mozzarella generously over the top of the flipped omelette. Cover again and cook for another 8–10 minutes, or until the cheese is fully melted and the bottom is golden brown. The omelette should feel firm when gently pressed in the center.
Doneness cue: The edges pull slightly away from the pan and the cheese on top is bubbly and melted. The underside should be evenly browned.
Slice and Serve
Slide the finished omelette onto a serving plate or cutting board. Cut into wedges like a pie or pizza. Serve hot while the cheese is still stretchy.
Expert Tips

- Cut the chicken into uniform small cubes so every piece cooks at the same rate.
- Use a good nonstick pan or lightly oil the surface to make flipping easier.
- Keep the heat moderate—high heat can brown the outside before the center sets.
- A plate that fits snugly over the pan makes the flip cleaner and safer.
- Let the omelette rest 1–2 minutes after cooking so the cheese sets slightly for neater slices.
- Freshly shredded mozzarella melts more smoothly than pre-shredded.
Common Mistakes
- Chicken pieces too large → uneven cooking. Solution: Cube the breast into 1–1.5 cm pieces.
- Heat too high → burnt bottom, raw center. Keep the flame medium to medium-low once covered.
- Skipping the flour → omelette falls apart when flipped. The flour is essential for structure.
- Flipping too early → mixture spills. Wait until the bottom is set and golden.
- Overloading with cheese on top before the first side is done → messy flip. Add the final cheese only after flipping.
Recipe Variations
- Spicy: Add a pinch of chili flakes or diced jalapeño with the chicken.
- Extra cheesy: Mix in cheddar or Parmesan with the mozzarella.
- Herb-forward: Increase parsley or add chives and a little dried oregano.
- Vegetable boost: Stir in finely chopped spinach, bell pepper, or mushrooms after the chicken.
- Low-carb: Reduce or omit the flour (the omelette will be more delicate).
- High-protein: Use chicken thighs or add an extra egg.
- Gluten-free: Substitute a 1:1 gluten-free flour blend.
What to Serve With This Recipe
Pair the cheesy chicken egg omelette with a simple green salad, sliced tomatoes, or steamed vegetables for balance. A light homemade tomato sauce or garlic yogurt sauce makes a nice optional accompaniment. Crusty bread or roasted potatoes turn it into a heartier plate. For drinks, sparkling water with lemon or a light white wine complements the richness.
Make-Ahead Tips
Cube the chicken and shred the cheese up to a day ahead. Store covered in the refrigerator. The full omelette is best cooked fresh, but leftovers reheat well.
Meal Prep Tips
Cook the entire omelette, cool completely, then slice into individual portions. Store in airtight containers for quick lunches or dinners throughout the week.
Storage Instructions
Refrigerate leftovers in an airtight container for up to 3 days. For longer storage, wrap individual slices tightly and freeze for up to 1 month. Thaw overnight in the refrigerator before reheating.
Reheating Instructions
- Oven or toaster oven: 160 °C (320 °F) for 8–10 minutes until heated through.
- Air fryer: 150 °C (300 °F) for 4–6 minutes.
- Microwave: 45–60 seconds on medium power, checking halfway.
- Stovetop: Warm gently in a covered nonstick pan over low heat.
Avoid high heat that can make the eggs rubbery.
Nutritional Information (approximate per serving, based on 6 servings)
Calories: 400 Protein: 32 g Carbohydrates: 8 g Fat: 26 g Fiber: 0.5 g Sugar: 1 g Sodium: 650 mg
Values vary with exact cheese amounts and chicken size.
Troubleshooting Guide
- Omelette sticks when flipping: Use a well-seasoned nonstick pan and ensure the bottom is fully set before inverting.
- Center still runny after 15 minutes: Continue cooking covered a few more minutes or lower the heat slightly.
- Dry or rubbery texture: Heat was too high or cooking time too long. Keep the temperature moderate and check earlier next time.
- Cheese does not melt on top: Cover the pan tightly so steam helps melt the cheese.
- Mixture too thick or too thin: Adjust with a splash of cream or an extra spoon of flour as needed before cooking.
Frequently Asked Questions
Can I use leftover cooked chicken? Yes. Add it after the eggs have started to set so it warms through without drying out.
Is the flour necessary? It helps the omelette hold its shape for flipping and slicing. You can reduce it slightly, but omitting it entirely makes the dish more fragile.
Can I bake this instead of cooking on the stove? Yes. Pour the mixture into a greased oven-safe skillet or baking dish and bake at 180 °C (350 °F) for 20–25 minutes, then top with cheese and bake a few more minutes until melted.
How do I know when it is ready to flip? The edges should look set and the bottom should be golden when you gently lift with a spatula.
Can I make it dairy-free? Use a dairy-free mozzarella alternative and plant-based cream. Results will vary with the specific products.
What size pan works best? A 25–28 cm (10–11 inch) nonstick skillet gives a good thickness. A larger pan produces a thinner omelette that cooks faster.
Can I add vegetables? Yes. Finely chopped vegetables that release little water (spinach, peppers, zucchini) work well. Sauté them first if they are watery.
How many people does this serve? It comfortably serves 4 as a main dish or 6 as a lighter meal with sides.
Final Thoughts
This cheesy chicken egg omelette proves that simple ingredients can deliver a satisfying, restaurant-style result at home. The combination of tender chicken, soft eggs, and melted mozzarella creates a comforting skillet meal that comes together quickly and slices beautifully for serving. Once you try the method—seasoning the chicken in the eggs, binding with a little flour, and finishing with extra cheese—you will understand why it becomes a regular request. Make it this week, then let me know in the comments how it turned out or what variations you tried. Enjoy every cheesy bite.