Quick Recipe Summary
| Feature | Details |
|---|---|
| Prep Time | 10 minutes |
| Cook Time | 5 minutes |
| Total Time | 15 minutes |
| Servings | 1 large wrap |
| Cuisine | American / Fusion |
| Course | Lunch, Breakfast, Snack |
| Difficulty | Easy |
| Calories | ~450 kcal (with filling) |
Table of Contents
- Introduction
- Why This Recipe Works
- Why You’ll Love This Recipe
- Ingredient Notes
- Kitchen Equipment
- Step-by-Step Instructions
- Expert Tips for the Perfect Green Wrap
- Common Mistakes to Avoid
- Recipe Variations
- What to Serve With This Recipe
- Make Ahead & Meal Prep Tips
- Storage & Reheating Instructions
- Nutritional Information
- Troubleshooting Guide
- Frequently Asked Questions
- Final Thoughts
Introduction
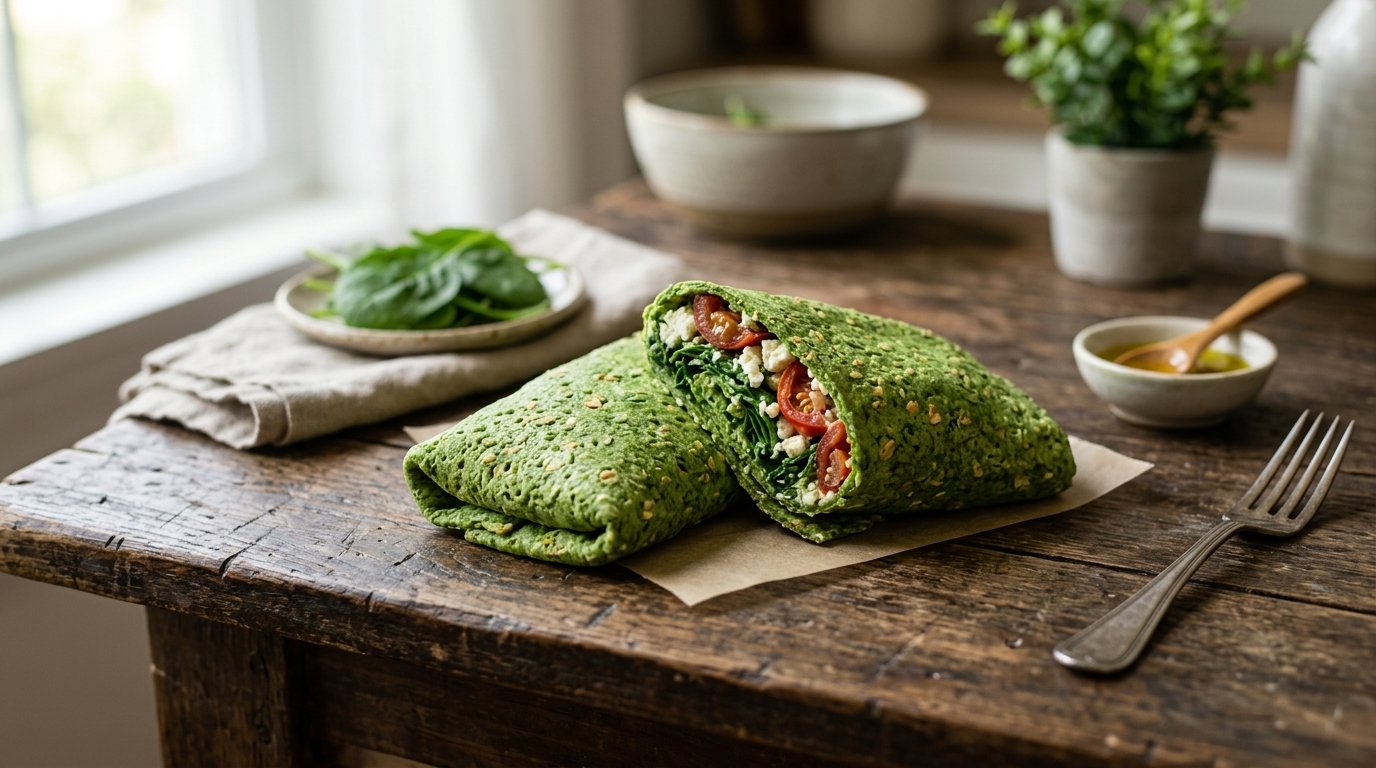
If you have been scrolling through social media lately, you have likely seen the viral spinach oat wrap trend taking over kitchen feeds everywhere. It is easy to see why: this simple hack transforms three humble pantry staples into a vibrant, nutrient-dense flatbread that rivals any store-bought tortilla. But beyond the aesthetic appeal of that stunning emerald green color lies a genuinely delicious and versatile meal solution.
This 3-ingredient spinach wrap is more than just a TikTok fad; it is a legitimate culinary tool for anyone looking to boost their vegetable intake without sacrificing flavor or texture. By blending fresh spinach with rolled oats and eggs, you create a batter that cooks down into a pliable, crepe-like vessel perfect for holding your favorite fillings. Whether you are packing a high-protein lunch, need a quick gluten-free breakfast, or simply want to use up that bag of wilting greens in your crisper drawer, this recipe delivers. In this guide, we will walk you through exactly how to master the technique, from achieving the perfect batter consistency to executing the famous “folded tortilla” assembly that makes every bite perfectly balanced.
Why This Recipe Works
The science behind this spinach oat wrap is surprisingly straightforward. Spinach provides the moisture and the vivid chlorophyll color, while the rolled oats act as the structural binder. When blended, the oats break down into a fine flour that gelatinizes during cooking, creating a flexible matrix that holds together even when folded. The eggs serve a dual purpose: they add protein for satiety and act as an emulsifier, ensuring the batter cooks evenly without cracking.
Unlike traditional flour tortillas that rely on gluten development for elasticity, this wrap relies on the starch gelatinization of the oats and the coagulation of the egg proteins. This makes it naturally gluten-free (provided your oats are certified GF) and significantly higher in fiber and micronutrients. The result is a wrap that is sturdy enough to hold heavy fillings like grilled chicken and cream cheese, yet tender enough to fold without snapping.
Why You’ll Love This Recipe
- Incredibly Fast: From blender to plate in under 15 minutes.
- Nutrient Dense: Packed with iron, fiber, and protein right in the base.
- Naturally Gluten-Free: A safe and delicious alternative to wheat wraps.
- Zero Food Waste: The perfect solution for using up leftover spinach.
- Customizable Canvas: Neutral flavor profile pairs with sweet or savory fillings.
- Kid-Friendly Color: The bright green hue makes healthy eating fun for children.
- Budget Friendly: Uses inexpensive, accessible ingredients.
- Meal Prep Ready: Wraps can be made in batches and stored for days.
Ingredient Notes
To make the best spinach oat wrap, quality and preparation matter. Here is what you need to know about the core components:
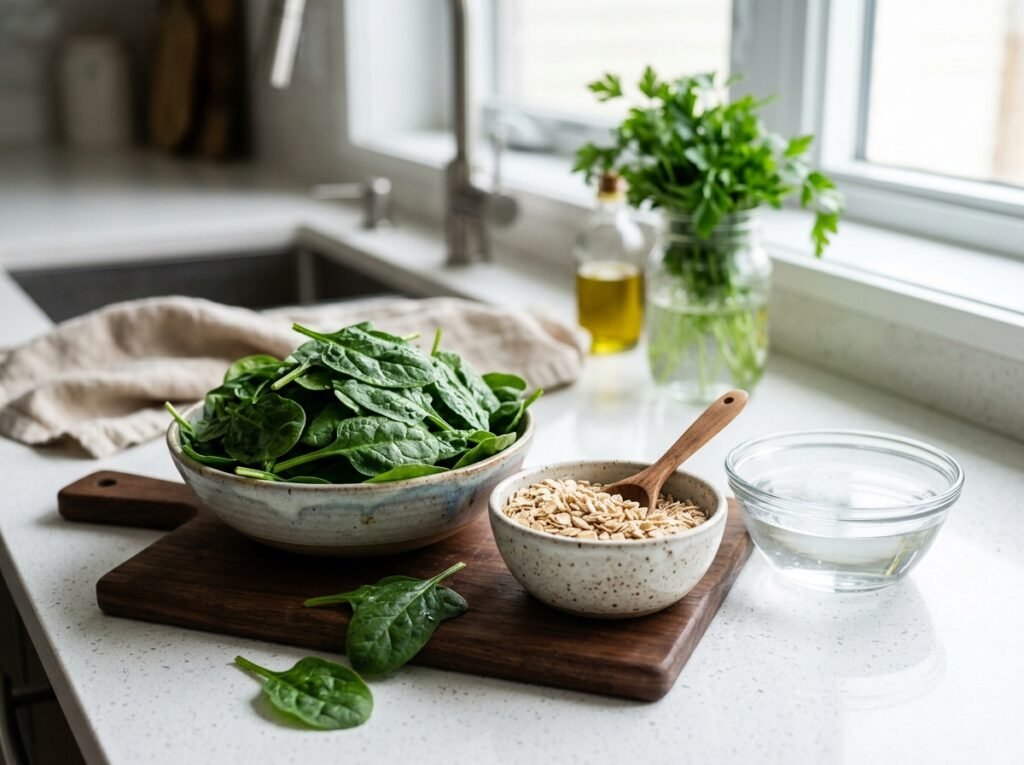
Fresh Spinach
- Purpose: Provides moisture, color, and nutrients.
- Buying Tips: Look for crisp, dark green leaves without yellowing or sliminess. Baby spinach is preferred over mature spinach as it has thinner stems and blends smoother.
- Substitutions: If you don’t have fresh spinach, you can use frozen spinach, but you must thaw and squeeze out all excess water first. Kale works too but will result in a darker, earthier flavor and may require more liquid.
- Storage: Store fresh spinach in the crisper drawer wrapped in a paper towel to absorb excess moisture. Use within 3-5 days.
Rolled Oats (Old Fashioned)
- Purpose: Acts as the flour substitute and structural binder.
- Buying Tips: Ensure you buy “Rolled Oats” or “Old Fashioned Oats.” Avoid “Instant” or “Quick” oats if possible, as they can sometimes make the batter gummy. Steel-cut oats are too hard and will not blend smoothly.
- Gluten-Free Note: Oats are naturally gluten-free but are often processed in facilities with wheat. If you have celiac disease or severe sensitivity, always look for the “Certified Gluten-Free” label.
- Storage: Keep in an airtight container in a cool, dry place for up to 6 months.
Eggs
- Purpose: Binds the batter, adds protein, and aids in browning.
- Substitutions: For a vegan version, you can try using a flax egg (1 tbsp ground flaxseed + 3 tbsp water per egg), though the texture will be slightly less elastic. Aquafaba (chickpea water) is another option but may alter the flavor.
- Tips: Room temperature eggs blend more easily into cold spinach than cold eggs straight from the fridge.
Seasonings (Optional but Recommended)
- Salt & Pepper: Essential for bringing out the natural flavors.
- Sesame Seeds: Adding these to the pan while cooking adds a nutty crunch and visual appeal.
- Garlic Powder/Onion Powder: Great for savory versions.
- Cinnamon/Nutmeg: Ideal if making a sweet breakfast wrap.
Kitchen Equipment
You do not need a professional kitchen to make this spinach oat wrap. Here are the essentials:
- Personal Blender (e.g., Nutribullet): Crucial for breaking down the oats and spinach into a smooth batter. A standard countertop blender works too, but personal blenders often achieve a finer consistency for this specific recipe.
- Non-Stick Skillet (8-10 inch): A good non-stick surface is vital. Since this batter has no oil and relies on egg proteins, it can stick to stainless steel or cast iron if not well-seasoned.
- Silicone Spatula: For spreading the batter evenly and flipping the delicate wrap.
- Sharp Knife: For slicing the wrap before folding.
- Measuring Cups/Spoons: For consistent ratios.
Step-by-Step Instructions
Follow these steps to create the perfect spinach oat wrap every time.
H3: Blend the Batter
Add 1 cup of fresh spinach, ½ cup of rolled oats, and 2 large eggs into your blender cup. Add a pinch of salt and pepper. Secure the lid and blend on high for 30-45 seconds.
- Why it matters: You want a completely smooth, vibrant green liquid. Any chunks of oat or spinach will create weak points in the wrap that can tear during folding.
- Visual Cue: The batter should be the consistency of heavy cream or pancake batter. If it is too thick (like dough), add a teaspoon of water. If too thin, add a tablespoon of oats.
H3: Cook the Wrap
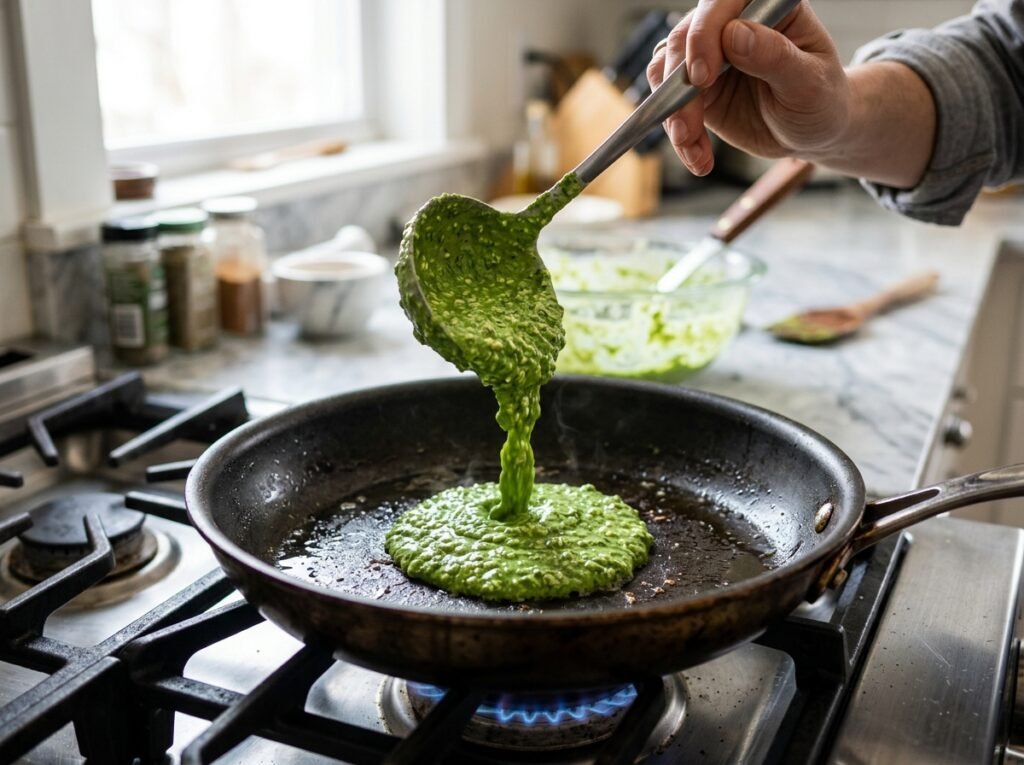
Heat your non-stick skillet over medium-low heat. Lightly grease with oil or cooking spray if your pan isn’t premium non-stick. Pour the batter into the center of the pan. Immediately tilt and swirl the pan to spread the batter into a thin, even circle. Sprinkle with sesame seeds if desired.
- Why it matters: Medium-low heat prevents the bottom from burning before the top sets. Swirling ensures uniform thickness, which is critical for even cooking and flexibility.
- Texture/Aroma Cue: Cook for 2-3 minutes. You will see bubbles form and pop on the surface, and the edges will begin to lift slightly. The aroma will shift from raw egg to a cooked, oaty scent.
- Doneness Check: Gently lift an edge with a spatula. It should be golden brown on the underside and firm enough to flip without tearing. Flip carefully and cook for another 1-2 minutes on the other side.
H3: Cool and Slice
Transfer the cooked wrap to a cutting board. Let it rest for 1-2 minutes. Using a sharp knife, cut a single straight line from the center of the wrap directly to the outer edge.
- Why it matters: Cutting while hot can cause steam to make the wrap soggy. The radial cut is the key to the “viral fold” technique, allowing you to layer four distinct quadrants.
H3: Assemble the Quadrants
Imagine your wrap as a clock face divided into four sections by your cut.
- Bottom Left (6-9 o’clock): Spread a layer of cream cheese or hummus. This acts as the “glue” and adds creaminess.
- Bottom Right (3-6 o’clock): Add fresh lettuce and a slice of tomato. These provide crunch and moisture.
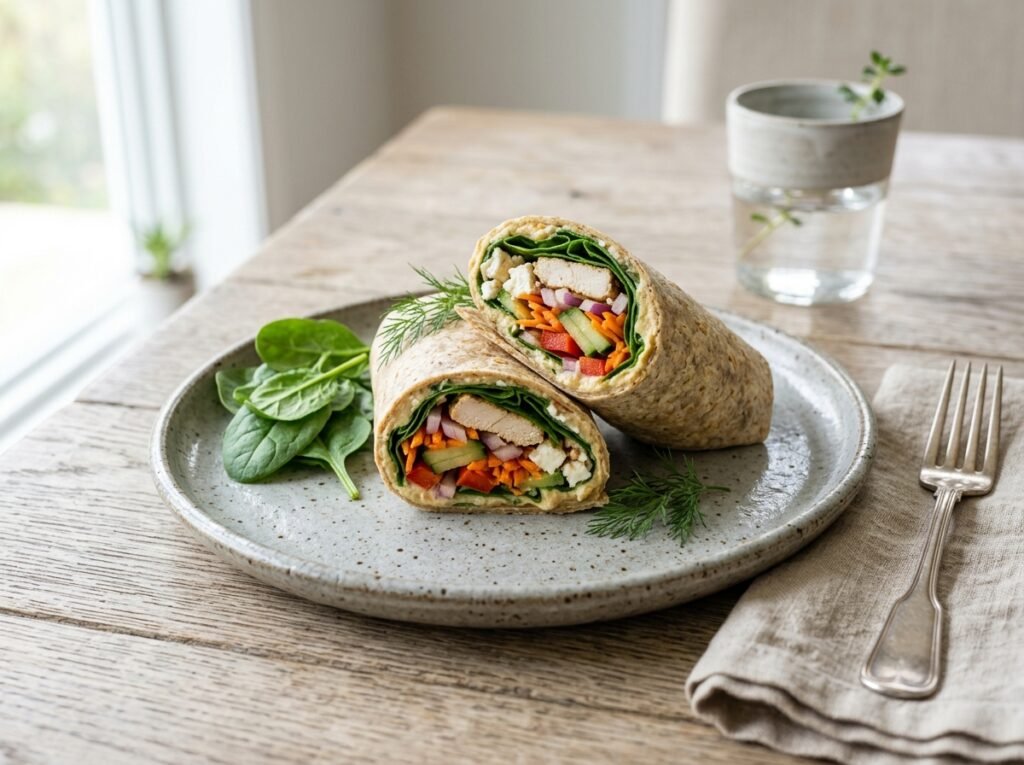
- Top Right (12-3 o’clock): Place sliced grilled chicken, cucumber sticks, and red onion. This is your protein and veggie powerhouse.
- Top Left (9-12 o’clock): Drizzle with hot sauce, sriracha, or balsamic glaze for acid and heat.
H3: The Viral Fold
- Fold the Bottom Left quadrant (cream cheese) up over the Bottom Right (lettuce/tomato).
- Fold that combined section over to the Top Right (chicken/veggies).
- Finally, fold the entire triangle over the Top Left (sauce) quadrant.
- Result: You now have a neat, triangular pocket with layers of flavor in every bite. Press gently to seal.
Expert Tips for the Perfect Green Wrap
- Don’t Overblend the Oats: While you want a smooth batter, blending for too long can heat up the mixture and start “cooking” the eggs prematurely. Pulse if necessary.
- Pan Temperature is Key: If your pan is too hot, the batter will seize instantly and you won’t be able to swirl it thin. If too cool, it will be pale and rubbery. Aim for a gentle sizzle.
- The “Rest” Period: Always let the wrap cool for a minute or two after cooking. Hot wraps are fragile and prone to tearing. As they cool, the starches set slightly, making them more pliable for folding.
- Dry Your Greens: If washing your spinach, ensure it is thoroughly dried before blending. Excess water is the enemy of a cohesive batter and will lead to a soggy wrap.
- Flip with Confidence: Use a wide, thin spatula. Slide it completely under the wrap before lifting. A hesitant flip often leads to tears.
Common Mistakes to Avoid
- Mistake: Batter Too Thick.
- Why: Results in a pancake rather than a wrap. Impossible to fold without breaking.
- Fix: Add liquid (water or milk) one teaspoon at a time until pourable.
- Mistake: Wrapping While Hot.
- Why: Steam softens the structure; fillings melt messily.
- Fix: Patience! Wait 2 minutes.
- Mistake: Overstuffing the Quadrants.
- Why: The wrap becomes too bulky to fold neatly; ingredients spill out.
- Fix: Less is more. Thin layers of filling work best.
- Mistake: Using Instant Oats.
- Why: Can create a gluey, pasty texture instead of a bread-like chew.
- Fix: Stick to Old Fashioned/Rolled oats.
Recipe Variations
This spinach oat wrap is incredibly adaptable. Try these twists:
- Vegan Version: Replace eggs with 2 flax eggs (2 tbsp ground flax + 6 tbsp water, let sit 5 mins). Add 1 tsp baking powder to help it rise slightly.
- Sweet Breakfast Wrap: Omit salt/pepper. Add cinnamon, vanilla extract, and a mashed banana to the batter. Fill with Greek yogurt, berries, and honey.
- Spicy Mexican Style: Add cumin and chili powder to the batter. Fill with black beans, corn, salsa, avocado, and pepper jack cheese.
- Low-Carb/Keto Adaptation: Replace oats with almond flour or coconut flour. Note: Coconut flour absorbs much more liquid, so you may need extra eggs or water.
- High-Protein Boost: Add a scoop of unflavored or vanilla protein powder to the batter. You may need to increase liquid slightly.
- Mediterranean Twist: Add dried oregano and sun-dried tomatoes to the batter. Fill with feta, kalamata olives, roasted peppers, and tzatziki.
What to Serve With This Recipe
Since this wrap is a complete meal, pair it with light sides:
- Side Salads: A simple arugula salad with lemon vinaigrette cuts through the richness of the cream cheese.
- Soups: Tomato basil soup or broccoli cheddar soup makes for a cozy lunch combo.
- Dips: Guacamole, tzatziki, or spicy mayo on the side for dipping the folded edges.
- Drinks: Iced green tea, sparkling water with lime, or a fruit smoothie.
- Snacks: Pickles, olives, or a handful of nuts add extra crunch.
Make Ahead & Meal Prep Tips
This recipe is a meal prep superstar.
- Batch Cooking: You can make 5-6 wraps at once. Stack them with parchment paper in between to prevent sticking.
- Freezing: Wrap individually in plastic wrap and freeze for up to 1 month. Thaw in the fridge overnight before using.
- Pre-Chopped Fillings: Prep your veggies and proteins ahead of time. Store in separate containers so assembly takes less than 2 minutes in the morning.
- Batter Storage: You can store the blended batter in the fridge for up to 24 hours. Give it a good shake/stir before cooking as the oats will settle.
Storage & Reheating Instructions
Storage
- Refrigerator: Store assembled wraps in an airtight container for up to 3 days. Store plain cooked wraps for up to 5 days.
- Freezer: Best stored plain. Assembled wraps with watery veggies (tomato, lettuce) do not freeze well as they become mushy upon thawing.
Reheating
- Skillet (Best Method): Reheat in a dry non-stick pan over medium heat for 1-2 minutes per side. This restores crispness and flexibility.
- Air Fryer: 350°F (175°C) for 2-3 minutes. Great for crisping up the exterior.
- Microwave: 30-45 seconds on high. Warning: This will make the wrap soft and potentially chewy. Best for when you are in a rush.
- Oven: 350°F (175°C) for 5-7 minutes on a baking sheet. Good for reheating multiple wraps at once.
Nutritional Information
Estimates based on 1 wrap with chicken/cream cheese filling:
- Calories: ~450 kcal
- Protein: 32g
- Carbohydrates: 38g
- Fat: 18g
- Fiber: 6g
- Sugar: 3g
- Sodium: 450mg
- Iron: 15% DV
- Vitamin A: 40% DV
Note: Values vary based on specific brands and portion sizes of fillings.
Troubleshooting Guide
| Problem | Cause | Solution |
|---|---|---|
| Wrap Tears When Folding | Batter too thick OR wrap too hot | Add liquid to batter next time; let cool longer before folding. |
| Wrap Is Rubbery/Chewy | Overcooked OR instant oats used | Reduce cook time; switch to rolled oats. |
| Wrap Sticks to Pan | Pan not non-stick OR heat too high | Use better pan; lower heat; add tiny bit of oil. |
| Batter Is Lumpy | Not blended long enough | Blend longer; strain through sieve if desperate. |
| Wrap Tastes Bland | Lack of seasoning | Add salt, garlic powder, or herbs to batter. |
| Fillings Slide Out | Too much sauce/wet ingredients | Pat veggies dry; use thicker spreads like hummus/cream cheese as barrier. |
Frequently Asked Questions
1. Can I make this spinach oat wrap without eggs? Yes, but the texture will change. Use a flax egg or chia egg as a binder. The wrap may be slightly more brittle, so handle with extra care when folding.
2. Does this wrap taste like spinach? Surprisingly, no. The cooking process mellows the spinach flavor significantly. It tastes mostly like a savory oat crepe with a mild earthy undertone. The fillings dominate the flavor profile.
3. Can I use protein powder in the batter? Absolutely! This is a great way to boost protein. Start with half a scoop and adjust liquid accordingly, as protein powder absorbs moisture.
4. Why did my wrap turn brown instead of green? High heat destroys chlorophyll. Cook over medium-low heat to preserve the vibrant green color. Also, ensure your spinach was fresh and not oxidized before blending.
5. Is this wrap really gluten-free? Only if you use certified gluten-free oats. Regular oats are often cross-contaminated with wheat during processing. Always check the label if you have celiac disease.
6. Can I bake these instead of frying? Yes, but the texture will be more like a flatbread cookie. Bake at 375°F (190°C) on parchment paper for 10-12 minutes. They will be less pliable for folding but great for rolling.
7. How do I prevent the wrap from getting soggy? Avoid overly wet fillings. Pat tomatoes and cucumbers dry. Use cream cheese or hummus as a moisture barrier between the wrap and wet veggies. Assemble just before eating if possible.
8. Can I freeze the assembled wraps? It is not recommended. The lettuce and tomato will release water upon thawing, making the wrap soggy. Freeze plain wraps and assemble fresh.
Final Thoughts
The 3-ingredient spinach wrap proves that healthy eating does not have to be complicated or boring. By mastering this simple technique, you unlock a world of nutritious, customizable meals that fit seamlessly into a busy lifestyle. Whether you are a student looking for budget-friendly lunches, a parent trying to sneak veggies into picky eaters, or a fitness enthusiast needing high-protein fuel, this recipe has you covered.
We encourage you to experiment with different fillings and share your creations in the comments below. Did you try the sweet version? What was your favorite protein pairing? Your feedback helps our community discover new ways to enjoy this versatile wrap. Don’t forget to rate the recipe if you give it a try—we love hearing about your kitchen successes!