
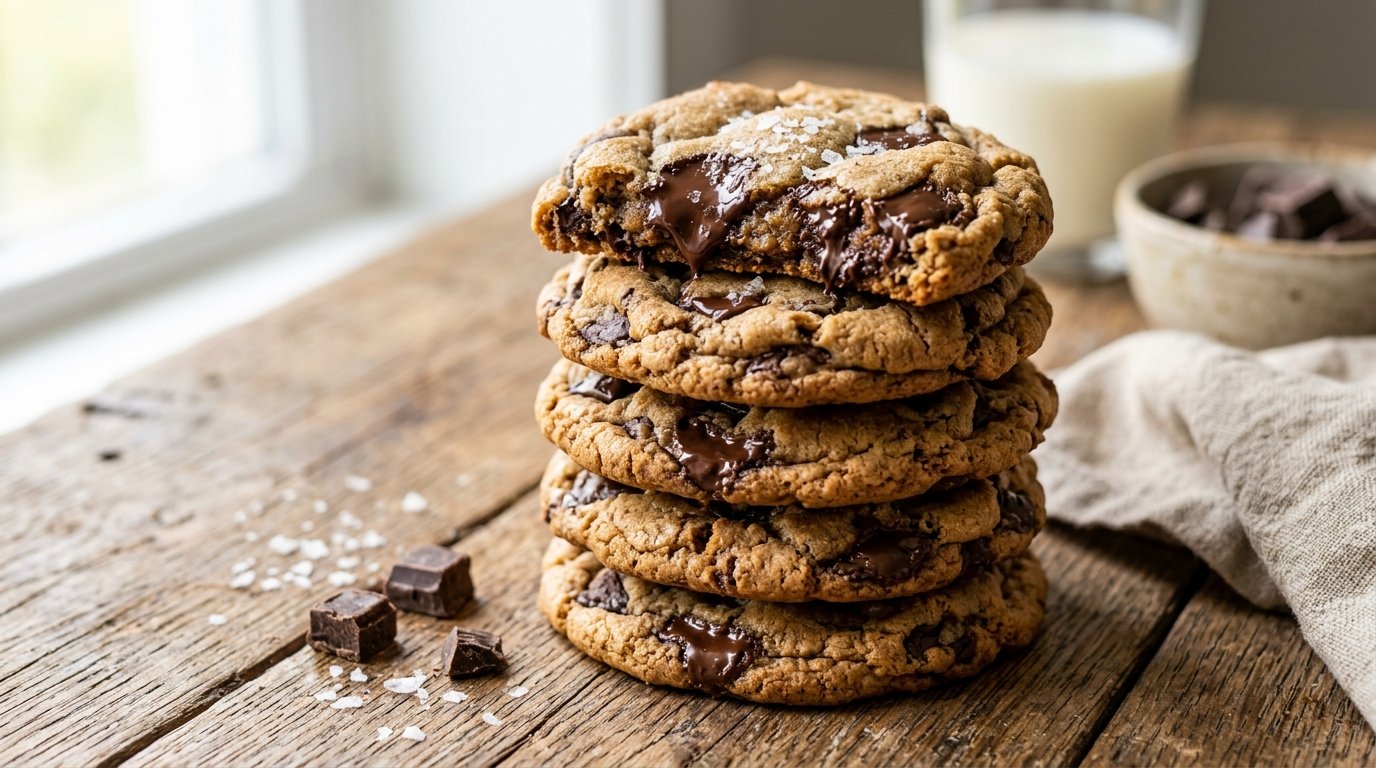
Quick Recipe Summary
| Feature | Details |
|---|---|
| Prep Time | 15 Minutes |
| Cook Time | 10–12 Minutes |
| Total Time | 27 Minutes |
| Servings | 12 Large Cookies |
| Cuisine | American / Bakery Style |
| Course | Dessert / Snack |
| Difficulty | Easy / Beginner Friendly |
| Calories | ~380 kcal per cookie |
Table of Contents
- Introduction
- Why This Recipe Works
- Why You’ll Love This Recipe
- Ingredient Notes
- Kitchen Equipment
- Step-by-Step Instructions
- Expert Tips for Perfect Texture
- Common Mistakes to Avoid
- Recipe Variations
- What to Serve With These Cookies
- Make Ahead & Storage Instructions
- Reheating Guide
- Nutritional Information
- Troubleshooting Guide
- Frequently Asked Questions
- Final Thoughts
Introduction
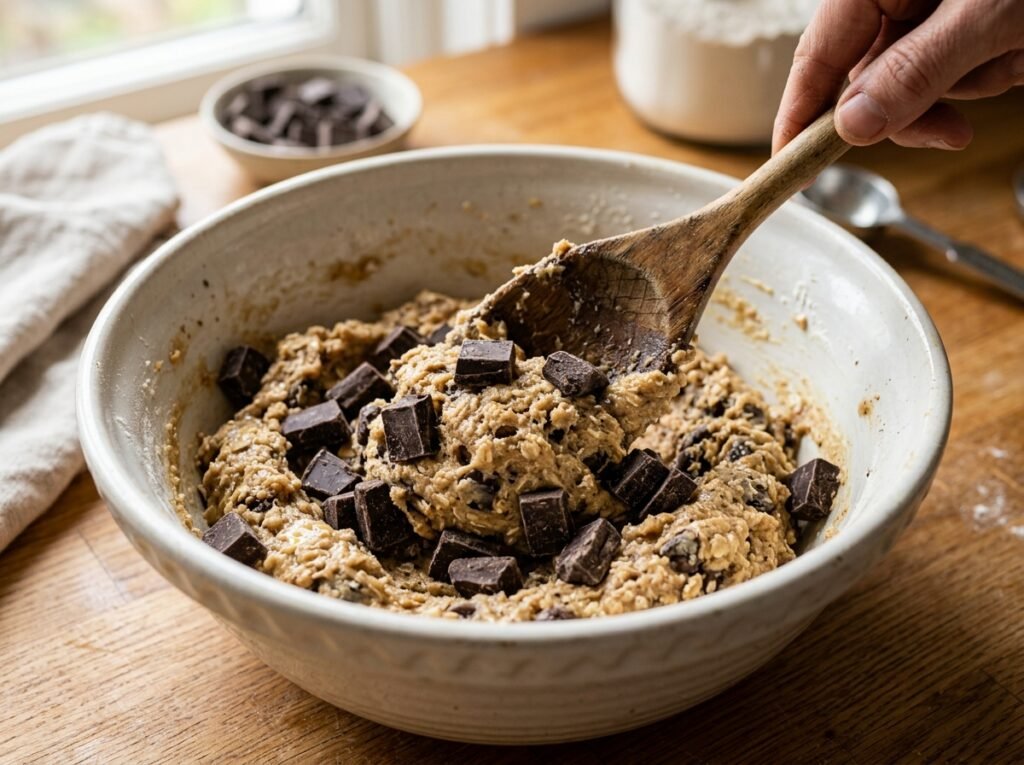
There is a specific moment in baking that defines success: pulling a tray of golden, puffy cookies from the oven, only to break one open and watch ribbons of molten chocolate stretch between the halves. If you have been searching for the definitive chewy chocolate chunk cookies recipe that rivals your favorite local bakery, look no further. This isn’t just another sugar cookie; it is a masterclass in texture.
Unlike standard recipes that rely solely on chips, this method uses chopped chocolate bars to create uneven pools of cocoa that melt differently than uniform discs. The result is a cookie with crisp, caramelized edges and a soft, fudgy center that stays chewy for days. Whether you are a seasoned baker or stepping into the kitchen for the first time, this guide will walk you through the science and technique required to achieve that elusive “perfect bite” every single time. Let’s get baking.
Why This Recipe Works
The secret to these chewy chocolate chunk cookies lies in the ratio of fats and sugars, as well as the physical form of the chocolate. By using a combination of melted butter (or warm butter) and brown sugar, we introduce more moisture and acidity into the dough. The molasses in the brown sugar is hygroscopic, meaning it attracts and holds onto water, ensuring the interior remains soft long after baking.
Furthermore, chopping a high-quality chocolate bar rather than using pre-made chips creates varying sizes of chocolate pieces. Small shards melt completely into the dough, flavoring the crumb itself, while larger chunks retain their shape, providing those dramatic, gooey pockets visible when you break the cookie apart. This structural difference is what elevates a homemade treat to professional status.
Why You’ll Love This Recipe
- Unmatched Chewiness: The texture is perfectly balanced—crisp on the outside, dense and fudgy on the inside.
- Superior Chocolate Distribution: Chopped chocolate ensures every bite has a generous amount of cocoa, not just empty dough.
- Simple One-Bowl Method: Minimal cleanup means less stress and more time enjoying the process.
- Bakery-Quality Results: Achieve thick, tall cookies without needing a mixer or complex chilling times.
- Customizable Intensity: Control the sweetness and bitterness by choosing your preferred percentage of dark or milk chocolate.
Ingredient Notes
Understanding your ingredients is the first step toward mastering chewy chocolate chunk cookies. Here is what you need and why it matters.
Unsalted Butter
- Purpose: Provides richness, tenderness, and structure. Using unsalted allows you to control the sodium level precisely.
- Substitutions: Salted butter can be used, but reduce added salt in the recipe by ¼ teaspoon. Margarine is not recommended as it contains water and vegetable oils that alter the spread and texture.
- Buying Tip: Look for butter with at least 82% fat content (European style) for superior flavor and browning.
- Storage: Keep refrigerated until ready to use. For this recipe, it needs to be melted or very soft.
Brown Sugar (Light or Dark)
- Purpose: The primary source of chewiness. The molasses adds moisture, acidity (which reacts with leaveners), and a deep caramel flavor.
- Substitutions: Dark brown sugar yields a deeper molasses flavor and slightly chewier texture. Light brown sugar offers a milder taste. White sugar alone will make the cookie crispier and paler.
- Buying Tip: Ensure it is fresh and clump-free. Old brown sugar hardens and won’t incorporate smoothly.
- Storage: Store in an airtight container with a slice of bread or terra cotta disk to maintain moisture.
All-Purpose Flour
- Purpose: Provides the gluten structure necessary to hold the cookie together.
- Substitutions: Bread flour can be used for an even chewier, denser texture due to higher protein content. Cake flour will make them too tender and cake-like.
- Buying Tip: Standard unbleached all-purpose flour works best. Bleached flour can sometimes result in a gummier texture.
- Storage: Keep in a cool, dry place. Sift before measuring if it has compacted.
Eggs
- Purpose: Acts as a binder and adds richness. The yolk contributes fat and emulsifiers for a tender crumb.
- Substitutions: Flax eggs or commercial egg replacers work for vegan versions, though texture may vary slightly.
- Buying Tip: Use large, room-temperature eggs for better emulsion with the butter and sugar.
- Storage: Refrigerate until use. Bring to room temperature 30 minutes before baking.
Baking Soda
- Purpose: Leavening agent that helps the cookie rise and spread. It also promotes browning via the Maillard reaction.
- Substitutions: Do not substitute with baking powder unless adjusting other acidic ingredients; they react differently.
- Buying Tip: Check expiration dates. Old baking soda loses potency, leading to flat, pale cookies.
- Storage: Keep in a sealed container away from humidity.
Salt
- Purpose: Enhances flavor and balances sweetness. Without salt, chocolate tastes flat.
- Substitutions: Kosher salt is preferred for its clean taste. Table salt is finer, so use half the volume.
- Buying Tip: Fine sea salt or kosher salt integrates best into dough.
- Storage: Indefinite shelf life in a dry environment.
Chocolate Bar (Dark or Semi-Sweet)
- Purpose: The star ingredient. Chopped bars create irregular melting patterns superior to chips.
- Substitutions: High-quality chocolate chips can be used in a pinch, but chop them roughly to mimic the effect. Milk chocolate makes a sweeter, softer cookie; bittersweet (60-70%) provides complexity.
- Buying Tip: Choose bars labeled “couverture” or with high cocoa butter content for the best melt. Avoid “compound” chocolate which uses vegetable oil instead of cocoa butter.
- Storage: Cool, dark place. Do not refrigerate as condensation can cause blooming (white streaks).
Kitchen Equipment
Having the right tools ensures consistency and ease.
- Large Glass Mixing Bowl: Essential for seeing the color and texture changes as you mix. Glass retains temperature well.
- Whisk: Crucial for breaking up brown sugar lumps and aerating the egg mixture initially.
- Wooden Spoon or Spatula: Best for folding in flour and chocolate without overworking the gluten. Metal spoons can scrape the bowl too harshly.
- Ice Cream Scoop (Cookie Scoop): Guarantees uniform size for even baking. A #20 or #24 scoop is ideal for bakery-style cookies.
- Rimmed Baking Sheet: Prevents overflow. Light-colored aluminum sheets promote even browning; dark sheets can burn bottoms.
- Parchment Paper: Non-stick surface that prevents spreading issues and aids in easy removal. Silicone mats are a reusable alternative.
- Sharp Chef’s Knife: For chopping the chocolate bar into rustic, varied chunks.
Preparation Information
- Prep Time: 15 Minutes
- Cook Time: 10–12 Minutes
- Total Time: 27 Minutes
- Servings: 12 Large Cookies
Step-by-Step Instructions
Follow these detailed steps to ensure your chewy chocolate chunk cookies turn out perfectly every time. Pay attention to the visual and textural cues described.
Combine Wet Ingredients
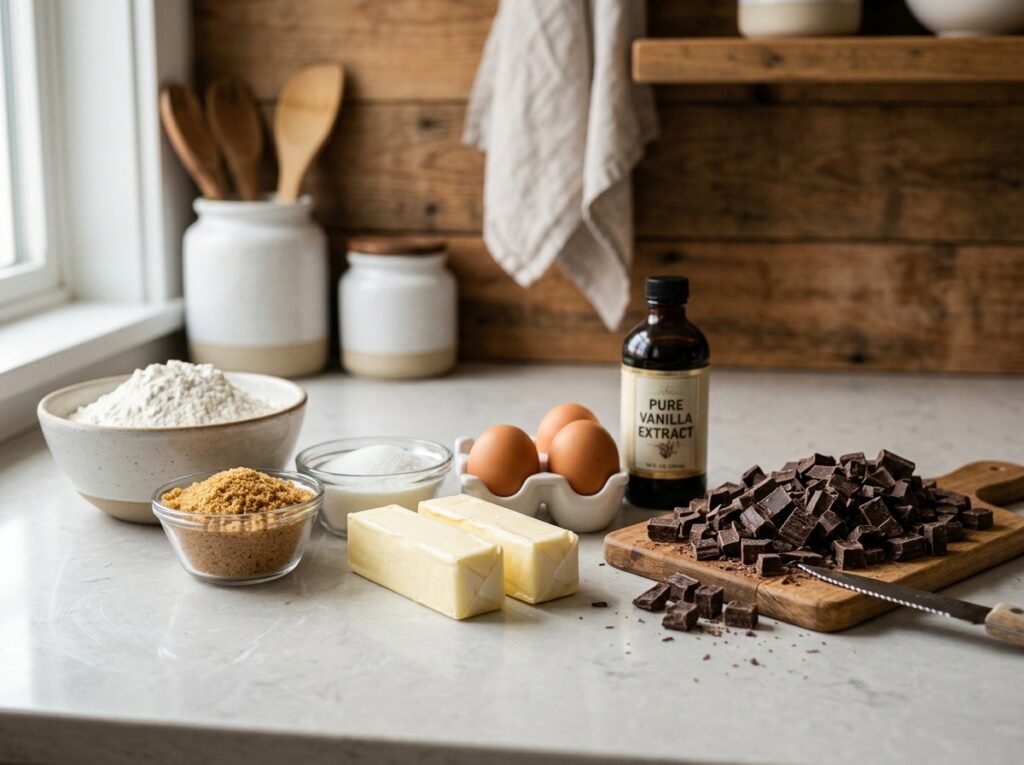
Start by pouring your melted (but not hot) butter into a large glass mixing bowl. Add the brown sugar and whisk vigorously. You aren’t just mixing; you are dissolving the sugar crystals into the fat. This step is critical for chewiness. Whisk until the mixture looks glossy and smooth, with no grainy texture remaining. Next, add the egg and vanilla extract (if using). Whisk again until fully emulsified. The mixture should lighten in color slightly and appear homogenous. If the butter was too hot, the egg might scramble; if it’s too cold, the sugar won’t dissolve. Aim for warm, liquid gold.
Incorporate Dry Ingredients
Switch to a wooden spoon or sturdy spatula. Add the all-purpose flour, baking soda, and salt directly to the wet mixture. Stir gently but thoroughly. Stop mixing the moment the white streaks of flour disappear. Overmixing at this stage develops gluten, which leads to tough, bread-like cookies rather than tender ones. The dough should look thick, cohesive, and slightly sticky. It should pull away from the sides of the bowl but still adhere to your spoon. This hydration balance is key to the final texture.
Add the Chocolate
Pour your chopped chocolate chunks into the dough. Fold them in using the spatula, distributing them evenly throughout. Don’t be afraid to press some chunks against the side of the bowl to ensure they are embedded. The goal is to have chocolate in every potential cross-section of the cookie. Once incorporated, the dough should look marbled with dark brown flecks and larger distinct chunks. If the dough feels too soft to handle, a brief 15-minute chill in the fridge can firm up the butter, making scooping easier, though it is not strictly necessary for this recipe.
Scoop and Bake
Preheat your oven to 350°F (175°C). Line your baking sheet with parchment paper. Using your ice cream scoop, portion the dough into uniform balls. Place them on the prepared sheet, spacing them at least 2 inches apart to allow for spread. Bake for 10–12 minutes. Watch closely at the 10-minute mark. The edges should be set and golden brown, but the centers must still look soft and slightly underbaked. They will puff up during baking and settle as they cool. Removing them while the center is soft is the secret to maintaining chewiness. Let them rest on the hot pan for 5 minutes before transferring to a wire rack. This residual heat finishes the cooking gently without drying them out.
Expert Tips for Perfect Texture
- Weigh Your Flour: Cup measurements can vary by up to 20%. For consistent chewy chocolate chunk cookies, use a kitchen scale (approx. 120g per cup). Too much flour = dry/cakey; too little = greasy/spread.
- Melt, Don’t Cream: Melting the butter hydrates the flour proteins differently than creaming solid butter, resulting in a denser, chewier crumb. Ensure it’s cooled slightly so it doesn’t cook the egg.
- Underbake Intentionally: Trust the process. If they look done in the oven, they will be overdone on the plate. The carryover cooking on the hot tray is part of the recipe.
- Chop Your Own Chocolate: Pre-chopped chocolate often has anti-caking agents that prevent smooth melting. Buying a bar and chopping it yourself ensures pure cocoa butter melt and superior mouthfeel.
- Bang the Pan: Upon removing from the oven, lift the tray 3 inches and drop it flat onto the counter. This deflates air pockets, creating a denser, fudgier texture and wrinkled top aesthetic.
Common Mistakes to Avoid
- Using Hot Butter: If butter is sizzling hot, it will cook the egg upon contact, creating scrambled bits in your dough. Cool melted butter to warm touch (approx. 100°F/38°C) before adding sugar.
- Overmixing After Adding Flour: Vigorous stirring activates gluten. Mix only until combined. Lumps are okay; toughness is not.
- Skipping Parchment Paper: Greasing pans can cause excessive spreading and burnt bottoms. Parchment provides insulation and non-stick reliability.
- Measuring Brown Sugar Incorrectly: Pack brown sugar firmly into the measuring cup. Loose-packed sugar lacks the necessary molasses volume for chewiness.
- Cooling on Wire Rack Immediately: Transferring hot cookies instantly stops the setting process and can cause cracking. The 5-minute rest on the pan is non-negotiable for structural integrity.
Recipe Variations
Adapt these chewy chocolate chunk cookies to suit different preferences and dietary needs.
- Double Chocolate: Replace ¼ cup of flour with unsweetened cocoa powder for a darker, richer base.
- Sea Salt Finish: Sprinkle flaky Maldon salt on tops immediately after baking. The contrast enhances the chocolate’s depth.
- Nutty Crunch: Fold in ½ cup toasted walnuts or pecans with the chocolate. Toasting nuts beforehand prevents sogginess.
- Espresso Mocha: Dissolve 1 tsp instant espresso powder in the melted butter. Coffee amplifies chocolate flavor without tasting like coffee.
- Vegan Version: Substitute butter with high-fat vegan butter sticks (not tub margarine) and egg with ¼ cup aquafaba or flax egg. Chill dough longer as vegan fats behave differently.
- Gluten-Free: Use a 1:1 GF baking blend containing xanthan gum. Add 1 extra tbsp flour if dough seems too wet, as GF blends absorb moisture variably.
- Stuffed Cookies: Encase a square of frozen ganache or peanut butter cup inside the dough ball before baking for a surprise center.
- Brown Butter Upgrade: Brown the butter until nutty amber before melting sugar. Adds complex toffee notes that pair beautifully with dark chocolate.
What to Serve With These Cookies
Elevate the experience by pairing your chewy chocolate chunk cookies with complementary flavors.
- Classic Milk: Cold whole milk cuts through the richness and cleanses the palate. Oat milk or almond milk work well for dairy-free options.
- Vanilla Bean Ice Cream: Create an à la mode experience. The temperature contrast between warm cookie and cold cream is divine.
- Strong Black Coffee: Espresso or dark roast balances the sweetness and highlights bitter chocolate notes.
- Berry Compote: Tart raspberry or strawberry sauce adds brightness and acidity to cut through the dense fudge.
- Salted Caramel Sauce: Drizzle over warm cookies for an indulgent dessert course.
- Hot Chocolate: For the ultimate chocolate lover, serve alongside spiced Mexican hot chocolate.
Make Ahead & Storage Instructions
Proper storage preserves the signature chew of these chewy chocolate chunk cookies.
Refrigerator Storage
Store cooled cookies in an airtight container at room temperature for up to 5 days. Place a slice of white bread in the container; the cookies will absorb moisture from the bread, staying soft while the bread hardens. Replace bread every 2 days. For longer freshness, refrigerate in sealed container for up to 1 week. Bring to room temp before serving.
Freezer Storage (Dough)
Portion dough into balls and freeze on parchment-lined tray until solid (2 hours). Transfer to freezer bag. Freeze up to 3 months. Bake frozen, adding 2-3 minutes to bake time. No thawing needed.
Freezer Storage (Baked)
Cool completely. Wrap individually in plastic wrap, then place in freezer bag. Freeze up to 3 months. Thaw at room temp or reheat briefly.
Reheating Guide
Restore that fresh-baked magic to stored chewy chocolate chunk cookies.
- Oven: Preheat to 300°F (150°C). Place cookies on parchment-lined sheet for 5-7 minutes. Restores crisp edges and soft center best.
- Air Fryer: 300°F (150°C) for 3-4 minutes. Quick and effective, but watch closely to prevent burning.
- Microwave: 10-15 seconds on medium power. Softens quickly but can make edges rubbery if overdone. Place damp paper towel underneath to retain moisture.
- Stovetop: Not recommended. Direct heat burns bottoms before warming centers.
Nutritional Information
Approximate values per cookie (based on 12 servings):
- Calories: 380 kcal
- Protein: 4g
- Carbohydrates: 48g
- Fat: 20g
- Fiber: 2g
- Sugar: 32g
- Sodium: 220mg
Note: Values vary based on specific brands and exact measurements. Always calculate based on your actual ingredients for precision.
Troubleshooting Guide
Solve common issues with your chewy chocolate chunk cookies:
- Cookies Spread Too Flat: Butter was too hot or dough wasn’t chilled enough. Next time, cool butter more or chill dough 30 mins. Could also be old baking soda.
- Cookies Are Cakey/Dry: Too much flour or overmixed. Weigh flour next time. Mix only until combined. Reduce bake time by 1-2 minutes.
- Bottoms Burnt: Dark pan absorbs too much heat. Switch to light aluminum or double-pan. Lower rack position. Reduce oven temp by 25°F.
- Chocolate Seized/Bloomy: Chocolate overheated during melting or stored improperly. Chop finely and fold in last. Store bars in cool, dry place.
- Dough Too Sticky: Humidity or inaccurate flour measure. Chill 15 mins. Add 1 tbsp flour incrementally if unmanageable. Wet hands when scooping.
- Lack of Chew: Used white sugar only or overbaked. Ensure brown sugar ratio is high. Pull from oven when centers look underdone.
Frequently Asked Questions
Can I use chocolate chips instead of chopped bars? Yes, but texture differs. Chips hold shape better and don’t create molten pools. For closer approximation, chop chips roughly or mix chips with chopped bar.
Why do my cookies crack on top? Cracking indicates proper structure and caramelization. It’s desirable! Excessive cracking may mean oven too hot or dough too dry. Bang pan after baking to minimize large fissures.
Do I need to chill the dough? Not mandatory for this melted-butter recipe, but chilling 30+ minutes deepens flavor and controls spread. If dough is very soft, brief chill helps handling.
Can I reduce the sugar? Sugar provides structure and moisture, not just sweetness. Reducing >25% alters texture significantly, making cookies drier and less chewy. Try reducing by 2 tbsp max.
Why use melted butter vs. softened? Melted butter creates denser, chewier cookies by hydrating flour differently. Softened/creamed butter incorporates air, yielding cakier, lighter textures. Choose based on desired outcome.
How do I know when they’re done? Edges golden/set, centers soft/puffy. They’ll firm as they cool. Internal temp should reach 190°F (88°C) for food safety without overbaking.
Can I make these gluten-free? Yes, use certified GF 1:1 baking blend. May need slight liquid adjustment. Chill dough longer as GF flours absorb slower. Texture will be slightly different but still delicious.
Why did my cookies turn out greasy? Butter too hot when mixed, or too much butter relative to flour. Ensure butter is warm, not hot. Measure accurately. Chill dough if greasy feel persists.
Final Thoughts
Mastering chewy chocolate chunk cookies is about understanding the interplay of ingredients and respecting the process. This recipe delivers that coveted bakery texture through thoughtful technique, not complicated steps. Whether you’re baking for family, friends, or simply treating yourself, these cookies promise satisfaction in every bite. Remember, the best cookies come from attention to detail and a willingness to learn from each batch. Now, grab your whisk, chop that chocolate, and create something truly special. Don’t forget to share your results and leave a comment below—we’d love to hear how your cookies turned out!