
Quick Recipe Summary
| Prep Time | 20 Minutes |
|---|---|
| Cook Time | 15 Minutes |
| Total Time | 35 Minutes |
| Servings | 4 (8-10 pieces) |
| Cuisine | American / Fast-Casual Fusion |
| Course | Appetizer / Snack / Light Dinner |
| Difficulty | Easy |
| Calories | ~320 kcal per serving |
Table of Contents
- Introduction
- Why This Recipe Works
- Why You’ll Love This Recipe
- Ingredient Notes
- Kitchen Equipment
- Step-by-Step Instructions
- Expert Tips for Maximum Crispness & Flavor
- Common Mistakes to Avoid
- Recipe Variations
- What to Serve With This Recipe
- Make Ahead & Meal Prep Tips
- Storage & Reheating Instructions
- Nutritional Information
- Troubleshooting Guide
- Frequently Asked Questions
- Final Thoughts
Introduction
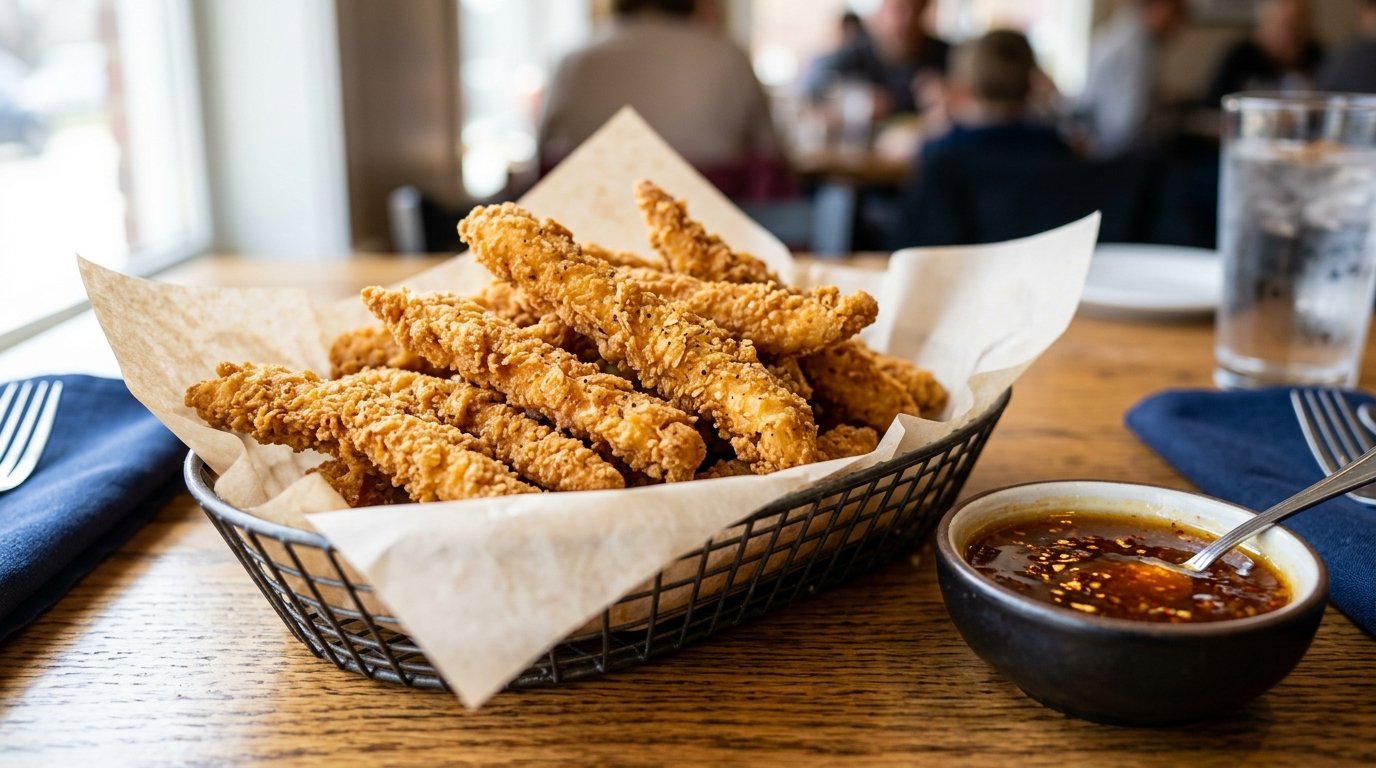
There is a specific kind of culinary satisfaction that comes from biting into a perfectly fried chicken fry—where the first crunch gives way to tender, juicy meat, all while a spicy-sweet sauce clings to every ridge. These Crispy Chicken Fries with Spicy Honey Dipping Sauce are not just a snack; they are a textural and flavor symphony that elevates the humble chicken tender into something truly special. Unlike generic frozen fries, this recipe focuses on technique: a precise breading sequence and controlled oil temperature ensure a shatteringly crisp exterior that stays crunchy even after dipping.
The magic lies in the balance of the dipping sauce. A blend of creamy mayonnaise, tangy ketchup, floral honey, and a touch of heat creates a condiment that complements rather than overwhelms the chicken. It’s the perfect marriage of sweet, savory, and spicy—a combination that keeps you reaching for another piece. Whether you’re hosting a game day party, looking for a kid-friendly dinner option, or simply craving something indulgent yet satisfying, this recipe delivers restaurant-quality results right at home. It proves that exceptional finger food doesn’t require complex ingredients—just attention to detail and respect for the fundamentals of frying.
Why This Recipe Works
The success of these Crispy Chicken Fries with Spicy Honey Dipping Sauce hinges on three key principles: moisture control, starch gelatinization, and thermal management. First, the chicken strips are seasoned and then coated in a dry flour layer, which absorbs any surface moisture and provides a rough texture for the egg wash to grip. This step is critical; without it, the breading would slide off during frying, resulting in greasy, unevenly coated pieces.
Second, the double-dredge method—flour, egg, then breadcrumbs—creates a multi-layered crust. The egg acts as a binder, while the breadcrumbs, especially when toasted in the oven beforehand, provide the signature golden-brown color, crunch, and flavor. The addition of cornstarch to the flour mixture is a professional trick that inhibits gluten formation, ensuring the crust remains light and crisp instead of tough and chewy.
Finally, maintaining the oil at a consistent 350°F (175°C) is non-negotiable. Too cool, and the chicken absorbs excess oil, becoming soggy and greasy; too hot, and the exterior burns before the interior cooks through. The brief frying time (3-4 minutes per batch) ensures the chicken reaches a safe internal temperature of 165°F (74°C) while preserving its juiciness. The result is a fry that is crispy on the outside, tender on the inside, and perfectly balanced by the vibrant, spicy-honey sauce.
Why You’ll Love This Recipe
- Unbeatable Texture: Achieves a shatteringly crisp exterior that holds up to dipping without turning soggy—a common flaw in homemade versions.
- Flavor Harmony: The spicy honey dipping sauce balances sweet, tangy, and fiery notes, enhancing the chicken without overpowering it.
- Quick & Efficient: From prep to plate in under 35 minutes, making it ideal for weeknight dinners or last-minute entertaining.
- Crowd-Pleasing Appeal: Universally loved by adults and children alike; the familiar shape and taste make it an instant hit at parties.
- Versatile Serving Options: Perfect as an appetizer, main course with sides, or even a fun lunch. Easily scaled up for larger gatherings.
- Customizable Heat Level: Adjust the spice level in the sauce to suit your preference, from mild to fiery.
- Budget-Friendly Luxury: Uses affordable chicken tenders to create a dish that feels like a treat, without the restaurant price tag.
Ingredient Notes
Chicken Tenders (or Breast Strips)
- Purpose: Primary protein. Tenders are naturally uniform in size, ensuring even cooking and consistent fry length.
- Substitutions: Boneless, skinless chicken breast cut into 1-inch strips. Thighs work but are fattier/more prone to shrinking. Avoid pre-marinated tenders (salt/sugar interfere with breading).
- Buying Tips: Look for plump, pink tenders with no gray spots or excessive liquid in packaging. Smell should be clean/meaty, not sour. Fresh > frozen for best texture, but frozen works if thawed properly.
- Storage Tips: Refrigerate and use within 2 days of purchase. Freeze in portioned bags up to 3 months. Thaw overnight in fridge before cooking.
All-Purpose Flour & Cornstarch
- Purpose: Flour provides structure and initial adhesion; cornstarch creates a lighter, crispier crust by inhibiting gluten development.
- Substitutions: Rice flour (gluten-free, crispier), potato starch (similar effect), or tapioca starch. Avoid cake flour (too low protein) or bread flour (too high protein = chewy crust).
- Buying Tips: Check for freshness; stale flour can impart off-flavors. Store in airtight container away from heat/light. Cornstarch lasts indefinitely.
- Storage Tips: Keep in cool, dark place. Discard if lumpy or musty-smelling. Sift together before use for even distribution.
Eggs & Buttermilk (or Milk)
- Purpose: Egg wash binds the breading layers. Buttermilk adds acidity, tenderizing the chicken and enhancing browning.
- Substitutions: Plain milk (milder), yogurt thinned with water (tangier), or aquafaba (vegan binder). Buttermilk preferred; its acidity improves texture/flavor.
- Buying Tips: Fresh eggs essential for strong protein network. Buttermilk should smell pleasantly sour, not rancid. Shake carton well before measuring.
- Storage Tips: Refrigerate eggs/buttermilk. Use eggs within 3-5 weeks of purchase. Buttermilk lasts 1-2 weeks opened. Discard if separated/smells off.
Panko Breadcrumbs (Toasted)
- Purpose: Provides the signature light, airy, and extra-crispy texture. Toasting enhances flavor and removes moisture.
- Substitutions: Regular breadcrumbs (denser/crustier), crushed cornflakes (sweet/crunchy), or crushed pork rinds (low-carb/keto). Panko is ideal for classic texture.
- Buying Tips: Choose plain panko for maximum control over seasoning. Flavored varieties can clash with sauce. Check for freshness; stale crumbs taste cardboard-like.
- Storage Tips: Store in airtight container. Freeze for long-term storage. Toast before use for best results.
Spicy Honey Dipping Sauce Ingredients (Mayo, Ketchup, Honey, Hot Sauce)
- Purpose: Creamy base, tangy sweetness, and controlled heat. Creates a balanced condiment that complements the fried chicken.
- Substitutions: Vegan mayo + agave syrup + sriracha for vegan version. Greek yogurt + tomato paste + maple syrup for lighter option. Mustard for extra tang.
- Buying Tips: Full-fat mayo for best emulsion/stability. Raw honey for floral notes. Hot sauce quality matters; avoid overly vinegary brands. Taste before mixing.
- Storage Tips: Refrigerate sauce up to 1 week in airtight container. Flavors meld and improve over 24 hours. Discard if separation or off-smell occurs.
Kitchen Equipment
- Deep Fryer or Heavy-Bottomed Pot/Dutch Oven: Essential for maintaining stable oil temperature and accommodating multiple fries. Cast iron retains heat best; stainless steel responds quickly. Avoid thin aluminum pots that cause dangerous temp swings.
- Fry Thermometer: Non-negotiable for safety and quality. Visual cues are unreliable. Digital probe gives instant reading; dial thermometers require calibration check. Target 350°F (175°C) consistently.
- Three Shallow Dredging Stations: Wide bowls or pie plates for flour, egg wash, and breadcrumbs. Prevents cross-contamination and ensures even coating. Paper plates work in a pinch.
- Spider Strainer or Slotted Spoon: For safe removal. Fine mesh prevents small crumbs from falling back. Long handle keeps hands away from splatter.
- Wire Cooling Rack: Superior to paper towels. Allows air circulation underneath, preventing steam buildup. Place over baking sheet. Critical for preserving crispness.
- Sharp Chef’s Knife & Cutting Board: For cutting chicken uniformly. Dull knife slips and tears meat. Stable board prevents accidents.
- Mixing Bowls & Whisk: For sauce and seasoning. Glass/ceramic preferred for easy cleaning/non-reactive surface.
Step-by-Step Instructions
H3: Step 1 – Season & Prep Chicken
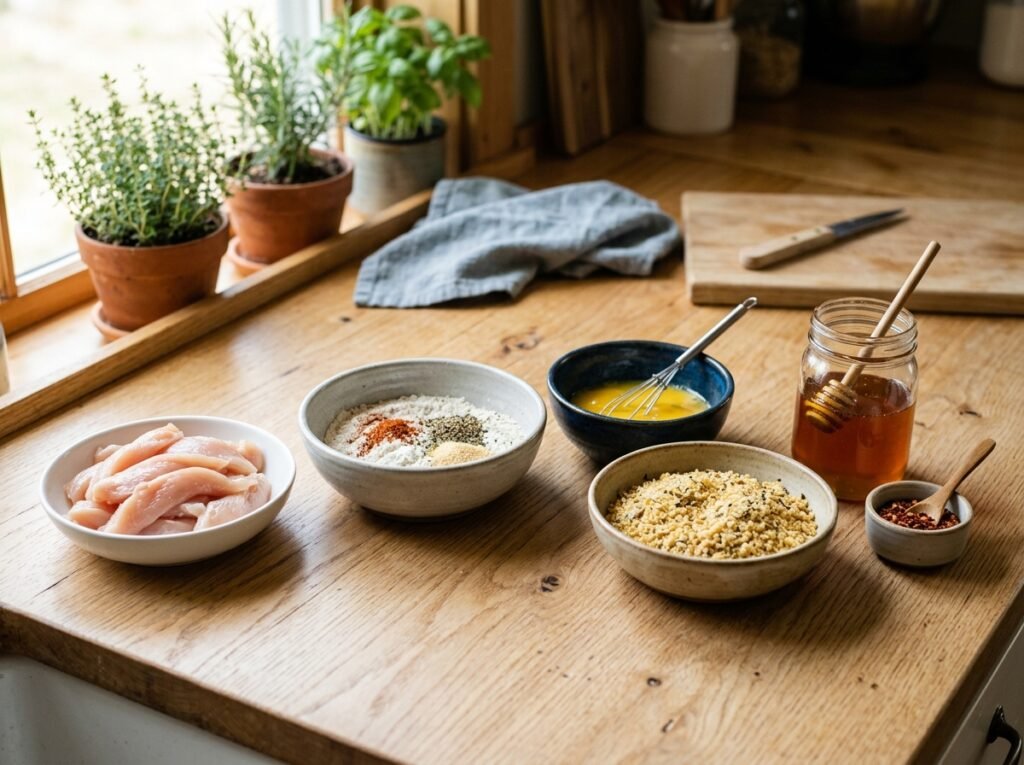
Cut chicken tenders into uniform 1-inch wide strips (if not pre-cut). In bowl, toss with salt, pepper, paprika, garlic powder, and onion powder. Let sit 10 minutes at room temperature. Pat completely dry with paper towels before breading. Moisture is enemy #1 of crispness.
- Why this matters: Uniform sizing ensures even cooking. Seasoning penetrates meat during rest. Drying prevents steam barrier that causes breading to slip off. Room temp promotes even cooking; cold chicken shocks oil, dropping temp dangerously.
- Visual Cue: Strips plump, pink, no gray spots. Seasoning adheres evenly; no clumps. Surface matte-dry, not glossy/wet.
- Texture Cue: Flesh firm, springs back when pressed. Not slimy or mushy.
- Aroma Cue: Clean meat scent enhanced by spices. No ammonia or sour notes.
- Common Mistake: Skipping drying step. Results in soggy breading and violent splattering. Fix: Pat bone-dry. Air-dry 5 mins if possible.
- Professional Tip: Chill seasoned strips 15 mins before breading. Firms meat, improves breading adhesion. Cold chicken hits hot oil better.
H3: Step 2 – Set Up Breading Station & Coat
In three shallow dishes, arrange: (1) 1 cup flour + 2 tbsp cornstarch + 1 tsp salt/pepper, whisked; (2) 2 eggs + ¼ cup buttermilk, beaten smooth; (3) 1 cup panko breadcrumbs + 1 tbsp grated Parmesan (optional). Dredge each strip: flour → egg wash → breadcrumbs. Press gently to adhere. Place on wire rack. Repeat for all strips.
- Why this matters: Cornstarch inhibits gluten = lighter crust. Buttermilk tenderizes and aids browning. Pressing ensures adhesion; shaking off excess prevents gummy coating. Wire rack prevents sogginess.
- Visual Cue: Coating uniform, no bare spots. Breadcrumbs adhere firmly. Strips look dry, not wet/glossy.
- Texture Cue: Coating feels dry and powdery. Not sticky or damp. Adheres when touched lightly.
- Aroma Cue: Mild eggy/spiced scent. No raw flour smell.
- Common Mistake: Overloading stations or using wet hands. Causes clumping and uneven coating. Fix: Use one hand for dry (flour/crumbs), one for wet (egg). Change towels if wet.
- Professional Tip: Toast panko in oven 5 mins at 350°F before breading. Deepens flavor, removes moisture, enhances crispness. Game-changer.
H3: Step 3 – Fry to Golden Perfection
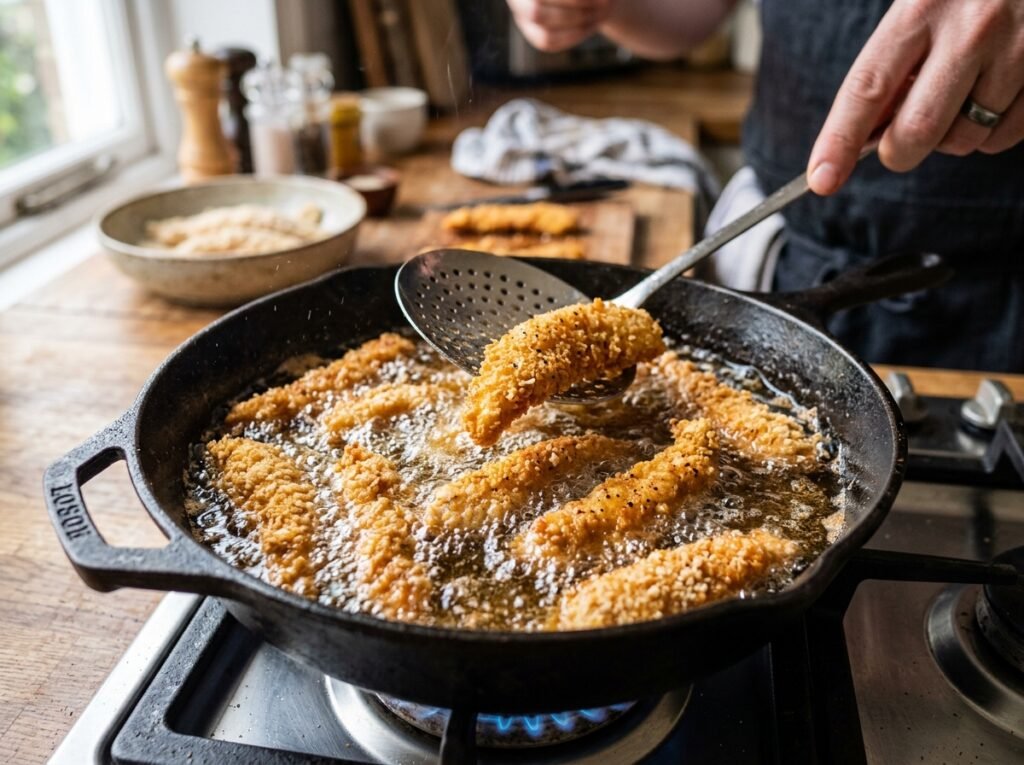
Heat oil to 350°F (175°C) in deep fryer or pot. Carefully add chicken strips in batches (do NOT overcrowd). Fry 3-4 minutes, turning once, until deep golden brown and internal temp reaches 165°F (74°C). Remove with spider strainer. Drain on wire rack 2 minutes. Repeat with remaining batches, recovering oil temp between batches.
- Why this matters: Correct temp ensures rapid crust formation without oil absorption. Undisturbed cooking allows even browning; moving prematurely tears crust. Internal temp guarantees safety without overcooking. Wire rack drainage preserves crispness vs. paper towels trapping steam.
- Visual Cue: Vigorous bubbling around chicken (not violent splashing). Color progresses from pale to amber to deep gold. Bubbles subside significantly when done. Fins/tails crisp and dark.
- Texture Cue: Skin crackles when tapped with tongs. Flesh flakes easily near bone. Tail/fins rigid, not floppy.
- Aroma Cue: Nutty, toasted oil and sweet chicken scent. Burnt smell = temp too high; remove immediately.
- Common Mistake: Overcrowding pot. Drops oil temp drastically, causing greasy/soggy fries. Fix: Fry in small batches. Wait for oil to recover to 350°F before adding next batch.
- Professional Tip: Skim floating burnt crumbs constantly. Excess carbon imparts bitter flavor to next batch. Clean oil = clean flavor.
H3: Step 4 – Make Spicy Honey Dipping Sauce
In small bowl, whisk together ½ cup mayonnaise, 3 tbsp ketchup, 2 tbsp honey, 1 tsp hot sauce (e.g., Sriracha), and a pinch of salt. Taste and adjust: more honey for sweetness, more hot sauce for heat, more ketchup for tang. Chill 10 minutes before serving to allow flavors to meld.
- Why this matters: Whisking creates a stable emulsion that clings to the fries. Chilling firms the sauce slightly and intensifies the flavor profile. Balancing the sweet, tangy, and spicy elements is crucial for harmony with the rich fried chicken.
- Visual Cue: Smooth, uniform coral-pink color. No streaks of unmixed mayo/ketchup. Glossy sheen.
- Texture Cue: Creamy, thick enough to coat spoon but pourable. Not watery or stiff.
- Aroma Cue: Sweet honey, garlicky ketchup, and spicy chili notes. Complex, inviting bouquet.
- Common Mistake: Using cold ingredients straight from fridge. Makes emulsification harder. Fix: Bring mayo/ketchup to room temp before mixing. Whisk vigorously.
- Professional Tip: Add 1/4 tsp smoked paprika to sauce. Adds depth and complexity without overwhelming heat. Subtle but effective.
H3: Step 5 – Plate & Serve Immediately
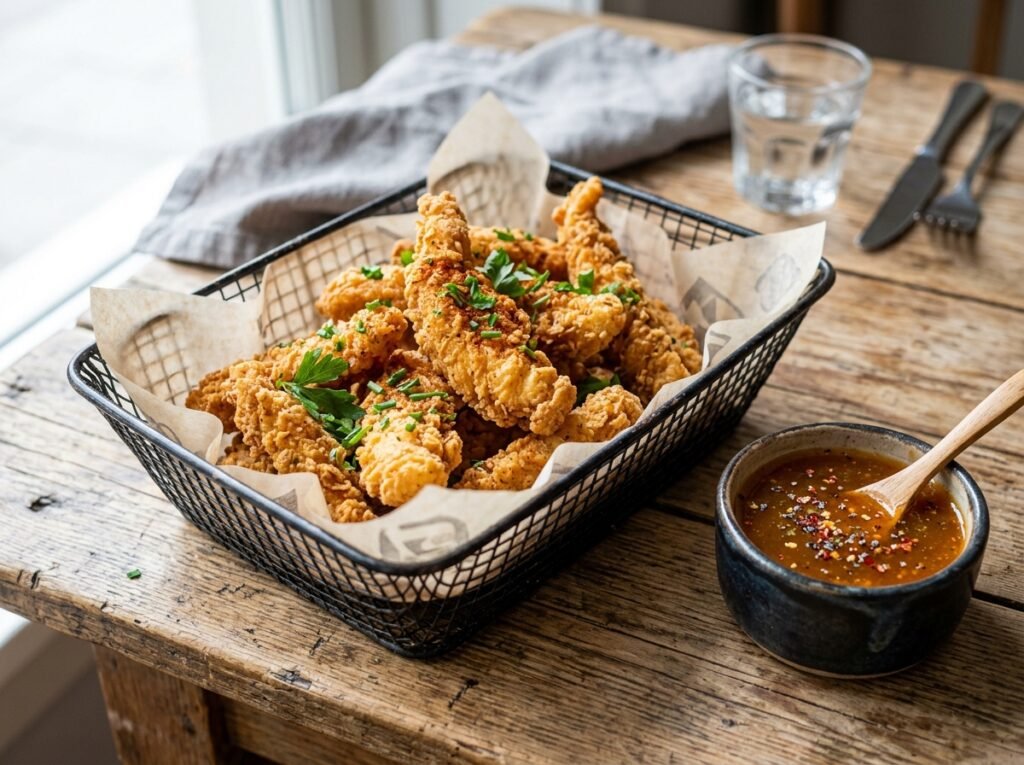
Arrange warm, crispy chicken fries on a platter. Place dipping sauce in a small ramekin in the center. Garnish with finely chopped fresh parsley or chives. Serve IMMEDIATELY while fries are still hot and crisp. Delaying service leads to sogginess.
- Why this matters: Immediate service preserves the textural contrast that defines this dish. Hot fries + cold sauce create a delightful temperature contrast. Garnish adds visual appeal and fresh aroma. Plating is part of the experience.
- Visual Cue: Golden fries glistening slightly. Sauce vibrant coral-pink. Parsley bright green. Steam rising subtly.
- Texture Cue: Fries shatter when bitten. Sauce creamy, clinging to ridges. Not soggy or dry.
- Aroma Cue: Fried chicken, sweet-spicy sauce, and fresh herbs. Inviting, appetizing bouquet.
- Common Mistake: Letting fries sit before serving. Sogginess inevitable. Fix: Have guests seated, plates ready, garnishes prepped BEFORE frying final batch. Timing is everything.
- Professional Tip: Warm the ramekin for the sauce briefly in the oven. Prevents cold sauce from shocking the hot fries and helps maintain crispness longer.
Expert Tips for Maximum Crispness & Flavor
- Toast Your Breadcrumbs: This is the single most impactful tip. Pre-toasting panko in a 350°F oven for 5 minutes drives off moisture and develops nutty, caramelized flavors that elevate the entire dish. The difference is profound and worth the 5 extra minutes.
- Cornstarch is Your Friend: Adding 2 tablespoons of cornstarch to the flour mixture is a professional secret. It disrupts gluten formation, resulting in a lighter, crisper, and more delicate crust that stays crunchy longer—even after dipping.
- Oil Temperature is King: Invest in a good thermometer. Maintaining 350°F is non-negotiable. If the oil drops below 325°F, the fries absorb oil and become greasy. If it exceeds 375°F, the exterior burns before the interior cooks. Recover temperature fully between batches.
- Don’t Crowd the Pan: This cannot be overstated. Overcrowding is the #1 cause of failed fries. Fry in small batches, leaving space between pieces. It takes longer, but the results are worth it. Your patience will be rewarded with perfect, crisp fries.
- Rest After Frying: Letting the fries drain on a wire rack for 2 minutes allows excess oil to drip off and the crust to set. Skipping this step traps oil against the crust, leading to sogginess.
- Sauce Consistency Control: If your sauce is too thin, stir in 1/2 tsp cornstarch slurry (cornstarch + water) and chill. If too thick, add a splash of buttermilk or lemon juice. The ideal consistency coats the back of a spoon and clings to the fries without pooling.
Common Mistakes to Avoid
- Wet Chicken Before Breading: Causes breading to slide off and oil to splatter violently. Fix: Pat chicken bone-dry with towels. Air-dry 5 minutes if needed.
- Overcrowding the Fryer: Drops oil temperature, leading to greasy, soggy fries. Fix: Fry in small batches. Wait for oil to return to 350°F before adding more.
- Skipping the Rest Period: Fries lose crispness rapidly. Fix: Drain on wire rack 2 minutes minimum. Never serve straight from oil.
- Using Stale Breadcrumbs: Results in a dull, cardboard-like texture. Fix: Use fresh panko or toast old crumbs to revive flavor.
- Underseasoning the Chicken: Leads to bland fries, regardless of the sauce. Fix: Season generously with salt and spices. Taste the raw breading mix for balance.
- Not Using a Thermometer: Guesswork leads to burnt or raw chicken. Fix: Use a digital probe thermometer. It’s the only reliable way to ensure safety and perfect doneness.
- Serving Sauce Too Early: Cold sauce cools fries faster. Fix: Chill sauce 10 minutes before serving. Warm ramekin briefly if desired.
Recipe Variations
- Spicy Jalapeño Popper Style: Mix diced jalapeños and cream cheese into the breading. Top with shredded cheddar before frying. Fiery, cheesy indulgence.
- Vegan Adaptation: Use plant-based chicken strips, flax egg (1 tbsp ground flax + 3 tbsp water), and vegan mayo. Agave syrup replaces honey. Surprisingly authentic texture.
- Low-Carb/Keto: Replace flour with almond flour and cornstarch with psyllium husk. Use pork rind “breadcrumbs.” Verify net carbs. High-fat, high-protein perfection.
- Extra Cheesy Pull: Add shredded mozzarella to the breading. Broil 1 minute after frying for a gooey, stretchy center. Indulgent upgrade.
- Mediterranean Twist: Add dried oregano and lemon zest to breading. Serve with tzatziki sauce instead of spicy honey. Fresh, herbaceous profile.
- Buffalo Chicken Fries: Toss fried fries in buffalo sauce instead of dipping. Top with blue cheese crumbles and celery. Game-day classic reimagined.
- Asian-Inspired Glaze: Replace dipping sauce with gochujang-mayo or teriyaki glaze. Garnish with sesame seeds and scallions. Umami-rich, bold flavor.
- Breakfast Fries: Serve with scrambled eggs, bacon, and maple syrup drizzle. Savory-sweet brunch masterpiece.
What to Serve With This Recipe
Balance the rich, fried element with fresh, acidic, or starchy accompaniments:
- Classic Fries & Coleslaw: The ultimate pairing. Creamy slaw cuts through richness; fries add carb comfort. Perfect for casual dining.
- Green Salad with Vinaigrette: Peppery greens and acidic dressing cleanse the palate. Simple, refreshing counterpoint.
- Roasted Vegetables: Asparagus, broccoli, or Brussels sprouts. Charred bitterness complements sweet/savory fries. Healthy balance.
- Garlic Butter Noodles: Udon or linguine tossed in garlic butter. Carby comfort that soaks up extra sauce. Indulgent pairing.
- Sparkling Water with Lime: Effervescence/acidity cleanses palate between bites. Better than still water or sweet soda.
- Light Lager or Pale Ale: Crisp beer complements fried foods perfectly. Carbonation cuts fat. Avoid heavy stouts/IPAs that overwhelm.
- Apple Pie or Tiramisu: Sweet dessert continues the indulgent theme. Avoid chocolate-heavy desserts that compete with savory fries.
Make Ahead & Meal Prep Tips
- Prep Chicken Ahead: Cut and season chicken up to 24 hours ahead. Store covered in fridge. Pat dry before breading. Saves active prep time.
- Toast Breadcrumbs Ahead: Toast panko up to 3 days ahead. Store in airtight container. Flavor deepens over time.
- Make Sauce Ahead: Prepare dipping sauce up to 3 days ahead. Refrigerate. Flavors meld and improve. Stir before serving.
- Freeze Unbreaded Chicken: Freeze seasoned strips individually on tray, then bag. Thaw overnight in fridge before breading/frying. Convenient future meals.
- Breaded & Freeze (Advanced): Bread strips, freeze on tray, then bag. Fry from frozen, adding 1-2 mins cook time. Texture slightly softer but still delicious.
Storage & Reheating Instructions
Storage
- Refrigerator: Store cooled fries in airtight container up to 2 days. Crispness diminishes significantly. Store sauce separately. Combine only when reheating/serving.
- Freezer: Freeze cooked fries individually on tray, then bag up to 1 month. Thaw overnight in fridge before reheating. Texture softens considerably; best for repurposing (e.g., salad topping).
Reheating
- Oven (Best): 375°F (190°C), 8-10 minutes on wire rack. Restores some crispness effectively. Avoid direct pan contact (soggy bottom).
- Air Fryer: 375°F (190°C), 3-5 minutes. Excellent revival method. Shake basket halfway. Spray lightly with oil if dried out.
- Stovetop: Skillet over medium heat, 2-3 minutes per side. Revives some crispness. Good for single portions. Watch closely.
- Microwave (Avoid): Steams fries, destroys crispness entirely. Only use if texture irrelevant (e.g., for soup/stew addition). Accept sogginess trade-off.
Nutritional Information
Estimates per serving (8 fries + 2 tbsp sauce):
- Calories: 320 kcal
- Protein: 22g
- Carbohydrates: 24g
- Fat: 16g
- Fiber: 1g
- Sugar: 8g
- Sodium: 580mg
Note: Values vary based on chicken size, oil absorption, breadcrumb type, and sauce ratio. Always check labels for precise tracking.
Troubleshooting Guide
| Problem | Cause | Solution |
|---|---|---|
| Fries Soggy/Greasy | Oil too cool or overcrowded. | Maintain 350°F strictly. Fry in small batches. Drain on wire rack. |
| Breading Falls Off | Wet chicken or improper dredging. | Pat chicken bone-dry. Use three-station method. Press gently. Chill breaded fries 10 mins pre-fry. |
| Chicken Raw Inside | Oil too cool or undercooked. | Use thermometer. Cook until 165°F internal temp. Extend time 1-2 mins if needed. |
| Fries Burnt Outside | Oil too hot or over-fried. | Reduce temp. Fry 3-4 mins max. Watch closely. Remove when golden, not dark brown. |
| Sauce Separated/Grainy | Mayo old, insufficient whisking, or cold ingredients. | Use fresh full-fat mayo. Whisk vigorously. Bring ingredients to room temp before mixing. |
| Bland Flavor | Underseasoned chicken or sauce. | Taste breading mix and sauce before serving. Adjust salt/heat/sweetness incrementally. |
Frequently Asked Questions
1. Can I bake these instead of frying? Yes, but texture differs significantly. Toss breaded fries in 1 tbsp oil, bake at 425°F for 18-20 mins (flip halfway). Finish under broiler 2 mins for color. Crispness won’t match frying, but offers a lighter alternative.
2. Why did my breading turn gummy? Wet chicken or overcrowded breading station. Fix: Pat chicken bone-dry. Use separate hands; shake excess at each stage. Refresh flour/crumbs if clumped.
3. How do I prevent oil splatters? Ensure chicken is COMPLETELY dry. Lower chicken gently into oil using tongs. Never add wet items to hot oil. Use splatter screen if concerned. Safety first!
4. Can I use frozen chicken tenders? Yes, if thawed properly. Thaw overnight in fridge. Pat EXTREMELY dry before seasoning/breading. Expect slightly softer texture than fresh.
5. What’s the best oil for frying? Vegetable, canola, or peanut oil. High smoke point (>400°F), neutral flavor, affordable. Avocado oil excellent but pricier. Avoid olive oil (low smoke point/strong flavor).
6. Can I make the sauce spicier? Absolutely. Add more hot sauce, minced jalapeño, or cayenne pepper. Taste as you go. Balance heat with honey/ketchup. Start with 1 tsp, add 1/4 tsp increments.
7. How do I keep fries crispy for a party? Fry in batches. Keep finished fries warm on a wire rack in a 200°F oven. Do NOT cover. Serve sauce on the side. Assemble platter just before guests arrive.
8. Are these gluten-free? Not as written. Substitute all-purpose flour with GF blend, cornstarch with tapioca starch, and panko with GF breadcrumbs. Ensure all ingredients certified GF. Texture nearly identical.
Final Thoughts
Creating the perfect Crispy Chicken Fries with Spicy Honey Dipping Sauce is about embracing technique and understanding the science behind great frying. The sizzle of hot oil, the golden-brown crunch, the tender bite of juicy chicken—all of it comes together when you respect the process. This recipe proves that exceptional finger food isn’t reserved for fast-food chains; it’s achievable in your own kitchen with attention to detail and quality ingredients.