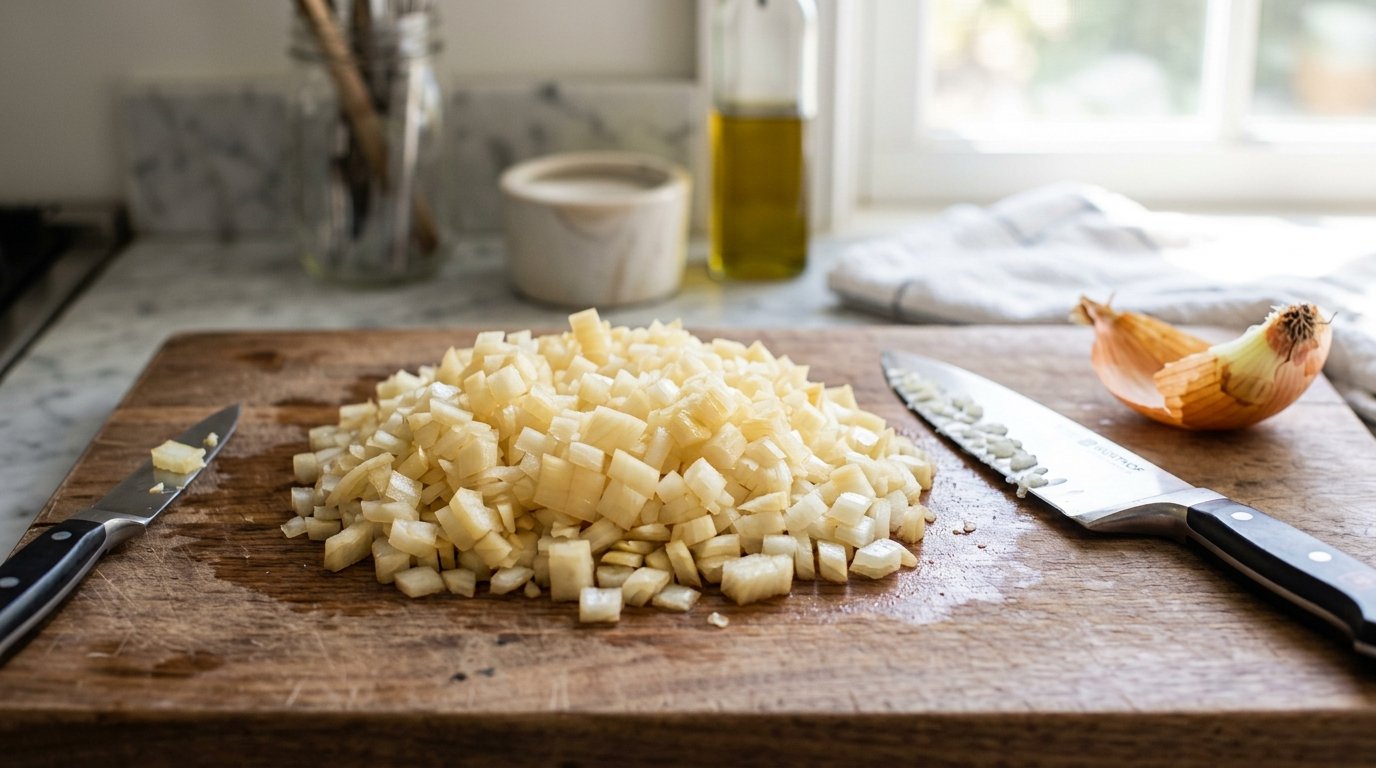
There is perhaps no fundamental kitchen skill more essential, yet more frequently botched, than learning how to dice an onion. For home cooks, the onion can be a source of frustration—tears, uneven chunks, and wasted product are common complaints. However, mastering the professional “root-on” dicing technique transforms this humble allium from a chore into a satisfying, rhythmic process. This method isn’t just about aesthetics; it is a functional approach that ensures uniform cooking, maximizes yield, and keeps your fingers safe.
In this guide, we break down the exact mechanics shown by professional chefs to achieve a perfect dice every time. By utilizing the root end as a natural anchor, you create a stable structure that holds the onion together while you make precise horizontal and vertical incisions. Whether you are building a mirepoix for a soup, prepping for a week of stir-fries, or simply making salsa, this technique is the foundation of efficient cooking. Let’s sharpen our knives and learn the art of the perfect onion dice.
Why This Technique Works
The secret to this method lies in structural integrity. An onion is composed of concentric layers held together at the base by the root plate. When you slice through the root completely, these layers separate, turning the onion into loose, slippery rings that are difficult to control and dangerous to cut.
By leaving the root intact, you maintain a solid “hinge” that keeps the layers unified. This allows you to make deep, parallel cuts without the onion falling apart. The result is a grid-like structure that, when sliced across, releases perfectly uniform cubes. Furthermore, this technique aligns with the natural grain of the onion fibers, resulting in cleaner cuts that release less sulfuric gas (the stuff that makes you cry) compared to hacking against the grain. From a culinary science perspective, uniform dicing ensures that every piece hits the pan at the same time and caramelizes at the same rate, preventing a mixture of burnt bits and raw chunks in your final dish.
Why You’ll Love This Method
Safety First: Keeping the root attached provides a stable handle, significantly reducing the risk of knife slips and finger injuries.
Uniform Cooking: Consistent cube size means even browning and texture, which is critical for sauces, soups, and sautés.
Speed and Efficiency: Once mastered, this rhythm allows you to prep pounds of onions in minutes, making it an incredible meal prep hack.
Less Waste: Precision cutting means you aren’t losing edible flesh to jagged, uneven slices.
Professional Results: Achieve restaurant-quality mise en place that elevates the visual appeal of your cooking.
Reduced Tears: Cleaner cuts with a sharp knife rupture fewer cells, releasing less of the irritant syn-propanethial-S-oxide.
Ingredient Notes
Yellow Onions
Purpose: The gold standard for cooking. They have a balanced sugar-to-astringency ratio that develops deep sweetness when caramelized.
Buying Tips: Look for onions that feel heavy for their size with dry, papery skins. Avoid any with soft spots, mold, or green sprouts emerging from the top, as these indicate age and bitterness.
Storage: Store in a cool, dark, well-ventilated place (like a pantry basket). Never store them in plastic bags or next to potatoes, which release moisture and gases that cause onions to rot faster.
White Onions
Purpose: Sharper and crisper than yellow onions. Often preferred in Mexican cuisine, salsas, and chutneys where a pungent bite is desired.
Substitutions: Can be used interchangeably with yellow onions for cooking, though they lack the same depth of sweetness when browned.
Red Onions
Purpose: Mild and colorful. Best used raw in salads or pickled.
Note: When cooked, red onions lose their vibrant color and turn a dull grey-blue. Stick to yellow or white for hot dishes where appearance matters.
Sweet Onions (Vidalia, Walla Walla)
Purpose: High water and sugar content. Excellent for eating raw or quick sautés.
Caution: Due to high water content, they do not caramelize as well as yellow onions and can become mushy if overcooked.
Kitchen Equipment
Chef’s Knife (8-inch): The workhorse of the kitchen. A sharp, wide blade allows for the rocking motion necessary for dicing.
Cutting Board: Use a large, stable board. Wood or composite is preferred over glass or stone, which dull knives and are slippery.
Damp Towel: Place this under your cutting board to prevent slipping—a crucial safety step often overlooked.
Bench Scraper (Optional): Extremely helpful for transferring piles of diced onion to a bowl or pan without using your hands.
Sharpener/Honing Steel: A dull knife is a dangerous knife. Ensure your edge is keen before starting.
Preparation Information
Prep Time: 2 Minutes
Cook Time: 0 Minutes
Total Time: 2 Minutes
Servings: Yields approx. 1 cup diced onion per medium onion
Step-by-Step Instructions
Preparation and Safety
Secure Your Station: Place a damp kitchen towel underneath your cutting board. This prevents the board from sliding on the counter as you apply pressure to the knife.
Trim and Peel: Slice off the stem end (the pointy top) of the onion, but leave the root end completely intact. Peel away the dry, papery outer skin and the first layer of flesh if it is bruised or tough.
Why this matters: The root is your anchor. Cutting it off now will make the subsequent steps impossible. The flat stem end creates a stable surface to rest the onion on.
Halve the Onion: Place the onion cut-side down on the board. Slice it vertically through the center, right through the middle of the root. You now have two stable halves.
Visual Cue: You should see the root plate divided evenly between the two halves.
The Horizontal Cut
Position the Onion: Take one half and place it cut-side down on the board. Orient it so the root is facing away from you (or to the side, depending on comfort), and the curved top is facing up.
Make Parallel Incisions: Holding the onion steady with a “claw grip” (fingertips curled under, knuckles guiding the blade), make horizontal cuts parallel to the cutting board. Start near the bottom and work upward toward the top curve.
Crucial Rule:Do not cut through the root. Stop your knife about ½ inch before reaching the root end.
Why this matters: These cuts define the height of your dice. Leaving the root intact keeps the layers stacked like a deck of cards.
Texture Cue: You want to slice through the layers cleanly without crushing them. If the onion squishes, your knife is too dull.
The Vertical Cuts (Root Intact)
Rotate or Adjust: Without moving the onion’s position relative to the board too much, prepare for vertical cuts.
Slice Lengthwise: Make vertical cuts from the stem end toward the root, following the natural curvature of the onion. Again, stop short of the root.
Spacing: Keep these cuts evenly spaced to match the width of your horizontal cuts. This determines the width of your dice.
Visual Cue: At this stage, the onion should still look like a whole half-onion, but it is now internally segmented into long, thin sticks (julienne) that are held together only by the root.
Pro Tip: Some chefs prefer to make these vertical cuts perpendicular to the horizontal ones immediately, while others do all verticals first. The key is maintaining the grid structure.
The Final Cross-Cut
The Release: Now, slice across the onion perpendicular to your previous vertical cuts. Move from the stem end toward the root.
Action: As you slice, perfect little cubes will fall away from the main body.
Visual Cue: “Look at that!” uniform cubes cascading onto the board.
Finish Near the Root: As you get close to the root, the pieces will get smaller. You can chop the remaining root-end chunk separately, or discard the hard root nub if it’s too tough.
Meal Prep Hack: If prepping large batches, use a bench scraper to sweep the finished dice into a container immediately to keep your workspace clear.
Expert Tips for Knife Skills
The Claw Grip is Non-Negotiable: Always tuck your fingertips under and use your knuckles as a guide for the blade. This protects your fingers and ensures consistent cut thickness.
Sharpness Over Strength: A sharp knife requires zero downward force; it glides. If you are pushing hard, stop and sharpen. A dull knife slips and causes accidents.
Rocking Motion: Use the tip of the knife as a pivot point on the board. Lift the handle and rock the blade forward and down. This is faster and safer than chopping straight up and down.
Clean Cuts vs. Sawing: Do not saw back and forth. Use a smooth, decisive slicing motion. Sawing bruises the onion cells, releasing more juice and odor.
Chill Before Cutting: If you are sensitive to onion fumes, chill the onion in the fridge for 30 minutes before cutting. Cold temperatures slow the chemical reaction that produces the tear-inducing gas.
Common Mistakes to Avoid
Cutting the Root Too Early: This is the #1 error. Without the root, the layers separate, and you lose control. Fix: If you accidentally cut the root, switch to holding the onion flat-side down and use extreme caution, or reserve it for stock where shape doesn’t matter.
Uneven Spacing: Randomly spaced cuts lead to a mix of fine mince and large chunks. Fix: Try to maintain a consistent rhythm and spacing. It takes practice, but muscle memory will develop.
Using a Small Paring Knife: Paring knives lack the length and weight for efficient dicing. Fix: Use an 8-inch chef’s knife or a Santoku.
Ignoring the Curve: Failing to adjust the angle of horizontal cuts to match the onion’s dome results in uneven pieces at the top. Fix: Angle your knife slightly to follow the natural arc of the onion layers.
Rushing: Speed comes from precision, not haste. Fix: Slow down until the technique is automatic. Fast, sloppy dicing is slower than slow, precise dicing because you have to fix mistakes.
Variations on the Dice
Small Dice (Brunoise): Make tighter horizontal and vertical cuts (approx. 1/8 inch). Ideal for delicate sauces, vinaigrettes, and garnishes.
Large Dice (Macedoine): Make wider cuts (approx. ½ to ¾ inch). Perfect for stews, chili, and roasting where you want distinct bites of onion.
Julienne: Skip the final cross-cut. After making horizontal and vertical cuts, slice thinly to create matchsticks. Great for stir-fries and slaws.
Slices/Rings: Simply slice across the onion (perpendicular to the root) for burgers and sandwiches, or parallel to the root for onion rings.
Minced: After dicing, gather the pile and run your knife through it repeatedly with a rocking motion until very fine. Essential for dressings and marinades.
Rough Chop: For rustic soups where texture is desired, skip the precision grid and simply quarter and chop irregularly. Faster, but less uniform cooking.
What to Serve With Diced Onions
Diced onions are rarely the star; they are the supporting actor that makes the ensemble shine.
Aromatics Base: Combine with diced carrots and celery (mirepoix) as the foundation for soups, stocks, and braises.
Salsas and Pico de Gallo: Mix with tomatoes, cilantro, lime juice, and jalapeños for a fresh condiment.
Stir-Fries: Add to hot woks with garlic, ginger, and proteins for instant flavor depth.
Omelets and Scrambles: Sauté until translucent before adding eggs for a savory breakfast.
Grain Bowls: Caramelize diced onions and toss with rice, quinoa, or farro for sweetness and texture.
Marinades: Mix with acid (vinegar/citrus) and oil to tenderize meats and infuse flavor.
Make Ahead and Meal Prep Tips
This technique is the ultimate meal prep hack. Onions are labor-intensive, so batching them saves immense time during the week.
Batch Processing: Dedicate 20 minutes on Sunday to dice 5-10 onions. Store them properly (see below) for use throughout the week.
Portion Control: Pre-measure onions into ½ cup or 1 cup portions in small containers or silicone bags. Grab-and-go convenience prevents waste.
Freezer Packs: Freeze diced onions in flat layers on a baking sheet before bagging. This prevents clumping, allowing you to grab exactly what you need.
Caramelized Batches: Go a step further and caramelize a large batch of diced onions. Freeze in ice cube trays for instant flavor bombs in future meals.
Peeled Whole Onions: Refrigerate in an airtight container. 7-10 days.
Diced Onions (Fridge): Store in an airtight container or sealed bag. Use within 7-10 days. Tip: Place a paper towel in the container to absorb excess moisture and prevent slime.
Diced Onions (Freezer): Best quality within 3-6 months. Note: Frozen onions will be soft upon thawing due to cell wall rupture. They are perfect for cooked dishes but unsuitable for raw applications like salsa.
Reheating Instructions
Since diced onions are typically an ingredient rather than a standalone dish, “reheating” usually means incorporating them into a hot preparation.
From Frozen (Cooking): Add frozen diced onions directly to a hot pan. Do not thaw first, as they will release water and steam rather than sauté. Cook longer to evaporate excess moisture.
From Fridge (Sautéing): Add to hot oil/butter. They may release some liquid; cook until evaporated and browning begins.
Microwave (Softening): If you need softened onions quickly for a casserole, microwave refrigerated diced onions in a covered dish for 1-2 minutes. They won’t brown, but they will soften.
Air Fryer (Crisping): Toss refrigerated diced onions with a little oil and air fry at 375°F for 8-10 minutes, shaking halfway, for crispy onion bits/toppings.
Nutritional Information
Per 1 medium yellow onion (approx. 110g):
Calories: 44
Protein: 1.2g
Carbohydrates: 10.3g
Fat: 0.1g
Fiber: 1.9g
Sugar: 4.7g
Sodium: 4mg
Vitamin C: 12% DV
Folate: 5% DV
Onions are low-calorie, fat-free, and rich in antioxidants like quercetin and vitamin C.
Troubleshooting Guide
Problem
Cause
Solution
Onion falls apart while cutting
Root was cut off or damaged
Switch to flat-side down method; hold firmly; accept imperfect dice or save for stock.
Pieces are uneven/mushy
Dull knife or sawing motion
Sharpen knife immediately; use clean slicing/rocking motion.
Board slides around
No friction under board
Always use a damp towel or non-slip mat under cutting board.
Tears uncontrollable
Bruising cells / warm onion
Chill onion first; use sharpest knife possible; cut near open window/fan.
Onion slips while cutting
Round surface unstable
Always create a flat surface by trimming stem end first.
Too much waste at root
Cutting too far from root
Practice stopping ¼-½ inch from root; trim root nub separately after dicing.
Frequently Asked Questions
1. Why shouldn’t I cut the root off? The root acts as a natural binding agent. It holds the concentric layers together, providing stability and safety while you make multiple cuts. Removing it causes the onion to separate into individual layers, making uniform dicing nearly impossible and increasing injury risk.
2. How do I stop crying when cutting onions? Use a razor-sharp knife (dull knives crush cells, releasing more gas), chill the onion beforehand, cut near a running fan or open window, and avoid touching your eyes. Some people find wearing goggles or breathing through their mouth helps.
3. Can I freeze diced onions? Yes! Frozen onions are excellent for cooked dishes like soups, stews, and sauces. Be aware they will lose their crisp texture upon thawing, so don’t use frozen onions for raw preparations like salads or salsa.
4. What’s the difference between yellow, white, and red onions? Yellow onions are all-purpose and sweeten beautifully when cooked. White onions are sharper and crisper, ideal for Mexican cuisine. Red onions are mild and colorful, best for raw applications. Substitute based on flavor profile needs.
5. How long do diced onions last in the fridge? Properly stored in an airtight container, diced onions last 7-10 days in the refrigerator. Add a paper towel to absorb moisture and extend freshness. Discard if they become slimy, discolored, or develop an off odor.
6. Is it better to dice onions ahead of time or fresh? Fresh is always superior for flavor and texture. However, for meal prep efficiency, pre-dicing is acceptable. Just know that pre-cut onions begin to oxidize and lose potency over time. Use within a few days for best results.
7. Can I use a food processor to dice onions? You can, but it often results in uneven pieces and excessive bruising/juice release. For small quantities, hand-dicing is faster and yields better results. Food processors are better suited for very large batches where perfection isn’t critical.
8. Why are my diced onions watery in the pan? Onions contain significant water. If crowded in the pan, they steam instead of sauté. Ensure your pan is hot, don’t overcrowd, and allow moisture to evaporate before expecting browning. Salt draws out moisture; add it after initial browning if you want caramelization.
Final Thoughts
Mastering how to dice an onion using the root-on method is a transformative skill that pays dividends in every meal you prepare. It turns a tedious task into a meditative, efficient ritual that sets the tone for successful cooking. The confidence gained from wielding a knife with precision extends far beyond the cutting board—it elevates your entire culinary repertoire.