
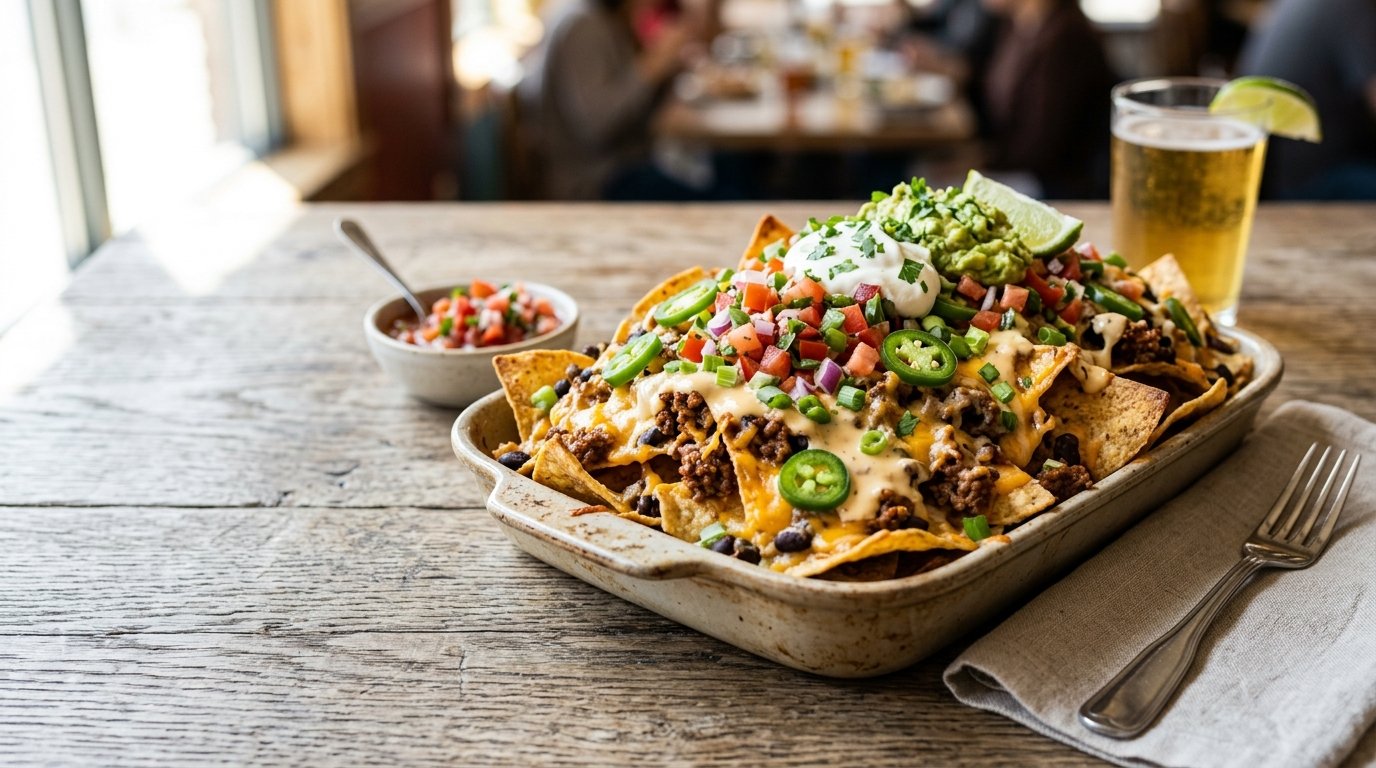
There is nothing quite like the experience of biting into a freshly fried tortilla chip that is still warm, crispy, and perfectly golden. While bagged chips have their place, making Ultimate Loaded Nachos from scratch using fresh corn tortillas elevates this beloved appetizer to a gourmet level. This recipe isn’t just about piling toppings onto a plate; it is a masterclass in texture contrast, flavor balancing, and proper assembly. By frying your own chips and layering ingredients with intention, you create a dish where every bite offers a satisfying crunch followed by creamy, savory, and fresh elements. Whether you are hosting a game day party or craving a high-quality snack at home, this guide will walk you through creating restaurant-style nachos that are far superior to anything you can buy pre-made.
Quick Recipe Summary
| Feature | Details |
|---|---|
| Prep Time | 20 minutes |
| Cook Time | 15 minutes |
| Total Time | 35 minutes |
| Servings | 4-6 people (as an appetizer) |
| Cuisine | Tex-Mex / Mexican-American |
| Course | Appetizer / Snack / Main Course |
| Difficulty | Medium |
| Calories | Approx. 650-800 per serving |
Table of Contents
- Why This Recipe Works
- Why You’ll Love This Recipe
- Ingredient Notes
- Kitchen Equipment
- Step-by-Step Instructions
- Expert Tips for Perfect Nachos
- Common Mistakes to Avoid
- Recipe Variations
- What to Serve With Loaded Nachos
- Make Ahead & Meal Prep Tips
- Storage & Reheating Instructions
- Nutritional Information
- Troubleshooting Guide
- Frequently Asked Questions
- Final Thoughts
Why This Recipe Works
The secret to exceptional Ultimate Loaded Nachos lies in the foundation: the chip itself. Store-bought chips are often stale, overly salty, or too thick to support heavy toppings without breaking. By cutting and frying fresh corn tortillas, you achieve a lightness and crispness that acts as the perfect vehicle for cheese and meat. Furthermore, this recipe emphasizes layering rather than piling. We start with a base of chips and queso, add protein and pico de gallo, and finish with cold, fresh toppings like guacamole, sour cream, and cilantro. This temperature contrast—hot chips and cheese against cool garnishes—is what makes each bite dynamic and prevents the “soggy bottom” phenomenon that plagues lesser nacho recipes.
Why You’ll Love This Recipe
- Superior Texture: Homemade fried chips provide an unmatched crunch that holds up under heavy toppings better than baked alternatives.
- Customizable Heat: From mild queso to spicy jalapeños and hot sauce, you control the spice level entirely.
- Freshness Factor: Making pico de gallo and guacamole from scratch ensures vibrant flavors that jarred salsas simply cannot replicate.
- Crowd-Pleasing Presentation: The colorful layers of red tomatoes, green guacamole, white cotija cheese, and golden chips make this a visually stunning centerpiece.
- Versatility: Easily adaptable for vegetarian diets or different protein preferences without losing the core appeal.
Ingredient Notes
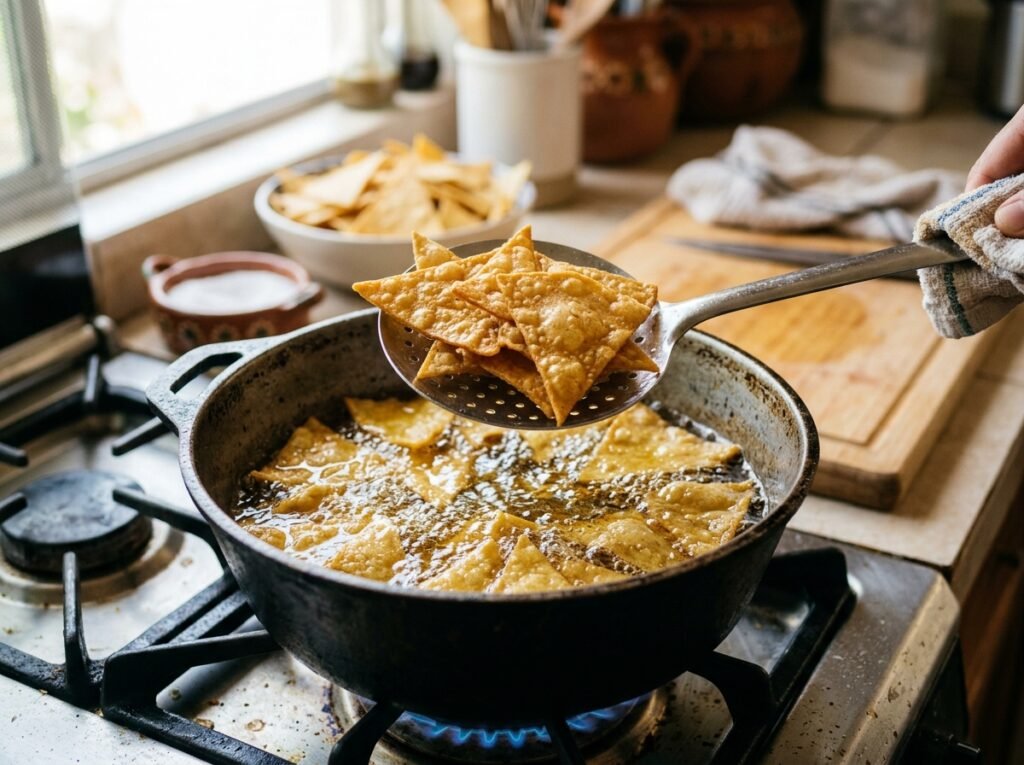
Understanding your ingredients is key to executing Ultimate Loaded Nachos successfully. Here is a breakdown of what you need and why.
Corn Tortillas
- Purpose: The structural base of the dish.
- Buying Tips: Look for 100% corn tortillas in the refrigerated section or the bread aisle. Avoid “flour tortillas” or blends if you want authentic flavor and fryability. They should be pliable, not cracked.
- Substitutions: If you must use store-bought chips, choose “restaurant style” or “thick cut” varieties, though the texture will differ significantly.
Queso / Cheese Sauce
- Purpose: The adhesive layer that binds the chips and adds creaminess.
- Buying Tips: A high-quality American cheese blend melts best due to emulsifying salts. For a from-scratch version, use a roux-based cheddar sauce.
- Substitutions: Shredded Monterey Jack or Oaxaca cheese melted directly on chips works well but lacks the pourable consistency of queso.
Ground Beef
- Purpose: Savory, umami-rich protein.
- Buying Tips: Use 85/15 or 90/10 lean ground beef. Too much fat will make the nachos greasy; too little will make the meat dry.
- Substitutions: Seasoned shredded chicken, carnitas (pork), or black beans for a vegetarian option.
Pico de Gallo
- Purpose: Acidic, fresh counterpoint to the rich cheese and meat.
- Ingredients: Roma tomatoes (less watery), white onion, fresh cilantro, lime juice, salt.
- Tip: Let the pico sit for 15 minutes before serving to allow flavors to meld.
Cotija Cheese
- Purpose: Salty, crumbly finishing cheese that doesn’t melt completely.
- Substitutions: Feta cheese or Parmesan can work in a pinch, though Cotija has a distinct milky tang essential to Tex-Mex profiles.
Guacamole & Sour Cream
- Purpose: Cooling agents that balance heat and richness.
- Tip: Add lime juice to guacamole immediately after mashing to prevent browning.
Jalapeños & Cilantro
- Purpose: Fresh heat and herbal aroma.
- Tip: Remove seeds and membranes from jalapeños if you want flavor without intense heat.
Kitchen Equipment
To prepare Ultimate Loaded Nachos efficiently, gather these tools:
- Deep Fryer or Heavy-Bottomed Pot: Essential for maintaining consistent oil temperature. A Dutch oven works well if you don’t have a dedicated fryer.
- Spider Strainer or Slotted Spoon: For safely removing chips from hot oil.
- Wire Rack or Paper Towels: For draining excess oil from fried chips.
- Sharp Chef’s Knife & Cutting Board: For precise tortilla cutting.
- Large Metal Mixing Bowl: For tossing chips with seasoning (if desired) or holding fried chips.
- Sheet Pan / Baking Tray: For assembling the nachos. Line with parchment paper for easy cleanup.
- Tongs: For handling hot chips and arranging toppings.
- Ladle or Spoon: For distributing queso evenly.
Step-by-Step Instructions
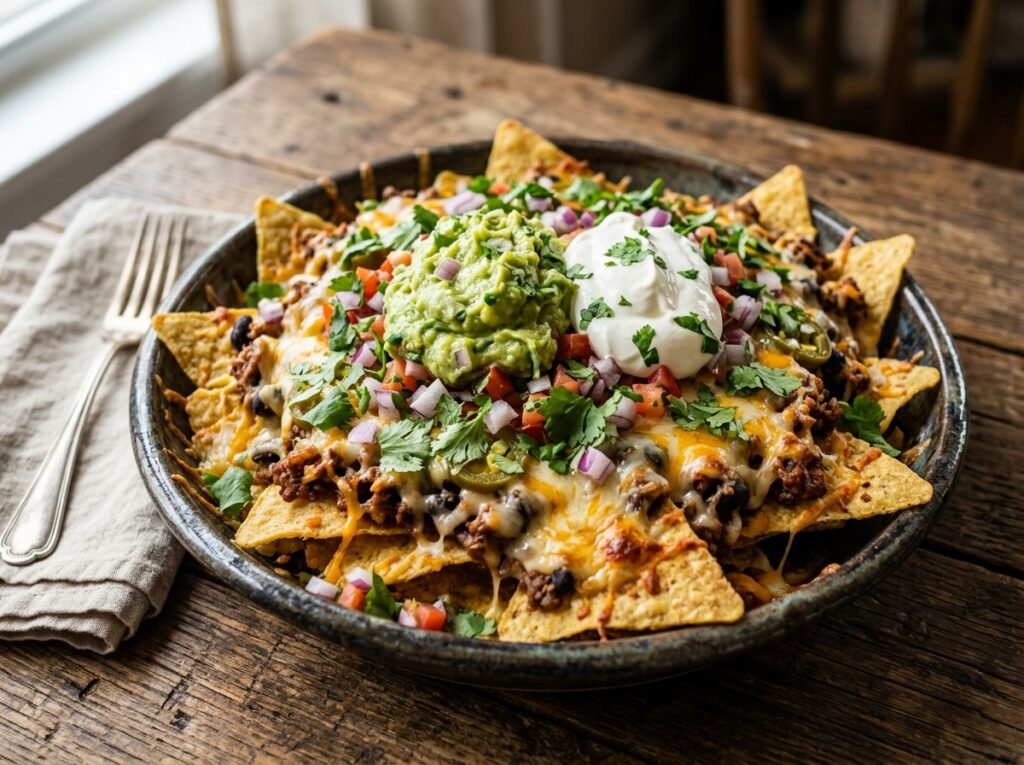
Follow these detailed steps to ensure your Ultimate Loaded Nachos turn out perfectly every time.
H3: Preparing and Frying the Tortilla Chips
- Cut the Tortillas: Stack 3-4 corn tortillas on your cutting board. Using a sharp chef’s knife, cut the stack in half, then cut each half into thirds or quarters to create triangular chips. Uniform size ensures even cooking.
- Why it matters: Consistent sizing prevents some chips from burning while others remain raw.
- Visual Cue: Edges should be clean, not ragged. Ragged edges burn faster.
- Heat the Oil: Fill your deep fryer or pot with neutral oil (vegetable, canola, or peanut) to a depth of at least 2 inches. Heat to 350°F (175°C). Use a thermometer; guessing leads to greasy or burnt chips.
- Why it matters: Oil that is too cool soaks into the tortilla, making it greasy. Oil that is too hot burns the exterior before the interior crisps.
- Fry in Batches: Carefully add a single layer of tortilla triangles to the hot oil. Do not overcrowd. Fry for 2-3 minutes, flipping occasionally with tongs or a spider strainer.
- Visual Cue: Chips are done when they are pale golden and rigid. They will darken slightly upon removal.
- Aroma Cue: A nutty, toasted corn smell indicates doneness. A acrid smell means they are burning.
- Drain and Season: Remove chips and place immediately on a wire rack or paper towels. If desired, toss lightly with salt while still hot so it adheres. Transfer to a large bowl.
- Texture Cue: Properly fried chips should snap when bent, not bend softly.
H3: Cooking the Protein
- Brown the Beef: While chips fry or rest, cook ground beef in a skillet over medium-high heat. Break it apart with a spatula as it cooks.
- Why it matters: Breaking the meat creates small crumbles that distribute evenly across chips rather than forming large, unmanageable chunks.
- Season: Once browned and no longer pink, drain excess grease. Season with taco seasoning, cumin, chili powder, salt, and pepper. Simmer for 2 minutes to bloom spices.
- Tip: Keep the meat moist but not soupy. Excess liquid will sog out the chips beneath it.
H3: Assembling the Ultimate Loaded Nachos
- Create the Base Layer: Spread a generous layer of fried chips on your sheet pan. Drizzle liberally with warm queso.
- Why it matters: This first layer of cheese acts as glue for subsequent layers and ensures every chip gets some cheesy goodness.
- Add Protein and Pico: Scatter the seasoned ground beef evenly over the cheesy chips. Follow with a layer of fresh pico de gallo.
- Technique: Distribute toppings to the edges of the pan. No one likes a pile of bare chips in the center.
- Melt (Optional): If you prefer melted cheese throughout, place the tray under a broiler for 1-2 minutes before adding cold toppings. Watch closely to prevent burning.
- Note: In the video method shown, the queso is poured warm over already-fried chips, relying on residual heat. Both methods work; broiling integrates flavors more deeply.
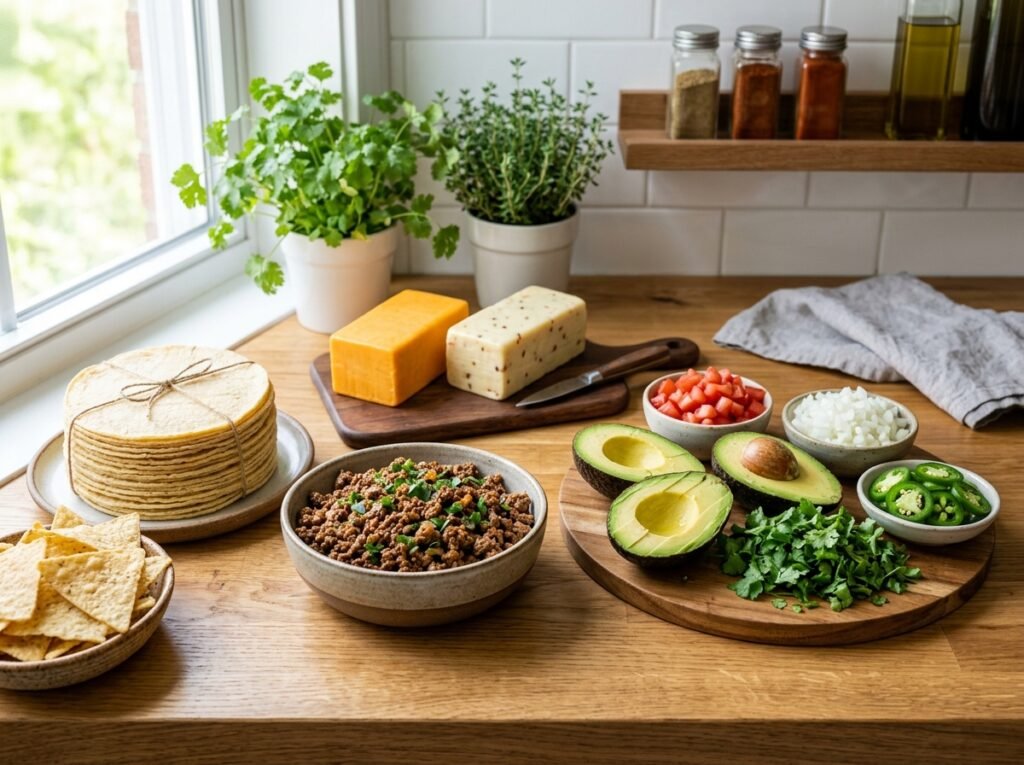
- Finish with Cold Toppings: Remove from heat (if broiled). Dollop guacamole and sour cream across the surface. Sprinkle generously with cotija cheese, sliced jalapeños, and fresh chopped cilantro.
- Why last? Cold toppings retain their freshness and distinct textures only when added at the end. Melting guacamole destroys its appeal.
Expert Tips for Perfect Nachos
- Double Fry for Extra Crunch: For truly shatteringly crisp chips, fry once at 325°F to cook through, drain, then fry again at 375°F for 30 seconds to crisp the exterior. This technique is used in professional kitchens for superior texture.
- Warm Your Queso: Never pour cold queso onto chips. Heat it to a pourable consistency (about 140°F) so it coats evenly without cooling the chips instantly.
- Serve Immediately: Nachos are a race against time. The moment hot cheese meets a chip, the clock starts. Have all toppings prepped and guests ready before assembly begins.
- Use a Wire Rack for Assembly: If possible, assemble nachos on a wire rack set over a sheet pan instead of directly on the pan. This allows air circulation underneath, preventing steam from softening the bottom layer.
- Salt Strategically: Taste your components individually. Queso is salty, cotija is salty, chips may be salted. Adjust seasoning on the beef and pico accordingly to avoid an overwhelmingly saline final dish.
Common Mistakes to Avoid
- Overloading the Pan: Piling chips three layers high guarantees soggy bottoms. Limit to 2-3 layers maximum. Make multiple batches if feeding a crowd.
- Using Wet Toppings Too Early: Adding salsa or pico before the cheese layer creates a moisture barrier that steams the chips. Always put wet ingredients on top of cheese or meat, never directly on bare chips.
- Skipping the Drain Step: Failing to drain fried chips properly leaves surface oil that makes the entire dish feel heavy and greasy. Always use a rack or fresh paper towels.
- Uneven Distribution: Clumping all the beef in one corner leaves other bites bland. Take an extra 30 seconds to spread toppings deliberately.
- Letting Chips Sit Before Assembling: Fried chips lose crispness within minutes exposed to air. Assemble immediately after frying, or keep chips warm in a 200°F oven until ready to build.
Recipe Variations
Adapt Ultimate Loaded Nachos to suit dietary needs and flavor preferences:
- Spicy Diablo: Add habanero slices, spicy chorizo, and a drizzle of sriracha-lime crema. Use pepper jack queso.
- Vegetarian Powerhouse: Replace beef with seasoned black beans and roasted sweet potato cubes. Add corn kernels for sweetness and texture.
- Vegan Version: Use cashew-based queso, vegan sour cream, and skip cotija (or use nutritional yeast). Ensure tortillas are certified vegan (some contain lard).
- Chicken Fiesta: Substitute ground beef with shredded rotisserie chicken tossed in chipotle adobo sauce. Top with pickled red onions for brightness.
- Seafood Splash: Use seasoned shrimp or crab meat. Pair with mango-pineapple salsa instead of traditional pico for a tropical twist.
- Extra Cheesy Indulgence: Add a second layer of shredded cheddar and mozzarella between chip layers before broiling. Finish with a cheese fondue dip on the side.
- Healthy Swap: Bake tortilla wedges at 400°F for 10-12 minutes instead of frying. Use Greek yogurt instead of sour cream and increase vegetable ratio.
- Low-Carb/Keto: Replace corn tortillas with cheese crisps (baked parmesan rounds) or pork rinds. Skip beans and use cauliflower rice as a filler.
- High-Protein Boost: Add edamame, hemp seeds, or grilled steak strips. Use a protein-enriched queso made with silken tofu base.
What to Serve With Loaded Nachos
Complete your meal with these complementary sides:
- Elote (Mexican Street Corn): Grilled corn slathered in mayo, cotija, and chili powder echoes the nacho flavors beautifully.
- Black Bean Soup: A warm, hearty soup contrasts nicely with the crunchy, shareable nature of nachos.
- Cilantro Lime Rice: Provides a neutral, fluffy base that soaks up any fallen queso or salsa.
- Margaritas or Palomas: Classic tequila cocktails cut through the richness of cheese and meat.
- Horchata: A sweet, cinnamon-spiced rice drink offers a cooling, non-alcoholic alternative.
- Churros with Chocolate Sauce: End on a sweet note that complements the Mexican-inspired theme.
Make Ahead & Meal Prep Tips
While nachos are best served fresh, preparation can be streamlined:
- Fry Chips Ahead: Fry tortilla chips up to 2 days in advance. Store in an airtight container at room temperature. Recrisp in a 350°F oven for 3-5 minutes before assembling.
- Prep Toppings Separately: Dice tomatoes, onions, cilantro, and make guacamole (with plastic wrap pressed directly on surface) up to 24 hours ahead. Store in separate containers.
- Cook Meat in Advance: Brown and season ground beef up to 3 days ahead. Refrigerate and reheat gently before assembling.
- Queso Prep: Make queso sauce up to 5 days ahead. Reheat slowly on stove or microwave in 30-second intervals, stirring frequently to prevent separation.
- Assembly Line Setup: For parties, set up a “nacho bar” with pre-warmed chips, heated queso, and bowls of toppings. Let guests build their own plates to ensure maximum crispness.
Storage & Reheating Instructions
Leftover nachos present challenges due to moisture migration, but here is how to manage them:
Refrigerator Storage
Store leftover assembled nachos in an airtight container for up to 2 days. Note that texture will degrade significantly; chips will soften. It is better to store components separately if possible.
Freezer Storage
Freezing assembled nachos is not recommended. The water content in toppings expands, destroying chip structure upon thawing. However, you can freeze cooked meat and unused fried chips separately for up to 3 months.
Reheating Methods
- Oven (Best Method): Preheat to 375°F. Spread leftovers on a baking sheet. Bake for 5-8 minutes until cheese bubbles and chips regain some crispness. Add fresh cold toppings after reheating.
- Air Fryer: Excellent for restoring crunch. Reheat at 350°F for 3-4 minutes. Shake basket halfway. Monitor closely to prevent burning.
- Microwave (Last Resort): Microwave in 30-second bursts. Expect soggy chips. Only use if speed is critical and texture is secondary.
- Stovetop: Not recommended for assembled nachos. Can be used to reheat meat or queso separately.
Nutritional Information
Approximate values per serving (based on 6 servings):
- Calories: 720
- Protein: 28g
- Carbohydrates: 58g
- Fat: 42g
- Fiber: 6g
- Sugar: 4g
- Sodium: 980mg
Note: Values vary based on portion size, specific brands, and exact ingredient quantities. For precise tracking, input your specific measurements into a nutrition calculator.
Troubleshooting Guide
| Problem | Cause | Solution |
|---|---|---|
| Soggy Bottom Chips | Moisture from toppings seeping down; overcrowding | Limit layers; add wet toppings last; use wire rack for assembly |
| Greasy Chips | Oil temperature too low during frying | Use thermometer; maintain 350°F; drain on rack, not paper |
| Burnt Chip Edges | Uneven cutting; oil too hot | Cut uniformly; lower oil temp; remove chips when pale gold |
| Cheese Separation | Queso overheated or cooled too quickly | Reheat gently; add splash of milk/cream when reheating |
| Bland Flavor | Underseasoned components | Taste each element individually; adjust salt, acid, heat |
| Guacamole Browning | Oxidation exposure | Press plastic wrap directly on surface; add extra lime juice |
| Meat Too Dry | Overcooked; lean meat used | Cook just until no pink; add splash of broth when reheating |
| Chips Stale Before Serving | Left out too long before assembly | Keep warm in 200°F oven; assemble immediately before eating |
Frequently Asked Questions
Can I bake the tortilla chips instead of frying? Yes. Brush tortilla wedges lightly with oil, arrange in a single layer on a baking sheet, and bake at 400°F for 10-12 minutes, flipping halfway. They will be lighter and less rich but still crispy. Watch closely near the end as they burn quickly.
What is the best oil for frying tortilla chips? Neutral oils with high smoke points are ideal: vegetable, canola, grapeseed, or peanut oil. Avoid olive oil (low smoke point, strong flavor) or butter (burns easily).
How do I prevent my queso from becoming grainy? Graininess occurs when cheese proteins tighten from excessive heat. Melt cheese slowly over low heat. If using a roux-based sauce, ensure the roux is cooked properly before adding milk. If grainy, blend briefly with an immersion blender or add a teaspoon of sodium citrate solution.
Can I make these nachos gluten-free? Corn tortillas are naturally gluten-free, but always check packaging for certification. Ensure all seasonings, queso, and toppings are certified gluten-free, as cross-contamination can occur in processing facilities.
Why are my homemade chips chewy instead of crispy? Chewiness indicates insufficient frying time or oil that was too cool. Ensure oil reaches 350°F before adding chips. Fry until rigid and golden, not just softened. Drain thoroughly on a wire rack.
What cheese melts best for nachos? American cheese melts most smoothly due to emulsifiers. For natural cheese, use young cheddar, Monterey Jack, or Oaxaca. Avoid aged cheeses like sharp cheddar or parmesan alone—they seize when melted. Blend with a melty cheese for best results.
How far in advance can I prep everything? Components can be prepped 1-2 days ahead. Chips stay crisp 2 days if stored airtight. Meat lasts 3 days refrigerated. Queso lasts 5 days. Assemble only when ready to serve for optimal texture.
Is there a way to keep nachos warm for a party without getting soggy? Use a warming tray set to low (under 200°F). Place nachos on a wire rack over the tray to allow airflow. Refresh with fresh cold toppings every 20-30 minutes. Alternatively, serve in small batches, keeping reserve components warm separately.
Final Thoughts
Creating Ultimate Loaded Nachos at home transforms a simple snack into an unforgettable culinary experience. The effort of frying your own chips and thoughtfully layering fresh, high-quality ingredients pays off in every crunchy, cheesy, vibrant bite.