Quick Recipe Summary
| Prep Time | Cook Time | Total Time | Servings |
|---|---|---|---|
| 20 Minutes | 15-20 Minutes | 35-40 Minutes | 4 as Appetizer |
| Cuisine | Course | Difficulty | Calories (Est.) |
|---|---|---|---|
| Thai / Asian Fusion | Appetizer / Main | Intermediate | 450 kcal per serving |
Table of Contents
- Introduction
- Why This Recipe Works
- Why You’ll Love This Recipe
- Ingredient Notes
- Kitchen Equipment
- Step-by-Step Instructions
- Expert Tips for Maximum Crunch
- Common Mistakes to Avoid
- Recipe Variations
- What to Serve With This Recipe
- Make Ahead & Meal Prep Tips
- Storage & Reheating Instructions
- Nutritional Information
- Troubleshooting Guide
- Frequently Asked Questions
- Final Thoughts
Introduction

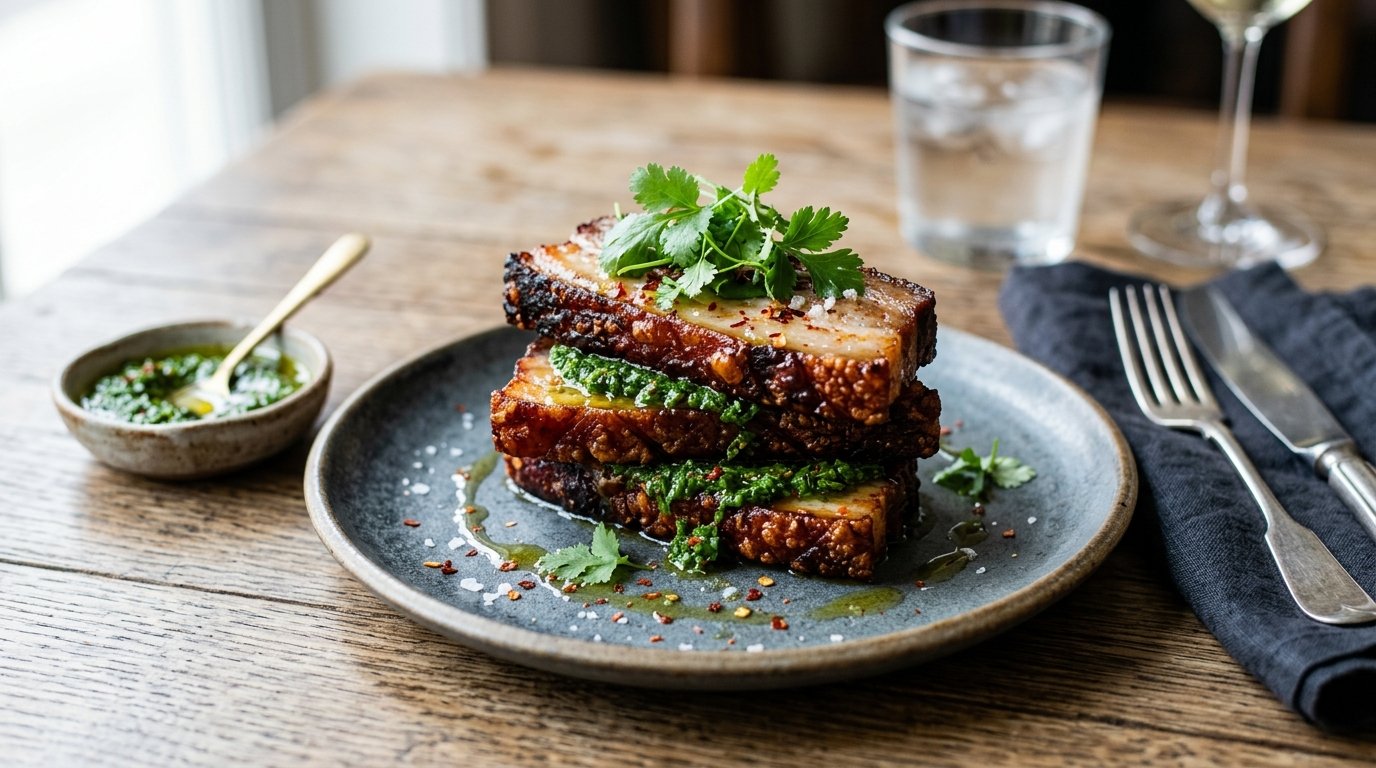
There is a specific sound that defines culinary perfection: the audible crack when you bite into a piece of Crispy Fried Pork Belly. It’s not just food; it’s a sensory experience that balances rich, melting fat with an impossibly shatteringly crisp skin. If you have ever been intimidated by frying pork belly at home, fearing soggy skin or dangerous oil splatters, this recipe is your definitive guide to mastering the technique.
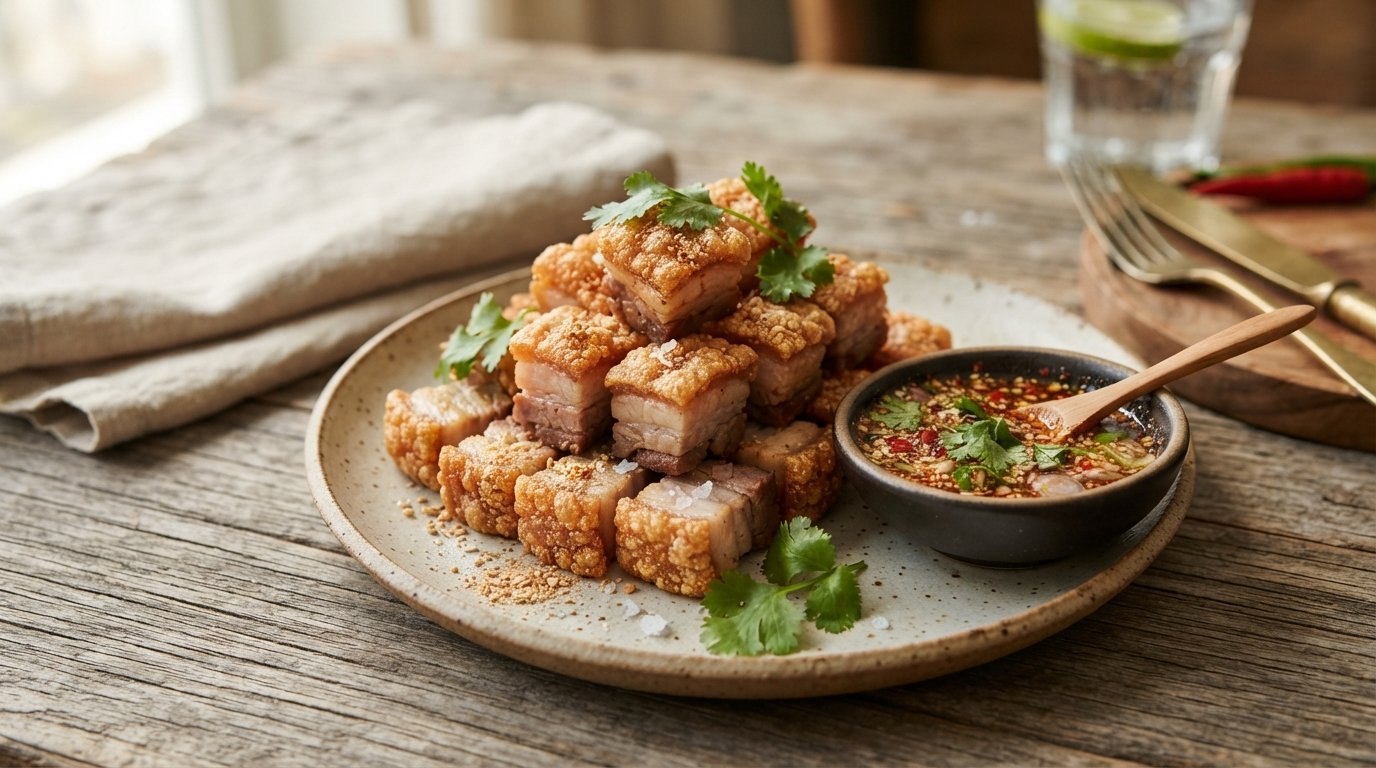
This dish transforms humble slabs of pork belly into golden-brown treasures, served alongside a vibrant, spicy-sour dipping sauce loaded with fresh chilies, shallots, and garlic. The contrast between the hot, crunchy meat and the cool, zesty sauce is what makes this a staple in Thai street food culture and high-end restaurants alike. Whether you are hosting a dinner party or treating yourself to a weekend indulgence, learning to make authentic crispy fried pork belly will elevate your cooking repertoire instantly. Let’s get that oil hot.
Why This Recipe Works
The secret to this recipe isn’t magic; it’s chemistry and technique. We use a two-stage coating process involving lime juice, egg, and starch. The acid from the lime juice helps tenderize the meat slightly and breaks down surface proteins, allowing the marinade to penetrate. The egg acts as a binder, while the rice flour (or cornstarch) creates a barrier that dehydrates rapidly in hot oil, forming a micro-crust that protects the moisture inside while becoming glass-like on the outside.
Furthermore, the dipping sauce is not an afterthought; it is essential for balance. Pork belly is inherently fatty and rich. The dipping sauce, typically made with fish sauce, lime juice, sugar, and aromatics, provides the necessary acidity and heat to cut through that richness. Without it, the dish would be cloying; with it, every bite is perfectly harmonized. The video demonstrates this interplay clearly, showing the crispy exterior holding up against the liquid dip without immediately soggifying—a testament to the proper frying temperature.
Why You’ll Love This Recipe
- Restaurant-Quality Crunch: Achieves a texture that rivals professional deep fryers using standard home kitchen equipment.
- Flavor Balance: The spicy, sour dipping sauce perfectly offsets the richness of the pork fat.
- Versatile Dish: Works as a standalone appetizer, a main course with rice, or even a topping for salads.
- Visual Appeal: The golden-brown color and distinct layers of fat and meat make for stunning food photography.
- Crowd Pleaser: Universally loved flavor profile that appeals to both adventurous eaters and comfort food lovers.
Ingredient Notes
Success starts at the grocery store. Here is what you need and why quality matters.
For the Pork Belly
- Pork Belly Slabs: Look for pieces with distinct, alternating layers of fat and meat. Ideally, the skin should still be attached if you want the ultimate crackling, though skinless belly works for a different texture.
- Buying Tip: Ask your butcher to slice the belly into uniform 1/2-inch thick strips. Uniformity ensures even cooking.
- Lime Juice: Freshly squeezed is non-negotiable. Bottled juice lacks the volatile aromatic compounds needed to tenderize and flavor the meat effectively.
- Egg: Acts as the glue. A single large egg is usually sufficient for 1 lb of pork. It creates a wet surface for the dry starch to adhere to.
- Rice Flour or Cornstarch: Rice flour creates a lighter, crispier crust that stays crunchy longer. Cornstarch is a fine substitute but can be slightly heavier. Avoid all-purpose wheat flour, which tends to get bread-like rather than crispy.
- Seasonings: Salt, white pepper, and paprika (visible in the video). White pepper provides a distinct earthy heat common in Asian cuisine, while paprika adds color and mild sweetness.
For the Dipping Sauce
- Fish Sauce: The umami backbone. Use a high-quality brand like Squid Brand or Megachef for cleaner flavor.
- Fresh Chilies: Bird’s eye chilies for authentic heat, or jalapeños for milder spice. Slice them thinly to release maximum flavor.
- Shallots & Garlic: Finely diced. Shallots add a sweeter, more delicate onion flavor than red onions.
- Lime Juice & Sugar: Balances the saltiness of the fish sauce. Palm sugar is traditional, but brown sugar works well.
Kitchen Equipment

- Heavy-Bottomed Pot or Wok: Essential for maintaining stable oil temperature. Thin pans fluctuate too much.
- Deep-Fry Thermometer: Critical safety and quality tool. Guessing oil temp leads to greasy or burnt food.
- Wire Rack: For draining fried pork. Never drain on paper towels; steam gets trapped and softens the crust.
- Tongs: Long-handled metal tongs for safe handling in hot oil.
- Glass Mixing Bowls: One for marinating, one for dry coating. Glass allows you to see the coating consistency.
- Sharp Knife & Cutting Board: For prepping aromatics and slicing cooked pork.
Preparation Information
- Prep Time: 20 Minutes
- Cook Time: 15-20 Minutes
- Total Time: 35-40 Minutes
- Servings: 4 as Appetizer
Step-by-Step Instructions
Follow these steps precisely to replicate the crispy results shown in the video.
H3: Marinate the Pork
- Prepare the Meat: Pat the pork belly strips completely dry with paper towels. Moisture on the surface prevents browning.
- Add Wet Ingredients: In a large bowl, combine pork with freshly squeezed lime juice, salt, white pepper, and paprika. Crack an egg directly over the meat.
- Why this matters: The acid begins to denature surface proteins, creating a tacky surface that grabs the flour. The egg adds protein that browns beautifully.
- Massage: Using gloved hands, massage the marinade into every crevice of the meat. Ensure each strip is evenly coated. Let it sit for 10-15 minutes while you prep other ingredients.
H3: Coat for Crispiness
- Prepare Dry Mix: In a separate shallow dish, mix rice flour (or cornstarch) with a pinch of salt and pepper.
- Dredge Methodically: Take a marinated strip, let excess egg drip off slightly, then press it firmly into the flour mixture.
- Visual Cue: The meat should look matte and powdery, not wet or clumpy. Shake off excess flour gently; thick clumps will burn before the meat cooks.
- Rest Briefly: Place coated strips on a wire rack for 2-3 minutes. This “hydration rest” allows the flour to absorb moisture from the egg, forming a batter-like adhesion that won’t fall off in the oil.
H3: Fry to Golden Perfection
- Heat Oil: Fill your pot/wok with 2-3 inches of neutral oil (vegetable, canola, or peanut). Heat to 350°F (175°C).
- Safety Note: Never leave hot oil unattended. Keep a lid nearby to smother potential flames.
- Fry in Batches: Carefully lower 3-4 strips into the oil using tongs. Do not overcrowd; this drops oil temp and causes steaming instead of frying.
- Monitor Color: Fry for 3-4 minutes per side. Flip when the bottom is pale gold.
- Aroma Cue: You will smell nutty, toasted starch. If it smells acrid, the oil is too hot.
- Check Doneness: Remove when deep golden brown and rigid. The crust should feel hard to the touch of the tongs. Internal temp should be 145°F (63°C), but visual cues are primary here.
H3: Drain and Serve
- Drain Properly: Transfer fried pork immediately to a wire rack set over a baking sheet.
- Why wire rack? Paper towels trap steam underneath, turning your crispy bottom soggy within seconds. Air circulation preserves crunch.
- Rest Briefly: Let rest for 2-3 minutes. The residual heat finishes cooking the center, and the crust sets further as it cools slightly.
- Slice and Plate: Cut into bite-sized pieces against the grain. Arrange on a banana leaf or plate with fresh cucumber slices.
- Serve Sauce Separately: Pour the spicy dipping sauce into small individual bowls. Dip just before eating to maintain maximum crispness.
Expert Tips for Maximum Crunch

- Oil Temperature is King: Invest in a thermometer. Below 325°F, the pork absorbs oil and becomes greasy. Above 375°F, the outside burns before the inside renders. Stay in the 350-360°F sweet spot.
- Double Fry Technique (Optional): For extra insurance, fry at 325°F for 3 minutes to cook through, remove and rest for 5 minutes, then flash fry at 375°F for 1 minute to crisp the exterior. This is how restaurants do it.
- Dry Surface = Crisp Surface: Any moisture on the raw pork before coating is your enemy. Pat it dry aggressively before marinating.
- Don’t Salt Too Early: Salt draws out moisture. While we salt in the marinade, don’t salt the pork hours ahead unless you’re doing a dry brine. The lime juice marinade time is sufficient.
- Sauce Timing: Assemble the dipping sauce right before serving. Fresh chilies and shallots lose their punch and texture if sitting in acid for hours.
Common Mistakes to Avoid
| Mistake | Why It Happens | How to Fix/Prevent |
|---|---|---|
| Soggy Bottoms | Draining on paper towels; overcrowding pan. | Always use a wire rack. Fry in small batches. |
| Burnt Outside, Raw Inside | Oil too hot; pieces too thick. | Maintain 350°F. Cut pork to uniform 1/2″ thickness. |
| Coating Falling Off | Meat too wet; no resting time. | Pat meat dry before marinade. Let coated meat rest 2 mins before frying. |
| Greasy Pork | Oil temp dropped too low. | Wait for oil to recover temp between batches. Use thermometer. |
| Bland Flavor | Under-seasoning marinade. | Taste your marinade (minus raw egg/pork). It should be slightly too salty/strong. |
Recipe Variations
Adapt this classic to suit different tastes and dietary needs.
- Spicy Korean Style: Replace Thai dipping sauce with a gochujang-soy-vinegar glaze. Add gochugaru (Korean chili flakes) to the flour coating.
- Chinese Five-Spice: Add 1 tsp five-spice powder to the marinade. Serve with plum sauce or hoisin instead of Thai dip.
- Air Fryer Version: Spray coated pork generously with oil. Air fry at 400°F for 12-15 mins, flipping halfway. Less crispy but significantly lower fat.
- Low-Carb/Keto: Use almond flour or crushed pork rinds instead of rice flour. Serve with sugar-free spicy mayo.
- Vietnamese Nuoc Cham: Swap fish sauce base for nuoc cham (fish sauce, lime, sugar, garlic, chili). Add pickled daikon/carrot for crunch.
- Extra Crispy Panko: Mix 50% rice flour with 50% panko breadcrumbs for an even more aggressive crunch texture.
What to Serve With This Recipe
Balance the richness with fresh, acidic, and starchy elements.
- Steamed Jasmine Rice: The traditional vehicle. The plain rice absorbs the spicy sauce and cuts the fat.
- Cucumber Salad: Sliced cucumbers with rice vinegar and sugar provide a cooling, crunchy contrast.
- Sticky Rice: For a more substantial meal, especially if serving as a main.
- Fresh Herbs: Thai basil, cilantro, and mint leaves wrapped with the pork add aromatic freshness.
- Drinks: Ice-cold lager beer or Thai iced tea. The carbonation and sweetness cleanse the palate.
- Papaya Salad (Som Tum): The ultimate pairing. The spicy, sour, crunchy salad mirrors and amplifies the dipping sauce flavors.
Make Ahead & Meal Prep Tips
- Marinate Ahead: Pork can be marinated up to 24 hours in advance. The acid will continue to work, so don’t exceed 24 hours or texture may become mushy.
- Pre-Coat: You can coat the pork and freeze it on a baking sheet. Once frozen solid, transfer to bags. Fry directly from frozen, adding 2-3 minutes to cook time.
- Sauce Prep: Chop all aromatics (shallots, garlic, chilies) ahead and store in fridge. Mix liquid components (fish sauce, lime, sugar) separately. Combine just before serving to preserve freshness.
- Re-Crisping: If preparing for a party, fry 80% done, rest, then flash fry at high heat just before serving. This guarantees peak crunch for guests.
Storage & Reheating Instructions
Refrigerator
Store leftover fried pork in an airtight container for up to 3 days. Store sauce separately. Note: it will lose significant crispness.
Freezer
Freeze cooked pork on a wire rack until solid, then bag. Keeps for 2 months. Thaw in fridge before reheating.
Reheating Methods
- Air Fryer (Best): 400°F for 3-5 minutes. Restores 90% of original crunch.
- Oven: 400°F on wire rack for 8-10 minutes. Better than microwave but slower.
- Stovetop: Dry pan over medium heat, toss for 2-3 minutes. Risk of burning if not careful.
- Microwave (Avoid): Will make pork rubbery and soggy. Only use if desperate, and finish under broiler for 1 min.
Nutritional Information
Approximate values per serving (4 servings, excluding sauce):
- Calories: 450 kcal
- Protein: 18g
- Carbohydrates: 12g
- Fat: 38g
- Saturated Fat: 14g
- Cholesterol: 65mg
- Sodium: 580mg
Note: Values vary based on pork belly fat ratio and oil absorption.
Troubleshooting Guide
Problem: Coating is gummy, not crispy. Solution: Oil temperature was too low, or pork was overcrowded. The starch hydrated instead of frying. Next time, verify temp with thermometer and fry fewer pieces at once.
Problem: Pork is tough/chewy. Solution: Overcooked or cut too thick. Pork belly needs rendering time but shouldn’t be dried out. Aim for 1/2″ thickness and pull at golden brown, not dark brown.
Problem: Sauce is too salty. Solution: Fish sauce brands vary wildly in salinity. Always taste before serving. Balance with extra lime juice and a pinch of sugar. Never add salt to the sauce until tasting.
Problem: Oil splattering dangerously. Solution: Moisture in the pork or coating was too wet. Ensure pork is patted dry and excess egg drips off before flouring. Lower pork gently into oil away from you.
Frequently Asked Questions
1. Can I use skin-on pork belly for this recipe? Yes! Skin-on yields the famous “crackling.” Score the skin deeply before marinating. The skin requires slightly longer frying; ensure it’s fully rendered and bubbly before removing.
2. What oil is best for frying pork belly? Use oils with high smoke points: peanut, avocado, canola, or vegetable oil. Avoid olive oil or butter—they’ll burn at frying temps and impart unwanted flavors.
3. Is the dipping sauce supposed to be fishy? Good fish sauce should be savory and complex, not overtly “fishy.” If yours is pungent, dilute with more lime juice and sugar. Quality matters enormously here.
4. Can I bake this instead of frying? Baking won’t achieve the same shattering crispness. For a healthier version, air frying is superior to oven baking. If baking, use convection at 425°F on a wire rack, but expect a chewier result.
5. How do I know when the oil is ready without a thermometer? Drop a small cube of bread or pinch of flour into the oil. If it sizzles vigorously and turns golden in 30-45 seconds, you’re at ~350°F. If it sinks or barely bubbles, it’s too cold. If it instantly blacks, it’s too hot.
6. Why did my coating fall off in the oil? The meat surface was too wet, or you didn’t let the coated pork rest before frying. The resting period allows the flour to hydrate and bind to the egg layer. Also, don’t move the pork for the first 60 seconds of frying—let the crust set.
7. Can I reuse the frying oil? Yes, 2-3 times if strained and stored properly. Cool completely, strain through cheesecloth to remove bits, and store in a sealed container in the fridge. Discard if oil smells rancid or smokes at normal temps.
8. What cut is best if I can’t find pork belly? Pork shoulder (butt) sliced thin is a decent substitute, though leaner. Chicken thighs (boneless, skin-on) work surprisingly well with this same coating and sauce method.
Final Thoughts
Making Crispy Fried Pork Belly at home is a rewarding challenge that pays off with every crunchy, juicy bite. It teaches you patience with oil temperature, respect for ingredient balance, and the joy of creating restaurant-level textures in your own kitchen. The combination of that golden, shattering crust with the bright, fiery dipping sauce is something that lingers in memory long after the meal is done.