
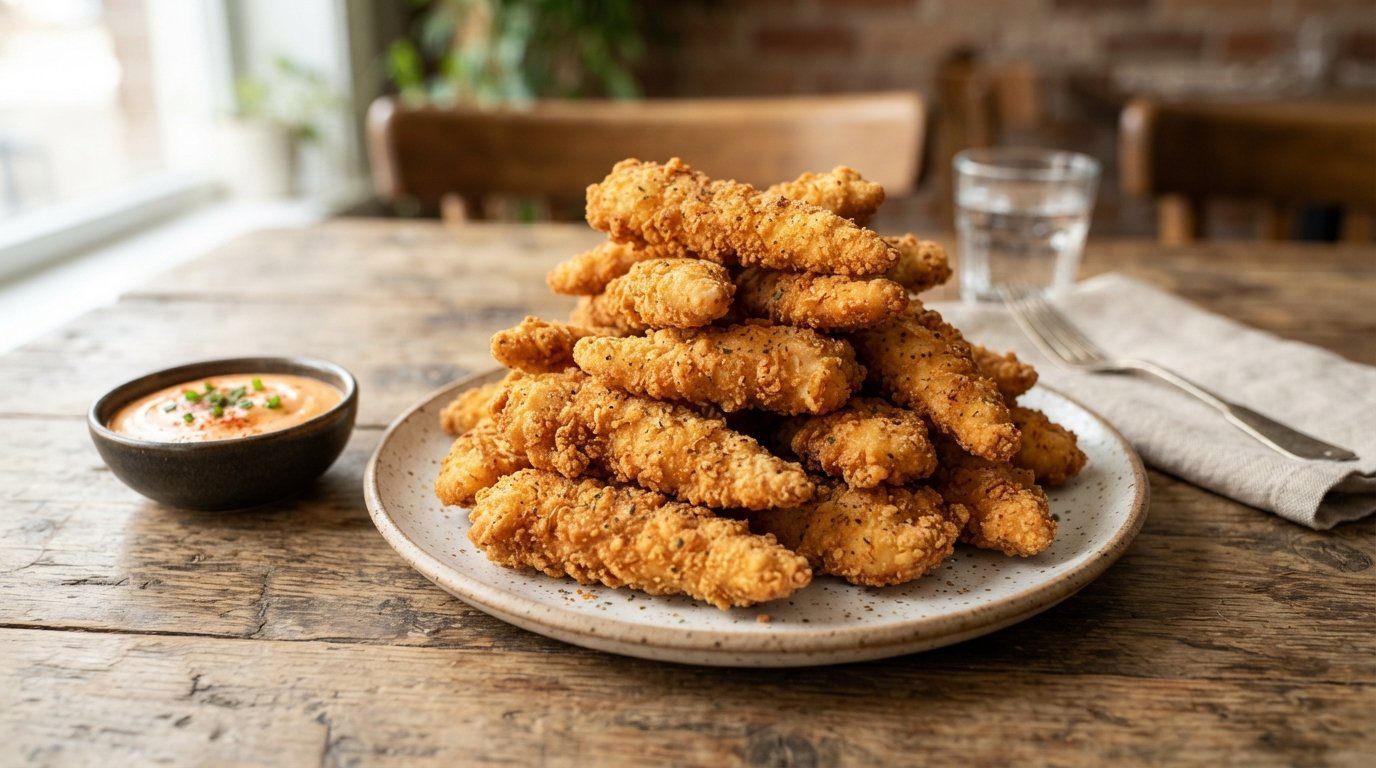
Quick Recipe Summary
| Feature | Details |
|---|---|
| Prep Time | 20 minutes |
| Cook Time | 15 minutes |
| Total Time | 35 minutes |
| Servings | 4 people |
| Cuisine | American / Comfort Food |
| Course | Appetizer / Snack / Main |
| Difficulty | Easy |
| Calories | ~380 kcal per serving |
Table of Contents
- Introduction
- Why This Recipe Works
- Why You’ll Love These Crispy Chicken Fries
- Ingredient Notes
- Kitchen Equipment
- Step-by-Step Instructions
- Expert Tips for Maximum Crunch
- Common Mistakes to Avoid
- Recipe Variations
- What to Serve With Chicken Fries
- Make Ahead and Storage Tips
- Reheating Instructions
- Nutritional Information
- Troubleshooting Guide
- Frequently Asked Questions
- Final Thoughts
Introduction
There is a specific kind of joy found in biting into a perfectly fried piece of chicken that snaps audibly before giving way to tender, juicy meat. These crispy chicken fries capture that magic in a convenient, finger-food format that rivals any fast-food chain but tastes infinitely better because they are made fresh at home. Unlike traditional nuggets which can sometimes be dense or processed, these fries use real chicken breast strips, marinated to ensure flavor penetrates every bite.
The secret lies not just in the frying, but in the preparation. A quick marinade of oil and spices tenderizes the meat, while a strategic breading process creates a craggy, textured crust that holds up to dipping. Served alongside a creamy, tangy dipping sauce, this recipe transforms simple pantry staples into an irresistible appetizer or a fun family dinner. Whether you are hosting game day guests or just craving a comfort food fix, mastering this recipe will elevate your snacking game permanently.
Why This Recipe Works
This recipe succeeds because it addresses the two biggest failures in homemade fried chicken: dryness and soggy breading. By cutting the chicken into uniform strips and marinating them briefly in oil and acid (from the spices), we ensure the interior remains moist even after the high heat of frying. The oil in the marinade also helps the seasoning adhere to the smooth surface of the raw meat.
The breading technique is equally deliberate. Using a standard flour-egg-crumb station provides the necessary adhesion, but the key is the texture of the crumbs. Coarse breadcrumbs or panko create more surface area for crunch than fine dust-like crumbs. Furthermore, frying at the correct temperature ensures the exterior seals instantly, preventing oil from soaking into the coating and making it greasy. The result is a fry that stays crispy longer and delivers a satisfying contrast between shell and filling.
Why You’ll Love These Crispy Chicken Fries
- Superior Texture: The double-coating method guarantees an extra-crunchy exterior that doesn’t fall off when you dip.
- Juicy Interior: Marinating prevents the lean chicken breast from drying out during the frying process.
- Customizable Flavor: The base marinade is versatile; swap paprika for curry powder or add heat with cayenne to match your mood.
- Better Than Takeout: Freshly fried means no stale oil taste and a crispness that delivery simply cannot replicate.
- Kid-Friendly: The familiar “fry” shape makes vegetables or proteins more approachable for picky eaters.
- Versatile Serving: Works as an appetizer, a main course with sides, or a topping for salads and wraps.
Ingredient Notes
For the Chicken & Marinade
- Chicken Breast: Boneless, skinless breasts are ideal for uniform strips. Trim any excess fat or connective tissue to prevent chewiness.
- Olive Oil: Acts as a binder for the spices and adds moisture. Extra virgin is fine here since it’s not being heated directly in the pan yet.
- Paprika: Sweet paprika adds color and mild earthiness. Smoked paprika can be used for a BBQ-like depth.
- Garlic Powder & Onion Powder: Provide savory umami notes without the risk of burning that fresh garlic might have in hot oil.
- Salt & Pepper: Essential for seasoning the meat itself, not just the crust. Don’t skimp on the salt in the marinade.
For the Breading
- All-Purpose Flour: The first layer creates a dry surface for the egg to grab onto. Season this layer lightly with salt.
- Eggs: Act as the glue. Whisk thoroughly to break up whites; uneven egg wash leads to patchy breading.
- Breadcrumbs: Panko or coarse Italian-style breadcrumbs work best. Fine crumbs can pack too densely and become hard rather than crispy.
- Dried Herbs: Parsley or oregano in the crumbs adds visual appeal and subtle flavor. Fresh herbs burn too quickly in deep fryers.
For the Dipping Sauce
- Mayonnaise Base: Provides creaminess and fat to carry flavor.
- Ketchup/Hot Sauce: Adds acidity and sweetness to cut through the richness of the fried chicken.
- Spices: A pinch of garlic powder or smoked paprika ties the sauce to the chicken’s flavor profile.
Kitchen Equipment
- Deep Skillet or Dutch Oven: Heavy-bottomed pans retain heat better, maintaining oil temperature when cold chicken is added.
- Candy/Deep Fry Thermometer: Crucial for safety and quality. Oil that is too cool = greasy food; too hot = burnt outside/raw inside.
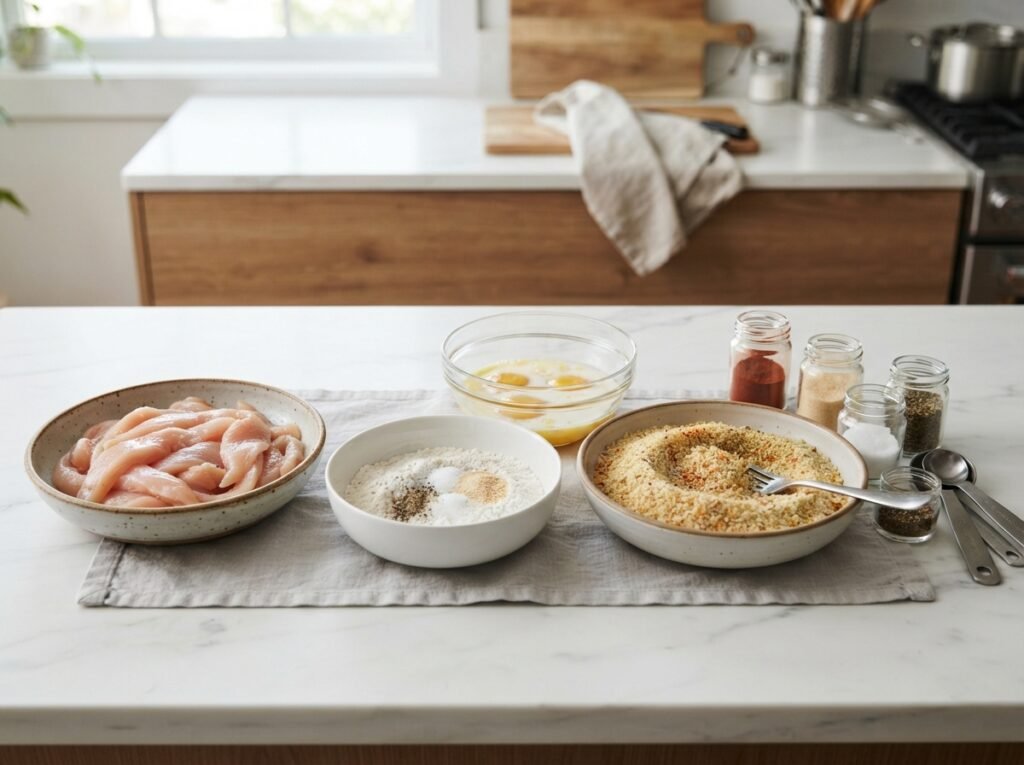
- Three Shallow Bowls/Plates: For the breading station assembly line.
- Tongs: Metal tongs with silicone tips are safest for turning chicken in hot oil without scratching pans.
- Wire Rack: Preferable to paper towels for draining. Paper towels trap steam and soften the bottom of the fries.
- Whisk: For emulsifying the egg wash and mixing the dipping sauce.
Step-by-Step Instructions
Marinating the Chicken
Cut chicken breasts into long, thin strips, roughly the size of a thick french fry (about 1/2 inch wide). Place them in a large glass bowl. Add olive oil, paprika, garlic powder, onion powder, salt, and black pepper. Toss vigorously with your hands or a spoon until every strip is evenly coated in the reddish-orange spice mixture. Let sit for at least 15 minutes, or up to 2 hours in the fridge.
- Why it matters: This step seasons the meat internally. Without it, you’d have flavorful crust and bland chicken.
- Visual Cue: The chicken should look glossy and uniformly colored, not pale with patches of white.
Setting Up the Breading Station
Prepare three separate vessels. Bowl 1: All-purpose flour (seasoned with a pinch of salt). Bowl 2: Beaten eggs (whisked until uniform yellow). Bowl 3: Breadcrumbs mixed with dried herbs. Arrange them in order: Flour → Egg → Crumbs. Keep one hand “dry” (for flour/crumbs) and one hand “wet” (for egg) to avoid clumping.
- Pro Tip: Use a plate for the final crumb coat so you have more surface area to press the coating on.
The Double-Dip Technique
Take a marinated chicken strip and dredge it in flour, shaking off excess. Dip it completely into the egg wash, letting the drip fall back into the bowl. Finally, press it firmly into the breadcrumbs, ensuring all sides are covered. For extra crunch, repeat the egg and crumb steps a second time. Place breaded strips on a wire rack while you finish the batch.
- Texture Cue: The coating should feel rough and substantial, not smooth or powdery.
- Common Mistake: Shaking off too much flour leaves bare spots where breading will slide off during frying.
Frying to Golden Perfection
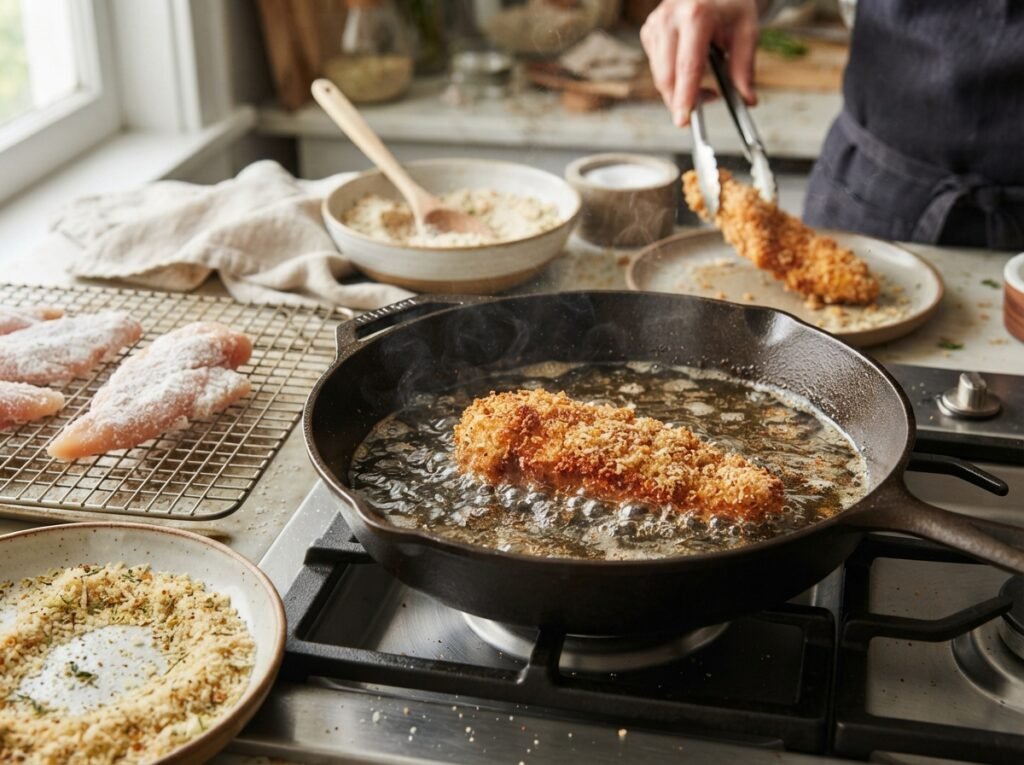
Heat 1-2 inches of neutral oil (vegetable, canola, or peanut) in your skillet to 350°F (175°C). Carefully lower 4-5 chicken fries into the oil using tongs. Do not overcrowd; this drops the oil temp drastically. Fry for 3-4 minutes, flipping halfway, until deep golden brown. Transfer immediately to a wire rack to drain. Repeat with remaining batches.
- Aroma Cue: You should smell toasted breadcrumbs and cooking chicken, not burning oil.
- Doneness Check: Internal temperature should reach 165°F (74°C). If unsure, cut one open; juices should run clear, not pink.
Expert Tips for Maximum Crunch
- Chill Before Frying: After breading, let the chicken rest in the fridge for 10-15 minutes. This helps the coating set and adhere better, reducing fallout in the oil.
- Oil Temperature is King: Invest in a thermometer. If you don’t have one, test by dropping a breadcrumb in; it should sizzle immediately and turn gold in 60 seconds. If it sinks and does nothing, the oil is too cold.
- Don’t Crowd the Pan: Adding too many fries at once steams them instead of frying them. Cook in small batches to maintain crispness.
- Use a Wire Rack: Never drain fried food on paper towels. The steam gets trapped underneath, creating a soggy bottom. A wire rack allows air circulation.
Common Mistakes to Avoid
- Skipping the Marinade: Results in dry, flavorless chicken. Even 10 minutes makes a difference.
- Wet Hands in Flour: Causes the flour to clump into globs rather than coating smoothly. Always keep your “dry hand” dry.
- Frying at Low Temp: Leads to oily, heavy breading. The oil must be hot enough to seal the crust instantly.
- Overcooking: Chicken breast dries out fast. Pull them when they are golden; carryover heat will finish the job.
- Using Old Oil: Degraded oil has a lower smoke point and transfers bad flavors. Change oil if it smells acrid or looks dark.
Recipe Variations
- Spicy Nashville Style: Add 1 tbsp cayenne pepper and 1 tsp chili flakes to the flour and breadcrumb mix. Serve with spicy honey butter.
- Parmesan Garlic: Mix 1/2 cup grated parmesan and 1 tsp garlic powder into the breadcrumbs. Richer, cheesier flavor.
- Gluten-Free: Substitute flour with rice flour or cornstarch. Use GF breadcrumbs or crushed cornflakes for the crust.
- Air Fryer Version: Spray breaded fries generously with oil. Air fry at 400°F for 10-12 mins, flipping halfway. Less oil, still crispy.
- Buffalo Chicken Fries: Toss cooked fries in melted butter and Frank’s RedHot sauce. Serve with blue cheese dip.
- Korean Inspired: Use gochujang in the marinade and coat finished fries in a sticky soy-garlic glaze.
- Vegan Option: Use firm tofu or seitan cut into strips. Marinate similarly and use flax eggs + GF crumbs.
What to Serve With Chicken Fries
These fries are versatile enough to stand alone or anchor a meal:
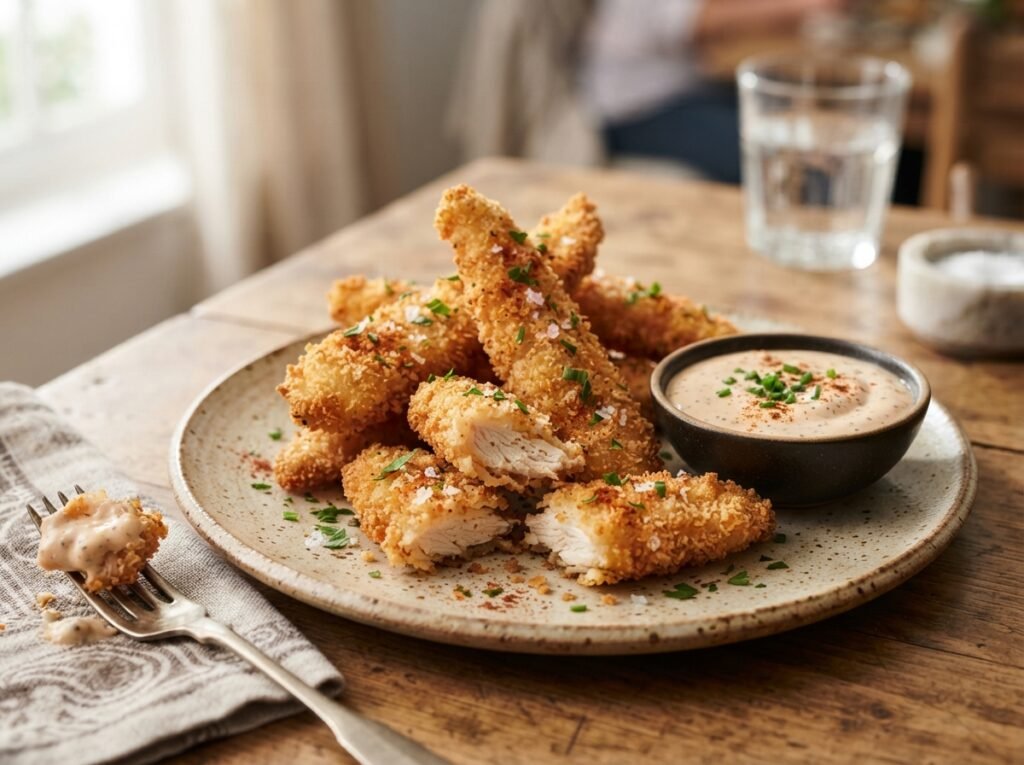
- Dipping Sauces: Ranch, honey mustard, BBQ, sriracha mayo, or the creamy orange sauce shown in the video.
- Classic Sides: Coleslaw, potato salad, or baked beans for a picnic vibe.
- Fresh Contrast: A simple green salad with vinaigrette cuts the richness of the fried food.
- Drinks: Ice-cold lager, lemonade, or sparkling water with lime.
- As a Main: Serve over a bed of lettuce with tomatoes and cheese for a “fried chicken salad.”
- In a Wrap: Stuff into a tortilla with slaw and ranch for a quick lunch.
Make Ahead and Storage Tips
- Prep Ahead: You can cut, marinate, and even bread the chicken up to 24 hours in advance. Store covered in the fridge. Bring to room temp for 10 mins before frying.
- Freezing Raw: Freeze breaded raw fries on a baking sheet, then transfer to a bag. Fry from frozen, adding 2-3 minutes to cook time.
- Leftovers: Store cooked fries in an airtight container in the fridge for up to 3 days. They lose crispness but are still safe to eat.
Reheating Instructions
- Air Fryer (Best): 375°F for 3-5 minutes. Restores 90% of original crunch.
- Oven: 400°F on a wire rack for 8-10 minutes. Better than microwave but slower.
- Stovetop: Re-fry briefly in shallow oil for 1 minute. Effective but messy.
- Microwave (Avoid): Makes them rubbery and soggy. Only use if desperate, and place on a paper towel.
Nutritional Information
Estimates per serving (approx. 4-5 fries):
- Calories: 380
- Protein: 28g
- Carbohydrates: 22g
- Fat: 20g
- Fiber: 1g
- Sugar: 1g
- Sodium: 550mg
Troubleshooting Guide
| Problem | Cause | Solution |
|---|---|---|
| Breading Falling Off | Chicken too wet; didn’t press crumbs. | Pat chicken dry before flour. Press crumbs firmly. Chill before frying. |
| Greasy/Soggy Fries | Oil temp too low. | Use thermometer. Wait for oil to recover between batches. |
| Burnt Outside, Raw Inside | Oil too hot; strips too thick. | Lower temp to 350°F. Cut thinner strips. Finish in oven if needed. |
| Dry Chicken | Overcooked; no marinade. | Use thermometer (pull at 165°F). Always marinate. |
| Bland Flavor | Underseasoned layers. | Salt EVERY layer: marinade, flour, AND crumbs. Taste test one fry. |
Frequently Asked Questions
Can I bake these instead of frying? Yes, but texture differs. Bake at 425°F on a wire rack for 20-25 mins, spraying heavily with oil. They will be less crunchy but still tasty.
What oil is best for frying? Neutral oils with high smoke points: vegetable, canola, peanut, or grapeseed. Avoid olive oil (burns) or butter (solids burn).
How do I keep the first batch warm while frying the rest? Keep them on a wire rack in a 200°F oven. This keeps them crisp without continuing to cook them.
Can I use chicken thighs? Absolutely! Thighs are juicier and more forgiving. Adjust cooking time slightly as they may take a minute longer.
Why did my oil splatter so much? Water is the enemy of hot oil. Ensure chicken isn’t dripping wet marinade or egg wash before entering the pan. Shake off excess liquid.
Is there a healthier breading alternative? Crushed cornflakes, almond flour, or pork rinds (for keto) offer different textures and nutritional profiles.
How do I make the dipping sauce spicier? Add sriracha, chipotle powder, or minced jalapeños to the mayo-ketchup base. Adjust to taste.
Can I reuse the frying oil? Yes, 2-3 times if strained and stored properly. Discard if it smokes, smells bad, or is very dark.
Final Thoughts
Making crispy chicken fries at home is a rewarding culinary skill that pays off in every crunchy bite. Once you master the balance of marinade, breading, and oil temperature, you will never need to rely on frozen alternatives again. This recipe is forgiving enough for beginners but offers enough nuance for experienced cooks to tweak and perfect.
I encourage you to experiment with different spice blends and dipping sauces to find your signature version. If you try this recipe, please leave a comment below sharing your favorite variation or pairing. Your feedback helps our community discover new ways to enjoy this classic comfort food. Don’t forget to rate the recipe if it brought a smile to your table!