
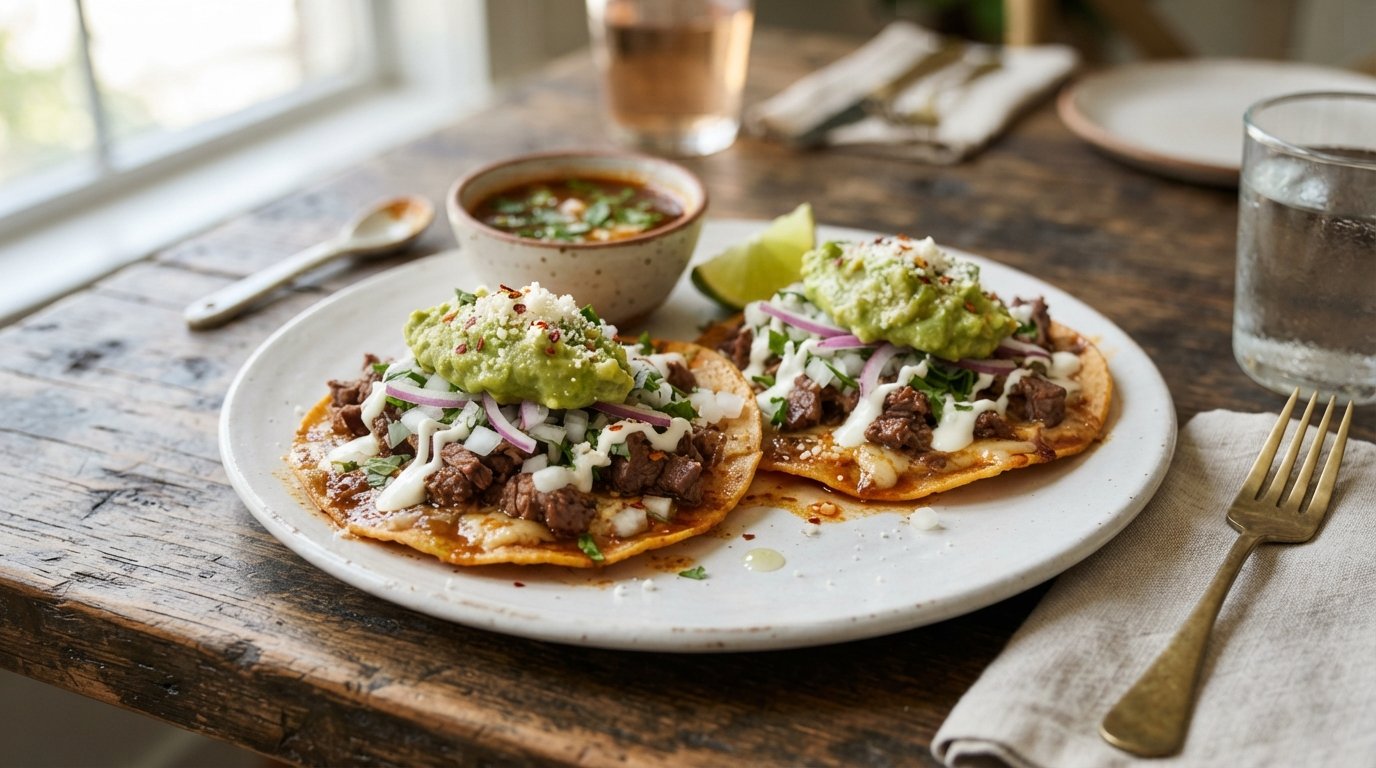
Quick Recipe Summary
| Feature | Details |
|---|---|
| Prep Time | 30 Minutes |
| Cook Time | 20 Minutes (Assembly & Griddle) |
| Total Time | 50 Minutes |
| Servings | 4-6 |
| Cuisine | Mexican / Tex-Mex Fusion |
| Course | Main Course / Street Food |
| Difficulty | Intermediate |
| Calories | ~650 kcal per serving (2 tacos) |
Table of Contents
- Introduction
- Why This Recipe Works
- Why You’ll Love This Recipe
- Ingredient Notes
- Kitchen Equipment
- Preparation Information
- Step-by-Step Instructions
- Expert Tips for Authentic Flavor
- Common Mistakes to Avoid
- Recipe Variations
- What to Serve With This Recipe
- Make Ahead & Meal Prep Tips
- Storage & Reheating Instructions
- Nutritional Information
- Troubleshooting Guide
- Frequently Asked Questions
- Final Thoughts
Introduction
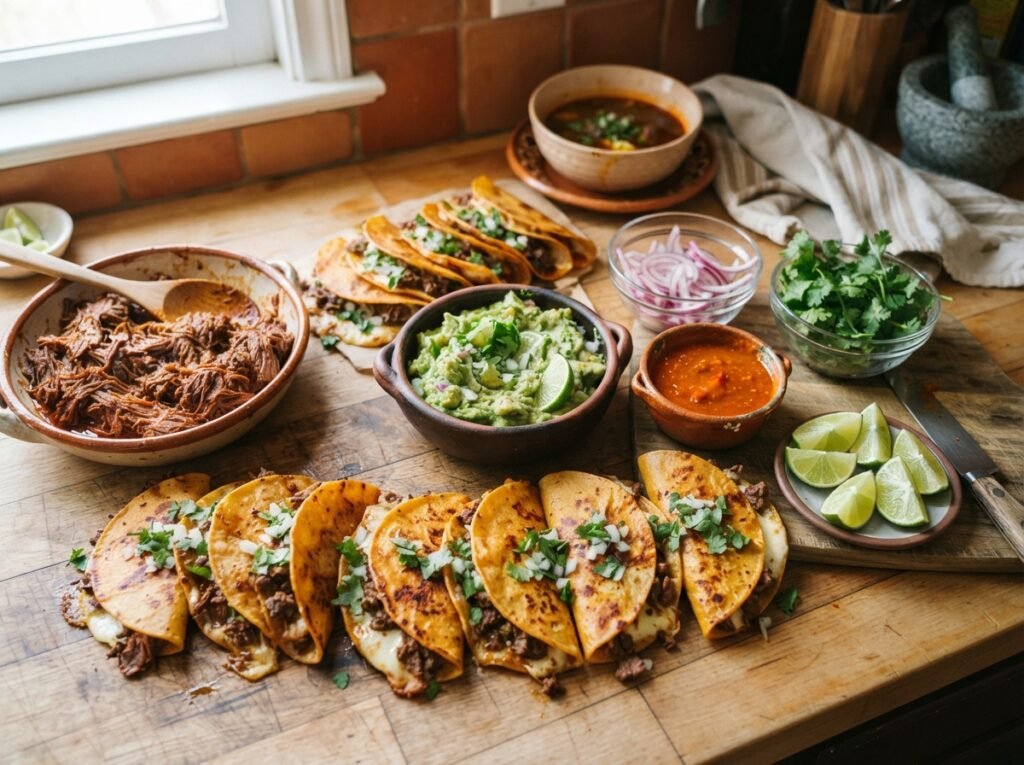
There is a reason why loaded birria quesabirria tacos have taken the culinary world by storm. They are not just a meal; they are an experience that engages every sense. Imagine biting into a tortilla that has been crisped in rich, red consommé, revealing a molten core of melted cheese, tender shredded beef, vibrant green guacamole, and tangy pickled onions. The contrast between the hot, savory meat and the cool, fresh toppings creates a flavor profile that is impossible to resist.
This recipe elevates the standard street taco into a gourmet event. By layering textures—the crunch of the fried tortilla, the chew of the beef, the creaminess of the avocado, and the snap of the onion—we create a bite that is complex yet comforting. Whether you are hosting a taco night or simply craving something extraordinary for dinner, these quesabirria tacos deliver restaurant-quality results right in your home kitchen. Let’s break down exactly how to build this masterpiece.
Why This Recipe Works
The magic of this dish lies in its structural integrity and flavor balance. Unlike a standard soft taco, a quesabirria relies on the “dip-fry” method. Dipping the corn tortilla in the fat-rich consommé before hitting the griddle does two critical things: it seasons the corn directly and creates a barrier that prevents the cheese from leaking out while promoting an even, deep-red crispness.
Furthermore, the layering order is scientifically designed for heat management. The cheese acts as a glue, binding the meat to the tortilla. The guacamole and pickled onions are added after cooking or during the final fold to preserve their fresh texture and bright acidity, which cuts through the richness of the beef tallow and cheese. This thoughtful construction ensures that every component shines without being overwhelmed.
Why You’ll Love This Recipe
- The Ultimate Cheese Pull: The combination of melting cheese and dipping the tortilla in consommé creates an iconic, stretchy cheese pull that is as delicious as it is photogenic.
- Flavor Bomb: Every bite offers a perfect ratio of savory beef, salty cheese, spicy salsa, creamy avocado, and acidic onion.
- Customizable Heat: You control the spice level by adjusting the amount of green salsa or the heat of your consommé.
- Interactive Dining: These tacos are fun to eat and even more fun to make, making them perfect for social gatherings.
- Texture Heaven: You get crispy edges, a soft center, and fresh toppings all at once.
Ingredient Notes
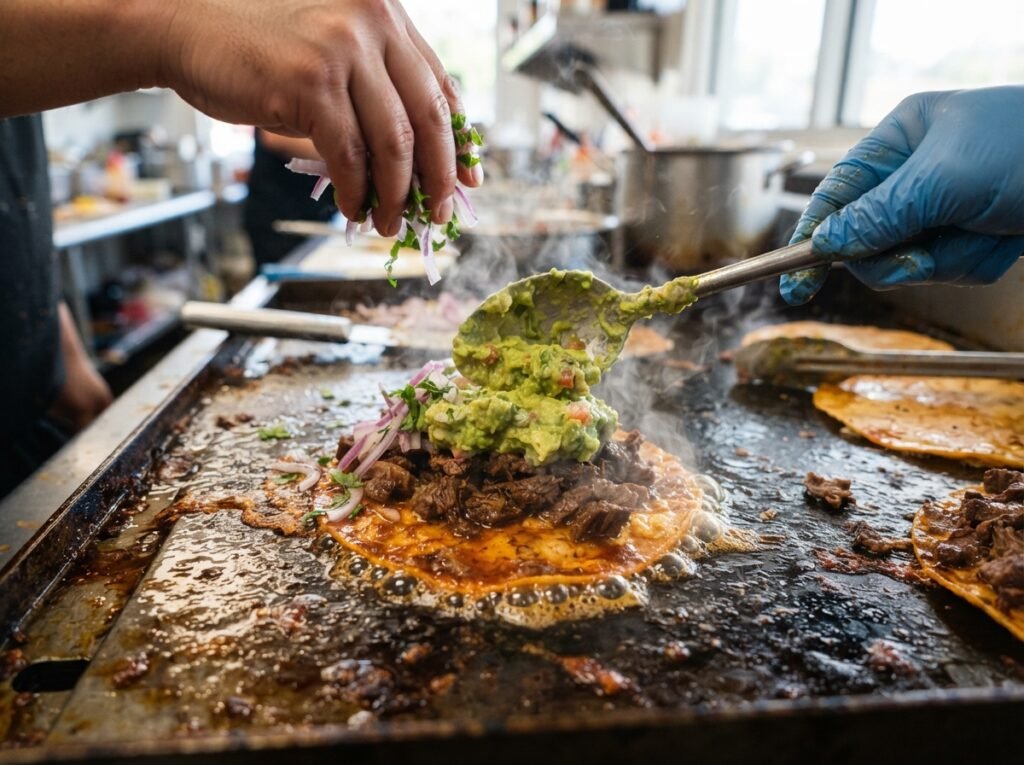
Quality ingredients are non-negotiable for authentic loaded birria quesabirria tacos. Here is what you need to know about each component.
The Foundation
- Corn Tortillas: Use small, yellow corn tortillas (about 4-5 inches). They must be fresh and pliable. Old, dry tortillas will crack when dipped in consommé. Look for brands that list only corn, water, and lime (cal) as ingredients.
- Birria Consommé: This is the liquid gold. It should be rich, reddish-orange, and have a layer of fat on top. If making from scratch, use dried guajillo and ancho chiles, cumin, oregano, and cloves. If buying, ensure it is high-quality and not overly salty.
- Shredded Beef (Birria Meat): Traditionally made with goat (chivo), but beef chuck roast or brisket is the standard for quesabirrias. The meat should be slow-cooked until it falls apart easily. Shred it while warm and mix it with a ladle of consommé to keep it moist.
The Fillings & Toppings
- Oaxaca or Mozzarella Cheese: Oaxaca cheese is the traditional choice because of its stringy, mozzarella-like melt. If unavailable, low-moisture whole milk mozzarella is the best substitute. Avoid pre-shredded bagged cheese, as the anti-caking agents prevent proper melting.
- Guacamole: Needs to be thick and seasoned well. Mash ripe Hass avocados with lime juice, salt, and cilantro. A thinner guacamole will make the taco soggy.
- Pickled Red Onions: Essential for acid. Slice red onions thinly and pickle them in lime juice or apple cider vinegar with a pinch of sugar and salt for at least 30 minutes. They provide the necessary crunch and brightness.
- Green Salsa (Salsa Verde): A tangy, tomatillo-based salsa adds a herbal note that complements the deep red consommé.
- Fresh Cilantro: Use whole leaves or large sprigs for garnish. The stem adds a nice textural element.
Kitchen Equipment
- Comal or Cast Iron Skillet: Essential for retaining high heat and creating an even sear on the tortillas.
- Small Bowl for Consommé: For dipping the tortillas. Wide enough to fit the tortilla flat.
- Tongs: For flipping tacos and handling hot meat.
- Sharp Knife & Cutting Board: For slicing onions and prepping garnishes.
- Molcajete or Blender: If making salsas or guacamole from scratch.
- Serving Plates: Warm plates help keep the tacos hot longer.
Preparation Information
- Prep Time: 30 Minutes (Assumes meat and consommé are prepared; includes chopping and pickling)
- Cook Time: 20 Minutes (Griddling and assembly)
- Total Time: 50 Minutes
- Servings: 4-6 (Approx. 2-3 tacos per person)
Step-by-Step Instructions
Follow this precise workflow to achieve the perfect loaded birria quesabirria tacos.
Phase 1: Preparing the Components
H3: Mise en Place is Key
Before you turn on the heat, have everything ready. The griddle moves fast, and you won’t have time to chop onions while tortillas are burning.
- Warm the Meat: Ensure your shredded beef is hot. Cold meat cools down the tortilla too fast. Mix the beef with ½ cup of warm consommé to ensure it is juicy.
- Grate Cheese: Grate your Oaxaca or mozzarella cheese now. Keep it covered to prevent drying.
- Prep Toppings: Have your guacamole, pickled onions, green salsa, and cilantro in separate bowls within arm’s reach of the stove.
- Heat Consommé: Keep your consommé simmering in a pot next to the griddle. It needs to be hot to properly fry the tortilla.
Phase 2: The Assembly Technique
H3: Building the Taco Structure
This is where the technique matters most. Watch the video closely for the specific layering order.
- Dip the Tortilla: Using tongs, fully submerge a corn tortilla into the hot consommé for 1-2 seconds. Shake off excess liquid gently. You want it coated, not dripping.
- Visual Cue: The tortilla should turn a deep orange-red color instantly.
- Why it matters: This infuses flavor and starts the frying process immediately upon contact with the pan.
- Place on Griddle: Lay the dipped tortilla onto the hot, dry comal (no extra oil needed if the consommé is fatty enough).
- Add Cheese First: Immediately sprinkle a generous handful of cheese over half of the tortilla.
- Why first? The cheese melts directly against the tortilla, acting as a sealant for the meat juices.
- Add Meat: Pile the moist shredded beef on top of the cheese. Don’t overload; about ¼ cup is sufficient.
- Fold: Once the cheese begins to melt (about 30-45 seconds), fold the empty half of the tortilla over the filling. Press down gently with a spatula.
Phase 3: Griddling to Perfection
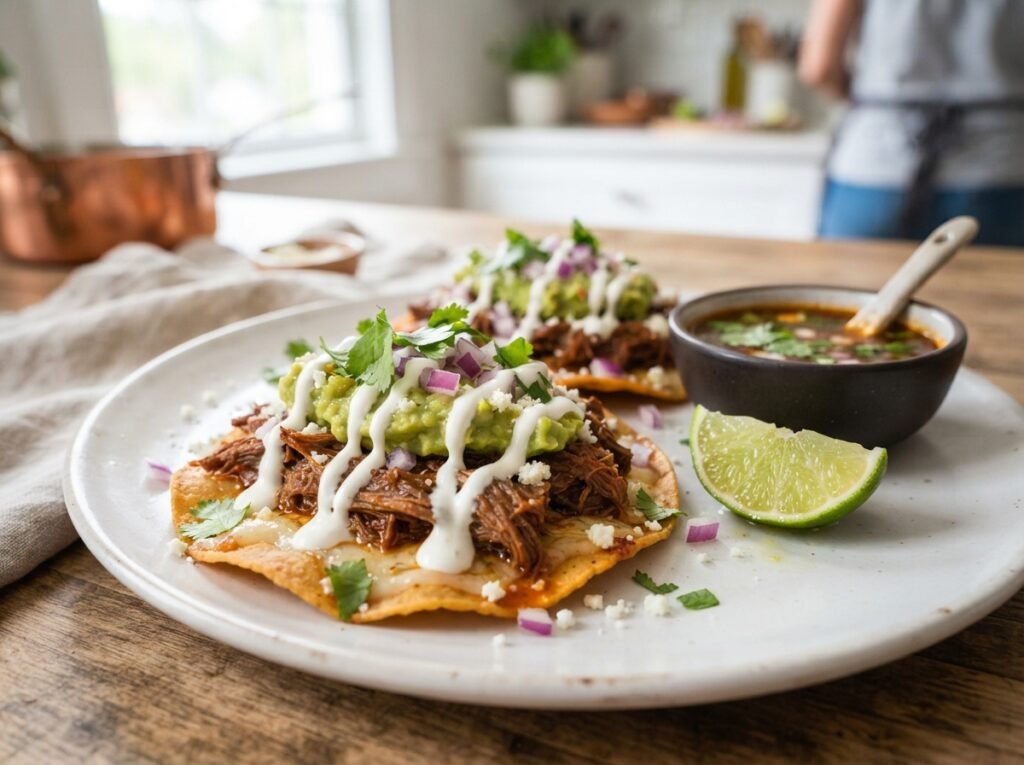
H3: Achieving the Crisp
- Cook Side One: Let the folded taco cook undisturbed for 2-3 minutes.
- Visual Cue: Look for bubbling cheese oozing slightly from the edges and the bottom turning dark red and crispy.
- Aroma Cue: You should smell toasted corn and caramelized beef fat.
- Flip: Flip the taco carefully. Cook the second side for another 1-2 minutes until equally crisp.
- Check Doneness: The taco should feel firm when pressed with a spatula, not floppy. The cheese should be fully melted inside.
Phase 4: Garnishing and Serving
H3: The Fresh Finish
Remove the taco from the griddle and plate immediately. The heat of the taco will wilt the garnishes slightly, marrying the flavors.
- Open and Top: Some prefer to open the taco slightly to add toppings inside, while others pile them on top. For loaded birria quesabirria tacos, piling on top showcases the ingredients better.
- Add Guacamole: Dollop a spoonful of guacamole on the meat.
- Add Onions: Scatter pickled red onions over the guacamole.
- Sauce and Herbs: Drizzle with green salsa and place a sprig of fresh cilantro on top.
- Serve with Consommé: Always serve with a cup of hot consommé on the side for dipping.
Expert Tips for Authentic Flavor
- Fat is Flavor: Do not skim all the fat from your consommé. That red oil (manteca) is what fries the tortilla and gives it that signature color and taste. If your consommé is lean, add a spoonful of beef tallow or lard to the dipping bowl.
- Tortilla Temperature: If your tortillas are cold and stiff, steam them for 30 seconds before dipping. A flexible tortilla absorbs consommé evenly; a stiff one cracks.
- Cheese Distribution: Spread the cheese to the very edges of the tortilla half. This creates a “cheese skirt” or lace that gets incredibly crispy on the griddle.
- Acid Balance: Taste your pickled onions before serving. They should be punchy. If they are too mild, add more lime juice or vinegar. The acid is crucial to cut the heavy fats.
Common Mistakes to Avoid
- Soggy Tacos: Caused by leaving the tortilla in the consommé too long or using thin, watery consommé. Fix: Dip quickly (1-2 seconds max). Reduce consommé if it’s too thin.
- Burnt Outside, Cold Inside: Heat too high. Fix: Medium-high heat is ideal. If the tortilla burns before the cheese melts, lower the heat and cover the pan briefly to trap steam.
- Leaking Cheese: Caused by overfilling or not sealing the edges. Fix: Leave a small border around the edge when adding fillings. Press firmly when folding.
- Dry Meat: Caused by using meat straight from the fridge without rehydrating. Fix: Always toss shredded meat with warm consommé before assembling.
Recipe Variations
- Spicy Lover: Add diced jalapeños or serrano peppers to the meat mixture before assembling. Use a habanero salsa verde.
- Chicken Quesabirria: Substitute beef with shredded chicken thigh meat cooked in a lighter, white wine-based consommé.
- Vegan Option: Use king oyster mushrooms or jackfruit braised in mushroom broth and chili paste as the “meat.” Use vegan Oaxaca-style cheese or skip cheese and use extra avocado.
- Seafood Twist: Use grilled shrimp or fish instead of beef. Pair with a citrus-heavy consommé and mango salsa instead of green salsa.
- Extra Cheesy: Add a second layer of cheese on top of the meat before folding. This creates a double-cheese pull.
- Low-Carb: Replace corn tortillas with large portobello mushroom caps or cheese shells (baked parmesan crisps).
What to Serve With This Recipe
- Mexican Rice: A classic side that soaks up extra consommé.
- Charro Beans: Pinto beans cooked with bacon and spices complement the beef perfectly.
- Elote (Street Corn): The creamy, cheesy corn provides a sweet contrast to the savory tacos.
- Agua Fresca: Hibiscus (Jamaica) or Tamarind drinks balance the richness with sweetness and acidity.
- Churros: For dessert, the cinnamon sugar pairs surprisingly well with the lingering chili notes.
Make Ahead & Meal Prep Tips
- Meat & Consommé: These actually taste better the next day. Make a large batch 1-2 days ahead. The flavors deepen, and the fat solidifies, making it easier to portion.
- Pickled Onions: Can be made up to a week in advance. Store in the fridge.
- Guacamole: Best made fresh. If you must prep ahead, press plastic wrap directly onto the surface to prevent browning.
- Tortillas: Keep sealed in their package until ready to use to maintain moisture.
Storage & Reheating Instructions
Storage
- Refrigerator: Store leftover assembled tacos in an airtight container for up to 2 days. Store meat, consommé, and toppings separately for best quality (up to 4 days).
- Freezer: Cooked meat and consommé freeze well for up to 3 months. Do not freeze assembled tacos; the tortilla will become gummy.
Reheating
- Skillet (Best): Reheat tacos in a dry skillet over medium heat for 2-3 minutes per side to restore crispness.
- Air Fryer: 350°F for 3-4 minutes. Great for restoring crunch.
- Microwave: Not recommended for assembled tacos (soggy). Use only for reheating meat/consommé.
- Oven: 375°F on a wire rack for 5-7 minutes.
Nutritional Information
Estimates per serving (2 tacos + sides)
- Calories: 650 kcal
- Protein: 38g
- Carbohydrates: 42g
- Fat: 36g
- Saturated Fat: 14g
- Cholesterol: 95mg
- Sodium: 1100mg
- Fiber: 5g
- Sugar: 4g
Note: Values vary significantly based on cheese amount and consommé fat content.
Troubleshooting Guide
| Problem | Cause | Solution |
|---|---|---|
| Tortilla Cracks When Dipping | Tortilla too cold/dry or consommé too hot. | Steam tortilla first. Let consommé cool slightly (should be hot but not boiling). |
| Cheese Doesn’t Melt | Heat too low or wrong cheese type. | Increase heat slightly. Cover pan for 30 secs to trap steam. Use high-moisture cheese. |
| Taco Falls Apart | Overfilled or not pressed enough. | Reduce filling amount. Press firmly with spatula after folding. Let it set 1 min before moving. |
| Too Greasy | Too much fat in consommé. | Skim some fat before dipping. Wipe griddle between batches. |
| Bland Flavor | Weak consommé or under-seasoned meat. | Reduce consommé to concentrate flavor. Season meat with salt/cumin before assembling. |
Frequently Asked Questions
1. Can I use flour tortillas? Traditional quesabirrias use corn, but flour works for a different texture. Flour absorbs more liquid, so dip very quickly. The result will be softer and less crispy.
2. What if I don’t have Oaxaca cheese? Low-moisture mozzarella is the best substitute. Monterey Jack melts well but lacks the stringiness. Avoid cheddar as it becomes oily.
3. How do I keep the tacos crispy? Serve immediately. Stack them vertically on the plate rather than laying flat to prevent steam from softening the bottom. Eat within 5 minutes of cooking.
4. Is birria always spicy? Not necessarily. The heat comes from the chiles used. Guajillo is mild; arbol is hot. Adjust your chile ratio to control spice. The consommé can be rich and savory without being fiery.
5. Can I make this in a non-stick pan? Yes, but cast iron or carbon steel gives superior browning. If using non-stick, ensure it’s oven-safe if you plan to finish under a broiler, and don’t use metal tongs.
6. Why are my tacos soggy on the bottom? You likely left them sitting on the plate too long. The steam from the hot meat gets trapped. Serve on a wire rack or eat immediately. Also, ensure you aren’t over-dipping in consommé.
7. What cut of beef is best? Chuck roast is ideal for shredding due to its marbling. Brisket is also excellent but takes longer to cook. Avoid lean cuts like round, which will be dry.
8. Can I use store-bought consommé? Yes, many grocery stores sell birria kits or frozen consommé. Just enhance it with fresh lime juice and cilantro before serving to brighten the flavor.
Final Thoughts
Mastering loaded birria quesabirria tacos is about respecting the process and embracing the mess. There is a joy in the sizzle of the tortilla hitting the hot comal and the anticipation of that first cheesy bite. Don’t be discouraged if your first batch isn’t perfect; the technique improves with every taco you fold.