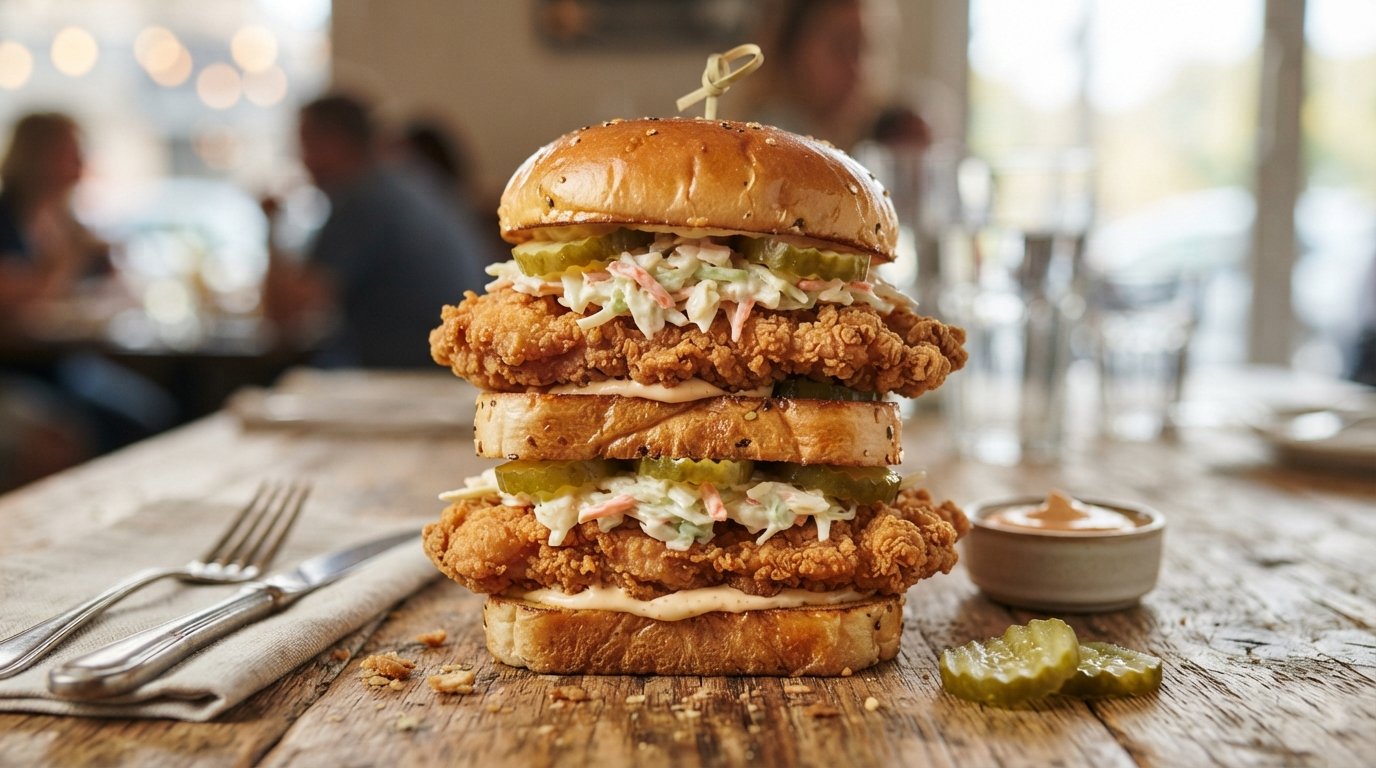
There is a moment in culinary history when “more” becomes an art form. This triple-decker fried chicken sandwich is not merely a meal; it is a monument to indulgence, stacking three massive pieces of golden, crispy fried chicken between slices of buttered white bread. Inspired by the bustling energy of high-volume soul food kitchens and modern viral food trends, this sandwich defies gravity and expectations alike. It combines the nostalgic comfort of classic Southern frying with the sheer spectacle of a towering stack that demands two hands and zero apologies.
While many sandwiches aim for balance, this one aims for impact. The contrast between the shatteringly crisp breading, the juicy hot chicken, the cool tang of pickles, and the soft, pillowy bread creates a sensory experience that is hard to replicate. Whether you are feeding a competitive eater, satisfying a serious craving, or simply want to make lunch the highlight of your week, this fried chicken stack delivers on every level. Let’s break down how to build this masterpiece without it collapsing under its own delicious weight.
Why This Recipe Works
The success of a triple-decker sandwich lies in engineering as much as flavor. Unlike a standard burger where ingredients are compressed, here we rely on strategic layering to maintain texture.
Bread as a Barrier: The thick-cut white bread serves a structural purpose. Its density supports the weight of three fillets, while its softness prevents the crust from tearing the roof of your mouth. Buttering the inner face adds a moisture barrier against the pickle juice and chicken grease.
Pickle Placement: Notice the pickles are placed directly on the bottom slice, beneath the first piece of chicken. This is intentional. They act as a acid buffer, cutting through the initial richness, while their firm texture provides a stable base for the meat.
Vertical Stacking vs. Horizontal Overlap: By stacking the chicken vertically rather than overlapping it horizontally, we maximize height while minimizing width. This keeps the sandwich manageable enough to hold, even if eating it requires strategy.
Temperature Contrast: Serving the chicken piping hot against room-temperature bread and cold pickles creates a dynamic eating experience. The heat steams the bread slightly, melding the flavors, while the cold elements refresh the palate between bites.
Why You’ll Love This Recipe
Unmatched Crunch-to-Juice Ratio: Three layers of fresh-fried chicken ensure that no bite is ever dry or soggy.
Visual Spectacle: It looks as incredible as it tastes, making it perfect for social media or impressing guests.
Customizable Heat: The neutral base allows you to add hot honey, spicy mayo, or extra pepper without disrupting the core structure.
Nostalgic Flavor Profile: White bread and fried chicken evoke classic diner and soul food memories, elevated to new heights.
Satiety Factor: One sandwich is a complete meal. No sides required (though highly recommended).
Ingredient Notes
Quality ingredients are non-negotiable when they are the only stars of the show.
The Core Components
Thick-Cut White Bread: Do not use thin sandwich bread. Look for “Texas Toast” style or bakery-sliced white bread, at least ½ inch thick. The crumb must be tight enough to support weight but soft enough to bite through. Brioche is too sweet and oily; sourdough is too tough. Classic white pullman loaf is ideal.
Fried Chicken Fillets: Boneless, skinless chicken thighs are superior to breasts for this application. Thighs remain juicy even when stacked and pressed. If using breasts, pound them to even thickness to prevent drying. The breading should be craggy and substantial—flaky bits catch sauce and provide crunch.
Dill Pickle Chips: Use crinkle-cut or standard round chips, not spears. They lay flat and distribute acid evenly. Avoid “sweet” pickles; the vinegar tang is necessary to cut the fat. Pat them dry before assembling to prevent sogginess.
Butter: Unsalted, softened butter for spreading. Salted butter can make the bread overly salty given the seasoned chicken. Softened butter spreads without tearing the delicate bread surface.
Optional Enhancements
Coleslaw: Creamy, vinegar-based slaw adds moisture and freshness. Place it on top of the chicken stack if adding, not underneath, to prevent sliding.
Hot Sauce/Honey: A drizzle adds complexity. Apply sparingly to avoid structural failure.
Lettuce: Iceberg only. Romaine is too slippery; spinach wilts instantly. Shredded iceberg provides crunch and acts as a friction layer between chicken pieces.
Kitchen Equipment
Deep Fryer or Heavy Dutch Oven: For maintaining consistent oil temperature (350°F-375°F).
Wire Rack: Essential for draining chicken. Paper towels trap steam and soften crust; wire racks preserve crunch.
Pastry Brush: For even butter application on bread.
Large Serving Tray/Basket: Lined with red-and-white checkered paper for authentic presentation and grease absorption.
Tongs: For handling hot chicken safely during assembly.
Sharp Serrated Knife: For slicing the final sandwich (if brave enough).
Layer Pickles: Arrange 4-6 pickle chips in a single layer on the bottom buttered slice. Overlap slightly to cover the surface area where chicken will sit.
Strategic Placement: Keep pickles within the bread perimeter. Overhanging pickles create instability.
First Chicken Layer: Place the first fried chicken fillet directly on the pickles. Center it perfectly.
Fit Check: Chicken should be slightly smaller than bread diameter. Overhang causes tipping.
Temperature: Chicken must be HOT. Warm chicken steams the bread; cold chicken feels greasy.
Second Chicken Layer: Stack the second fillet directly on top of the first. Align edges carefully.
Friction Point: If chicken surfaces are very smooth/crispy, add a tiny shred of lettuce between layers to increase grip. Otherwise, direct contact is fine.
Weight Distribution: Press down GENTLY with palm for 2 seconds to seat the layers. Do not crush.
Third Chicken Layer: Add the final fillet. This is the crown. Ensure it sits squarely.
Visual Symmetry: The stack should look like a tower, not a leaning ruin. Adjust alignment now; it won’t fix itself later.
Height Check: Total stack should be 4-5 inches tall. Taller risks toppling.
Cap with Bread: Place the top buttered slice gently onto the stack. Press down firmly but briefly to adhere.
Seal Test: Lift one corner of top bread. If chicken lifts with it, adhesion is good. If bread slides off, add more butter or a dab of mayo as glue.
Phase 3: Plating and Sides
H3: Present Like a Pro
Transfer to Tray: Move assembled sandwich to checkered-paper-lined tray immediately. Do not let it sit on cutting board; steam softens bottom bread.
Add Sides: Place coleslaw and macaroni salad in separate compartments or small cups beside the sandwich. Never pile sides ON the sandwich unless specified.
Color Contrast: Bright orange mac salad and green/purple slaw frame the golden-brown sandwich beautifully.
Serve Immediately: This sandwich has a 5-minute optimal window. After that, gravity and steam win. Provide extra napkins. Lots of them.
Expert Tips for Structural Integrity
Chicken Shape Matters: Hand-breaded, irregular fillets stack better than uniform, machine-pressed patties. The craggy edges interlock like puzzle pieces, creating natural friction points.
Oil Temperature is Critical: Fry at 365°F (185°C). Too cool = greasy, heavy chicken that collapses. Too hot = burnt outside, raw inside. Use a thermometer. Consistency prevents structural weakness.
Rest Before Stacking: Let fried chicken rest on wire rack for 2 minutes after frying. This allows excess oil to drain and crust to set. Hot-off-the-fryer chicken is too fragile to stack.
Bread Selection Science: Pullman loaf has tighter crumb structure than standard sandwich bread. Tighter crumb = less compression under weight. Ask bakery for “sandwich loaf” specifically.
The Mayo Glue Trick: If your stack feels unstable, spread a THIN layer of mayonnaise on the top surface of the middle chicken fillet before adding the third piece. Mayo acts as edible mortar. Use sparingly; too much causes slippage.
Common Mistakes to Avoid
Soggy Bottom Bread: Caused by wet pickles or un-toasted bread. Fix: Pat pickles dry. Lightly toast bread interior. Butter acts as moisture barrier.
Toppling Tower: Caused by misaligned layers or overhang. Fix: Center each layer precisely. Trim chicken if larger than bread. Press gently to seat.
Dry Chicken: Caused by overcooking or using breast meat. Fix: Use thighs. Cook to 165°F internal, not higher. Rest before stacking.
Sliding Layers: Caused by smooth breading or lack of friction. Fix: Add shredded lettuce between layers. Use mayo as adhesive. Choose craggy breading style.
Grease Soaked Bread: Caused by stacking immediately after frying. Fix: Drain chicken on wire rack 2+ mins. Blot excess oil with paper towel BEFORE stacking.
Recipe Variations
Spicy Nashville Hot: Toss fried chicken in cayenne-infused oil before stacking. Add ranch dressing between layers to cool heat. Use thicker bread to handle moisture.
Waffle Sandwich: Replace white bread with toasted waffles. Sweet-savory contrast is iconic. Add maple syrup drizzle. Structure is weaker; eat immediately.
Low-Carb/Keto: Replace bread with large portobello mushroom caps or cheese crisps. Reduce to double-decker for stability. Use almond flour breading.
Seafood Stack: Substitute fried catfish or shrimp fillets. Add tartar sauce between layers. Lighter protein requires less structural support; can go quadruple-decker.
Vegetarian Option: Use fried oyster mushrooms or cauliflower steaks. Same breading technique. Mushrooms release water; pat VERY dry and fry longer for crispness.
Breakfast Version: Add fried egg and bacon between chicken layers. Use biscuit instead of bread. Yolk acts as sauce; runny yolk compromises structure—cook egg over-hard.
Extra Cheesy: Melt cheese slice on each chicken fillet during last minute of frying. Cheese acts as glue between layers. Use low-moisture mozzarella to prevent sogginess.
What to Serve With This Recipe
Balance the heaviness with acid, crunch, and refreshment.
Pickled Okra or Green Beans: Extra acid and crunch. Southern tradition.
Sweet Tea or Lemonade: Sugar and acid cleanse palate. Carbonation helps digestion.
Potato Chips: Extra crunch factor. Salty contrast to rich sandwich.
Watermelon Salad: Feta + mint + balsamic. Unexpectedly refreshing against fried richness.
Make Ahead & Meal Prep Tips
Fry Chicken Ahead: Cook chicken up to 2 hours ahead. Hold in 200°F oven on wire rack. Crispness degrades after 2 hours; fry fresh if possible.
Prep Bread & Pickles: Butter bread and arrange pickles up to 4 hours ahead. Cover tightly to prevent drying. Assemble just before serving.
Breading Station Setup: Set up flour/egg/breadcrumb stations ahead. Keep chicken chilled until frying. Cold chicken = better coating adhesion.
Freezing: NOT recommended assembled. Freeze cooked chicken fillets individually wrapped. Reheat in air fryer to restore crispness. Assemble fresh.
Storage & Reheating Instructions
Storage
Refrigerator: Store leftover components separately for up to 2 days. Assembled sandwich does NOT store well; bread becomes inedible.
Freezer: Freeze cooked chicken fillets for up to 3 months. Bread and pickles do not freeze well for this application.
Reheating
Air Fryer (Best): 375°F for 3-4 minutes. Restores crispness without sogginess. Reheat chicken ONLY; assemble fresh with new bread/pickles.
Oven: 400°F on wire rack for 8-10 minutes. Better than microwave but slower than air fryer.
Microwave: NEVER reheat assembled sandwich. Bread turns rubbery, chicken steams soggy. Emergency only: 30-second bursts on chicken alone.
Stovetop: Skillet over medium-low heat, 2-3 minutes per side. Revives crust better than oven. Watch for burning.
Nutritional Information
Estimates per sandwich (entire triple-decker)
Calories: 1,200 kcal
Protein: 68g
Carbohydrates: 95g
Fat: 62g
Saturated Fat: 18g
Cholesterol: 210mg
Sodium: 1,850mg
Fiber: 4g
Sugar: 8g
Note: Values vary significantly based on chicken size, breading thickness, and butter amount.
Troubleshooting Guide
Problem
Cause
Solution
Sandwich Collapses
Misaligned layers or overhang.
Center each piece precisely. Trim chicken to fit bread. Press gently to seat.
Soggy Bread
Wet pickles or hot chicken steam.
Pat pickles dry. Rest chicken 2 mins before stacking. Toast bread lightly.
Chicken Slides Out
Smooth breading or no friction.
Add shredded lettuce between layers. Use mayo as adhesive. Choose craggy breading.
Dry/Tough Chicken
Overcooked or breast meat used.
Use thighs. Cook to 165°F only. Brine chicken 2 hrs before frying.
Greasy Mouthfeel
Oil too cool or no draining.
Fry at 365°F+. Drain on wire rack, not paper towels. Blot before stacking.
Bread Tears When Biting
Bread too thin or crust too hard.
Use thicker bread (½”+). Toast lightly, not heavily. Let sandwich rest 1 min before biting.
Frequently Asked Questions
1. Can I use chicken breasts instead of thighs? Yes, but pound to ½” thickness and brine 2+ hours. Breasts dry out faster under stacking pressure. Thighs are forgiving and juicier. Adjust cook time down by 2-3 minutes.
2. Why white bread? Can I use sourdough or brioche? White bread has neutral flavor and soft texture that doesn’t compete with chicken. Sourdough is too chewy; brioche is too sweet/rich. Classic white pullman loaf is structurally and flavor-wise ideal.
3. How do I keep the breading crispy during stacking? Rest chicken on wire rack 2 mins post-fry. Don’t stack immediately. Ensure chicken isn’t greasy-wet. Craggy breading holds up better than smooth batter.
4. Is there a vegetarian version that works? Fried oyster mushrooms are best substitute. Their texture mimics chicken remarkably. Pat VERY dry before frying. Use same assembly method. Cauliflower steaks work but are softer.
5. Can I make this gluten-free? Use GF flour blend for breading and GF bread. GF bread is often denser/drier; toast lightly and butter generously. Chicken thighs still preferred for moisture.
6. Why not add cheese or sauces between layers? You CAN, but moisture = structural risk. If adding, use THIN layers. Melted cheese acts as glue; liquid sauces cause slippage. Balance flavor with stability.
7. How long can assembled sandwich sit before eating? Maximum 5 minutes. After that, steam softens bread, grease soaks in, structure fails. Assemble à la minute. Have everything ready before frying last batch.
8. Best oil for frying? Peanut oil has highest smoke point and neutral flavor. Canola or vegetable oil work. Avoid olive oil (low smoke point, strong flavor). Maintain 365°F consistently.
Final Thoughts
This triple-decker fried chicken sandwich is more than food—it’s a celebration of excess done right. It challenges us to embrace joy without apology, to find engineering in indulgence, and to remember that sometimes, the best meals are the ones that make you laugh while you eat. The crunch, the juice, the sheer audacity of three fillets stacked high—it’s unforgettable.