
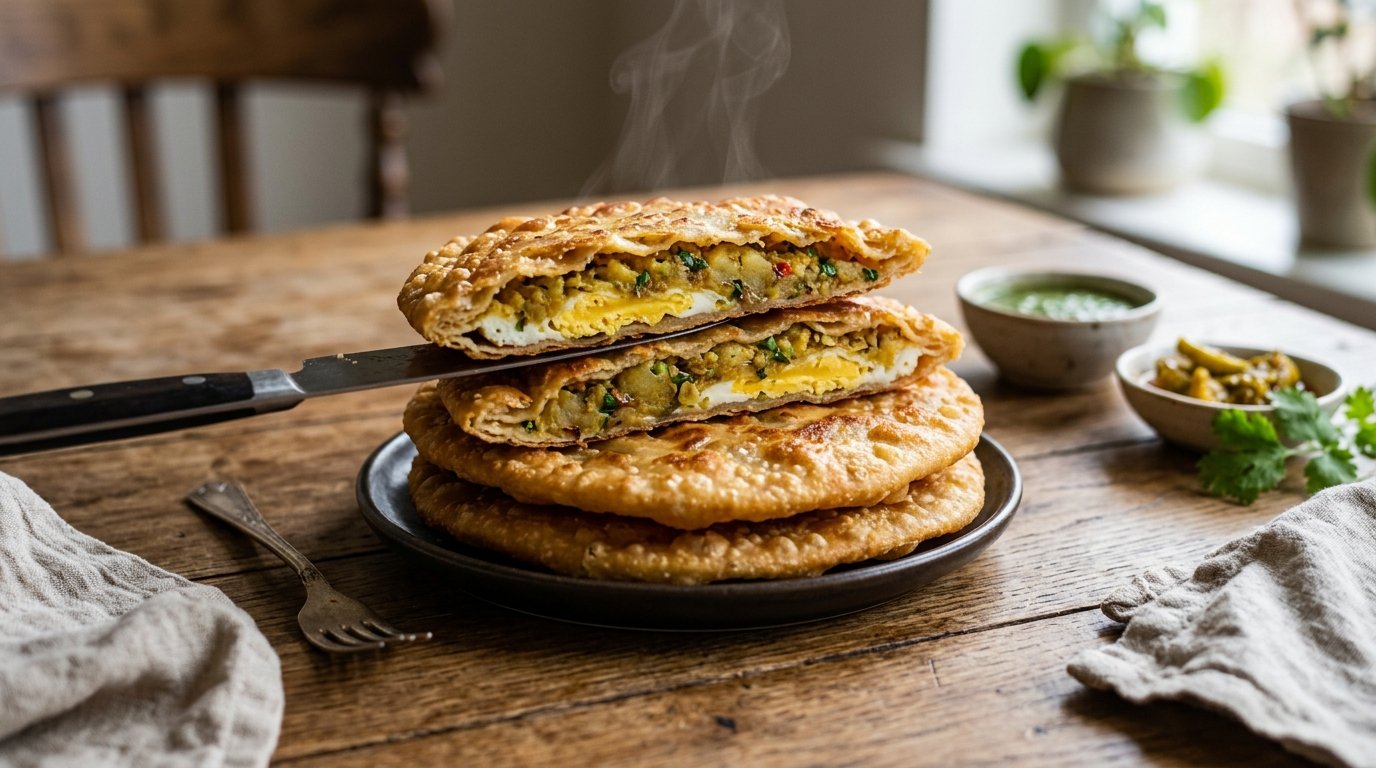
Quick Recipe Summary
| Feature | Details |
|---|---|
| Prep Time | 45 Minutes |
| Cook Time | 20 Minutes |
| Total Time | 1 Hour 5 Minutes |
| Servings | 4 Pies |
| Cuisine | South Asian / Desi Fusion |
| Course | Breakfast / Snack / Appetizer |
| Difficulty | Intermediate |
| Calories | ~380 kcal per pie |
These stuffed potato and egg fried pies require patience during assembly but reward you with a restaurant-quality result. The dough must be rolled thin enough to crisp up but strong enough to hold the heavy filling without tearing. Frying at the correct temperature ensures the crust bubbles beautifully while the interior heats through without burning. This recipe is perfect for those who love savory pastries like empanadas or samosas but want a richer, more substantial center. Mastering the sealing technique shown here guarantees a leak-free, picture-perfect pie every time.
Table of Contents
- Introduction
- Why This Recipe Works
- Why You’ll Love This Recipe
- Ingredient Notes
- Kitchen Equipment
- Preparation Information
- Step-by-Step Instructions
- Expert Tips for Crispy Results
- Common Mistakes to Avoid
- Recipe Variations
- What to Serve With This Recipe
- Make Ahead & Meal Prep Tips
- Storage & Reheating Instructions
- Nutritional Information
- Troubleshooting Guide
- Frequently Asked Questions
- Final Thoughts
Introduction
There is something universally appealing about a warm, stuffed pastry fresh from the pan. This stuffed potato and egg fried pie elevates the concept of a filled flatbread by incorporating a whole hard-boiled egg slice into a seasoned potato patty, creating a stunning cross-section when sliced. It bridges the gap between a light snack and a heavy meal, offering satiety through complex carbohydrates and protein.
The beauty of this dish lies in its versatility. While traditionally enjoyed with chai or yogurt, it stands alone as a complete flavor experience. The dough acts as a protective vessel, steaming the filling slightly while frying to a shatteringly crisp finish. If you have ever struggled with fillings leaking out or dough becoming soggy, this guide will walk you through the professional techniques needed to achieve structural integrity and maximum crunch. Let’s dive into making this iconic potato and egg paratha at home.
Why This Recipe Works
Success in stuffed frying relies on moisture management and thermal balance. The potato filling is pre-cooked and cooled, which prevents excess steam from rupturing the dough during frying. By shaping the potato into a compact disc before adding the egg, we create a stable base that supports the weight of the topping.
The “cup method” for sealing is a game-changer. Instead of trying to pleat dough over a bulky filling—a task that often leads to thick, doughy tops—pressing a mug or bowl down cuts a perfect circle and seals the edges simultaneously. This ensures uniform thickness and a neat, crimped edge that looks professional and holds tight against hot oil. Finally, frying at medium-high heat creates immediate puffing; if the oil is too cool, the pie absorbs grease; too hot, and it burns before the inside warms.
Why You’ll Love This Recipe
- Stunning Visual Appeal: The cross-section reveals a perfect ring of white egg yolk surrounded by herb-flecked potato, making it incredibly photogenic.
- Textural Contrast: Achieves the holy grail of fried dough: blistered, crispy exterior with a soft, yielding interior.
- Protein-Packed: Unlike plain parathas, the addition of egg and potato makes this a nutritionally balanced meal.
- Crowd Pleaser: Familiar flavors in an exciting format; kids and adults alike love the surprise center.
- Versatile Eating Occasion: Perfect for breakfast, lunchboxes, tea-time snacks, or even as an appetizer cut into wedges.
Ingredient Notes
Understanding your ingredients ensures the success of this stuffed potato and egg fried pie.
For the Dough
- All-Purpose Flour (Maida): Provides the gluten structure necessary to stretch thin without breaking. Do not use cake flour (too weak) or bread flour (too chewy).
- Water: Use room temperature water. Cold water makes dough stiff; hot water cooks the starch prematurely. Adjust quantity based on humidity; dough should be soft but not sticky.
- Oil/Ghee (in dough): Adding a teaspoon of fat to the flour makes the dough pliable and contributes to flakiness.
For the Filling
- Potatoes: Russet or Yukon Gold are ideal. They mash smoothly without being gluey. Boil until fork-tender but not waterlogged. Mash while warm for best texture.
- Hard-Boiled Eggs: Must be fully cooked with firm yolks. Soft-boiled eggs will leak and make the dough soggy. Cool completely before slicing to prevent crumbling.
- Green Chilies & Cilantro: Finely chopped. These provide moisture and freshness. Squeeze out excess liquid from cilantro if it’s very wet to avoid a gummy filling.
- Spices: Red chili flakes, salt, and optionally chaat masala or garam masala. Season the potato well; the dough is bland, so the filling must carry the flavor load.
Kitchen Equipment
- Rolling Pin & Board: Essential for rolling dough evenly. A wooden board provides better grip than marble.
- Round Cutter or Mug: A smooth-rimmed cup or bowl (approx. 4-5 inches diameter) is crucial for the sealing technique shown.
- Deep Skillet or Kadai: Heavy-bottomed pan retains heat better for consistent frying.
- Slotted Spoon/Spider: For safely lowering and retrieving pies from hot oil.
- Paper Towels/Wire Rack: For draining excess oil. Wire rack keeps bottoms crisp; paper towels can trap steam.
- Fork: For crimping edges decoratively and ensuring a tight seal.
Preparation Information
- Prep Time: 45 Minutes (Includes boiling eggs/potatoes, making dough, assembling)
- Cook Time: 20 Minutes (Frying in batches)
- Total Time: 1 Hour 5 Minutes
- Servings: 4 Large Pies
Step-by-Step Instructions
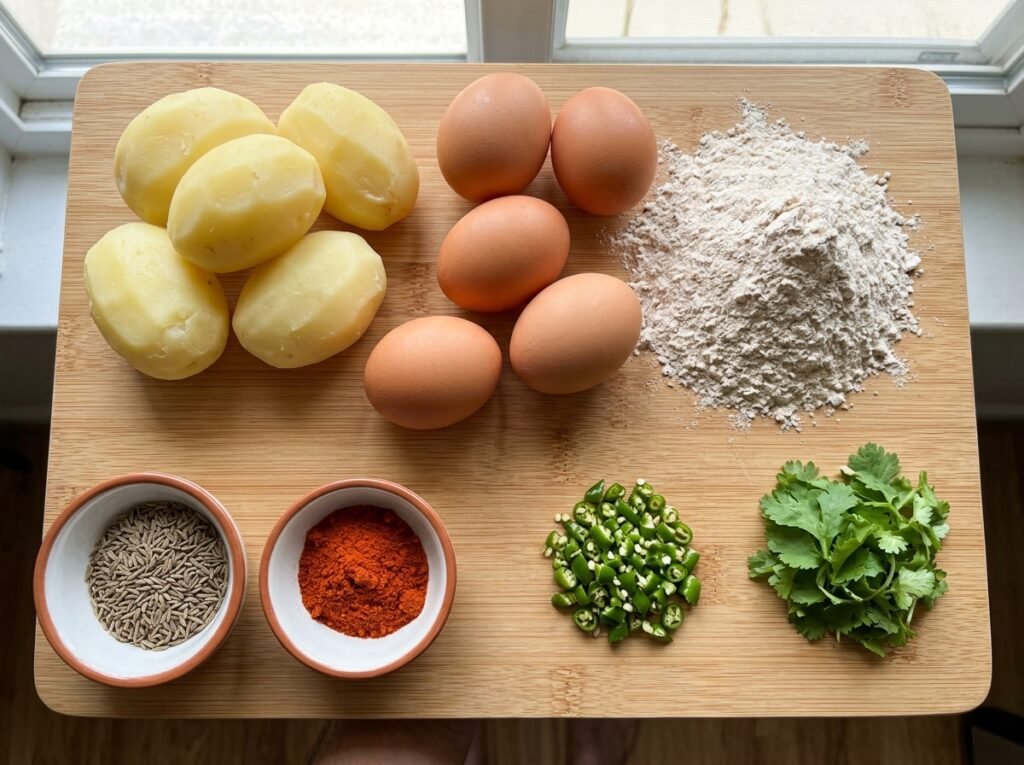
Follow this precise workflow to recreate the stuffed potato and egg fried pie exactly as seen.
Phase 1: Dough Preparation and Rolling
H3: Create a Pliable Wrapper
- Mix Dough: Combine flour, salt, and oil in a bowl. Gradually add water while kneading. Knead for 5-7 minutes until smooth and elastic.
- Texture Cue: Dough should feel like an earlobe—soft but springy. If it snaps back, it’s too tight; add water. If it sticks, add flour.
- Resting: Cover and rest for 20-30 minutes. This relaxes gluten, making rolling easier without shrinking back.
- Divide and Roll: Divide dough into 4 equal balls. On a floured surface, roll one ball into a large, thin circle (approx. 8-9 inches).
- Visual Cue: Dough should be translucent enough to see the board grain faintly, but not torn.
- Technique: Rotate dough frequently while rolling to maintain circular shape. Dust lightly with flour to prevent sticking, but brush off excess before filling.
Phase 2: Assembling the Filling
H3: Build the Core Structure
- Prepare Potato Patties: Divide seasoned mashed potato into 4 portions. Shape each into a flat, round patty slightly smaller than your cutter size (approx. 3.5 inches).
- Why flatten? A dome-shaped patty creates air pockets and uneven cooking. Flat discs ensure even heat distribution.
- Temperature: Filling should be room temp or cool. Hot filling melts the dough instantly upon contact.
- Place on Dough: Center a potato patty on the rolled dough. Press gently to adhere.
- Add Egg Slice: Place one thick slice of hard-boiled egg centrally on the potato patty.
- Placement: Ensure egg is centered. Off-center eggs lead to lopsided pies and potential leakage points.
- Thickness: Slice eggs approx. ¼ inch thick. Too thin = disappears; too thick = difficult to seal.
Phase 3: Sealing and Crimping
H3: The Cup Method Seal
- Cover with Second Dough Layer (Optional) OR Fold:Note: Video shows single layer folding/cutting. Place another small rolled circle on top OR fold edges up. Correction based on video: The video actually shows placing filling on ONE sheet, then using a cup to press down and cut/seal. Wait—looking closely at 0:04, it appears they might be using a top layer or just pressing down. Actually, standard technique for this specific “cup seal” often involves a top layer, BUT the video at 0:04 shows the cup pressing down on the filling which is on a SINGLE sheet? No, looking at 0:05, there is clearly a top layer of dough being pressed. Let’s assume a top layer is used for structural integrity as shown by the double thickness at the rim in 0:06.
- Clarification: Place a second rolled dough circle (same size) over the filling. Align edges.
- Press with Cup: Take a sturdy mug or bowl with a smooth rim. Place it directly over the filling mound. Press down FIRMLY and twist slightly.
- Action: This cuts through both layers of dough and seals them simultaneously around the filling.
- Visual Cue: Excess dough outside the cup rim should be separated cleanly.
- Remove Excess: Lift the cup. Peel away the outer scrap dough. You now have a perfectly sealed, round pie.
- Crimp Edges: Use a fork to press decorative ridges around the entire perimeter.
- Why crimp? Reinforces the seal created by the cup. Prevents oil ingress. Adds professional aesthetic.
- Check: Run finger along seal. Should feel fused, not just touching.
Phase 4: Deep Frying to Perfection
H3: Achieve Golden Blistering
- Heat Oil: Fill skillet with 1-2 inches of oil. Heat to 350°F-375°F (medium-high).
- Test: Drop a tiny dough scrap. It should sizzle immediately and rise to surface within 2 seconds. If it sinks, oil is too cold. If it browns instantly, too hot.
- Fry Carefully: Gently slide pie into oil. Do not overcrowd; fry 1-2 at a time.
- Visual Cue: Surface should bubble vigorously and form blisters within 30 seconds. This indicates proper hydration and heat.
- Flip: Fry first side 2-3 minutes until deep golden brown. Flip carefully. Fry second side 2-3 minutes.
- Color Cue: Even mahogany brown. Pale spots indicate under-frying; dark spots mean heat too high.
- Texture Cue: Crust should sound hollow when tapped with spoon.
- Drain: Remove and place on wire rack. Let rest 2 minutes before serving.
- Why rest? Internal steam finishes cooking filling. Cutting immediately releases steam and risks burns.
Expert Tips for Crispy Results
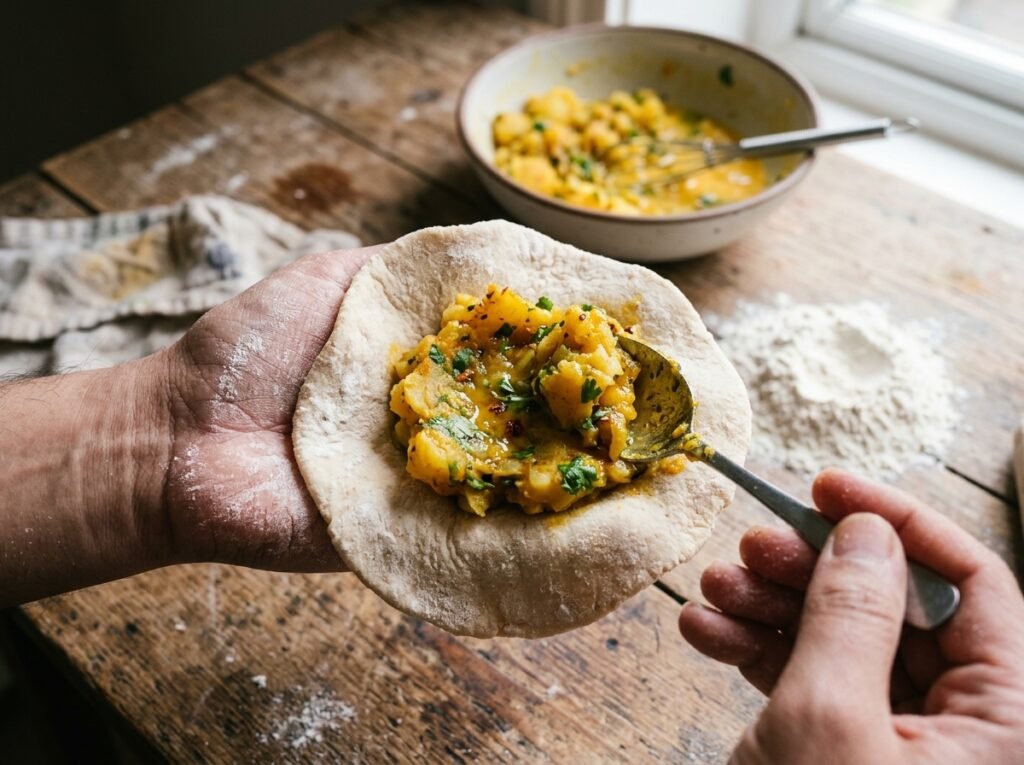
- Dough Hydration Balance: The dough must be softer than pasta dough but firmer than pizza dough. Too dry = cracks during sealing; too wet = greasy fried product. Aim for a tacky-but-clean feel.
- Seal Integrity Check: Before frying, inspect every seal. Any gap, no matter how small, will explode in hot oil. Re-crimp or patch with a dab of water + flour paste if needed.
- Oil Temperature Management: Temperature drops when adding cold pies. Allow oil to recover to 350°F between batches. Consistent heat = consistent crispness. Use a thermometer.
- Filling Dryness: Potatoes absorb oil if wet. After mashing, let potatoes sit in colander for 5 mins to release steam. Add spices only after cooling slightly to prevent clumping.
- Egg Adhesion: Lightly moisten the potato surface with water before placing egg. Acts as glue to prevent egg sliding during sealing.
Common Mistakes to Avoid
- Leaking Filling: Caused by poor seal or overfilling. Fix: Leave ½ inch border when placing filling. Press cup firmly. Double-check crimps. Never overstuff.
- Soggy Bottoms: Caused by oil too cool or draining on flat plate. Fix: Maintain 350°F+. Use wire rack for drainage. Never stack hot pies.
- Burnt Outside, Raw Inside: Heat too high. Fix: Lower heat to medium. Fry longer. Cover pan briefly (uncover to crisp) if browning too fast.
- Tough Dough: Over-kneaded or rested insufficiently. Fix: Rest dough minimum 20 mins. Knead just until smooth. Add splash of oil to dough for tenderness.
- Bland Filling: Under-seasoned potato. Fix: Taste potato mix BEFORE assembling. It should taste slightly salty/spicy on its own. Dough dilutes flavor.
Recipe Variations
- Spicy Green Chili Version: Increase green chilies to 3-4. Add ½ tsp red chili powder to potato. Garnish with mint chutney.
- Cheesy Addition: Mix ¼ cup grated mozzarella or cheddar into potato. Creates gooey pull. Reduce potato volume slightly to accommodate cheese.
- Chicken Mince filling: Replace potato with cooked, spiced ground chicken. Higher protein. Ensure chicken is dry-cooked to prevent sogginess.
- Vegetable Medley: Add finely diced carrots, peas, corn to potato. Increases fiber and color. Sauté veggies first to remove moisture.
- Baked Option (Healthier): Brush pies with oil. Bake at 400°F (200°C) for 25-30 mins, flipping halfway. Less crispy but lower fat. Spray with oil mid-bake for color.
- Vegan Version: Omit egg. Use larger potato patty or add paneer/tofu cube center. Season aggressively to compensate for missing egg richness.
- Mini Appetizer Size: Use 3-inch cutter. Bite-sized versions perfect for parties. Reduce frying time to 1-2 mins per side.
What to Serve With This Recipe
Balance the richness of fried dough with acidic, fresh, or cooling accompaniments.
- Mint Coriander Chutney: Classic pairing. Herbal acidity cuts through oil and complements potato spices.
- Tamarind Date Chutney: Sweet-sour contrast enhances the savory filling. Traditional with samosas and pakoras.
- Plain Yogurt/Raita: Cooling probiotic element. Cucumber raita adds crunch and freshness.
- Ketchup or Sriracha: Modern fusion dip. Adds tangy heat for those who prefer Western condiments.
- Masala Chai: Spiced tea is the traditional beverage partner. Tannins cleanse palate; warmth contrasts crispy pie.
- Pickled Onions: Quick pickle red onions in vinegar + salt. Sharp crunch and acid reset taste buds between bites.
Make Ahead & Meal Prep Tips
- Dough Advance Prep: Make dough up to 24 hours ahead. Refrigerate in oiled bag. Bring to room temp 30 mins before rolling. Cold dough cracks; warm dough sticks.
- Filling Prep: Boil potatoes and eggs day before. Store separately. Mash and season morning of cooking. Freshly mashed potato has better texture than reheated.
- Assembly Line: Roll all dough circles first. Shape all patties. Assemble sequentially. Keeps workflow efficient and dough from drying out.
- Freezing Unfried: Assemble pies completely. Freeze on tray until solid. Transfer to bags. Fry directly from frozen; add 2-3 mins to cook time. Do NOT thaw; thawing makes dough soggy.
Storage & Reheating Instructions
Storage
- Refrigerator: Store cooked pies in airtight container up to 3 days. Separate layers with parchment to prevent sticking.
- Freezer: Freeze cooked pies up to 1 month. Reheat from frozen. Texture degrades slightly but still enjoyable.
Reheating
- Air Fryer (Best): 350°F (175°C) for 3-5 mins. Restores crispness perfectly. Shake basket halfway.
- Oven: 375°F (190°C) on wire rack for 8-10 mins. Better than microwave. Avoids sogginess.
- Stovetop: Dry skillet over medium-low heat. 2-3 mins per side. Revives crust better than oven. No oil needed.
- Microwave (Last Resort): 30-45 secs max. Makes crust chewy/soggy. Only use if no other option. Pat dry after microwaving.
Nutritional Information
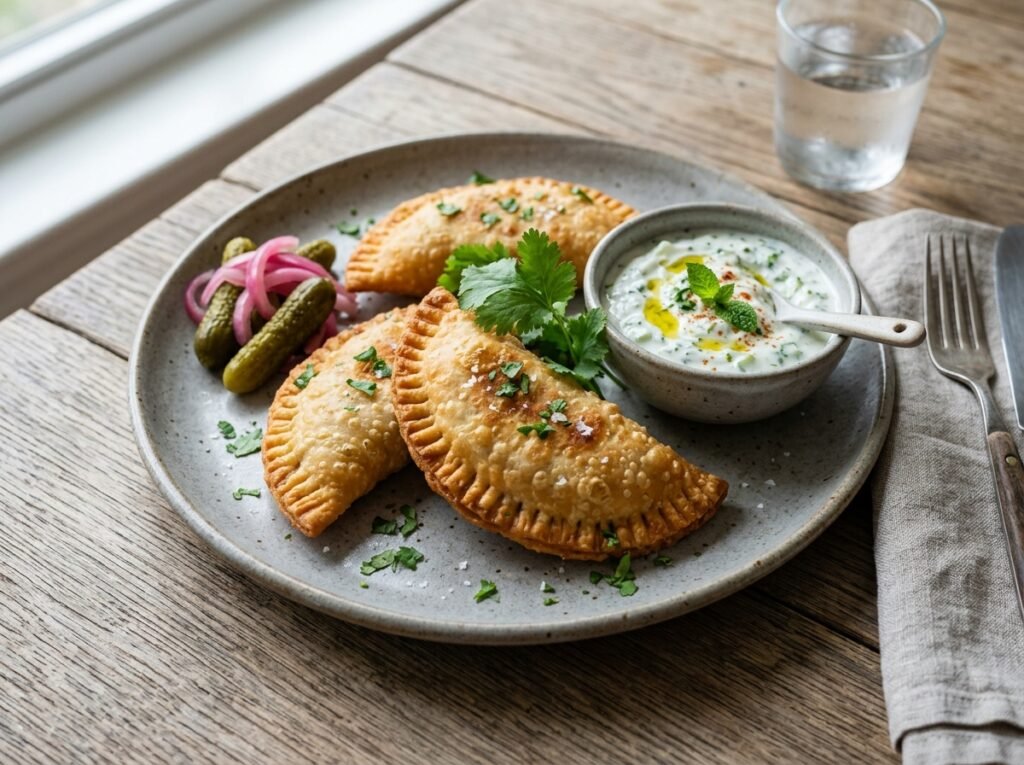
Estimates per pie (based on 4 servings)
- Calories: 380 kcal
- Protein: 12g
- Carbohydrates: 42g
- Fat: 18g
- Saturated Fat: 3g
- Cholesterol: 95mg
- Sodium: 420mg
- Fiber: 3g
- Sugar: 2g
Note: Values vary based on oil absorption, potato size, and specific flour brand.
Troubleshooting Guide
| Problem | Cause | Solution |
|---|---|---|
| Pie Explodes in Oil | Seal failed or trapped air. | Ensure tight seal. Prick top gently with fork to vent steam (optional). Don’t overfill. |
| Greasy/Soggy | Oil too cool or drained poorly. | Maintain 350°F+. Use wire rack. Fry in smaller batches to maintain temp. |
| Dough Tears During Rolling | Too dry or not rested. | Rest longer. Knead in tsp water/oil. Roll gently; don’t force. |
| Filling Falls Out | Overfilled or seal weak. | Reduce filling amount. Use cup method firmly. Crimp edges thoroughly. |
| Uneven Browning | Pan hot spots or uneven thickness. | Rotate pie in pan. Roll dough uniformly. Move pan on burner. |
| Hard/Tough Crust | Overcooked or dough too lean. | Reduce fry time. Add fat to dough. Don’t over-knead. |
Frequently Asked Questions
1. Can I bake these instead of frying? Yes. Brush generously with oil/ghee. Bake at 400°F (200°C) for 25-30 mins, flipping halfway. Spray with oil mid-bake for color. Won’t be as blistered/crispy but healthier.
2. Why did my seal open during frying? Likely moisture between dough layers or insufficient pressure. Ensure filling is dry/cool. Press cup down HARD. Wet fingers slightly when crimping to activate gluten bond.
3. Can I use sweet potatoes? Absolutely. Sweeter profile pairs well with spicy chilies. May need less seasoning. Texture is softer; handle gently during assembly.
4. How do I know oil is ready without thermometer? Drop tiny dough piece. Should sizzle vigorously and float within 2-3 secs. If it sinks/stays bottom = too cold. If browns instantly = too hot. Ideal = steady rise + bubbles.
5. Can I make the dough with whole wheat flour? Yes, but texture will be denser/nuttier. Mix 50/50 with AP flour for balance. Needs more water and longer rest. Won’t blister same way but still tasty.
6. Why cool the filling before assembling? Hot filling melts dough fats, causing leaks and sogginess. Steam expands in oil, bursting seals. Always assemble with cool/room-temp filling.
7. Can I freeze the assembled raw pies? Yes! Flash freeze on tray 1 hr, then bag. Fry from frozen. Add 2-3 mins cook time. Do NOT thaw first; thawing ruins dough structure.
8. What if I don’t have a round cutter? Use any smooth-rimmed bowl/cup/mug. Size doesn’t matter as long as it fits your pan. Trim excess dough after pressing. Fork crimping hides imperfect edges.
Final Thoughts
Mastering this stuffed potato and egg fried pie unlocks a world of savory pastry possibilities. The satisfaction of biting into that perfectly crisp shell to reveal the warm, spiced potato and tender egg center is unmatched. It’s a testament to how humble ingredients, treated with care and technique, become extraordinary.