
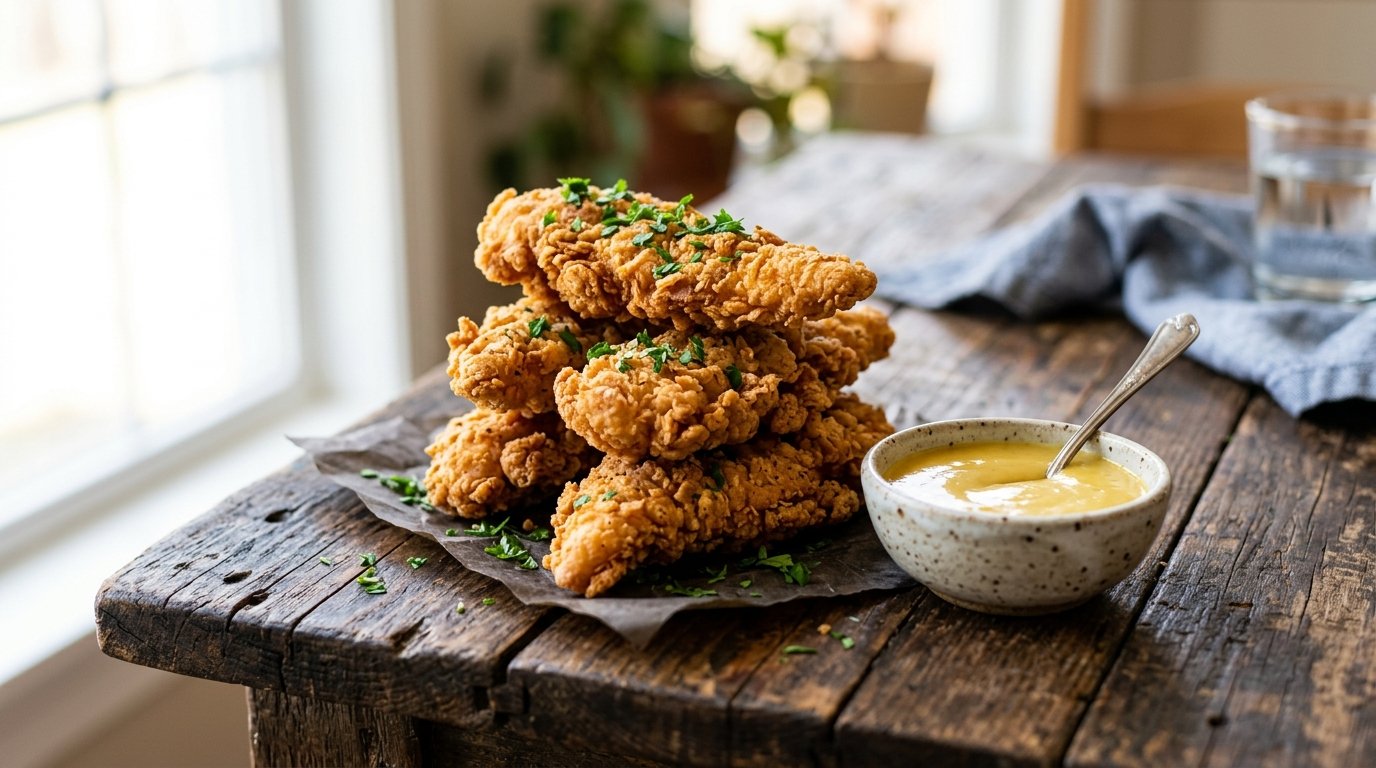
Golden, shatteringly crisp on the outside and juicy inside, these homemade crispy chicken fingers deliver restaurant-quality crunch with a simple buttermilk marinade and double flour coating. Serve them hot with a creamy dipping sauce for the ultimate comfort food experience that beats any takeout version.
Quick Recipe Summary
| Prep Time | Cook Time | Total Time | Servings | Cuisine | Course | Difficulty | Calories |
|---|---|---|---|---|---|---|---|
| 20 minutes (+ 30 min marinade) | 15-20 minutes | 1 hour 10 minutes | 4 | American | Appetizer / Main | Easy | ~380 per serving |
These crispy chicken fingers start with a quick buttermilk soak that tenderizes the meat, followed by a seasoned flour dredge and a double-dip technique for maximum crunch. Fried until deep golden, they stay moist inside while the coating stays crisp. Perfect for weeknights, game days, or kid-friendly dinners.
Table of Contents
| Section |
|---|
| Introduction |
| Why This Recipe Works |
| Why You’ll Love This Recipe |
| Ingredient Notes |
| Kitchen Equipment |
| Preparation Information |
| Step-by-Step Instructions |
| Expert Tips |
| Common Mistakes |
| Recipe Variations |
| What to Serve With This Recipe |
| Make Ahead Tips |
| Meal Prep Tips |
| Storage Instructions |
| Reheating Instructions |
| Nutritional Information |
| Troubleshooting Guide |
| Frequently Asked Questions |
| Final Thoughts |
Introduction
Crispy chicken fingers are one of those foods that never go out of style. Whether you’re feeding hungry kids after school or looking for a satisfying appetizer, the combination of tender chicken and a golden, crunchy coating always hits the spot. This version relies on a buttermilk marinade and a simple double-flour coating to create that signature shatter when you bite in. The method is straightforward, the ingredients are pantry staples, and the results taste better than anything from a drive-thru. Once you try these homemade crispy chicken fingers, the frozen bag will stay in the freezer.
Why This Recipe Works
The buttermilk marinade does double duty: its acidity gently tenderizes the chicken while the thickness helps the flour cling. Seasoning the flour itself builds flavor into every layer of the crust. The double-dip technique—flour, back into the wet marinade, then flour again—creates those craggy, ultra-crispy edges that stay crunchy longer. Frying at the right temperature seals the coating quickly so the interior stays juicy. Every step is designed for maximum texture contrast and reliable results.
Why You’ll Love This Recipe
- Extra-crispy exterior that stays crunchy even after cooling slightly
- Juicy, flavorful chicken thanks to a short buttermilk soak
- Uses everyday pantry ingredients
- Kid-approved and adult-satisfying
- Ready in about an hour with minimal active work
- Easy to customize with different spices or sauces
- Far superior texture and taste compared with store-bought tenders
Ingredient Notes
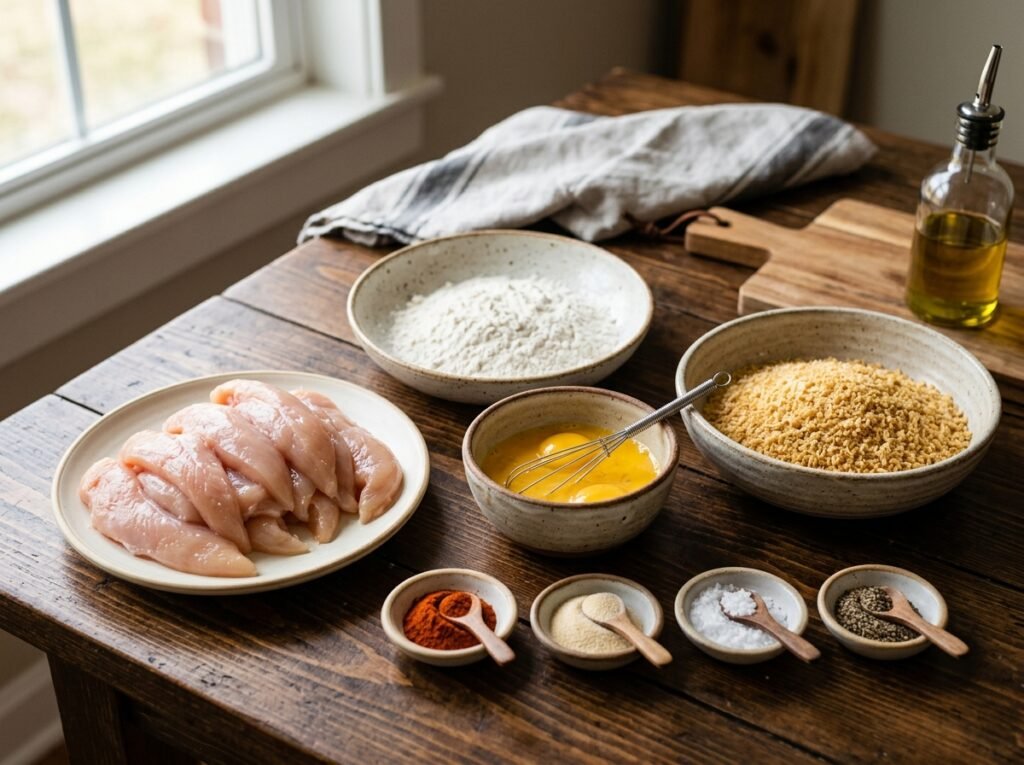
Chicken tenders or boneless skinless chicken breasts (1–1½ pounds) Purpose: The star protein. Tenders are convenient; breasts sliced into even strips work equally well. Substitutions: Boneless thighs for richer flavor. Buying tips: Look for uniform thickness so everything cooks at the same rate. Storage tips: Keep refrigerated and use within 1–2 days of purchase, or freeze for longer storage.
Buttermilk (1–1½ cups) Purpose: Tenderizes and helps the coating adhere. Substitutions: Mix 1 cup milk with 1 tablespoon lemon juice or white vinegar and let stand 5 minutes. Plain yogurt thinned with a little milk also works. Buying tips: Full-fat gives the best results. Storage tips: Refrigerate and use by the date on the carton.
All-purpose flour (1½–2 cups) Purpose: Forms the crispy coating. Substitutions: A 1:1 gluten-free blend works for a gluten-free version. Buying tips: Standard all-purpose is ideal. Storage tips: Keep in an airtight container in a cool pantry.
Seasonings for the flour (salt, black pepper, paprika or chili powder, optional garlic powder) Purpose: Builds flavor directly into the crust. The red spice visible in the video is typically paprika or mild chili powder. Substitutions: Smoked paprika for deeper flavor, cayenne for heat, or your favorite seasoned salt blend. Buying tips: Fresh spices make a noticeable difference. Storage tips: Store in a cool, dark place.
Neutral oil for frying (vegetable, canola, or peanut) Purpose: High smoke point for even frying. Substitutions: Any neutral high-smoke-point oil. Buying tips: Fresh oil produces cleaner flavor. Storage tips: Store in a cool place away from light.
Dipping sauce (optional but recommended) The orange creamy sauce shown is typically a cheese sauce, spicy mayo, or buffalo-style dip finished with chopped herbs. Use your favorite.
Kitchen Equipment
- Large mixing bowls
- Tongs
- Deep heavy-bottomed pan or Dutch oven
- Candy/deep-fry thermometer (highly recommended)
- Wire rack set over a baking sheet
- Paper towels
Optional: Kitchen scale for even chicken strips, spider or slotted spoon.
Preparation Information
- Prep Time: 20 minutes
- Marinating Time: 30 minutes (or up to 8 hours)
- Cook Time: 15–20 minutes
- Total Time: Approximately 1 hour 10 minutes
- Servings: 4
Step-by-Step Instructions
Marinate the Chicken
Place the chicken strips in a medium bowl. Pour the buttermilk over them and stir until every piece is coated. The liquid should look creamy and fully cover the chicken. Cover and refrigerate for at least 30 minutes (up to 8 hours). This step tenderizes the meat and creates a sticky surface so the flour sticks well. Visual cue: the chicken turns opaque and is completely coated in the white marinade.
Season the Flour
In a wide shallow bowl, combine the flour with salt, black pepper, paprika or chili powder, and any additional spices. Mix thoroughly so the color is even. The red spice should be distributed throughout. This seasoned flour is what gives the coating its flavor, so taste a pinch and adjust if needed.
Double-Coat the Chicken
Working one piece at a time, lift a strip from the buttermilk, letting excess drip off. Dredge thoroughly in the seasoned flour, pressing gently so it adheres. Dip it briefly back into the buttermilk marinade, then return it to the flour for a second coat. Shake off excess. The double dip creates those irregular, crispy ridges. Place coated pieces on a plate or rack while you finish the rest. Texture cue: the coating should look thick and slightly shaggy, not smooth.
Heat the Oil
Pour oil into a deep pan to a depth of about 2 inches. Heat over medium-high until it reaches 350°F (175°C). A thermometer is the most reliable way to check. If you don’t have one, drop a small bit of flour in—it should sizzle vigorously but not burn immediately.
Fry the Chicken Fingers
Carefully lower a few pieces into the hot oil using tongs, without crowding the pan. Fry 3–4 minutes per side, turning once, until deep golden brown and the internal temperature reaches 165°F (74°C). Visual and aroma cues: the coating turns rich golden, the bubbles slow, and a savory fried-chicken aroma fills the kitchen. Transfer to a wire rack set over paper towels to drain. Repeat with remaining pieces, letting the oil return to temperature between batches.
Serve
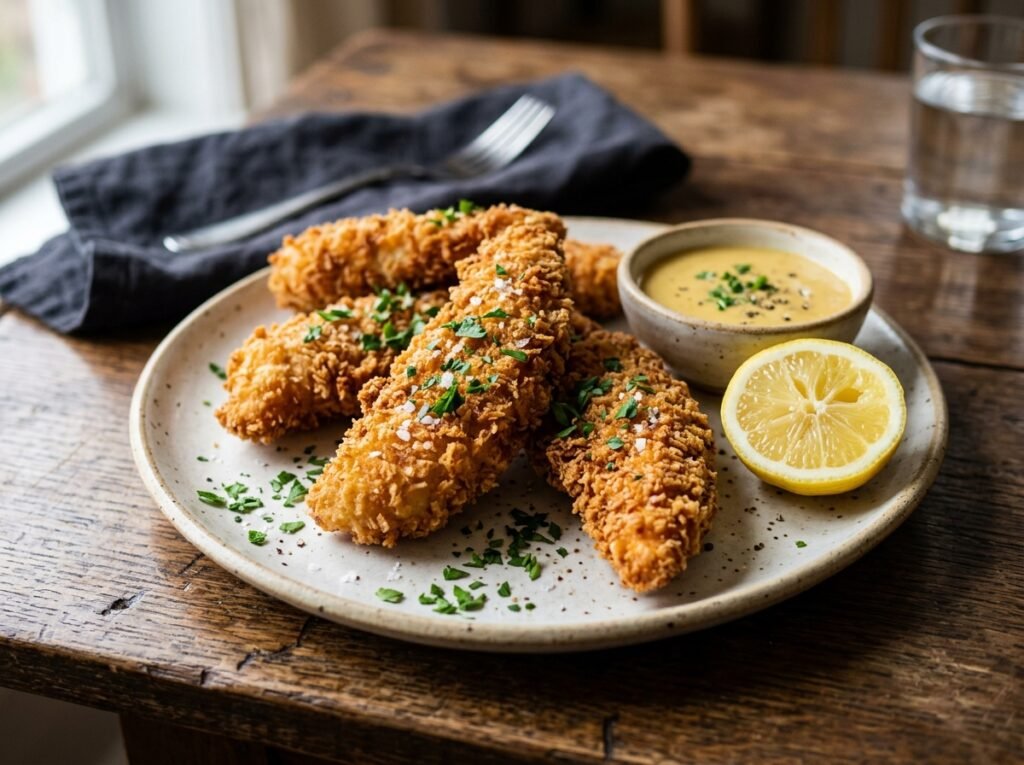
Serve the crispy chicken fingers immediately with the creamy orange dipping sauce of your choice, garnished with chopped herbs if desired.
Expert Tips
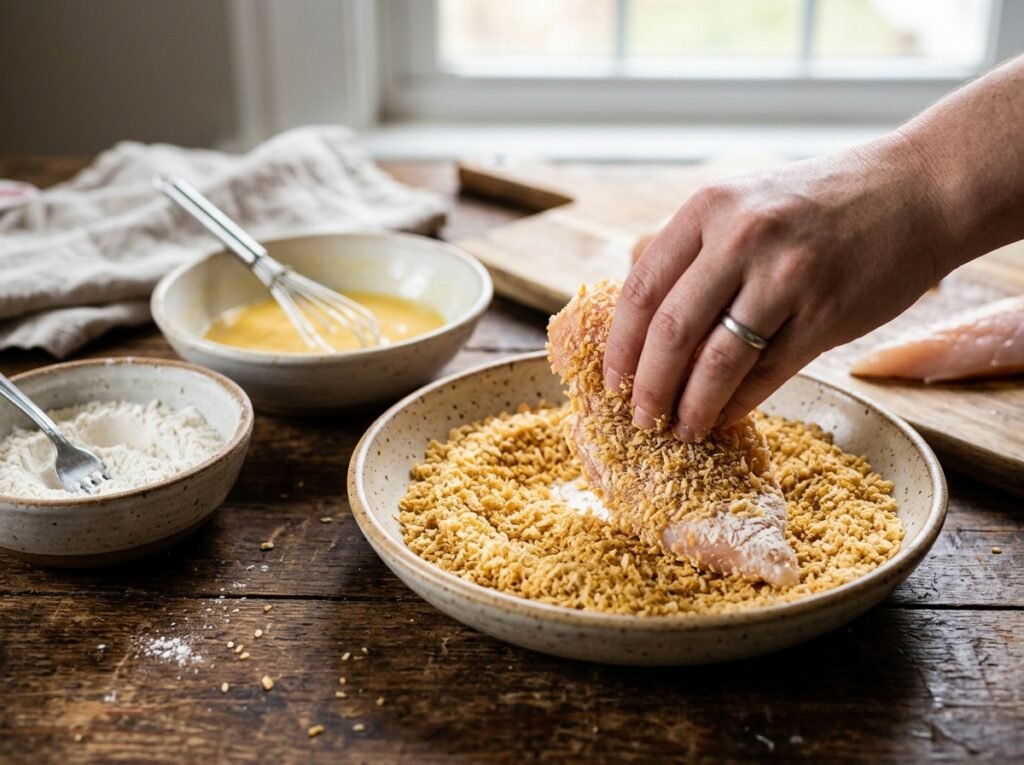
Keep the oil temperature steady—too low and the coating absorbs oil; too high and it browns before the chicken cooks through. Press the flour firmly onto the chicken during the second dredge for maximum adhesion. Let the coated chicken rest 5 minutes before frying so the coating sets. Fry in small batches to maintain oil temperature. A wire rack keeps the bottoms from steaming and going soggy.
Common Mistakes
Skipping or shortening the marinade – The chicken won’t be as tender and the coating may not stick as well. Solution: Give it at least 30 minutes. Overcrowding the pan – Oil temperature drops and the crust turns greasy. Solution: Fry in batches. Oil too cool or too hot – Results in greasy or burnt coating. Solution: Use a thermometer and adjust heat as needed. Not shaking off excess flour – Creates a thick, pasty coating that can fall off. Solution: Shake gently after each dredge. Moving the chicken too early – The crust needs a moment to set before turning. Solution: Wait until it releases easily from the pan.
Recipe Variations
- Spicy: Add cayenne or hot sauce to the buttermilk and extra chili powder to the flour.
- Extra Crispy: Mix a tablespoon of cornstarch into the flour.
- Herb: Add dried oregano, thyme, or Italian seasoning to the flour.
- Healthy-ish: Air-fry at 400°F for 12–15 minutes, spraying lightly with oil and flipping halfway.
- Gluten-Free: Use a 1:1 gluten-free flour blend.
- Cheesy: Serve with a warm cheese sauce as shown in the video.
- Low-Carb: Coat in a mixture of almond flour and Parmesan (results will differ).
What to Serve With This Recipe
Classic pairings include French fries, coleslaw, or a simple green salad. Honey mustard, ranch, barbecue, or the creamy orange cheese-style dip all work beautifully. For a full meal, add roasted vegetables or mac and cheese. Cold lemonade or iced tea balances the richness.
Make Ahead Tips
Marinate the chicken up to 8 hours ahead. You can also coat the chicken and refrigerate on a rack for up to 2 hours before frying. The flour mixture can be mixed a day ahead.
Meal Prep Tips
Cook a double batch and portion into containers with dipping sauce on the side. Pair with pre-cut vegetables or leftover sides for easy lunches.
Storage Instructions
Refrigerator: Store cooled chicken fingers in an airtight container for up to 3 days. Freezer: Freeze in a single layer on a baking sheet, then transfer to a freezer bag for up to 2 months. Place parchment between layers to prevent sticking.
Reheating Instructions
- Oven: 375°F on a wire rack for 10–12 minutes until hot and crisp.
- Air Fryer: 350°F for 4–6 minutes.
- Stovetop: Reheat gently in a lightly oiled skillet over medium heat.
- Microwave: Not recommended—coating will soften. Use only if necessary and finish in a toaster oven or air fryer.
Nutritional Information
(Approximate values per serving, based on 4 servings and standard ingredients; actual values vary with oil absorption and exact quantities)
- Calories: 380
- Protein: 32 g
- Carbohydrates: 22 g
- Fat: 18 g
- Fiber: 1 g
- Sugar: 2 g
- Sodium: 650 mg
Troubleshooting Guide
Coating falls off – Chicken was too wet or not pressed firmly into the flour. Pat lightly and press the second coat well. Greasy results – Oil temperature was too low or pan was overcrowded. Monitor temperature and fry in smaller batches. Dry chicken – Overcooked or cut too thin. Aim for 165°F internal temperature and even strip size. Pale coating – Oil not hot enough or flour not seasoned. Heat to 350°F and ensure spices are mixed in. Uneven browning – Crowding or uneven oil temperature. Maintain heat and space the pieces.
Frequently Asked Questions
Can I bake these instead of frying? Yes. Place coated chicken on a wire rack over a baking sheet, spray lightly with oil, and bake at 425°F for 15–20 minutes, flipping halfway, until golden and cooked through. Texture will be less shatteringly crisp than fried.
How long should I marinate the chicken? Minimum 30 minutes; up to 8 hours is ideal. Longer than that can make the texture slightly mushy.
Can I use regular milk instead of buttermilk? Yes—add 1 tablespoon lemon juice or vinegar per cup of milk and let it sit 5 minutes to curdle.
Why double-dip the chicken? The second flour coat creates extra craggy texture that fries up crispier and stays crunchy longer.
What oil is best for frying? Neutral oils with high smoke points such as vegetable, canola, or peanut oil.
How do I know when the chicken is done? The coating is deep golden and a thermometer inserted into the thickest part reads 165°F.
Can I make these gluten-free? Substitute a good 1:1 gluten-free flour blend for the all-purpose flour.
What’s the best dipping sauce? The creamy orange sauce shown pairs perfectly. Honey mustard, ranch, or spicy mayo are also excellent.
Can I freeze the coated uncooked chicken? Yes. Freeze on a tray, then bag. Fry from frozen, adding 1–2 extra minutes.
How do I keep them crispy for a party? Hold on a wire rack in a 200°F oven for up to 30 minutes.
Final Thoughts
These crispy chicken fingers prove that a few simple techniques—buttermilk marinade, well-seasoned flour, and a double coating—can turn everyday ingredients into something truly special. The contrast of the crunchy golden exterior and juicy interior makes every bite satisfying. Whether you’re cooking for family dinner or a casual gathering, this recipe delivers reliable, crowd-pleasing results. Give it a try, then leave a comment or rating to let others know how it turned out for you. Once you taste homemade crispy chicken fingers this good, you’ll want to make them again and again.