| Quick Recipe Summary | |
|---|---|
| Prep Time | 25 minutes |
| Cook Time | 15–18 minutes |
| Total Time | 40–45 minutes |
| Servings | 4 |
| Cuisine | French-American |
| Course | Main Course |
| Difficulty | Intermediate |
| Calories | ~520 kcal per serving |
Table of Contents
- Why This Recipe Works
- Why You’ll Love This Recipe
- Ingredient Notes
- Kitchen Equipment
- Preparation Information
- Step-by-Step Instructions
- Expert Tips
- Common Mistakes
- Recipe Variations
- What to Serve With This Recipe
- Make Ahead Tips
- Meal Prep Tips
- Storage Instructions
- Reheating Instructions
- Nutritional Information
- Troubleshooting Guide
- Frequently Asked Questions
- Final Thoughts
Introduction
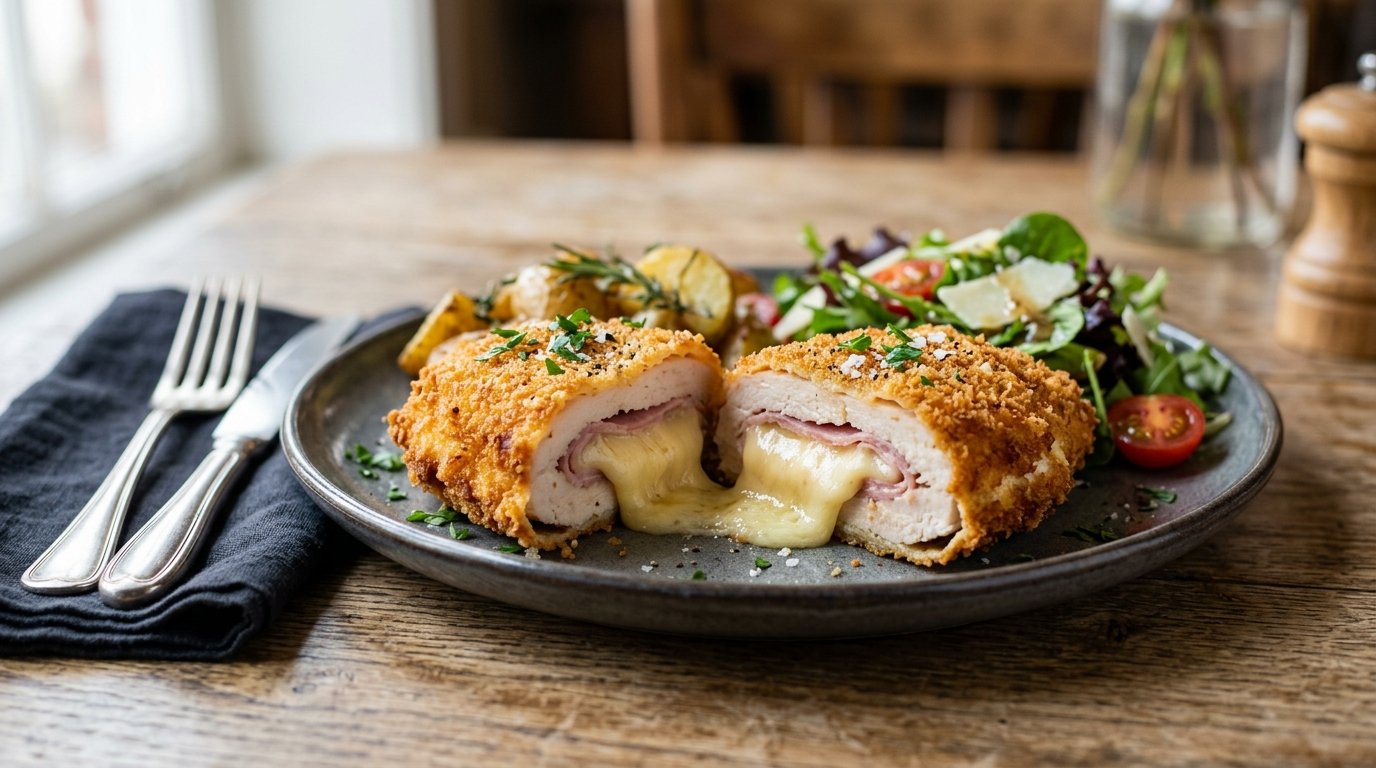
Chicken Cordon Bleu is one of those classic dishes that feels special yet is surprisingly approachable once you understand the technique. A thin chicken breast is pounded, layered with ham and cheese, rolled tight, breaded, and fried until golden. The result is a crisp exterior that gives way to juicy chicken, savory ham, and molten cheese. This version follows the traditional method with a few practical refinements that help the roll stay sealed and the coating stay crunchy. Whether you’re cooking for a weeknight dinner or guests, this chicken cordon bleu delivers the same satisfying contrast of textures you expect from a good restaurant plate.
Why This Recipe Works
The success of chicken cordon bleu rests on three fundamentals: even thickness, a secure roll, and proper breading. Pounding the chicken creates a uniform surface that cooks evenly and rolls without tearing. A simple plastic-wrap assist keeps the ham and cheese centered so the filling stays inside during frying. The classic flour–egg–breadcrumb sequence builds a sturdy crust that seals in juices and turns deeply golden in hot oil. Finally, a short rest after frying lets the cheese settle slightly while the exterior stays crisp. These details turn a potentially messy dish into a reliable, impressive main course.
Why You’ll Love This Recipe

- Crisp, golden breading that stays crunchy even after slicing
- Melty cheese that oozes just enough without making the crust soggy
- Juicy chicken that never dries out
- Familiar flavors elevated by careful technique
- Easy to scale for two or a small dinner party
- Freezer-friendly for future meals
- Looks restaurant-worthy with minimal extra effort
Ingredient Notes
Chicken breasts Use boneless, skinless breasts of similar size (about 6–8 oz / 170–225 g each). Thinner pieces need less pounding and cook more evenly. If the breasts are very thick, butterfly them first. Substitutions: chicken cutlets work well if already thin. Storage: keep refrigerated and use within 1–2 days of purchase, or freeze for up to 3 months.
Ham Thin-sliced deli ham or Black Forest-style ham provides the classic salty contrast. Avoid thick cuts that make rolling difficult. Substitutions: prosciutto or smoked turkey for a lighter flavor. Storage: once opened, use within 3–5 days.
Cheese Swiss or Gruyère melts smoothly and has the traditional nutty flavor. A single thick slice or two thinner ones work best. Substitutions: provolone, mozzarella, or a mild cheddar. Avoid pre-shredded cheese, which contains anti-caking agents that hinder melting. Storage: keep wrapped tightly in the refrigerator.
All-purpose flour Creates the first dry layer so the egg wash adheres. Season it lightly with salt and pepper. Gluten-free all-purpose blends work as a 1:1 substitute.
Eggs The binder that helps breadcrumbs stick. Two large eggs are usually enough for four breasts. Beat them thoroughly with a splash of water or milk for better coverage.
Breadcrumbs Panko gives the lightest, crispiest texture. Regular fine breadcrumbs produce a denser crust. Season with a little salt, pepper, and optional paprika or garlic powder. Storage: keep in an airtight container; panko stays fresher longer than traditional crumbs.
Oil for frying Neutral oil with a high smoke point (vegetable, canola, or peanut) is ideal. You need enough to come about halfway up the rolls so they brown evenly without deep-frying the entire piece.
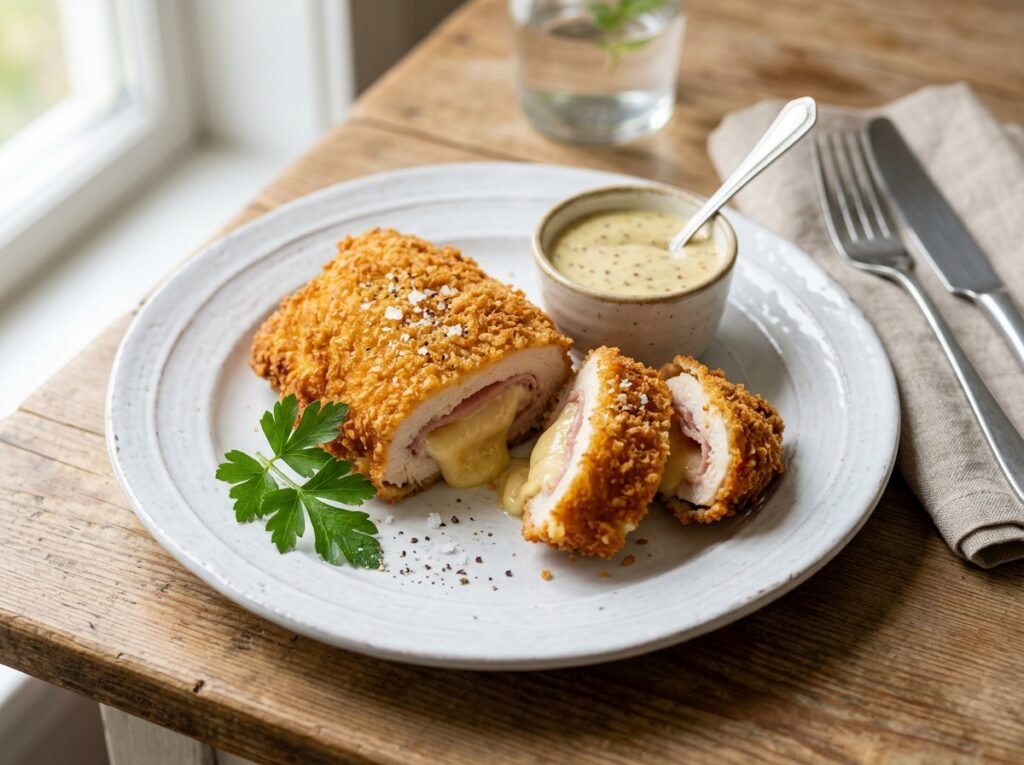
Sauce (optional but recommended) A simple Dijon cream or béchamel-style sauce complements the dish. The video shows a creamy, herb-flecked sauce poured over the finished slices.
Kitchen Equipment
Required
- Meat mallet or heavy rolling pin
- Plastic wrap
- Three shallow bowls or plates for breading station
- Large skillet, Dutch oven, or heavy-bottomed pot
- Tongs
- Instant-read thermometer (highly recommended)
- Sharp chef’s knife and cutting board
Optional but helpful
- Kitchen twine or toothpicks for securing rolls
- Wire rack set over a baking sheet for draining
- Small saucepan for the sauce
Preparation Information
- Prep Time: 25 minutes
- Cook Time: 15–18 minutes
- Total Time: 40–45 minutes
- Servings: 4
Step-by-Step Instructions
1. Pound the Chicken
Place each chicken breast between two sheets of plastic wrap or inside a large zip-top bag. Using the flat side of a meat mallet, gently pound from the center outward until the breast is an even ¼-inch (6 mm) thick. Avoid tearing the meat. Even thickness is the single most important factor for a roll that cooks uniformly and holds its shape.
2. Layer Ham and Cheese
Lay the pounded chicken flat. Place one or two slices of ham on top, followed by a slice of Swiss or Gruyère centered slightly toward one end. Leave a small border around the edges so the filling doesn’t squeeze out when you roll.
3. Roll Tightly
Starting from the end with the cheese, roll the chicken into a tight cylinder. Use the plastic wrap to help form a neat log if needed. Tuck the sides in as you go. Secure with two or three toothpicks or a short length of kitchen twine. The tighter the roll, the less chance the cheese will leak during frying.
4. Set Up the Breading Station
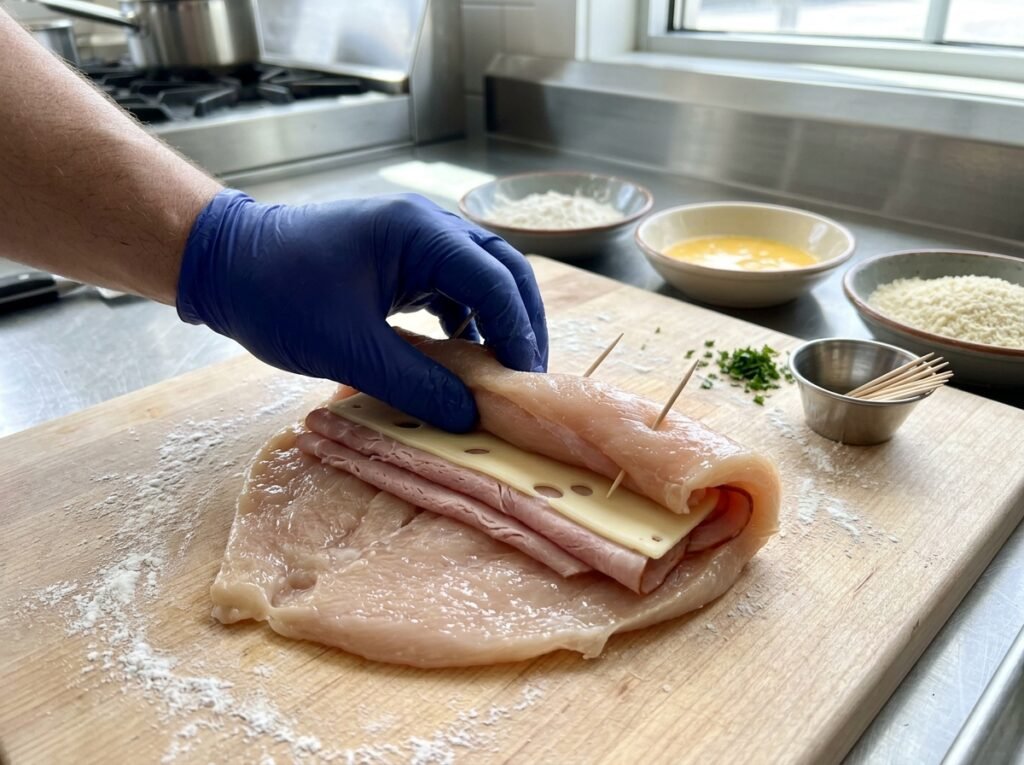
Arrange three shallow dishes: flour seasoned with salt and pepper, beaten eggs, and breadcrumbs. Working with one roll at a time, dredge thoroughly in flour, shaking off excess. Dip into the egg, letting excess drip away. Finally press firmly into the breadcrumbs so every surface is coated. Place the breaded rolls on a plate and refrigerate 10–15 minutes if time allows—this helps the coating set.
5. Heat the Oil
Pour oil into a heavy pot or deep skillet to a depth of about 1–1½ inches (2.5–4 cm). Heat over medium heat until it reaches 350°F (175°C). A thermometer is the most reliable way to know the oil is ready. If you don’t have one, test with a small piece of breadcrumb—it should sizzle gently and turn golden in about 30 seconds.
6. Fry the Rolls
Carefully lower two rolls into the hot oil using tongs. Fry 6–8 minutes, turning occasionally, until the exterior is deep golden brown and the internal temperature reaches 165°F (74°C). Transfer to a wire rack set over a baking sheet or paper-towel-lined plate. Repeat with the remaining rolls. Avoid overcrowding, which lowers the oil temperature and produces a greasy crust.
7. Rest and Slice
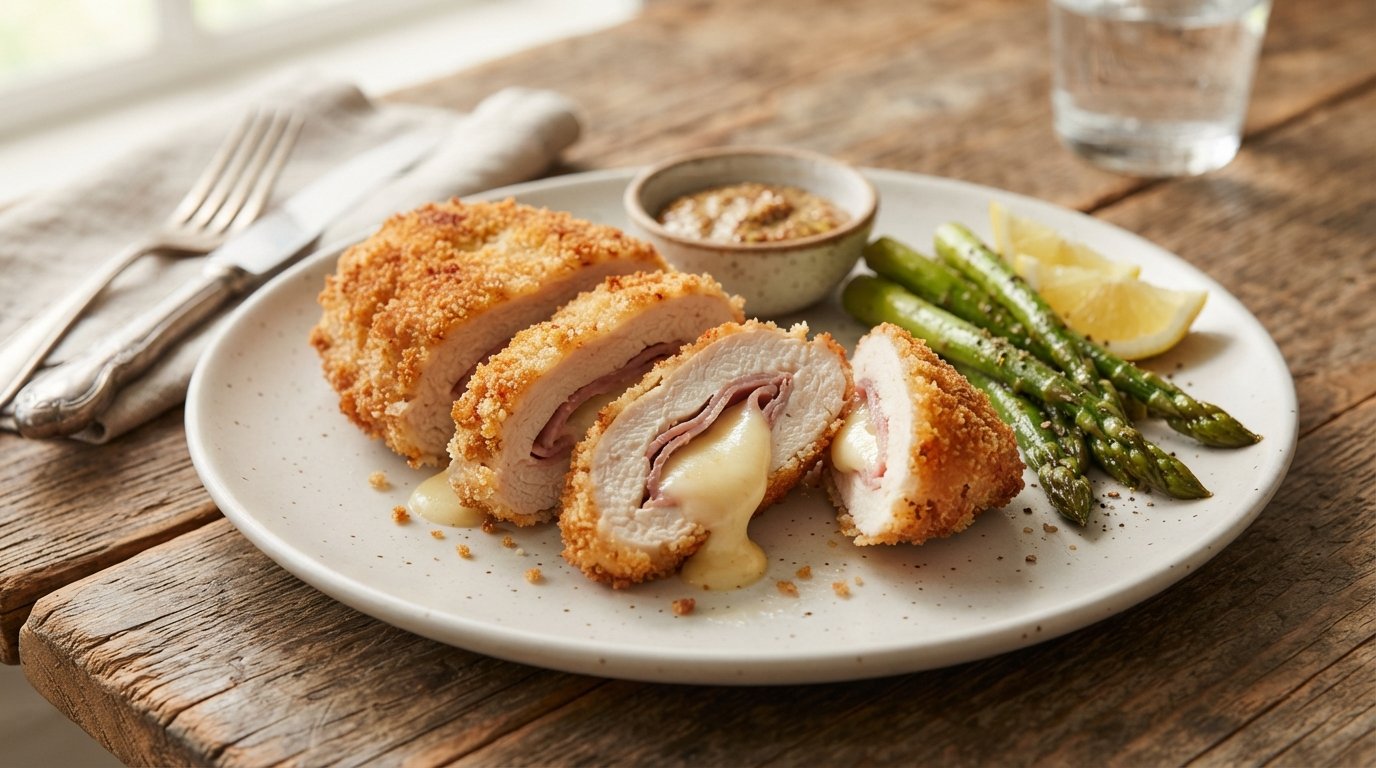
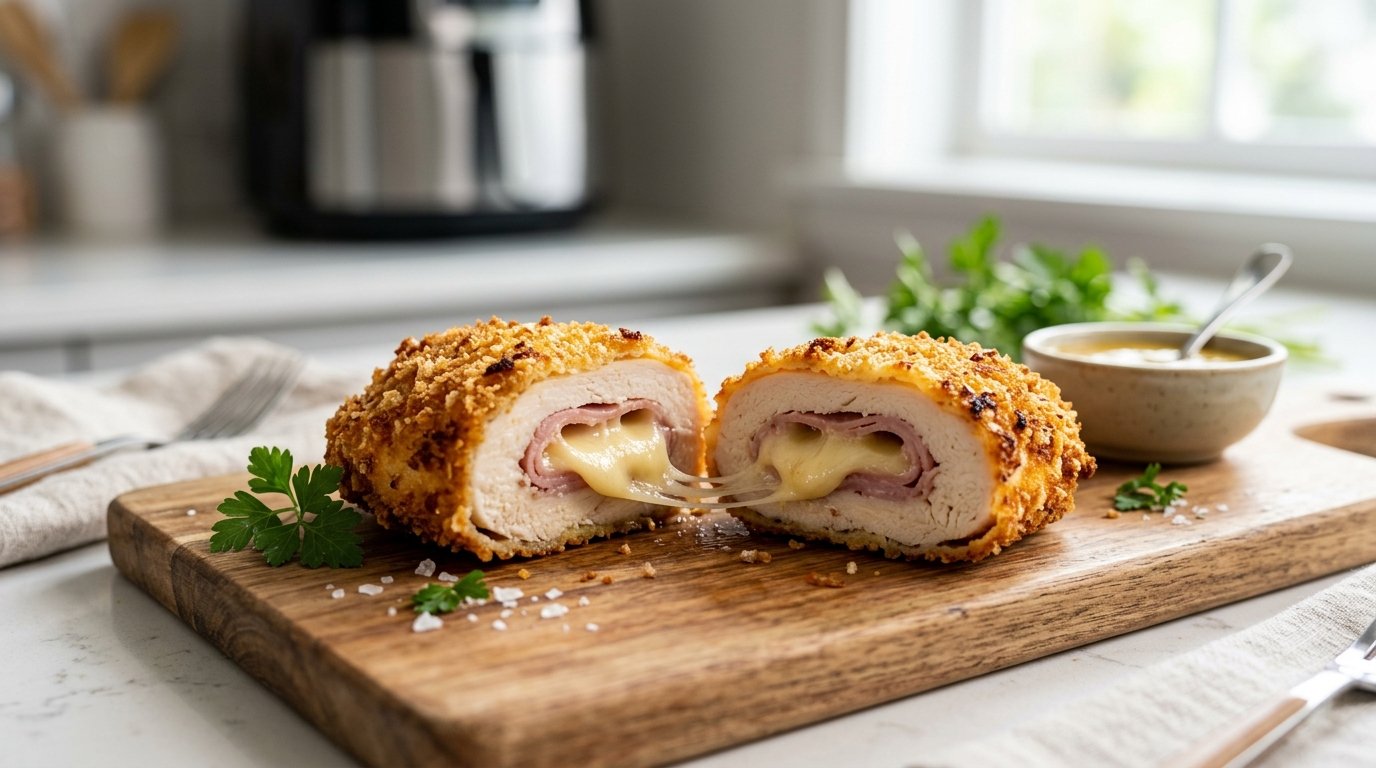
Let the chicken cordon bleu rest 3–5 minutes. Remove toothpicks or twine. Using a sharp knife, slice into thick rounds so the spiral of ham and cheese is visible. The cheese should be molten and just beginning to ooze.
8. Sauce and Serve
Warm a simple cream sauce (Dijon, garlic, or herb) and spoon it generously over the sliced rolls. Serve immediately with rice, potatoes, or a green vegetable.
Expert Tips
- Chill the rolled and breaded chicken for 15–20 minutes before frying. The cold coating sets better and is less likely to fall off.
- Keep the oil between 340–360°F (170–180°C). Too hot and the outside burns before the center cooks; too cool and the crust absorbs oil.
- If cheese starts to leak, lower the heat slightly and continue cooking. A small amount of leakage is normal and actually looks appetizing on the plate.
- For an extra-crisp finish, finish the fried rolls in a 375°F (190°C) oven for 5 minutes.
- Use a digital thermometer. Chicken is done at 165°F; anything higher risks dryness.
Common Mistakes
Uneven pounding Thick spots stay undercooked while thin spots dry out. Take the time to pound evenly.
Loose rolling Gaps allow cheese to escape and the roll to unravel. Roll tightly and secure well.
Skipping the flour or egg step The breading will not adhere properly. Always follow the full three-step process.
Oil that is too cool or too hot Results in greasy or burnt coating. Monitor temperature closely.
Slicing too soon Hot cheese runs everywhere. A short rest keeps the presentation clean.
Recipe Variations
- Spicy: Add a thin layer of Dijon or a pinch of cayenne to the flour. Serve with a spicy mayo.
- Extra Cheesy: Use two cheeses—Swiss plus a sharp cheddar or mozzarella.
- Healthier: Bake at 400°F (200°C) for 20–25 minutes after a light spray of oil, or air-fry at 375°F (190°C) for 12–15 minutes.
- Low-Carb: Replace breadcrumbs with crushed pork rinds or almond flour mixed with Parmesan.
- Turkey Cordon Bleu: Substitute turkey cutlets for chicken.
- Vegetarian: Use thick portobello slices or eggplant, stuffed with spinach and cheese, then breaded and fried or baked.
What to Serve With This Recipe
- Buttered rice or creamy mashed potatoes
- Simple green salad with vinaigrette
- Steamed asparagus or roasted broccoli
- Dijon cream sauce or a light mushroom gravy
- Crisp white wine (Chardonnay or Sauvignon Blanc) or sparkling water with lemon
- Light dessert such as fruit sorbet or a small chocolate mousse
Make Ahead Tips
Assemble and bread the rolls up to 24 hours ahead. Cover tightly and refrigerate. Fry just before serving for the best texture. You can also freeze the breaded, uncooked rolls on a tray, then transfer to a freezer bag for up to 2 months. Fry from frozen, adding a few extra minutes.
Meal Prep Tips
Cook a full batch, cool completely, and portion with sides into airtight containers. The rolls reheat well and make satisfying lunches for 3–4 days.
Storage Instructions
Refrigerator: Store cooled leftovers in an airtight container for up to 3–4 days. Freezer: Wrap individual rolls tightly in plastic and foil or place in freezer bags. Freeze up to 2 months. Thaw overnight in the refrigerator before reheating.
Reheating Instructions
- Oven: 350°F (175°C) for 12–15 minutes until heated through and crisp.
- Air Fryer: 350°F (175°C) for 6–8 minutes.
- Stovetop: Warm gently in a skillet with a splash of oil or butter over medium-low heat, turning occasionally.
- Microwave: Not recommended—the coating becomes soft. Use only if necessary and finish under a broiler for crispness.
Nutritional Information
Approximate values per serving (one roll with light sauce, without sides):
- Calories: 520
- Protein: 42 g
- Carbohydrates: 22 g
- Fat: 28 g
- Fiber: 1 g
- Sugar: 2 g
- Sodium: 780 mg
Values will vary based on exact ingredients and portion size.
Troubleshooting Guide
Cheese leaking excessively Roll more tightly next time and chill before frying. A little leakage is normal and flavorful. Soggy coating Oil was not hot enough or rolls were overcrowded. Drain thoroughly on a rack. Dry chicken Overcooked. Use a thermometer and remove at 165°F. Breading falling off Insufficient flour or egg coverage, or the rolls were handled too roughly. Press the crumbs firmly and chill before frying. Uneven browning Oil temperature fluctuated or the rolls were not turned. Maintain steady heat and rotate every couple of minutes.
Frequently Asked Questions
Can I bake chicken cordon bleu instead of frying? Yes. Place breaded rolls on a wire rack over a baking sheet, spray lightly with oil, and bake at 400°F (200°C) for 20–25 minutes until golden and 165°F inside.
What cheese works best? Swiss or Gruyère are traditional. Provolone and mozzarella also melt beautifully.
How do I keep the filling from falling out? Pound evenly, leave a border, roll tightly, and secure with toothpicks. Chilling helps.
Can I use chicken thighs? Boneless thighs work but are harder to pound evenly. Breast is preferred for classic shape.
Is it necessary to use plastic wrap when rolling? It helps create a tight cylinder, but you can roll by hand if you prefer.
Can I make this gluten-free? Yes—use a gluten-free flour blend and gluten-free breadcrumbs or crushed cornflakes.
How long does it keep in the fridge? 3–4 days when stored properly.
What’s the best way to reheat without losing crispness? Oven or air fryer. Avoid the microwave if possible.
Can I prepare it the night before? Yes. Bread the rolls, cover, and refrigerate. Fry the next day.
Why is my oil smoking? It’s too hot. Lower the heat and wait for the temperature to drop to 350°F before continuing.
Final Thoughts
Chicken cordon bleu rewards a little care with a dish that feels both comforting and elegant. The combination of crisp breading, savory ham, and stretching cheese is hard to beat. Once you’ve made it a couple of times, the process becomes second nature and the results are consistently impressive. Give this chicken cordon bleu recipe a try the next time you want something special without spending hours in the kitchen. If you make it, leave a comment or rating—I’d love to hear how it turned out for you.