Quick Recipe Summary
| Feature | Details |
|---|---|
| Prep Time | 20 minutes |
| Cook Time | 15 minutes |
| Total Time | 35 minutes |
| Servings | 4 (approx. 12-16 tenders) |
| Cuisine | American / Italian Fusion |
| Course | Main Course / Appetizer |
| Difficulty | Intermediate (Frying Technique) |
| Calories | ~450 kcal per serving |
Table of Contents
| Section | Description |
|---|---|
| Introduction | Why these tenders beat takeout every time. |
| Why This Recipe Works | The science behind the triple-dredge and post-fry toss. |
| Why You’ll Love This Recipe | Key benefits for home cooks. |
| Ingredient Notes | Sourcing the best chicken, cheese, and oil. |
| Kitchen Equipment | Essential tools for safe, crispy frying. |
| Preparation Information | Timing breakdown and yield details. |
| Step-by-Step Instructions | Detailed guide from marinating to tossing. |
| Expert Tips | Professional secrets for maximum crunch. |
| Common Mistakes | Avoiding soggy breading and burnt garlic. |
| Recipe Variations | Spicy, baked, and gluten-free options. |
| What to Serve With This Recipe | Perfect pairings and dipping sauces. |
| Make Ahead & Storage | Meal prep and freezer instructions. |
| Reheating Instructions | Restoring crispiness without sogginess. |
| Nutritional Information | Macros and dietary notes. |
| Troubleshooting Guide | Fixing coating issues and texture problems. |
| Frequently Asked Questions | Answers to top search queries. |
| Final Thoughts | Encouragement to cook and share. |
Introduction
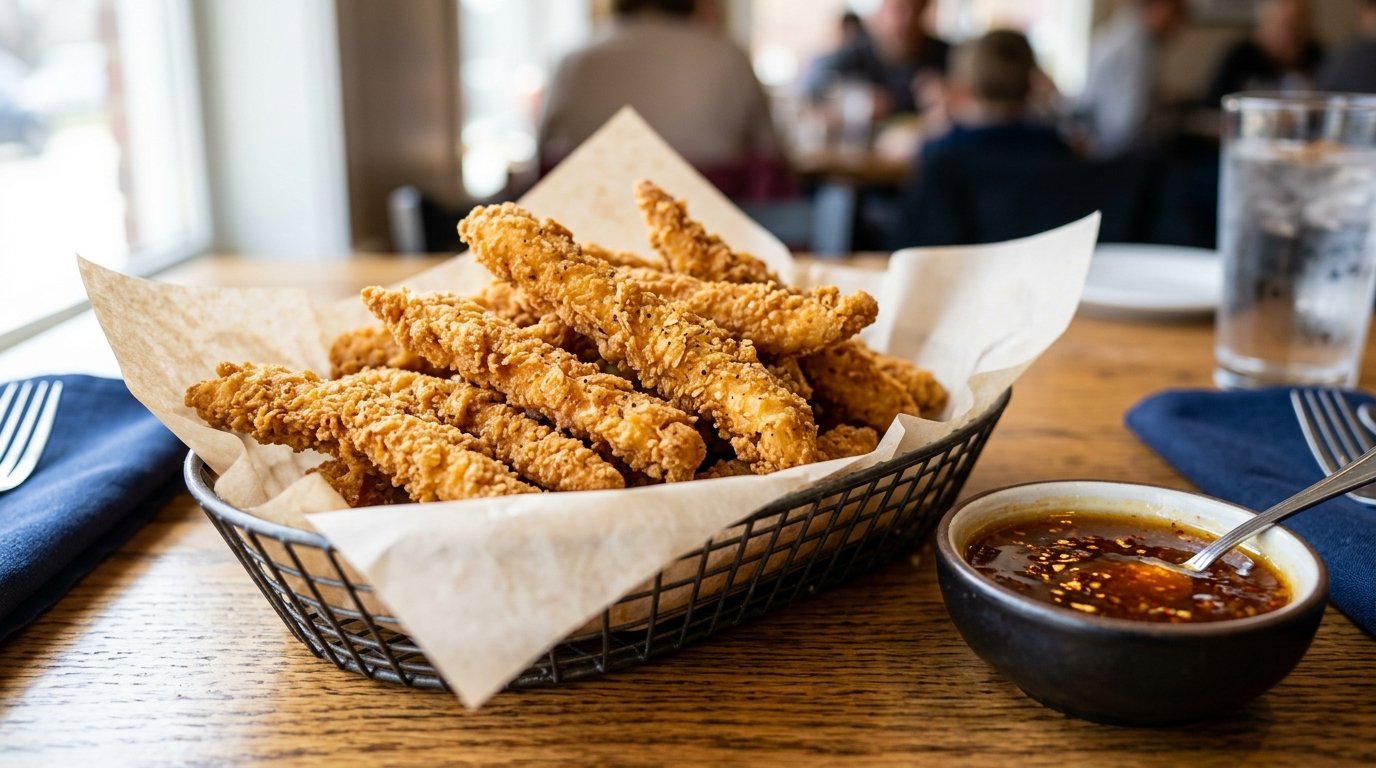
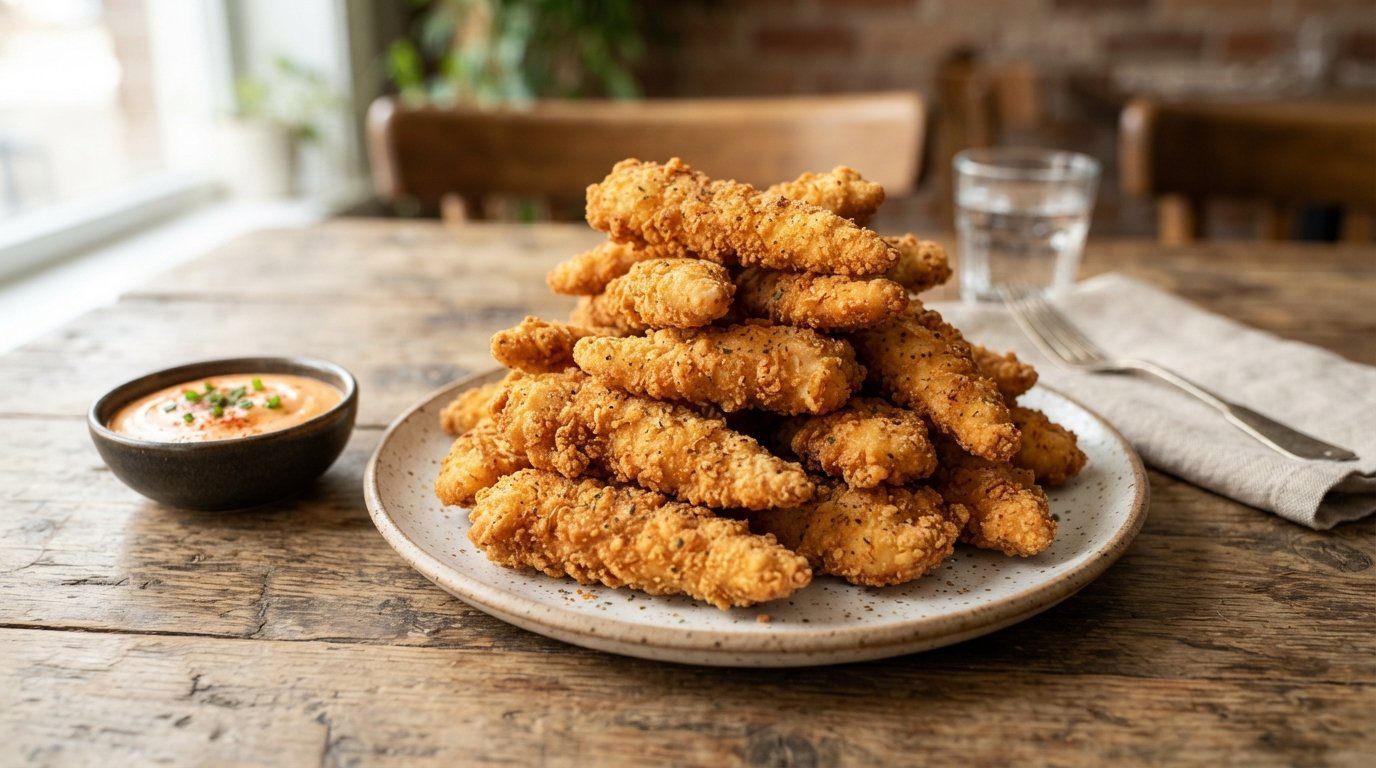
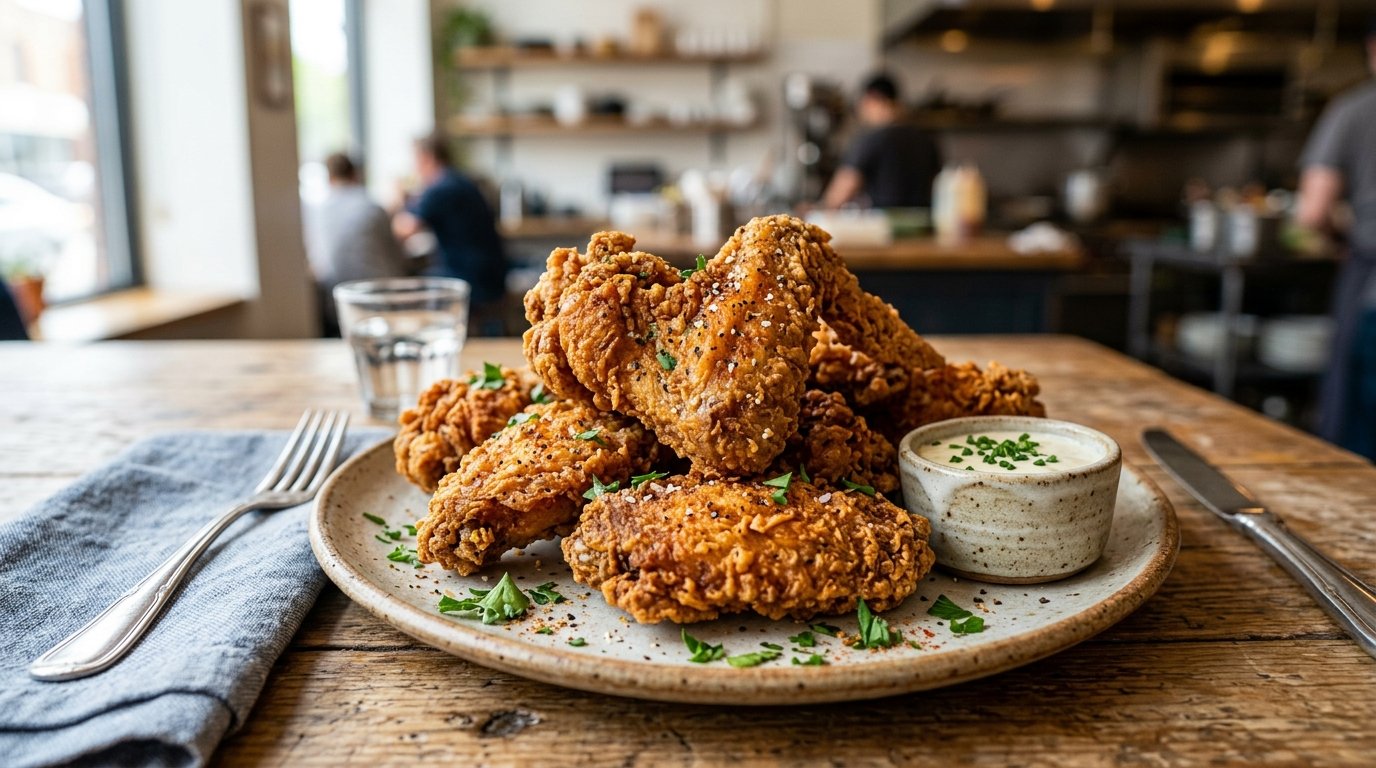
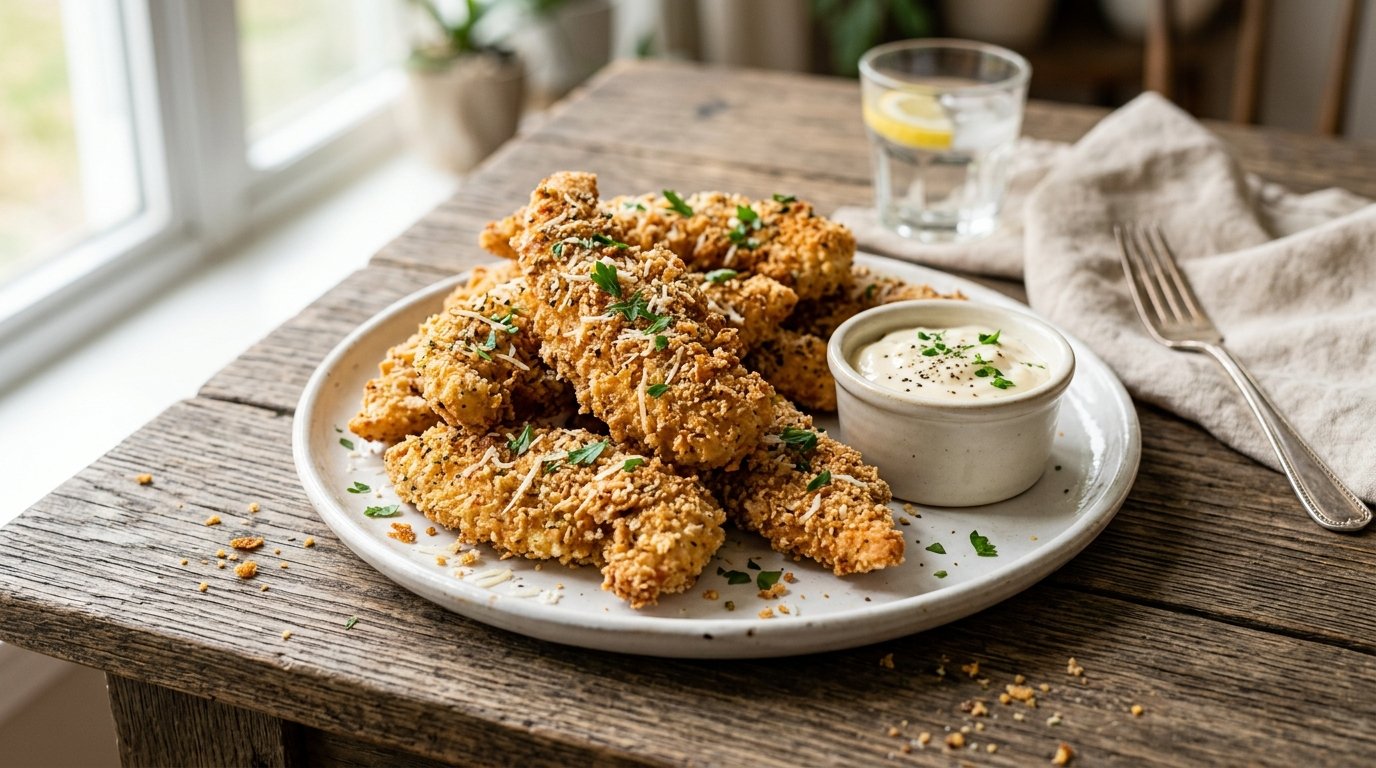
There is a distinct moment of joy when you bite into a perfectly fried chicken tender and hear that audible crack before reaching the juicy meat inside. These garlic parmesan chicken tenders capture that magic while elevating it with a savory, aromatic finish that transforms standard fried chicken into something truly gourmet. Unlike recipes that rely solely on seasoned breadcrumbs, this method uses a unique post-fry toss technique that coats the hot, crispy exterior in fresh garlic, parsley, and grated Parmesan, creating a flavor bomb that clings to every ridge of the breading.
Whether you are feeding a family of picky eaters, hosting a game day watch party, or simply craving comfort food that feels special, this recipe delivers restaurant-quality results at home. The secret lies not just in the frying, but in the layering of flavors: a buttermilk soak for tenderness, a triple-dredge for structural integrity, and a final seasoning toss that ensures every bite is packed with garlicky, cheesy goodness. If you have ever been disappointed by bland, soggy homemade tenders, this guide will show you exactly how to achieve golden, shatteringly crisp perfection every single time.
Why This Recipe Works
The success of these tenders relies on three culinary principles: moisture retention, adhesion, and flavor timing. First, the buttermilk marinade serves a dual purpose. Its acidity gently breaks down protein fibers, ensuring the chicken remains tender even after high-heat cooking, while its viscosity helps the flour adhere better than plain milk or water would. This creates the foundational “glue” for the breading.
Second, the triple-dredge system (flour → egg → breadcrumb) is non-negotiable for deep frying. Each layer has a specific job: flour dries the surface and provides initial grip; egg acts as the binding agent; and breadcrumbs create the textured crust that fries up crispy. Skipping any step risks the coating sliding off in the oil. Finally, adding fresh garlic and herbs after frying prevents burning. Raw garlic scorches instantly in 350°F oil, turning bitter. By tossing the cooked tenders in a bowl with fresh aromatics and residual heat, you get vibrant, pungent flavor without the acrid taste of burnt alliums. The residual oil on the hot chicken acts as a vehicle for the Parmesan and herbs to stick, creating a cohesive seasoning layer rather than a dusty topping.
Why You’ll Love This Recipe
- Superior Crunch: The triple-dredge method creates a thick, craggy crust that stays crispy longer than single-coated versions.
- Flavor Explosion: Post-fry tossing ensures garlic and Parmesan flavor is intense and fresh, not muted by heat.
- Juicy Interior: Buttermilk marination guarantees moist meat that pulls apart easily, never dry or chalky.
- Versatile Dining: Equally impressive as a main course with mashed potatoes or as an appetizer with dipping sauces.
- Customizable Heat: Easy to adjust spice levels in the breading or dipping sauce to suit any palate.
- Crowd Pleaser: Universally loved by kids and adults alike, making it a safe bet for gatherings.
- Better Than Takeout: Control over oil quality, sodium levels, and ingredient freshness means a healthier, tastier result.
Ingredient Notes
Chicken Tenderloins
- Purpose: The star protein. Their uniform size ensures even cooking and perfect bite-sized portions.
- Buying Tips: Look for “tenderloins” specifically, not just sliced breast meat. True tenderloins have a natural tapered shape and connective tissue that holds together well during frying. Avoid pre-trimmed pieces that look overly processed or wet.
- Substitutions: Boneless, skinless chicken thighs cut into strips work beautifully and stay juicier due to higher fat content. Breast meat can be used but must be pounded to even thickness to prevent drying.
- Storage Tips: Use within 2 days of purchase. Pat completely dry before marinating to ensure buttermilk adheres properly.
Buttermilk
- Purpose: Tenderizes meat and aids breading adhesion through acidity and viscosity.
- Why It Matters: The lactic acid in buttermilk denatures proteins gently, resulting in superior texture compared to yogurt or milk. Its thickness creates a tacky surface for flour to cling to.
- Substitutions: Whole milk + 1 tbsp lemon juice/vinegar per cup (let sit 5 mins). Plain whole-milk yogurt thinned with milk works in a pinch but lacks the same enzymatic action.
- Storage Tips: Freeze leftover buttermilk in ice cube trays for future marinades. Thaw overnight in fridge.
All-Purpose Flour
- Purpose: Creates the base layer of the breading, providing structure and initial crispness.
- Why AP Flour? Lower protein content than bread flour means less gluten development, resulting in a lighter, crispier crust rather than a chewy one.
- Substitutions: Gluten-free 1:1 baking blend works well. Almond flour can be used for low-carb but requires careful temperature control to prevent burning.
- Storage Tips: Store in airtight container in cool, dark place. Sift before use to remove lumps and aerate for lighter coating.
Panko Breadcrumbs
- Purpose: Provides the signature shatteringly crisp texture and visual appeal.
- Why Panko? Japanese-style breadcrumbs are larger, flakier, and airier than traditional fine crumbs. They absorb less oil and create more surface area for crunch.
- Substitutions: Crushed cornflakes or crushed crackers (Ritz, saltines) offer similar texture. Traditional breadcrumbs work but yield a denser, less crispy crust.
- Storage Tips: Keep sealed tightly; panko stales quickly when exposed to air. Toast lightly in oven before use for extra crispness if desired.
Fresh Garlic & Parsley
- Purpose: Aromatic finishing elements that provide bright, pungent flavor without burning.
- Why Fresh? Pre-minced jarred garlic lacks volatile compounds and often contains preservatives that alter taste. Fresh parsley has grassy brightness that dried cannot replicate.
- Substitutions: Garlic powder (½ tsp per clove) can be mixed into breading if fresh isn’t available, but flavor profile changes significantly. Dried parsley works but add ⅓ amount; rehydrate in buttermilk if possible.
- Storage Tips: Mince garlic just before tossing to prevent oxidation/bitterness. Store parsley stems-down in water like flowers; change water daily.
Parmesan Cheese (Grated)
- Purpose: Adds salty, umami-rich depth and helps seasoning adhere to hot chicken.
- Why Grated? Finely grated Parm melts slightly into the hot oil residue, creating a cohesive coating. Shaved or chunky pieces won’t stick properly.
- Substitutions: Pecorino Romano for sharper, saltier bite. Nutritional yeast for vegan/dairy-free option (adds cheesiness without dairy). Asiago for milder flavor.
- Storage Tips: Buy block Parm and grate yourself; pre-grated contains anti-caking agents that prevent proper melting/adhesion. Store wrapped in parchment, then foil, in veggie drawer.
Neutral Oil (Vegetable, Canola, or Peanut)
- Purpose: Cooking medium for deep frying. Must have high smoke point and neutral flavor.
- Why Neutral? Olive oil smokes too low and imparts strong flavor that clashes with garlic-Parm profile. Peanut oil offers highest smoke point and subtle nuttiness that complements dish.
- Substitutions: Avocado oil (highest smoke point), grapeseed oil, or sunflower oil. Avoid butter, coconut oil, or extra virgin olive oil for frying.
- Storage Tips: Strain and reuse oil up to 3 times if filtered properly. Discard if dark, foamy, or smells rancid. Store cooled oil in sealed container away from light.
Kitchen Equipment
- Heavy-Bottomed Pot or Dutch Oven (4-6 qt): Essential for maintaining stable oil temperature. Thin pots cause dangerous temp fluctuations. Cast iron or enameled cast iron ideal.
- Deep-Fry Thermometer: Non-negotiable for safety and consistency. Visual cues aren’t reliable enough for perfect crispness. Clip-on models free up hands.
- Three Shallow Bowls/Dishes: For organized dredging station. Wide rims prevent spillage. Label if helping hands are involved.
- Wire Rack over Baking Sheet: For draining fried tenders. Paper towels trap steam and soften crust; wire racks allow airflow to preserve crispness.
- Large Metal Mixing Bowl: For post-fry tossing. Metal retains heat better than glass/plastic, helping seasoning adhere.
- Tongs or Spider Strainer: For safely lowering/removing chicken from hot oil. Long handles protect hands from splatter.
- Instant-Read Thermometer: To verify internal chicken temp (165°F) without guesswork. Prevents under/overcooking.
Preparation Information
- Prep Time: 20 Minutes (Marinating optional but recommended; dredging setup)
- Cook Time: 15 Minutes (Batch frying + resting)
- Total Time: 35 Minutes (Without extended marinate)
- Servings: 4 (3-4 tenders per person)
Step-by-Step Instructions
Phase 1: Marinate the Chicken
Place chicken tenderloins in a bowl and cover completely with buttermilk. Refrigerate for at least 30 minutes, or up to 4 hours.
- Why It Matters: Even a short soak begins the tenderizing process and hydrates the surface. Longer marination (up to 4 hrs) yields noticeably juicier results. Do not exceed 8 hours or texture becomes mushy.
- Visual Cue: Chicken should look opaque white/pink, fully submerged. Buttermilk may appear slightly cloudy from surface proteins.
- Pro Tip: Add ½ tsp salt to buttermilk to enhance penetration. Remove chicken from fridge 10 mins before frying to take chill off; cold chicken drops oil temp drastically.
Phase 2: Set Up Dredging Station
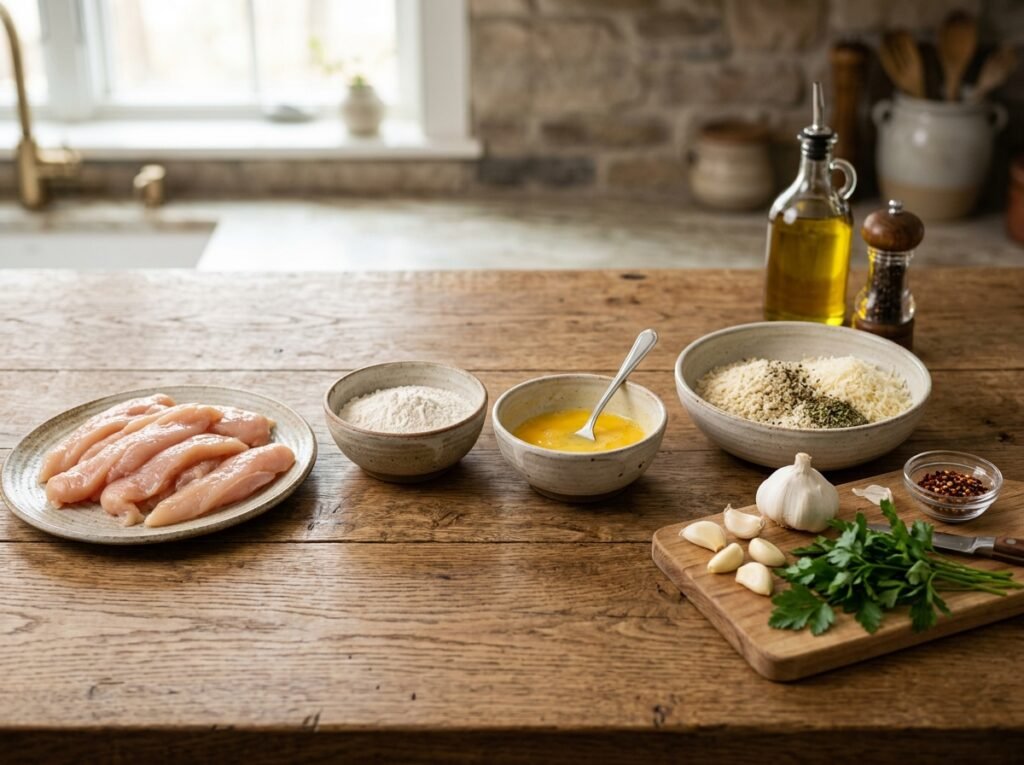
Arrange three shallow bowls in assembly line order: Bowl 1 = flour (seasoned with 1 tsp salt, ½ tsp black pepper); Bowl 2 = beaten eggs (2 large eggs + 1 tbsp water); Bowl 3 = panko breadcrumbs mixed with ¼ cup grated Parmesan.
- Why Order Matters: Flour first creates dry base. Egg binds flour to panko. Parm in panko adds foundational cheese flavor that survives frying. Seasoning flour ensures every layer has taste.
- Texture Cue: Flour should feel powdery, not clumpy. Eggs should be smooth, no white streaks. Panko should be loose, not compacted.
- Common Mistake: Using same hand for wet/dry stations causes gloopy fingers and uneven coating. Use left hand for wet, right for dry (or vice versa).
Phase 3: Triple-Dredge Each Tender
Remove chicken from buttermilk, letting excess drip off. Dredge in flour, shaking off excess. Dip in egg, allowing surplus to drain. Press firmly into panko-Parm mixture, ensuring full coverage. Place on wire rack.
- Why Shake Off Excess? Too much buttermilk/flour/egg creates thick, doughy batter that falls off in oil. Thin, even layers fry crisply.
- Visual Cue: Coated tender should look uniformly textured, no bare spots. Panko should adhere densely, not loosely scattered.
- Professional Tip: Let coated tenders rest on rack 5-10 mins before frying. This “sets” the breading, reducing fallout in oil. Chill briefly if kitchen is warm.
Phase 4: Fry to Golden Perfection
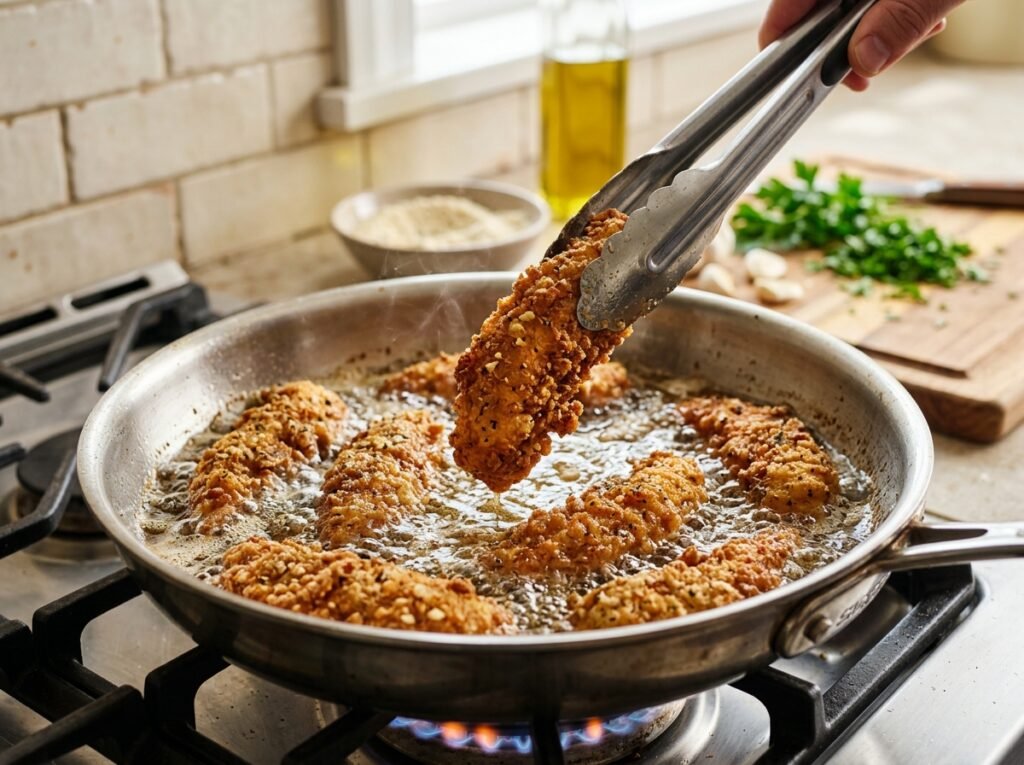
Heat 2 inches of oil in pot to 350°F (175°C). Fry tenders in batches (don’t crowd!) for 3-4 minutes per side, flipping once, until deep golden brown and internal temp reaches 165°F. Drain on wire rack.
- Why Batch Fry? Overcrowding drops oil temp below 300°F, causing greasy, soggy coating. Maintain 325-350°F throughout. Adjust heat between batches.
- Color/Aroma Cue: Bubbling should be vigorous but not violent. Color progresses from pale → light gold → rich amber. Smell should be toasty, not acrid.
- Doneness Check: Thermometer inserted into thickest part reads 165°F. Juices run clear when pierced. Crust feels firm, not soft/squishy.
Phase 5: The Flavor Toss
While chicken is still piping hot, transfer to large metal bowl. Add minced garlic, chopped parsley, and remaining grated Parmesan. Toss vigorously for 30 seconds until evenly coated. Serve immediately.
- Why Hot Chicken? Residual heat and surface oil activate garlic aromatics and melt Parm slightly, creating adhesive seasoning layer. Cold chicken = dusty, falling-off toppings.
- Texture/Sound Cue: Tossing should produce faint rustling/crisp sound. Garlic should smell fragrant, not raw/pungent. Parm should appear integrated, not clumped.
- Critical Timing: Complete toss within 2 minutes of removing from oil. Delay = lost heat = poor adhesion. Have garnishes pre-measured and ready.
Expert Tips
- Oil Temp is King: Invest in a good thermometer. 350°F is sweet spot. Below 325°F = greasy; above 375°F = burnt outside/raw inside. Recalibrate between batches.
- Dry Chicken Before Marinade: Pat tenderloins thoroughly with paper towels before buttermilk. Wet surface dilutes marinade and prevents proper adhesion later.
- Season Every Layer: Don’t rely solely on post-fry toss. Salt/pepper in flour builds foundational flavor. Parm in panko adds mid-layer savoriness. Final toss is the crescendo.
- Use a Splatter Screen: Reduces mess and safety risk. Allows steam escape (unlike lid) while containing oil droplets. Essential for stovetop frying.
- Rest After Frying: 2-3 minute rest on wire rack lets juices redistribute AND crust set slightly. Cutting immediately releases steam that softens breading.
- Garlic Size Matters: Mince garlic finely but not paste-like. Tiny pieces distribute evenly and cook gently via residual heat. Large chunks burn or stay raw.
Common Mistakes
- Soggy/Bread Falling Off: Caused by skipping rest after dredging, overcrowding pan, or oil too cool. Fix: Always rest coated chicken 5+ mins. Fry in small batches. Verify temp before each batch.
- Burnt Garlic/Bitter Taste: Added garlic during frying or tossed when chicken wasn’t hot enough. Fix: ONLY add fresh garlic post-fry. Ensure chicken is straight-from-oil hot. If garlic burns, discard and start fresh toss.
- Dry/Tough Chicken: Overcooked or skipped buttermilk. Fix: Use thermometer religiously. Pull at 165°F; carryover heat brings to 170°F. Never skip marinade.
- Bland Flavor: Underseasoned breading or insufficient post-fry toss. Fix: Taste flour mixture before dredging (should be noticeably salty). Be generous with garlic/Parm in toss. Add pinch of salt to finished product if needed.
- Uneven Cooking: Tenderloins varying wildly in size. Fix: Trim to similar thickness. Pound thicker ends gently. Cook smaller pieces first/larger pieces longer if necessary.
Recipe Variations
- Spicy Nashville Hot Style: Add 2 tbsp cayenne + 1 tbsp brown sugar to post-fry toss. Drizzle with spicy oil infused with chili flakes.
- Lemon Herb Twist: Replace garlic with lemon zest + fresh dill/thyme. Add squeeze of lemon juice to toss. Bright, summery profile.
- Buffalo Garlic Parm: Toss fried tenders in ¼ cup buffalo sauce + garlic/Parm mix. Blue cheese dressing mandatory dip.
- Baked (Healthier Option): Spray coated tenders generously with oil. Bake at 400°F on wire rack 20-25 mins, flipping halfway. Crispier than expected, less oil.
- Gluten-Free Adaptation: Use GF flour blend + GF panko (or crushed GF crackers). Verify all seasonings certified GF. Texture nearly identical.
- Korean-Inspired: Add gochujang + sesame oil to post-fry toss. Garnish with toasted sesame seeds + scallions. Sweet-spicy-sticky glory.
- Extra Cheesy Bomb: Mix shredded mozzarella INTO panko coating. Creates gooey cheese pull inside crust. Watch melt carefully during fry.
- Air Fryer Method: Spray basket + tenders well. Cook 380°F 12-15 mins, flipping/shaking halfway. Less oil, decent crunch, faster cleanup.
What to Serve With This Recipe
- Classic Ranch Dressing: Cool, creamy contrast to hot, crispy chicken. Homemade ranch elevates it further.
- Honey Mustard Sauce: Sweet-tangy complement to garlic-Parm savoriness. Mix Dijon + honey + mayo + splash vinegar.
- Marinara Sauce: Italian-inspired pairing. Warm marinara turns tenders into deconstructed chicken parm.
- Coleslaw: Creamy or vinegar-based slaw cuts richness with crunch and acid. Essential BBQ-side synergy.
- French Fries/Waffle Fries: Ultimate comfort combo. Season fries with matching garlic-Parm for cohesion.
- Macaroni and Cheese: Rich-on-rich indulgence. Sharp cheddar mac balances garlic-Parm tenders perfectly.
- Sparkling Lemonade: Acidic, bubbly refreshment cleanses palate between bites. Cuts through fried heaviness.
- Caesar Salad: Romaine + Parm + croutons echo tender flavors. Light starter before heavy main.
Make Ahead & Storage Tips
- Prep Ahead: Marinate chicken up to 4 hrs ahead. Set up dredging station morning-of. Coat tenders, rest on rack, refrigerate uncovered 1 hr before frying (dries surface = crispier).
- Freeze Unfried: Flash-freeze coated tenders on sheet pan 1 hr, then bag. Fry frozen directly, adding 2-3 mins to cook time. No thawing needed.
- Leftovers: Store cooled tenders in airtight container max 3 days. Separate from sauces/dips to prevent sogginess.
- Meal Prep: Reheat using oven/air fryer ONLY (see below). Microwave destroys texture irreversibly. Pack sauces separately for lunchboxes.
Reheating Instructions
- Oven (Best): Preheat 375°F. Place tenders on wire rack over sheet pan. Heat 10-12 mins until crispy/internal 165°F. Restores near-fresh texture.
- Air Fryer (Excellent): 350°F 5-7 mins, shaking halfway. Superior crispness restoration. Watch closely to prevent over-browning.
- Stovetop Skillet: Medium heat, dry skillet. Re-crisp 2-3 mins per side. Good for small batches. Adds slight toastiness.
- Microwave (Last Resort): 30-sec bursts on medium power. Expect soft/soggy crust. Only use if no other option. Pair with crunchy side to compensate.
Nutritional Information
Per Serving (4 tenders)
- Calories: 450
- Protein: 38g
- Carbohydrates: 28g
- Fat: 22g
- Fiber: 1g
- Sugar: 2g
- Sodium: 780mg
Note: Values vary based on oil absorption, chicken size, and Parm quantity. Dark meat thighs increase fat/calories slightly.
Troubleshooting Guide
| Problem | Cause | Solution |
|---|---|---|
| Coating Falls Off in Oil | Wet chicken / No rest / Oil too cool | Dry chicken before marinade. Rest coated tenders 5+ mins. Verify 350°F oil temp. |
| Chicken Raw Inside/Burnt Outside | Oil too hot / Pieces too thick | Lower temp to 325°F. Pound chicken even. Finish in 300°F oven if needed. |
| Greasy/Soggy Tenders | Oil too cool / Overcrowded pan | Maintain 350°F+. Fry in small batches. Drain on wire rack, NOT paper towels. |
| Garlic Tastes Burnt/Bitter | Added during fry / Chicken cooled | ONLY toss post-fry while HOT. If burnt, discard garlic, re-toss with fresh. |
| Parm Clumps/Doesn’t Stick | Chicken not hot enough / Pre-grated cheese | Toss immediately after frying. Use freshly grated block Parm. |
| Breading Too Thick/Doughy | Excess liquid in dredge / Didn’t shake off | Shake off excess buttermilk/egg/flour at each stage. Thin, even layers only. |
Frequently Asked Questions
1. Can I use chicken breasts instead of tenderloins? Yes! Cut breasts into ¾-inch strips lengthwise. Pound to even thickness. Adjust fry time to 4-5 mins total. Tenderloins are preferred for uniformity and natural shape.
2. Is buttermilk essential, or can I skip it? Highly recommended but not absolute. Substitute with whole milk + 1 tbsp vinegar/lemon juice (rest 5 mins). Yogurt works but yields different texture. Buttermilk’s enzymes provide superior tenderness.
3. Why do my tenders get soggy after 10 minutes? Steam trapped under breading. Always drain on WIRE RACK, never paper towels. Serve immediately. If holding, keep warm in 200°F oven on rack, uncovered.
4. Can I make the garlic-Parm topping ahead? No. Fresh garlic oxidizes and turns bitter within minutes. Mince garlic and chop parsley RIGHT BEFORE tossing. Have Parm grated and ready, but combine only when chicken exits oil.
5. How do I know oil is ready without thermometer? Drop 1-inch bread cube in oil. Should bubble vigorously and turn golden in 60 seconds at 350°F. Too fast = too hot; too slow = too cool. Thermometer is far more reliable.
6. Can I reuse the frying oil? Yes, 2-3 times if strained through cheesecloth/coffee filter after cooling. Store in sealed container, dark place. Discard if dark, foamy, or smells off. Never mix old/new oil.
7. Why does my breading look patchy/not covering fully? Insufficient pressing in panko OR chicken too wet entering panko. Shake off excess egg thoroughly. Press panko FIRMLY onto chicken, rotating to cover all surfaces.
8. Are these suitable for meal prep lunches? Yes, IF reheated properly (oven/air fryer). Pack sauces separately. Expect some texture loss vs. fresh. Best consumed within 2 days for optimal quality.
9. Can I bake these instead of frying? Absolutely. Spray coated tenders liberally with oil. Bake 400°F on wire rack 20-25 mins, flipping halfway. Crispier than expected, significantly less oil. Internal temp still 165°F.
10. What makes panko better than regular breadcrumbs? Panko’s larger, flakier structure creates more surface area and air pockets. Absorbs less oil, fries crispier, stays crunchy longer. Regular crumbs pack densely, yielding heavier, softer crust.
Final Thoughts
These garlic parmesan chicken tenders represent the beautiful intersection of technique and comfort. Mastering the triple-dredge and post-fry toss unlocks a level of crispiness and flavor that transforms humble chicken into something extraordinary. Whether you’re cooking for a crowd or treating yourself to a well-deserved indulgence, the satisfaction of pulling apart a perfectly golden, garlicky-cheesy tender is unmatched. Don’t be intimidated by frying—with the right tools and attention to detail, it becomes second nature. I’d love to hear about your experience: Did you try the spicy variation? How did your first batch turn out? Share your photos and tips in the comments below, and please rate the recipe if it earned a spot in your regular rotation. Happy frying, and may your tenders always be crispy!