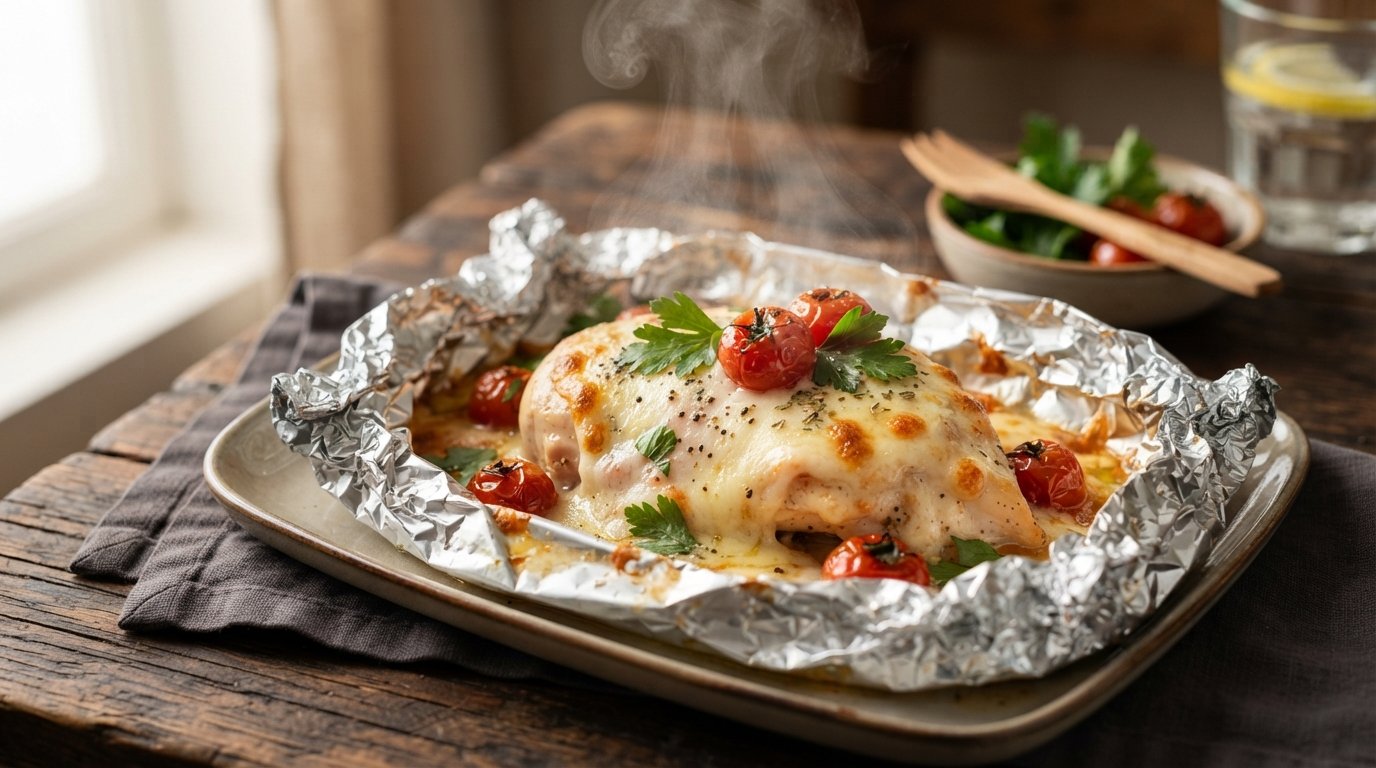
There is a specific kind of magic that happens when you combine the savory depth of seared chicken with a blanket of molten cheese, all sealed tight in aluminum foil. This Cheesy Foil Chicken recipe isn’t just a dinner idea; it’s a technique that guarantees moisture and flavor every single time. Whether you are cooking for a busy weeknight family meal or looking for an impressive yet low-stress dish for guests, this method delivers restaurant-quality results right at home.
The secret lies in the dual-cooking process. By searing the chicken first, we develop a rich, caramelized crust that boiling or steaming simply cannot achieve. Then, by wrapping it in foil with a spiced cheese mixture, we create a personal steam oven that locks in those juices while melting the cheese into a creamy, herb-flecked sauce. It is comfort food elevated to an art form, and once you try it, you will never want to bake plain chicken breasts again.
Why This Recipe Works
This recipe succeeds because it respects the science of cooking chicken. Chicken breast and thighs often suffer from dryness when baked directly in an oven without protection. The foil packet acts as a barrier, trapping moisture and heat. However, unlike traditional “en papillote” which can sometimes result in pale, boiled meat, our pre-sear step ensures the Maillard reaction occurs. This creates complex flavor compounds on the surface of the meat before it even enters the foil.
Furthermore, the marinade serves a double duty. The yogurt base contains lactic acid and enzymes that gently tenderize the protein fibers, ensuring the meat remains succulent. When combined with the high-fat content of the cheese mix inside the foil, the result is a self-basting environment where the chicken essentially poaches in its own flavorful fats and aromatics.
Why You’ll Love This Recipe
Guaranteed Juiciness: The foil seal prevents moisture loss, making it nearly impossible to overcook the chicken to a dry texture.
Minimal Cleanup: Since everything cooks in the foil, your baking sheet stays relatively clean, and there are no scrubbing pots required.
Flavor Explosion: The combination of a yogurt-spice marinade and a seasoned cheese melt provides layers of taste in every bite.
Versatile Protein: While optimized for chicken legs and thighs, this method works beautifully with boneless breasts, pork chops, or even firm fish fillets.
Visual Appeal: Unwrapping the foil at the table releases a burst of aromatic steam and reveals a gorgeous cheese pull that looks incredible on social media or the dinner table.
Beginner Friendly: The steps are straightforward—slit, marinate, sear, wrap, bake—making it accessible for novice cooks.
Ingredient Notes
Understanding your ingredients is key to mastering Cheesy Foil Chicken. Here is what you need to know about each component:
For the Marinade
Plain Yogurt: Use full-fat Greek yogurt or thick curd. The thickness helps the spices adhere to the chicken, and the fat content protects the meat during the high-heat sear. Avoid watery yogurts, or your chicken will steam rather than sear.
Spices (Coriander, Chili Flakes, Salt): Freshly ground coriander powder offers a citrusy, nutty warmth that pairs perfectly with dairy. Red chili flakes add heat without altering the color too drastically. Adjust salt based on whether your yogurt is already salted.
For the Cheese Mix
Mozzarella Cheese: Low-moisture, part-skim mozzarella is ideal for shredding. It melts smoothly without becoming greasy. Avoid pre-shredded bags if possible, as they contain anti-caking agents (cellulose) that can prevent a smooth melt.
Dried Herbs (Oregano/Thyme): Dried herbs are preferred here over fresh because they withstand the high heat inside the foil better and release their oils more slowly, infusing the cheese as it melts.
Red Chili Flakes: Adds a subtle kick to cut through the richness of the cheese.
The Chicken
Chicken Legs/Thighs: Bone-in, skin-on pieces are recommended for maximum flavor and juiciness. The bone conducts heat gently, cooking the meat evenly from the inside out. If using boneless thighs, reduce the baking time by 5-7 minutes.
Kitchen Equipment
You don’t need a professional kitchen to make this, but having the right tools makes the process seamless:
Heavy-Bottomed Skillet or Cast Iron Pan: Essential for getting a hard, even sear on the chicken without burning the marinade.
Aluminum Foil (Heavy Duty): Standard foil can tear easily when handling hot, juicy chicken. Heavy-duty foil is safer for sealing packets.
Sharp Chef’s Knife: For making precise slits in the chicken to allow marinade penetration.
Tongs: Metal tongs are necessary for flipping chicken safely in hot oil.
Mixing Bowls: Two medium bowls—one for the wet marinade, one for the dry cheese mix.
Baking Sheet: To hold the foil packets in the oven.
Step-by-Step Instructions
Follow these detailed steps to ensure your Cheesy Foil Chicken turns out perfectly every time.
H3: Step 1 – Slit the Chicken
Take your raw chicken legs or thighs and use a sharp knife to make 2-3 deep slashes into the thickest part of the meat. Cut down until you almost touch the bone, but do not cut through it.
Why this matters: Chicken legs are dense. Without slits, the marinade sits on the surface, and the heat takes longer to reach the center, potentially drying out the outer layers before the inside is cooked. Slits act as channels for flavor and heat.
Visual Cue: You should see the pink flesh open up slightly.
H3: Step 2 – Make the Marinade
In a bowl, combine plain yogurt, coriander powder, red chili flakes, and salt. Whisk until smooth. Add the chicken pieces and massage the marinade deeply into the slits and all over the skin. Let it rest for at least 30 minutes (or up to 4 hours in the fridge).
Why this matters: Massaging ensures the yogurt penetrates the cuts. The resting period allows the acids to begin breaking down proteins, tenderizing the meat.
Aroma Cue: The mixture should smell tangy and earthy from the coriander.
H3: Step 3 – Prepare the Cheese Mix
In a separate bowl, toss shredded mozzarella with dried oregano (or thyme), red chili flakes, and a pinch of black pepper. Mix well so the herbs are distributed evenly.
Why this matters: Pre-mixing ensures you don’t get a clump of plain cheese next to a clump of herbs. Every bite should be seasoned.
Texture Cue: The cheese should look fluffy and coated in specks of green and red.
H3: Step 4 – Sear the Chicken
Heat a tablespoon of oil in a skillet over medium-high heat. Once the oil shimmers, place the marinated chicken in the pan. Do not overcrowd. Sear for 3-4 minutes per side until golden brown and caramelized. Remove from heat.
Why this matters: This step builds the fond (browned bits) and creates a textural contrast to the soft interior. It also renders some fat from the skin, preventing sogginess.
Visual Cue: Look for a deep golden-brown color, not pale beige. Listen for a steady sizzle; if it stops, the pan is too cool.
Common Mistake: Moving the chicken too soon. Let it release naturally from the pan when the crust has formed.
H3: Step 5 – Wrap & Seal
Tear off large sheets of heavy-duty foil. Place a seared chicken piece in the center. Spoon a generous amount of the cheese mix directly onto the hot chicken (the residual heat will start melting it immediately). Fold the sides of the foil up and crimp the edges tightly to create a sealed packet.
Why this matters: A tight seal is non-negotiable. If steam escapes, the chicken dries out. The cheese needs to be on top so it melts onto the meat, basting it as it liquefies.
Safety Tip: Be careful of steam when opening later!
H3: Step 6 – Bake & Enjoy
Place packets on a baking sheet. Bake at 400°F (200°C) for 20-25 minutes. Carefully open the foil (watch for steam!) to check doneness. The cheese should be bubbling and golden, and chicken internal temp should reach 165°F (74°C).
Visual Cue: The cheese should be fully melted with slight browning spots. The chicken juices should run clear.
Serving: Serve immediately while the cheese is stretchy.
Expert Tips for Perfect Foil Chicken
Double Wrap for Safety: If you are worried about leaks, use two layers of foil or place the packet inside a second sheet folded in the opposite direction. Leaking foil means lost moisture.
Room Temperature Chicken: Take your marinated chicken out of the fridge 15 minutes before searing. Cold chicken hits the hot pan and drops the temperature instantly, leading to steaming instead of searing.
Don’t Skip the Rest: After baking, let the foil packets rest for 5 minutes before opening. This allows the juices to redistribute throughout the meat fibers rather than spilling out onto the plate.
Cheese Placement: Always put the cheese on the top surface of the chicken inside the foil. Gravity and rising steam will help it coat the meat evenly.
Use Freshly Grated Cheese: As mentioned, pre-shredded cheese contains potato starch or cellulose to prevent clumping in the bag. This coating inhibits melting. Buy a block of mozzarella and grate it yourself for the ultimate cheese pull.
Common Mistakes to Avoid
Overcrowding the Pan During Searing: If the chicken pieces touch, they steam each other. You want a crisp crust, not a soggy surface. Cook in batches if necessary.
Loose Foil Seals: A loose packet lets steam escape. The chicken will end up roasted and dry rather than steamed and juicy. Crimp those edges tightly!
Burning the Marinade: Yogurt burns faster than oil. Keep your heat at medium-high, not max. If the pan starts smoking excessively, lower the heat.
Opening Too Early: Resist the urge to peek while baking. Every time you open the oven, you lose heat and extend cooking time. Trust the timer.
Using Thin Foil: Standard foil tears easily when manipulating hot, sharp bones. Always opt for heavy-duty or extra-wide foil for this recipe.
Recipe Variations
Customize your Cheesy Foil Chicken to suit different dietary needs or flavor profiles:
Spicy Kick: Add 1 tsp of cayenne pepper or chopped fresh jalapeños to the cheese mix. Swap regular chili flakes for Gochugaru (Korean chili flakes) for a smoky heat.
Herb Garden: Replace oregano with fresh basil, parsley, and chives added after baking for a brighter, fresher flavor profile.
Low-Carb / Keto: This recipe is naturally low-carb. Ensure your yogurt is unsweetened and full-fat. Serve with cauliflower mash instead of rice.
Creamy Garlic Parmesan: Swap mozzarella for a mix of parmesan and provolone. Add minced garlic to the cheese mix for a sharper, nuttier flavor.
BBQ Twist: Brush the seared chicken with BBQ sauce before adding the cheese. Use smoked gouda instead of mozzarella for a smoky depth.
Vegan Option: Use firm tofu or chickpea cutlets instead of chicken. Substitute dairy yogurt with coconut yogurt and use vegan mozzarella shreds. Note that vegan cheese melts differently, so monitor closely.
Citrus Zest: Add lemon or lime zest to the marinade. The acidity brightens the heavy cheese and cuts through the richness beautifully.
What to Serve With This Recipe
Because Cheesy Foil Chicken is rich and savory, pair it with sides that offer freshness or absorbent textures:
Garlic Naan or Pita: Perfect for scooping up the melted cheese and juices.
Green Salad with Vinaigrette: A simple arugula salad with lemon dressing balances the heaviness of the cheese.
Steamed Basmati Rice: The neutral flavor of rice complements the spiced yogurt marinade.
Roasted Vegetables: Broccoli, asparagus, or zucchini roasted with olive oil adds fiber and color to the plate.
Mint Chutney or Raita: Cooling yogurt-based sauces provide a refreshing contrast to the hot, spicy cheese.
Crusty Bread: Essential for mopping up any leftover sauce in the foil packet.
Make Ahead & Meal Prep Tips
Marinate Ahead: You can marinate the chicken up to 24 hours in advance. In fact, overnight marination yields the most tender results. Store in an airtight container in the fridge.
Pre-Shred Cheese: Grate your cheese and mix with herbs up to 3 days in advance. Store in a ziplock bag in the fridge.
Sear and Freeze: You can sear the chicken, let it cool, and freeze it before wrapping. When ready to cook, thaw in the fridge, wrap with fresh cheese, and bake. Note: Frozen seared chicken may need 5-10 extra minutes in the oven.
Assembly Line: For meal prep, assemble all foil packets on Sunday. Store them in the fridge for up to 2 days before baking. This makes weeknight dinners a 25-minute affair.
Storage & Reheating Instructions
Storage
Refrigerator: Store leftover chicken (removed from foil) in an airtight container for up to 3-4 days.
Freezer: Freeze cooked chicken in freezer-safe bags for up to 3 months. Thaw overnight in the fridge before reheating.
Reheating
Oven (Best Method): Preheat to 350°F (175°C). Place chicken in a baking dish, cover with foil, and heat for 10-15 minutes. This restores the cheese texture best.
Air Fryer: Reheat at 350°F for 3-5 minutes. Watch closely to prevent burning the cheese. Great for crisping up the skin again.
Microwave (Quick Fix): Heat in 30-second intervals. Cover with a damp paper towel to prevent splattering. Note: Cheese may become rubbery; this is the least ideal method.
Stovetop: Reheat gently in a covered skillet over low heat with a splash of water to create steam.
Nutritional Information
Estimates per serving (based on 1 chicken leg + cheese mix):
Calories: 480 kcal
Protein: 38g
Carbohydrates: 6g
Fat: 32g
Fiber: 1g
Sugar: 3g
Sodium: 650mg
Note: Values vary based on specific brands of cheese and yogurt used.
Troubleshooting Guide
Problem
Cause
Solution
Chicken is Dry
Overcooked or foil leaked steam.
Next time, check temp at 20 mins. Ensure tight foil seal. Use thighs instead of breasts.
Cheese Didn’t Melt
Oven temp too low or cheese type wrong.
Use low-moisture mozzarella. Ensure oven is fully preheated to 400°F.
Burnt Bottom
Pan too hot during sear or sugar in marinade burned.
Lower sear heat to medium. Wipe excess marinade off before searing.
Soggy Skin
Steamed too long without sear.
Ensure a hard sear before wrapping. Don’t overfill foil with liquid marinade.
Bland Flavor
Insufficient marinating time or salt.
Marinate min. 30 mins. Taste marinade (if safe) or rely on measured salt ratios.
Frequently Asked Questions
1. Can I use chicken breasts instead of legs? Yes, but boneless, skinless breasts cook much faster. Reduce baking time to 15-18 minutes and check internal temperature early to avoid dryness. Butterfly the breast for even cooking.
2. Do I need to flip the chicken in the foil? No. The steam circulates inside the packet, cooking the chicken evenly from all sides. Flipping risks tearing the foil and losing precious juices.
3. Can I cook this on a grill? Absolutely! Place foil packets on a grill over indirect medium heat. Close the lid and cook for 20-25 minutes. The grill adds a wonderful smoky flavor to the cheese.
4. Is it safe to put aluminum foil in the oven? Yes, standard aluminum foil is oven-safe up to very high temperatures. Just avoid letting it touch the heating elements directly.
5. Why is my cheese oily? Some cheeses separate when heated. Using part-skim mozzarella helps. Also, ensure you aren’t overheating; 400°F is the sweet spot. If it separates, stir it vigorously before serving to re-emulsify.
6. Can I add vegetables to the foil packet? Yes! Add quick-cooking veggies like cherry tomatoes, spinach, or sliced bell peppers around the chicken. Avoid root vegetables like potatoes unless par-cooked, as they won’t soften in 25 minutes.
7. How do I know when the chicken is done without opening the foil? Use an instant-read thermometer inserted through a small gap in the foil seal. Alternatively, press the packet; if the chicken feels firm and springs back, it’s likely done. Visual confirmation upon opening is safest for beginners.
8. Can I make this dairy-free? Yes. Use coconut yogurt for the marinade and vegan mozzarella or nutritional yeast for the topping. The texture will differ slightly but will still be delicious.
Final Thoughts
Mastering Cheesy Foil Chicken is about embracing a cooking method that prioritizes moisture and flavor without demanding constant attention. It transforms humble ingredients into a luxurious dining experience with minimal effort. Whether you are feeding a picky eater who loves cheese or hosting friends who appreciate culinary technique, this dish delivers consistently.