Quick Recipe Summary
| Prep Time | Cook Time | Total Time | Servings |
|---|---|---|---|
| 20 Minutes | 15-20 Minutes | 35-40 Minutes | 12 Mini Chimichangas |
| Cuisine | Course | Difficulty | Calories (Est.) |
|---|---|---|---|
| Mexican-American | Appetizer / Snack | Easy | 280 kcal per piece |
Table of Contents
- Introduction
- Why This Recipe Works
- Why You’ll Love This Recipe
- Ingredient Notes
- Kitchen Equipment
- Step-by-Step Instructions
- Expert Tips for Crispy Perfection
- Common Mistakes to Avoid
- Recipe Variations
- What to Serve With This Recipe
- Make Ahead & Meal Prep Tips
- Storage & Reheating Instructions
- Nutritional Information
- Troubleshooting Guide
- Frequently Asked Questions
- Final Thoughts
Introduction

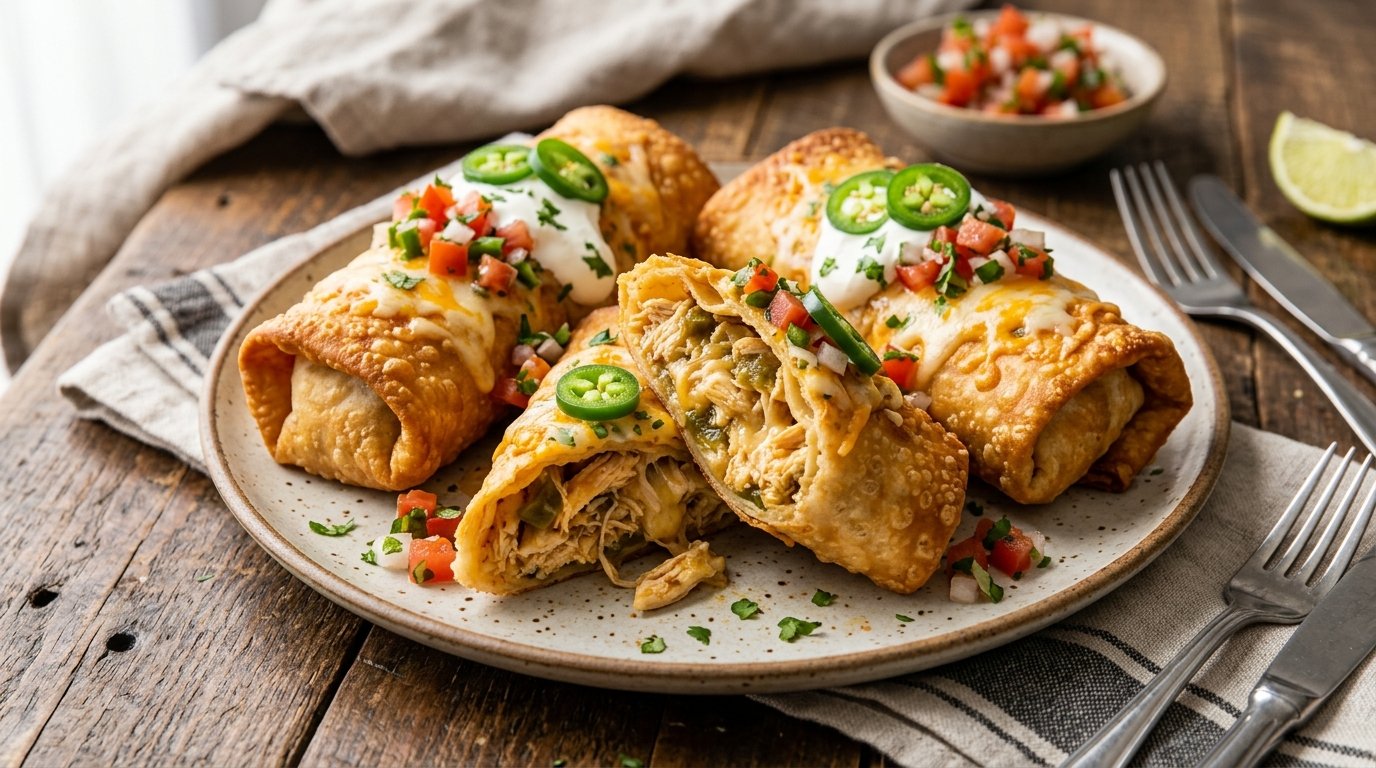
There is a specific joy in biting into a crispy, golden shell and discovering a warm, creamy center that stretches as you pull it away. These Baked Mini Chicken Chimichangas capture that exact moment of perfection without the mess or guilt of deep frying. By using a clever butter-brushing technique and baking at a precise temperature, we achieve a shatteringly crisp exterior that rivals any restaurant version, all while keeping the filling luxuriously soft and cheesy.
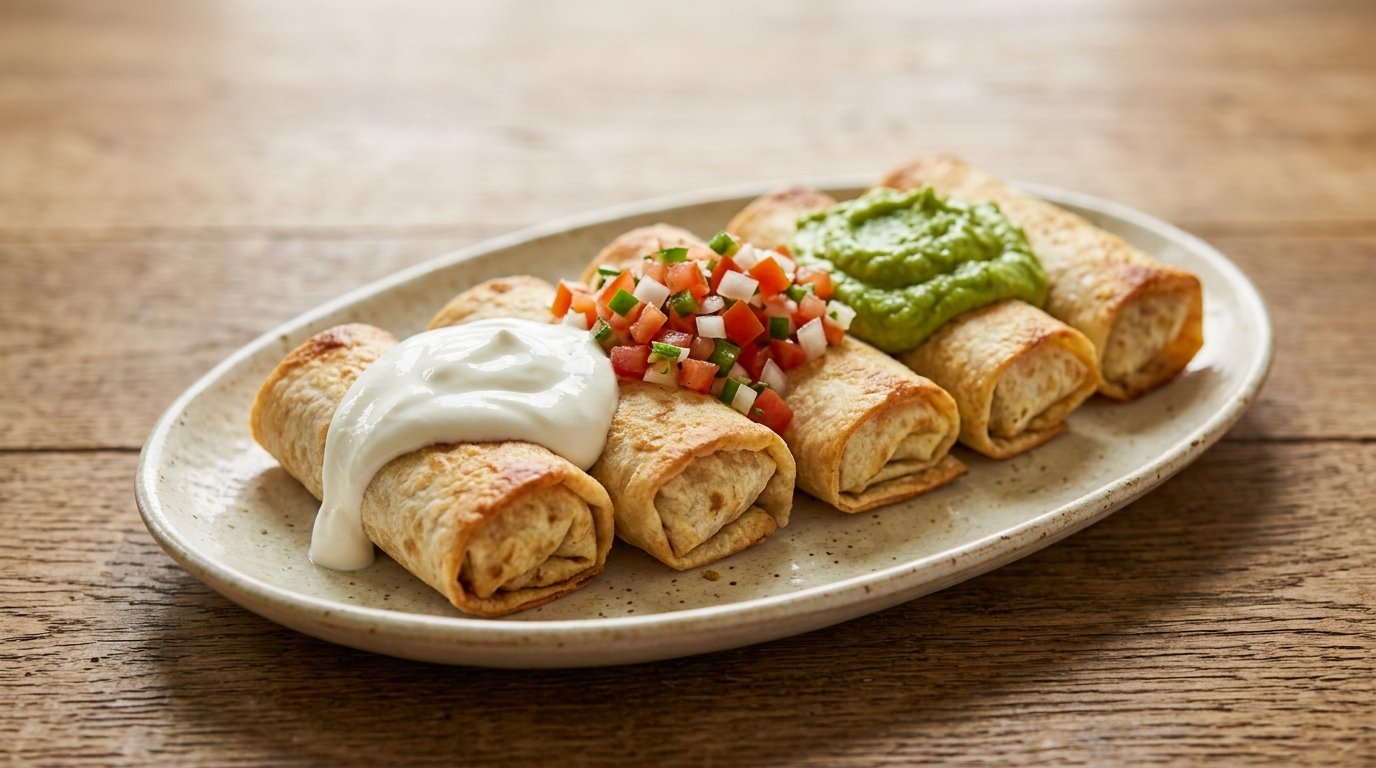
If you are looking for a crowd-pleasing appetizer that comes together in under 40 minutes, this recipe is your new go-to. The combination of shredded chicken, melted cheese, and tangy cream cheese creates a savory bomb of flavor wrapped in a convenient, bite-sized package. Topped with cool sour cream, fresh guacamole, and zesty pico de gallo, these mini chimichangas are not just food; they are an experience. Let’s get baking and bring some fiesta to your kitchen.
Why This Recipe Works
The secret to this recipe lies in the balance of moisture and heat. Traditional fried chimichangas rely on oil to conduct heat rapidly, creating a crust while sealing in moisture. Our baked version mimics this by brushing the tortillas with melted butter before baking. The butter fries the surface of the tortilla in the oven’s dry heat, promoting browning and crispness through the Maillard reaction, while the internal steam keeps the chicken filling tender.
Furthermore, the use of cream cheese in the filling is a game-changer. Unlike plain shredded chicken which can dry out during baking, cream cheese acts as a stabilizer and emulsifier. It binds the shredded meat and cheddar together into a cohesive, gooey mass that doesn’t slide out when you bite into it. This ensures every single mini chimichanga delivers a consistent ratio of crispy shell to creamy filling, making them structurally sound and incredibly satisfying.
Why You’ll Love This Recipe
- Crispy Without Deep Frying: Achieves authentic crunch using only melted butter and an oven, saving calories and cleanup time.
- Creamy, Non-Dry Filling: The cream cheese base guarantees a moist interior that contrasts perfectly with the crisp shell.
- Perfect Party Size: Bite-sized portions make them ideal for grazing, game days, or kids’ lunches.
- Customizable Toppings: The neutral canvas allows for endless topping combinations from classic salsa to spicy crema.
- Quick Assembly: From bowl to oven in 20 minutes flat, making it a stress-free option for busy hosts.
Ingredient Notes
Understanding your ingredients ensures success. Here is what you need and why quality matters.
For the Filling
- Shredded Chicken: Cooked and cooled rotisserie chicken works best for speed and flavor. Ensure it is finely shredded so it mixes evenly with the cheese.
- Substitution: Canned chicken (drained well) or leftover roasted turkey.
- Cream Cheese: Full-fat block cream cheese, softened to room temperature. Low-fat versions contain more water and won’t bind as effectively.
- Buying Tip: Avoid tub cream cheese; it has higher water content and additives that affect texture.
- Shredded Cheddar/Jack Blend: Provides sharpness and meltability. Shred your own block cheese if possible; pre-shredded bags contain anti-caking agents that prevent smooth melting.
- Diced Tomatoes & Onions: Fresh, small dice adds brightness and crunch to cut through the richness. Drain excess liquid to prevent soggy shells.
For the Shell & Finish

- Small Flour Tortillas: 6-inch size is ideal for minis. They must be pliable and fresh. Stale tortillas will crack when rolled.
- Storage Tip: Keep sealed in plastic until ready to use. Warm briefly in microwave (10 secs) if stiff.
- Unsalted Butter: Melted. Allows control over saltiness. Brushing rather than spraying ensures even coverage and richer flavor.
- Toppings: Sour cream, guacamole, and pico de gallo. These provide necessary acid and freshness to balance the heavy, fried-style shell.
Kitchen Equipment
- Large Mixing Bowl: For combining filling ingredients.
- Baking Sheet: Rimmed to catch any butter drips.
- Parchment Paper: Prevents sticking and makes cleanup effortless.
- Pastry Brush: Essential for applying butter evenly without tearing tortillas.
- Spoon or Scoop: For portioning filling consistently.
- Wire Rack (Optional): For cooling after baking to maintain crispness on bottom.
Preparation Information
- Prep Time: 20 Minutes
- Cook Time: 15-20 Minutes
- Total Time: 35-40 Minutes
- Servings: 12 Mini Chimichangas
Step-by-Step Instructions
Follow these steps to achieve the crispy, creamy results shown in the video.
H3: Prepare the Creamy Chicken Filling
- Combine Ingredients: In a large bowl, mix shredded chicken, softened cream cheese, and shredded cheese blend. Add diced tomatoes and onions if using.
- Mix Thoroughly: Use hands or a sturdy spoon to mash and combine until uniform. The mixture should be thick and hold its shape, not runny.
- Why this matters: Uniform mixing ensures every bite has equal flavor and texture. Clumps of plain chicken lead to dry spots.
- Visual Cue: Mixture should look cohesive and pale orange/pink from the cheeses.
- Taste Test: Adjust seasoning with salt, pepper, or cumin if needed. Remember, toppings will add more salt later.
H3: Assemble the Mini Chimichangas
- Warm Tortillas: If tortillas are cold or stiff, microwave stack for 10-15 seconds covered with damp paper towel. This prevents cracking during rolling.
- Portion Filling: Place 1-2 tablespoons of filling in the center of each tortilla. Don’t overfill; leave 1-inch border on sides.
- Professional Tip: Consistent portioning ensures even baking. Use a cookie scoop for precision.
- Fold Tight: Fold bottom edge up over filling, tucking it under slightly. Fold sides in, then roll up tightly like a burrito.
- Critical Step: Seam side DOWN on baking sheet. The weight of the chimichanga seals the flap during baking. Loose rolls will unravel.
H3: Butter Brush and Bake
- Arrange on Sheet: Place rolled chimichangas seam-side down on parchment-lined baking sheet. Leave slight space between them for air circulation.
- Brush Generously: Melt butter. Using pastry brush, coat tops and exposed sides thoroughly. Don’t skimp; this is your “frying” agent.
- Why brush? Butter conducts heat and promotes browning. Unbuttered spots will remain pale and chewy.
- Bake: Preheat oven to 350°F (175°C). Bake for 15-20 minutes.
- Visual Doneness Cues: Tops should be golden brown with darker blistered spots. Edges should look crisp, not soft. Cheese may peek out and bubble slightly.
- Cool Briefly: Remove from oven. Let rest 2-3 minutes on sheet. This allows filling to set slightly, preventing burns and leaks when biting.
H3: Top and Serve
- Add Cool Elements: Dollop sour cream and guacamole on top of warm chimichangas.
- Garnish: Sprinkle with fresh pico de gallo and cilantro.
- Why now? Cold toppings contrast with hot shell. Adding them before baking would make shells soggy.
- Serve Immediately: Best eaten within 10 minutes of baking for peak crispness.
Expert Tips for Crispy Perfection

- Butter Temperature Matters: Use melted but not hot butter. Hot butter can cook the tortilla prematurely and make it gummy. Warm liquid gold is the goal.
- Seam Side Down Always: Gravity is your friend. The filling’s weight presses the seam closed as the starch gelatinizes. Never bake seam-side up unless you want an open-faced taco.
- Don’t Overstuff: It’s tempting, but excess filling creates steam pressure that bursts seams. Stick to 1-2 tbsp max for 6-inch tortillas.
- Parchment is Non-Negotiable: Butter + cheese = sticky disaster on bare pans. Parchment ensures easy release and intact bottoms.
- Rotate Pan Halfway: Ovens have hot spots. Rotate baking sheet 180 degrees at 10-minute mark for even browning.
Common Mistakes to Avoid
| Mistake | Why It Happens | How to Fix/Prevent |
|---|---|---|
| Soggy Bottoms | Trapped steam; no air circulation. | Use parchment. Don’t crowd pan. Cool on wire rack if possible. |
| Unraveled Rolls | Loose folding; seam side up. | Roll tightly. Always place seam DOWN. Tuck edges securely. |
| Pale/Chewy Shells | Insufficient butter; low oven temp. | Brush generously. Verify oven temp with thermometer. Bake until golden. |
| Dry Filling | Overcooked chicken; no cream cheese. | Use cream cheese binder. Don’t overbake. Cover loosely with foil if browning too fast. |
| Burnt Tops | Oven too high; butter pooled. | Stick to 350°F. Brush evenly, don’t puddle butter. Move rack lower if needed. |
Recipe Variations
Adapt these mini chicken chimichangas to suit any craving.
- Spicy Jalapeño Popper: Add diced pickled jalapeños and extra pepper jack cheese. Top with chipotle crema.
- Beef Barbacoa: Swap chicken for slow-cooked shredded beef. Add cumin and oregano to filling.
- Vegetarian Black Bean: Replace chicken with mashed black beans and corn. Add spinach and feta.
- Buffalo Chicken: Toss chicken in buffalo sauce before mixing. Top with blue cheese crumbles and celery.
- Breakfast Style: Fill with scrambled eggs, bacon, and cheddar. Serve with salsa verde.
- Low-Carb/Keto: Use low-carb tortillas or cheese wraps. Skip flour tortillas entirely.
- Seafood Fiesta: Use lump crab or shrimp. Add Old Bay seasoning and lemon zest.
- Vegan Version: Use vegan cream cheese and dairy-free cheese shreds. Brush with olive oil instead of butter.
What to Serve With This Recipe
Balance the richness with fresh, acidic, and crunchy elements.
- Mexican Street Corn Salad: Charred corn with lime/chili complements the crispy texture.
- Cilantro Lime Rice: Light, fluffy base that soaks up any leaked filling.
- Pickled Red Onions: Quick-pickled onions add necessary acid and vibrant color.
- Drinks: Horchata, Mexican Coke, or crisp lager beer.
- Dessert: Churros or flan. Keep it light if chimichangas were heavy.
- Simple Green Salad: Arugula with vinaigrette cuts through the fat effectively.
Make Ahead & Meal Prep Tips
- Filling Prep: Mix filling up to 24 hours ahead. Store in airtight container. Bring to room temp before assembling for easier rolling.
- Assemble Ahead: Roll chimichangas up to 4 hours ahead. Store covered on baking sheet in fridge. Bake directly from cold, adding 3-5 mins to time.
- Freezer Friendly: Freeze UNBAKED rolled chimichangas on sheet, then bag. Bake from frozen at 375°F for 20-25 mins. Perfect for meal prep.
- Topping Prep: Make pico de gallo and guac up to 1 day ahead. Store separately. Assemble just before serving to prevent sogginess.
Storage & Reheating Instructions
Refrigerator
Store baked chimichangas in airtight container for up to 3 days. Store toppings separately.
Freezer
Freeze baked chimichangas (without toppings) for up to 2 months. Thaw in fridge overnight before reheating.
Reheating Methods
- Oven (Best): 350°F for 8-10 mins on wire rack. Restores crispness perfectly.
- Air Fryer: 320°F for 3-5 mins. Quick and effective for single servings.
- Stovetop: Dry skillet over medium-low heat, seam-side down first. Flip gently. Creates crispy bottom.
- Microwave (Avoid): Makes shells rubbery and soggy. Only use if desperate, and finish in toaster oven.
Nutritional Information
Approximate values per mini chimichanga (based on 12 servings, without toppings):
- Calories: 280 kcal
- Protein: 14g
- Carbohydrates: 22g
- Fat: 16g
- Fiber: 1g
- Sugar: 2g
- Sodium: 420mg
Note: Values vary based on tortilla brand, cheese amount, and butter usage.
Troubleshooting Guide
Problem: Shells are tough/chewy, not crispy. Solution: Oven temp too low or insufficient butter. Next time, verify temp with thermometer. Brush more generously. Ensure tortillas aren’t stale.
Problem: Filling leaks out during baking. Solution: Overstuffed or loose roll. Reduce filling amount. Roll tighter. Ensure seam is sealed and placed DOWN.
Problem: Tops burn before bottoms crisp. Solution: Oven rack too high or butter pooling. Move rack to center. Brush evenly, don’t puddle. Tent with foil if browning too fast.
Problem: Filling is cold when shell is done. Solution: Filling was too cold starting or oven temp too high. Bring filling to room temp before assembling. Lower temp to 325°F and extend bake time.
Frequently Asked Questions
1. Can I use corn tortillas instead of flour? Not recommended. Corn tortillas are smaller, less flexible, and crack easily when rolled cold. Flour tortillas provide the necessary structure and chew for chimichangas.
2. How do I prevent the tortillas from cracking? Warm them! Microwave stack for 10-15 seconds covered with damp paper towel. Cold tortillas are brittle. Fresh, pliable tortillas roll smoothly.
3. Can I make these gluten-free? Yes! Use certified GF flour tortillas. They behave similarly but may be slightly more fragile. Handle gently when rolling.
4. Why did my chimichangas unravel in the oven? Usually caused by loose rolling or baking seam-side up. Roll tightly, tuck edges, and ALWAYS place seam DOWN. Gravity seals the deal.
5. Can I air fry these instead of baking? Absolutely! Air fry at 350°F for 8-10 mins, flipping halfway. Spray lightly with oil/butter. Results are often crispier than oven-baked.
6. How do I keep the filling from drying out? Cream cheese is key. It binds moisture. Also, don’t overbake. Pull when golden, not dark brown. Internal temp should be 165°F.
7. Can I use store-bought salsa in the filling? Yes, but drain it well. Excess liquid makes shells soggy. Mix drained salsa into filling for extra flavor and moisture.
8. What’s the best way to reheat leftovers? Oven or air fryer only. Microwave destroys the crisp texture. Reheat at 350°F until warmed through and re-crisped.
Final Thoughts
Mastering these Baked Mini Chicken Chimichangas opens up a world of creative appetizer possibilities. They prove that you don’t need a deep fryer or hours of prep to create something truly spectacular. The beauty of this dish lies in its simplicity—crispy shell, creamy filling, fresh toppings—and its ability to bring people together around a shared plate of deliciousness.