| Quick Recipe Summary | |
|---|---|
| Prep Time | 20 minutes |
| Cook Time | 18–22 minutes |
| Total Time | 40–45 minutes |
| Servings | 4 large bombs (or 8 smaller) |
| Cuisine | American |
| Course | Appetizer, Snack, or Main |
| Difficulty | Easy |
| Calories (approx.) | 420–480 per bomb |
Table of Contents
- Introduction
- Why This Recipe Works
- Why You’ll Love This Recipe
- Ingredient Notes
- Kitchen Equipment
- Preparation Information
- Step-by-Step Instructions
- Expert Tips
- Common Mistakes
- Recipe Variations
- What to Serve With This Recipe
- Make-Ahead Tips
- Meal Prep Tips
- Storage Instructions
- Reheating Instructions
- Nutritional Information
- Troubleshooting Guide
- Frequently Asked Questions
- Final Thoughts
Introduction
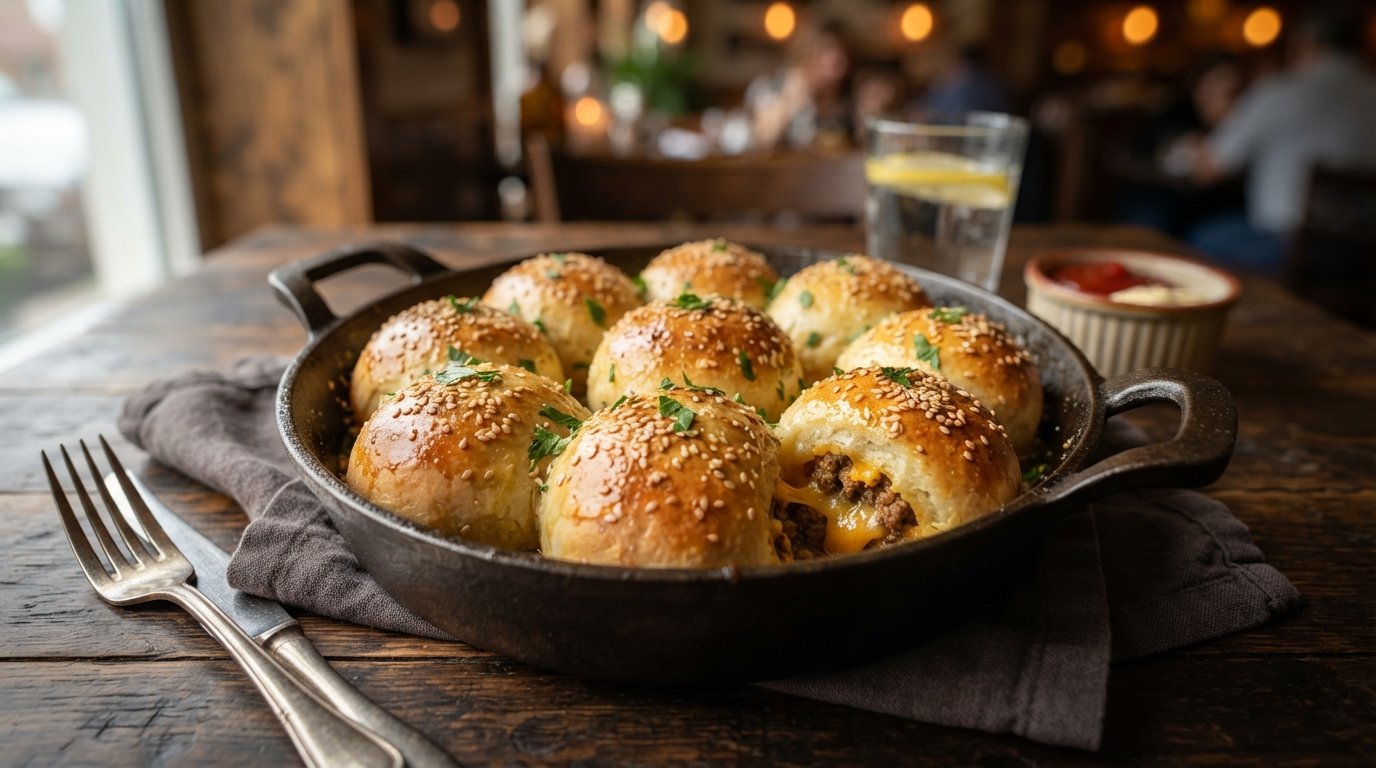
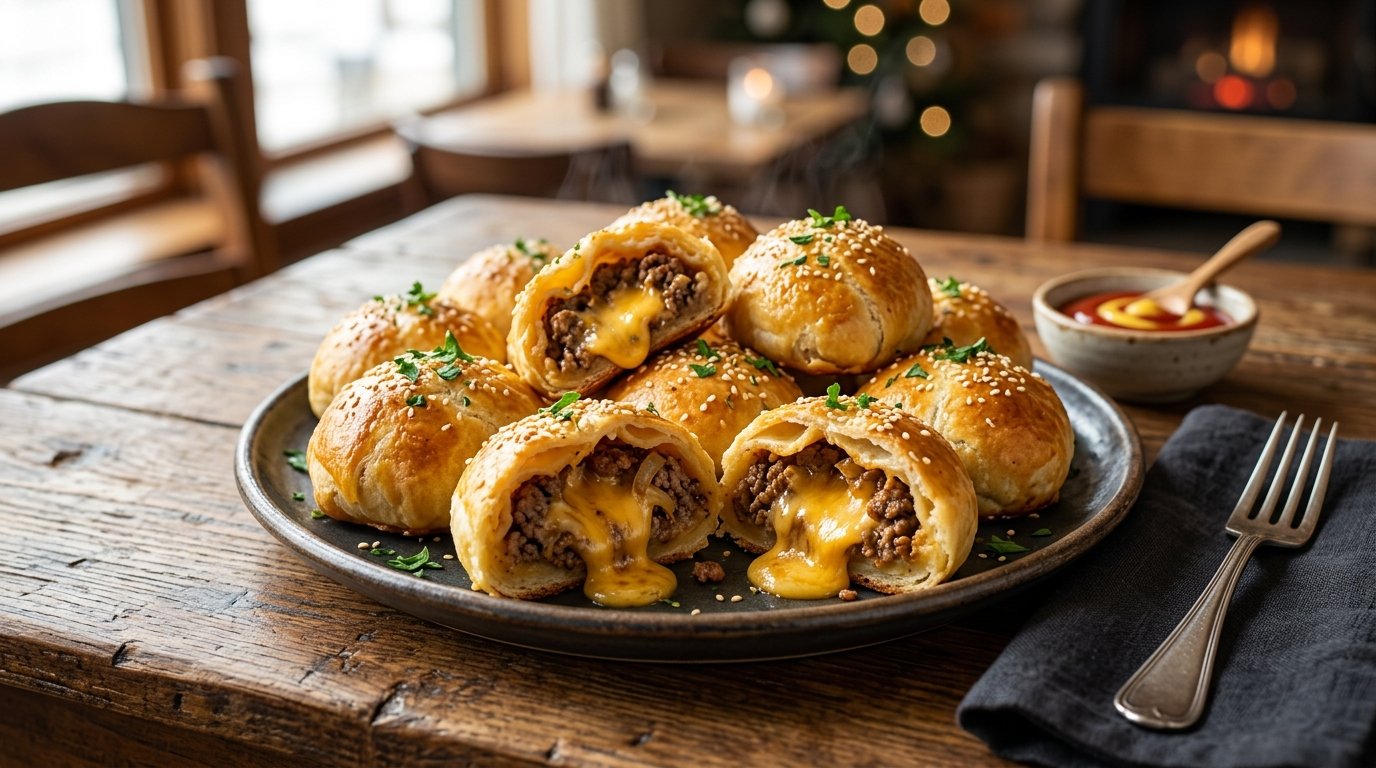
Cheeseburger bombs are the ultimate handheld comfort food: soft, golden dough wrapped around seasoned ground beef and a molten core of melted cheese, finished with a buttery herb topping. These pull-apart bundles deliver everything you love about a classic cheeseburger—savory meat, gooey cheese, and that satisfying stretch—without the bun falling apart. Baked together in a pan so they stay soft and shareable, they are perfect for game day, family dinners, or anytime you want big flavor with minimal effort. Once you pull one open and see the cheese stretch, you’ll understand why they disappear so fast.
Why This Recipe Works
The sealed dough creates a self-contained package that traps steam and keeps the filling juicy while the exterior turns golden and slightly crisp. Cooking the ground beef with onion first builds deep savory flavor so the bombs never taste bland. A single square of melting cheese placed right in the center guarantees that dramatic cheese pull every time. Baking the bombs close together in a pan encourages soft sides (like pull-apart rolls) while the tops brown beautifully. A final brush of egg wash or melted butter plus a sprinkle of fresh herbs adds shine, aroma, and that bakery-style finish. The result is reliable, impressive, and forgiving for home cooks.
Why You’ll Love This Recipe
- All the flavor of a cheeseburger in a neat, portable package
- Dramatic cheese pull that looks great and tastes even better
- Minimal ingredients and simple assembly
- Kid-friendly yet satisfying for adults
- Easy to scale up for parties
- Freezer-friendly and reheats well
- Customizable with your favorite burger toppings or sauces
Ingredient Notes
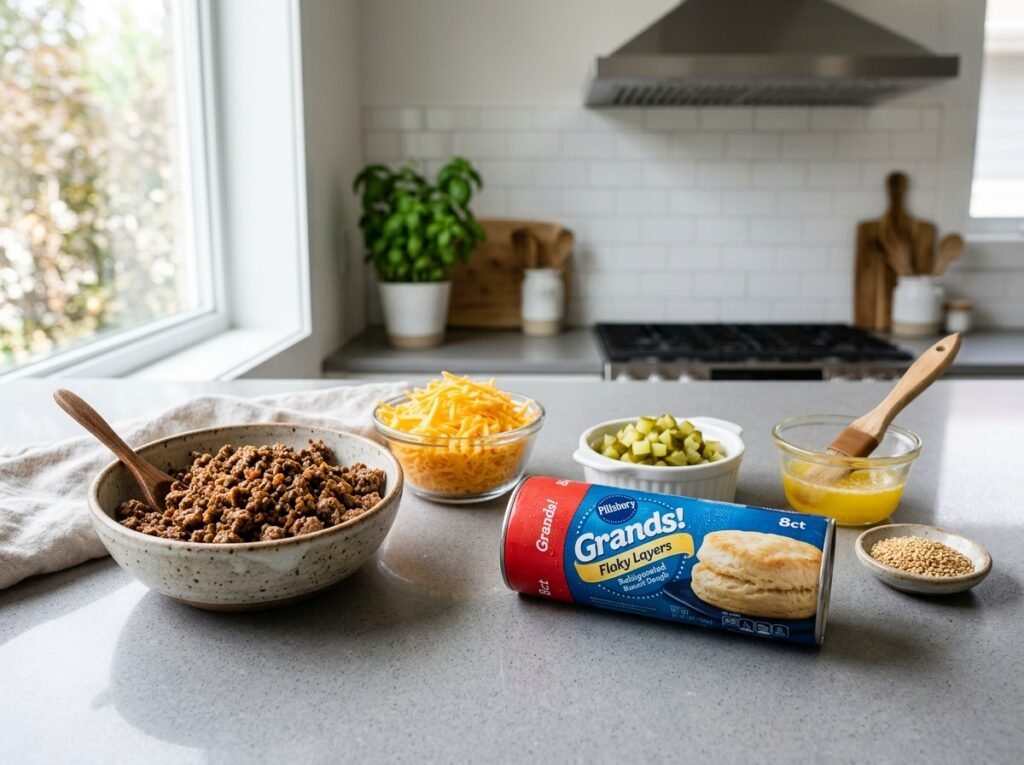
Ground Beef 80/20 or 85/15 ground beef gives the best balance of flavor and moisture. Purpose: the classic cheeseburger base. Substitutions: ground turkey, chicken, or plant-based crumbles. Buying tip: fresh, bright red meat. Storage: use within 1–2 days or freeze.
Onion Finely diced onion cooked with the beef adds sweetness and moisture. Purpose: aromatic depth. Yellow or white onion works best.
Seasonings Salt, black pepper, and any preferred burger seasonings (garlic powder, paprika, or a pinch of mustard powder). Purpose: build authentic cheeseburger taste. Adjust to preference.
Cheese Thick square slices or cubes of cheddar, American, or a melting cheese blend. Purpose: the signature molten center. Low-moisture mozzarella or pepper jack also work for variation.
Dough Soft yeast dough, pizza dough, or refrigerated biscuit dough flattened into circles. Purpose: the soft outer shell. Store-bought dough keeps the recipe fast; homemade works equally well if you prefer.
Egg Wash or Melted Butter For brushing the tops before baking. Purpose: golden color and shine. Optional but highly recommended.
Fresh Herbs Chopped parsley or cilantro sprinkled after baking. Purpose: color and fresh aroma.
Dipping Sauce A creamy pink sauce (mayonnaise mixed with ketchup, a little mustard, and pickle relish or similar) for serving. Purpose: classic burger-sauce contrast.
Kitchen Equipment
- Skillet for cooking the beef
- Mixing spoon or spatula
- Baking pan (square or rectangular, lined with parchment)
- Rolling pin or hands for flattening dough
- Pastry brush
- Sharp knife or kitchen scissors
Optional: cookie scoop for portioning the filling.
Preparation Information
Prep Time: 20 minutes Cook Time: 18–22 minutes Total Time: 40–45 minutes Servings: 4 large bombs
Step-by-Step Instructions
1. Cook the Beef Filling Heat a skillet over medium heat. Add the ground beef and diced onion. Cook, breaking the meat into small pieces, until the beef is fully browned and the onion is soft and translucent. Season with salt, pepper, and any additional burger seasonings. Drain excess fat if needed and let the mixture cool slightly.
Why it matters: Cooking the onion with the beef builds flavor and prevents raw onion bite inside the finished bomb. Cooling keeps the dough from becoming soggy or tearing. Visual cue: the meat should be evenly browned with no pink remaining.
2. Prepare the Dough Circles Divide the dough into equal portions (four for large bombs). On a lightly floured surface or parchment, flatten each portion into a circle roughly 4–5 inches across, slightly thicker in the center than at the edges.
Why it matters: Even circles make sealing easier and produce uniform bombs. Leaving the center a bit thicker helps prevent the filling from breaking through.
3. Fill and Seal Place a generous spoonful of the cooled beef mixture in the center of each dough circle. Top with one square of cheese. Bring the edges of the dough up and over the filling, pinching firmly to seal completely. Turn the ball seam-side down and gently roll between your hands to smooth the surface.
Why it matters: A tight seal traps the melting cheese and juices so nothing leaks during baking. Smoothing creates an even, attractive shape. Texture cue: the sealed bomb should feel firm and round with no gaps.
4. Arrange and Brush Place the sealed bombs seam-side down in a parchment-lined baking pan, close enough that they will touch as they rise and bake. Brush the tops generously with egg wash or melted butter.
Why it matters: Baking them close together keeps the sides soft and pull-apart style. The egg wash or butter promotes deep golden color and a soft sheen.
5. Bake Bake in a preheated oven at 180–190 °C (350–375 °F) for 18–22 minutes until the tops are deep golden brown and the bombs sound hollow when tapped. The cheese inside will be fully melted.
Visual cue: the tops should be evenly browned and slightly puffed. Remove from the oven and immediately sprinkle with chopped fresh herbs.
6. Serve Let the bombs rest 3–5 minutes so the cheese sets slightly (it will still be stretchy). Serve warm with the creamy dipping sauce on the side.
Expert Tips
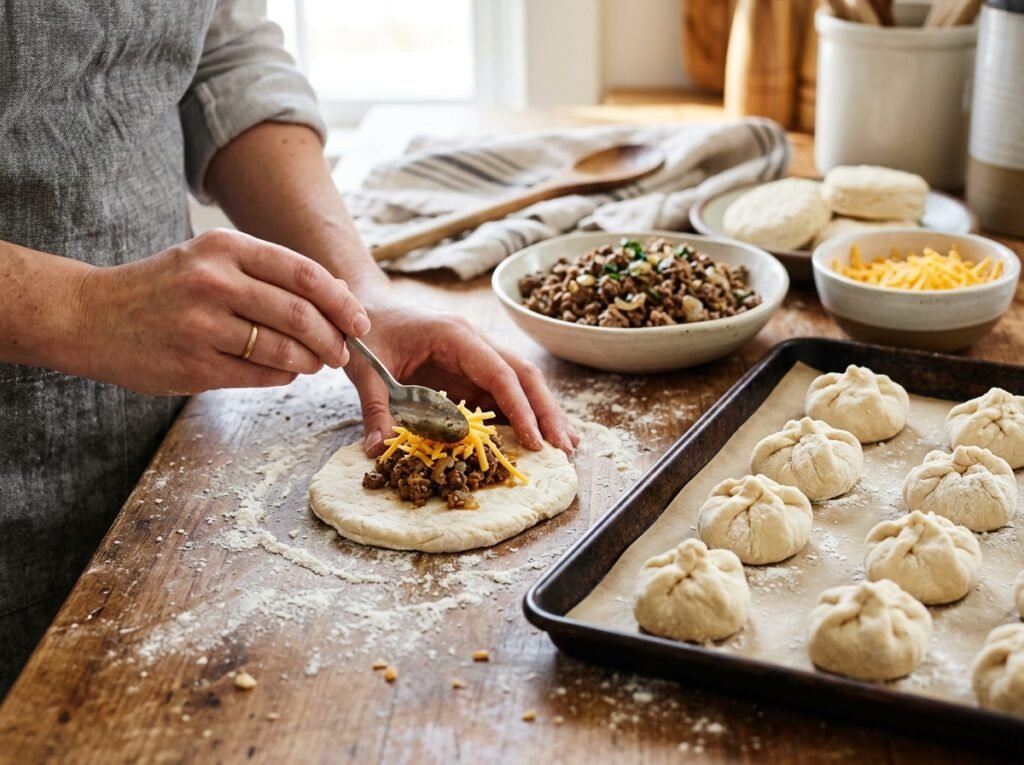
- Cool the beef filling completely before assembling—hot filling makes the dough soft and hard to seal.
- Don’t overfill; a heaping tablespoon of meat plus one cheese square is ideal for most dough portions.
- Pinch the seams very firmly and roll the bombs gently to create a smooth surface.
- For extra flavor, brush with garlic butter instead of plain egg wash.
- If using refrigerated biscuit dough, separate the biscuits and flatten each one.
- Work on parchment paper for easy transfer and cleanup.
Common Mistakes
- Leaking cheese or filling: seams not sealed tightly enough. Pinch well and place seam-side down.
- Dough tearing: filling was too hot or dough was rolled too thin. Cool the meat and keep the dough slightly thicker in the center.
- Pale tops: skipped the egg wash or butter, or oven not hot enough. Always brush and fully preheat.
- Dense or undercooked centers: oven temperature too low or bombs too large. Stick to the recommended size and time.
- Dry filling: overcooked the beef or used very lean meat. Choose 80/20 or 85/15 and don’t cook past browned.
Recipe Variations
- Spicy: Add diced jalapeños or a pinch of cayenne to the beef, and use pepper jack cheese.
- Vegetarian: Replace beef with seasoned plant-based ground or sautéed mushrooms and lentils.
- Chicken: Use ground chicken or shredded cooked chicken mixed with the same seasonings.
- Extra Cheesy: Add a second smaller cube of cheese or mix shredded cheese into the beef.
- Bacon Cheeseburger: Stir cooked crumbled bacon into the beef mixture.
- Healthy: Use lean ground turkey, reduced-fat cheese, and whole-wheat dough.
- Low-Carb: Wrap the filling in thin slices of zucchini or use a fathead-style dough.
- High-Protein: Increase the beef portion slightly and choose a higher-protein cheese.
What to Serve With This Recipe
Serve with classic burger sides: crispy fries, onion rings, or a simple green salad. The creamy pink dipping sauce is essential. For a fuller meal, add coleslaw or pickles on the side. Drinks that pair well include soda, iced tea, or a cold beer. These bombs also work as an appetizer platter with extra sauce for dipping.
Make-Ahead Tips
Cook the beef filling up to 2 days ahead and refrigerate. Assemble the bombs, place them in the pan, cover tightly, and refrigerate for up to 8 hours before baking. Add 2–3 extra minutes to the baking time if starting cold. You can also freeze unbaked bombs on a tray, then transfer to a freezer bag.
Meal Prep Tips
Bake a full batch, cool completely, and store individual bombs for quick lunches. Reheat as needed. The filling alone freezes well for future batches.
Storage Instructions
Cool completely, then store in an airtight container in the refrigerator for up to 3 days. For longer storage, wrap individually and freeze for up to 1 month.
Reheating Instructions
- Oven (best): 160 °C (320 °F) for 8–10 minutes until warmed through and the exterior re-crisps slightly.
- Air Fryer: 160 °C for 4–6 minutes.
- Microwave: 30–45 seconds (the exterior will be softer).
- Stovetop: Warm gently in a covered skillet over low heat with a tiny splash of water.
Nutritional Information (Approximate per large bomb)
Calories: 420–480 Protein: 20–24 g Carbohydrates: 32–38 g Fat: 22–28 g Fiber: 1–2 g Sugar: 3–5 g Sodium: 650–800 mg
Values vary with dough type, cheese, and exact beef quantity.
Troubleshooting Guide
- Cheese leaking out the bottom: place bombs seam-side down and seal tightly.
- Dough not browning: brush more generously with egg wash or butter and ensure the oven is fully preheated.
- Filling too dry: next time leave a little more fat in the beef or add a spoonful of ketchup or mustard to the mixture.
- Bombs spreading too much: chill the assembled bombs for 10–15 minutes before baking.
- Undercooked dough: bake a few minutes longer; internal temperature near the center should reach about 90 °C if using a thermometer.
Frequently Asked Questions
Can I use canned biscuit dough? Yes. Separate the biscuits, flatten each one, and proceed with filling and sealing. It is one of the fastest methods.
What cheese works best? Cheddar, American, or any good melting cheese. A thick square or cube holds its shape until it melts inside.
Can I make smaller bombs? Absolutely. Divide the dough into more portions for bite-size versions—great for parties. Reduce baking time by a few minutes.
Do I have to cook the onion with the beef? It is recommended for the best flavor and texture, but you can omit it if preferred.
How do I know when they are done? The tops should be deep golden brown and the bombs should feel light. If you gently press the side, it should spring back.
Can I freeze them after baking? Yes. Cool completely, wrap well, and freeze. Reheat from frozen in the oven for best texture.
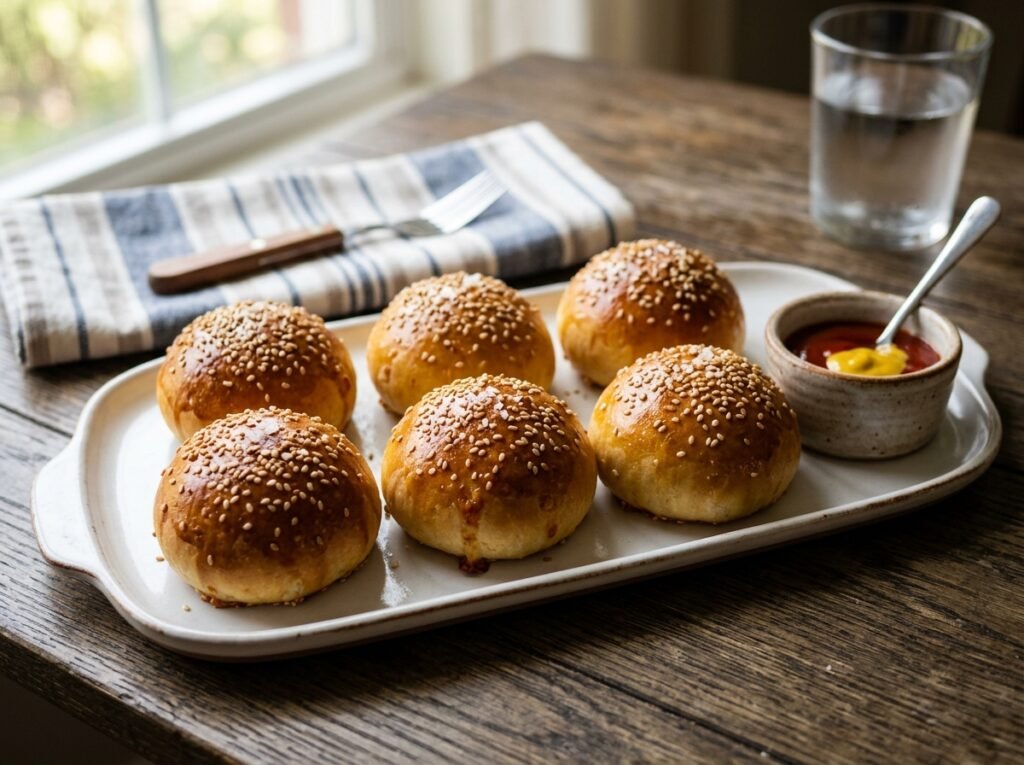
What dipping sauce is shown? A creamy pink burger-style sauce (mayonnaise + ketchup + a little mustard or relish). Ranch or garlic aioli also work well.
Can I add pickles or other toppings inside? Yes—finely chopped pickles, cooked bacon, or a dab of mustard can be added with the cheese for extra burger flavor.
Final Thoughts
Cheeseburger bombs take everything people love about a classic cheeseburger and wrap it in soft, golden dough for a fun, shareable treat. The combination of seasoned beef, molten cheese, and that final herb-flecked shine makes them irresistible. Whether you serve them as a weeknight dinner, game-day snack, or party appetizer, they consistently deliver big flavor and that satisfying cheese pull. Make a batch this week, try a variation or two, and let me know how they turned out—especially how far the cheese stretched!