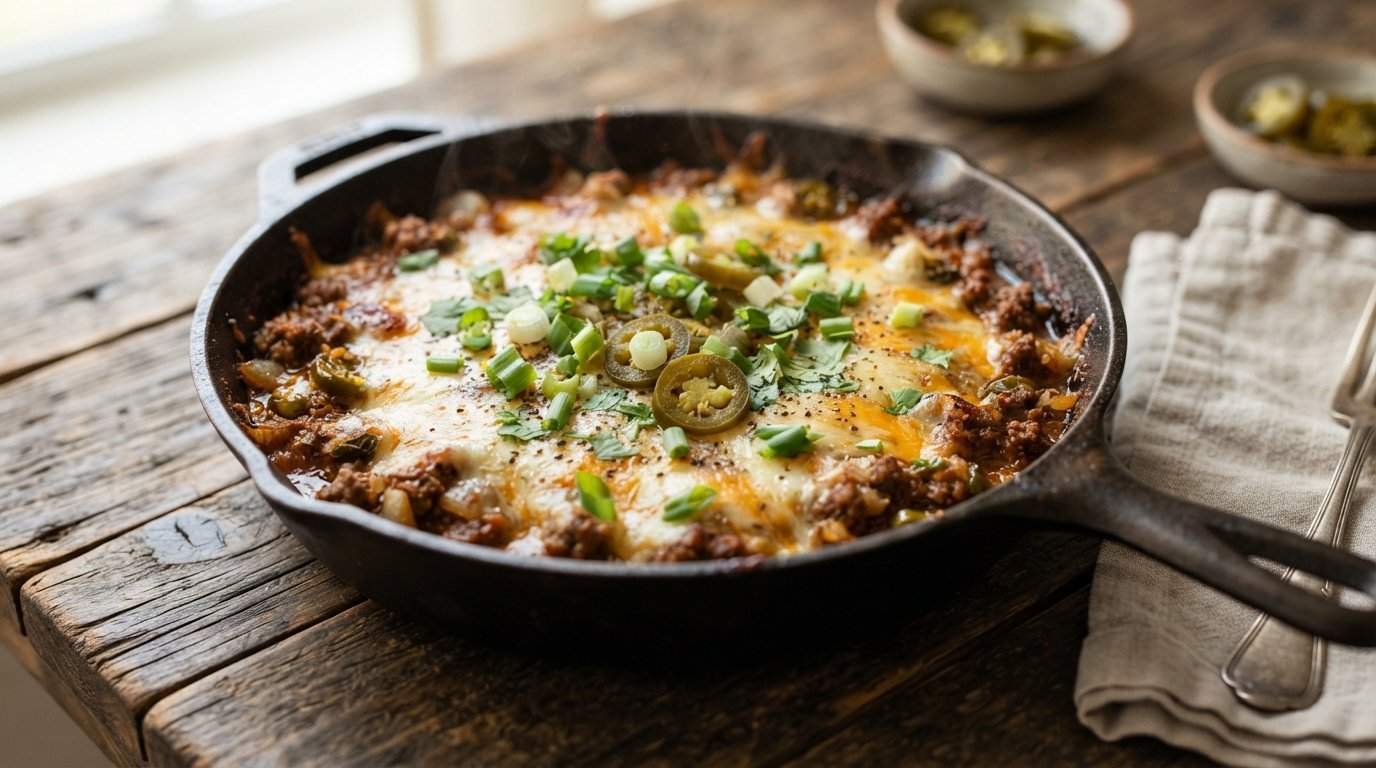
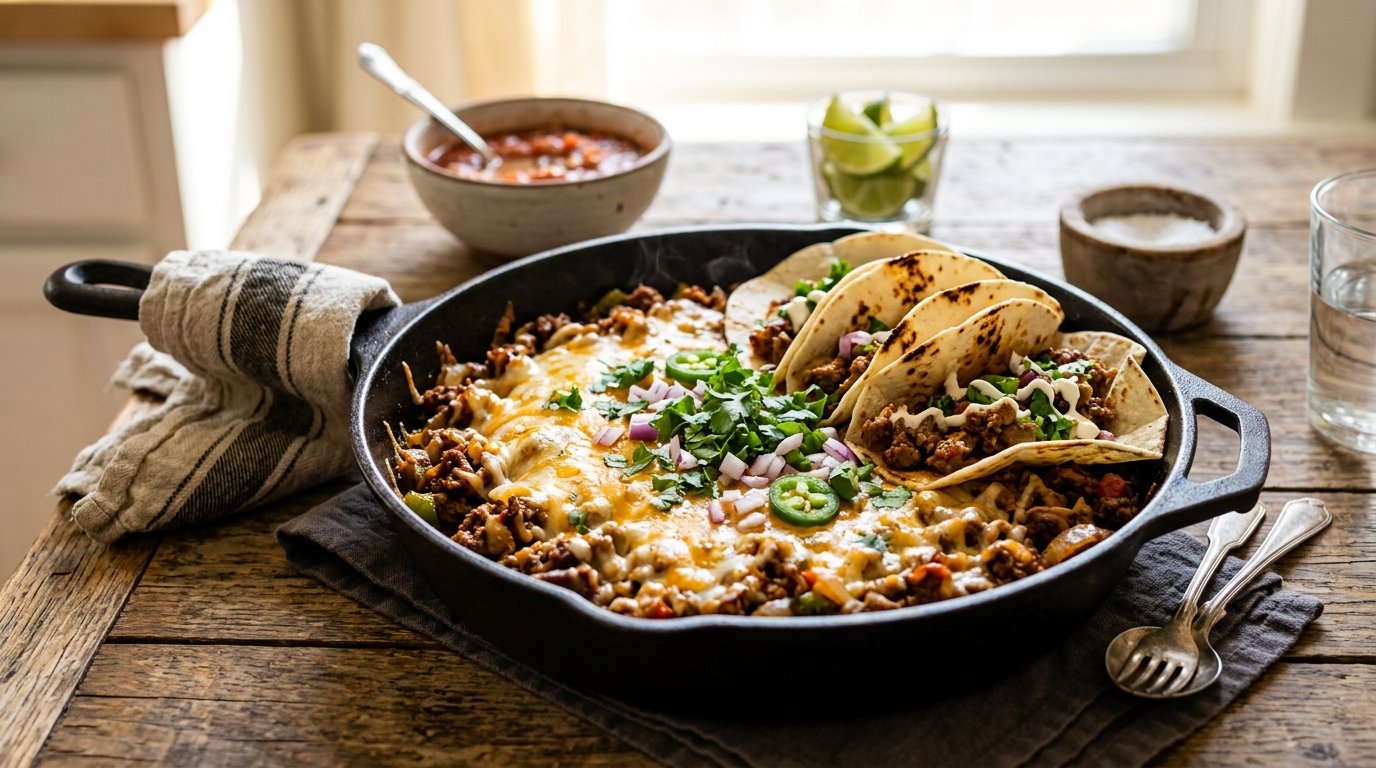
There is nothing quite like the visual and aromatic satisfaction of a cheesy skillet beef dip. It’s the kind of dish that stops conversation at a party and turns a quiet Tuesday night into a comfort food celebration. If you’ve ever scrolled past a video of golden, molten cheese stretching endlessly from a cast iron skillet and thought, “I need that in my life right now,” this recipe is your answer.
This isn’t just a simple nacho dip; it’s a hearty, vegetable-packed meal disguised as an appetizer. By combining savory ground beef with fresh garden vegetables like zucchini, bell peppers, and sweet corn, we create a textured base that stands up to the richness of melted mozzarella. Whether you are looking for a game-day showstopper or a quick weeknight dinner that requires minimal cleanup, this one-skillet wonder delivers on flavor, ease, and pure indulgence. Let’s get cooking.
Why This Recipe Works
The secret to a superior skillet beef dip lies in the balance of moisture and fat. Ground beef provides the necessary umami and protein structure, but lean meat can sometimes result in a dry dip. By browning the beef properly and retaining some of its rendered fat, we create a flavorful foundation for the vegetables.
Adding fresh zucchini and tomatoes introduces natural moisture and acidity, which cuts through the heaviness of the cheese and tomato sauce. The corn adds a crucial textural contrast—a satisfying “pop” against the soft beef and gooey cheese. Finally, using a cast iron skillet isn’t just for aesthetics; its superior heat retention ensures the cheese melts evenly without burning the bottom layer, creating that signature stretchy pull that defines a perfect dip.
Why You’ll Love This Recipe
One-Pan Simplicity: From browning the beef to melting the cheese, everything happens in a single vessel. Less washing up means more time enjoying the food.
Hidden Veggies: Packed with onions, peppers, zucchini, tomatoes, and corn, this dip sneaks in a full serving of vegetables without sacrificing the cheesy goodness.
Customizable Heat: The base is mild and family-friendly, but it acts as a perfect canvas for jalapeños, hot sauce, or spicy salsa if you crave a kick.
Crowd-Pleasing Texture: The combination of tender beef, crisp-tender veggies, and elastic mozzarella creates a mouthfeel that keeps people coming back for another chip.
Budget-Friendly: Uses affordable pantry staples and seasonal produce to feed a crowd without breaking the bank.
Ingredient Notes
Ground Beef
Purpose: Provides the savory, meaty backbone of the dip.
Buying Tip: Look for 85/15 (lean/fat) ground beef. Too lean (90/10 or higher) can make the dip dry; too fatty (70/30) can make it greasy.
Substitution: Ground turkey or chicken works well for a lighter version, though you may need to add a teaspoon of olive oil to compensate for lower fat content.
Fresh Vegetables (Onion, Green Bell Pepper, Zucchini, Tomato)
Purpose: Adds freshness, color, volume, and nutritional value.
Prep Tip: Dice all vegetables uniformly (about 1/4 to 1/2 inch cubes). This ensures they cook at the same rate and provide a consistent bite.
Zucchini Note: Do not peel the zucchini; the skin holds the shape during cooking and adds vibrant green color.
Canned Corn
Purpose: Adds sweetness and a distinct textural pop.
Tip: Drain the corn well before adding. Excess liquid from the can can water down the dip and prevent the cheese from setting properly.
Substitution: Fresh or frozen corn kernels (thawed) work beautifully and often taste sweeter.
Tomato Sauce / Enchilada Sauce
Purpose: Binds the ingredients together and adds tangy moisture.
Selection: A standard red pasta sauce or mild enchilada sauce works best. Avoid chunky marinara unless you prefer a very rustic texture; smooth sauces coat the beef better.
Flavor Boost: Look for sauces with garlic and onion already in the ingredient list to save prep time.
Mozzarella Cheese
Purpose: The star of the show—provides the melt, stretch, and creamy finish.
Critical Rule:Always shred your own cheese. Pre-shredded bagged cheese is coated in cellulose (an anti-caking agent) that prevents smooth melting and results in a gritty texture.
Blend Option: For extra flavor, mix mozzarella with sharp cheddar or Monterey Jack. Mozzarella provides the stretch; cheddar provides the tang.
Kitchen Equipment
10-12 Inch Cast Iron Skillet: Essential for even heating and oven-to-table presentation. An oven-safe stainless steel skillet works as a backup.
Sharp Chef’s Knife: For precise dicing of vegetables.
Cutting Board: Large enough to hold prepped veggies.
Wooden Spoon or Spatula: For breaking up beef and stirring.
Box Grater or Food Processor: For shredding cheese efficiently.
Measuring Cups/Spoons: For accuracy with sauce and seasonings.
Start by placing your cast iron skillet over medium-high heat. Add the ground beef, breaking it apart with a wooden spoon as it cooks. You want to achieve a deep brown color, not just gray.
Why it matters: Browning triggers the Maillard reaction, developing complex savory flavors that boiling cannot achieve.
Visual Cue: The meat should be crumbly and browned with no pink spots remaining.
Pro Tip: Don’t drain all the fat. Leave about 1 tablespoon in the pan to sauté the vegetables; this carries the beef flavor into the rest of the dish.
H3: Sauté the Aromatics and Vegetables
Add the diced white onion and green bell pepper directly to the beef. Cook for 2-3 minutes until the onions become translucent. Next, stir in the corn, diced zucchini, and tomatoes.
Why it matters: Cooking the onions and peppers first softens their harsh raw bite. Adding the wetter vegetables (zucchini/tomato) later prevents them from turning to mush.
Texture Cue: The vegetables should soften slightly but still retain a bit of crunch. They will finish cooking under the cheese.
Aroma Cue: The kitchen should smell sweet and savory as the onions caramelize slightly in the beef fat.
H3: Simmer with Sauce
Pour the tomato sauce (or enchilada sauce) over the meat and vegetable mixture. Stir thoroughly to combine. Reduce the heat to low and let it simmer for 3-5 minutes.
Why it matters: Simmering allows the flavors to meld and thickens the sauce slightly so it doesn’t pool at the bottom of the skillet.
Visual Cue: The mixture should look cohesive and glossy, not watery. Bubbles should be slow and lazy, not rapid.
Taste Test: This is your last chance to adjust seasoning. Add salt, pepper, cumin, or chili powder now if needed.
H3: The Cheese Melt
Remove the skillet from the heat (if your handle isn’t oven-safe) or turn the burner to the lowest setting. Sprinkle the freshly shredded mozzarella evenly over the entire surface. Cover the skillet with a lid or foil for 2-3 minutes.
Why it matters: Trapping steam helps the cheese melt uniformly without requiring high direct heat, which could burn the bottom layer before the top melts.
Visual Cue: The cheese should transform from opaque white strands to a glossy, bubbling blanket.
The Pull: When you dip a chip, the cheese should stretch in long, elastic strands. If it breaks immediately, it may have been overheated or used pre-shredded cheese.
Expert Tips
Room Temperature Cheese: Take your block of mozzarella out of the fridge 20 minutes before shredding. Cold cheese shocks the hot pan and can lead to uneven melting.
Season the Layers: Don’t rely solely on the sauce for flavor. Season the beef with salt and pepper while browning, and consider a pinch of cumin or smoked paprika when adding the vegetables.
Skillet Size Matters: Use a skillet that matches your serving size. If the layer of filling is too thin in a huge pan, the cheese will burn before the center heats through. If it’s too deep in a small pan, the middle won’t get cheesy. A 10-12 inch pan is the sweet spot.
Double Cheese Strategy: For maximum indulgence, sprinkle a small handful of cheese into the meat mixture before topping. This ensures every bite has cheese, not just the top layer.
Common Mistakes
Using Pre-Shredded Cheese: As mentioned, the anti-caking agents ruin the melt. Always buy blocks and shred yourself.
Overcooking the Vegetables: Zucchini and tomatoes release water quickly. If you sauté them too long before adding the sauce, the dip becomes soupy. Keep them crisp-tender.
Skipping the Rest: Let the dip sit for 2-3 minutes after melting the cheese. This allows the cheese to set slightly, making it easier to scoop without sliding off the chip.
High Heat Melting: Trying to rush the cheese melt on high heat will cause the oils to separate, resulting in a greasy, grainy mess. Low and slow (or residual heat) is key.
Recipe Variations
Spicy Kick: Add 1 diced jalapeño with the onions, or swirl in 2 tablespoons of sriracha or chipotle adobo sauce with the tomato sauce.
Vegetarian Version: Omit the beef and substitute with 1 can of black beans (rinsed) or 8oz of crumbled tempeh/mushrooms. Increase the zucchini quantity for bulk.
Chicken Twist: Swap beef for 2 cups of shredded rotisserie chicken. Since the chicken is cooked, reduce the initial browning time and focus on heating the veggies.
Extra Cheesy Blend: Mix 1 cup mozzarella with ½ cup pepper jack and ½ cup sharp cheddar for a complex, spicy-savory profile.
Low-Carb/Keto: Serve with cucumber rounds, celery sticks, or pork rinds instead of tortilla chips. Ensure your tomato sauce has no added sugar.
Mediterranean Style: Swap tomato sauce for pesto or tzatziki, use feta instead of mozzarella, and add kalamata olives and spinach.
What to Serve With This Recipe
Classic Tortilla Chips: Thick, restaurant-style chips are best for supporting the heavy dip.
Veggie Sticks: Carrot, celery, and bell pepper strips offer a fresh, crunchy contrast.
Crusty Bread: Warm baguette slices or sourdough toast points are excellent for scooping.
Beverage Pairing: A crisp lager, margarita, or sparkling water with lime cuts through the richness perfectly.
Side Salad: A simple arugula salad with lemon vinaigrette balances the heaviness of the cheesy beef.
Make Ahead & Meal Prep Tips
Prep Ahead: You can dice all vegetables and shred cheese up to 2 days in advance. Store in airtight containers in the fridge.
Cook-Ahead Filling: The beef and vegetable mixture can be fully cooked and stored in the fridge for up to 3 days. When ready to serve, reheat the filling in the skillet, then add fresh cheese and melt. Never freeze the assembled dip with cheese already on top, as the texture will suffer.
Freezer Friendly: The cooked meat/veggie base freezes beautifully for up to 3 months. Thaw overnight in the fridge before reheating and cheesing.
Storage & Reheating Instructions
Storage
Refrigerator: Store leftover dip in an airtight container for up to 3-4 days.
Freezer: Freeze the meat/vegetable base only (without cheese) for up to 3 months.
Reheating
Oven (Best Method): Preheat to 350°F (175°C). Place dip in an oven-safe dish, cover with foil, and bake for 15-20 minutes until bubbly. Remove foil for the last 2 minutes to re-crisp the cheese.
Stovetop: Reheat gently over low-medium heat in a skillet, stirring occasionally to prevent scorching. Add a splash of water or broth if it looks dry. Top with fresh cheese if desired.
Microwave (Quick Fix): Microwave in 30-second intervals, stirring between each. Note: Microwaved cheese often loses its stretch and becomes rubbery.
Air Fryer: Great for reviving individual portions. Heat at 350°F for 3-5 minutes in an air fryer-safe ramekin.
Nutritional Information
Estimates per serving (based on 6 servings):
Calories: 420
Protein: 28g
Carbohydrates: 18g
Fat: 26g
Fiber: 3g
Sugar: 6g
Sodium: 680mg
Note: Values vary based on specific brands of cheese/sauce and beef fat percentage.
Troubleshooting Guide
Problem
Cause
Solution
Cheese is oily/greasy
Overheated or pre-shredded cheese
Lower heat next time; shred block cheese. Stir vigorously to emulsify.
Dip is watery
Vegetables released too much liquid
Simmer filling longer before adding cheese to evaporate excess moisture.
Cheese didn’t stretch
Wrong cheese type or cold cheese
Use high-moisture mozzarella; bring to room temp before melting.
Beef is tough/chewy
Overcooked or lean meat
Use 85/15 beef; don’t over-stir once browned.
Bottom layer burnt
Heat too high during melt
Use residual heat or lowest burner setting; use cast iron for even distribution.
Frequently Asked Questions
1. Can I use ground turkey instead of beef? Yes, absolutely. Ground turkey is leaner, so add 1 tbsp of olive oil to the pan before cooking to prevent sticking and ensure the vegetables sauté properly. You may also want to add extra seasoning since turkey is milder than beef.
2. Why is my cheese not stretching like in the video? Stretchiness comes from moisture and protein structure. Pre-shredded cheese lacks moisture due to anti-caking agents. Also, overheating breaks down the proteins, causing oil separation. Use fresh-shredded, high-quality mozzarella and melt gently.
3. Can I make this in a slow cooker? Yes! Cook the beef and veggies on the stovetop first, then transfer to a slow cooker. Keep on “Warm” or “Low” and stir in cheese 15 minutes before serving. Slow cookers can get very hot on the sides, so monitor closely.
4. Is this recipe gluten-free? The dip itself is naturally gluten-free, but you must verify your tomato sauce and serve it with certified gluten-free chips or veggies. Many commercial sauces contain hidden wheat thickeners.
5. How do I keep the dip warm for a party? Use a warming tray, fondue pot, or keep the cast iron skillet on a trivet over a tea light candle. Alternatively, keep it in a 200°F oven until guests arrive.
6. Can I add beans to this dip? Yes! Black beans or pinto beans are excellent additions. Rinse and drain 1 can of beans and stir them in with the corn. They add fiber and make the dip even more filling.
7. What’s the best cheese for dipping? Low-moisture, whole-milk mozzarella is the gold standard for stretch. For flavor, blend it with mild cheddar, Gruyère, or Monterey Jack. Avoid parmesan as a primary melting cheese—it’s too dry and salty.
8. Can I freeze the finished dip? It’s not recommended. Dairy-based dips tend to separate and become grainy when frozen and reheated. Freeze the meat/veggie base only, and add fresh cheese when reheating.
Final Thoughts
This cheesy skillet beef dip proves that comfort food doesn’t have to be complicated or unhealthy. By embracing fresh vegetables and quality ingredients, you create a dish that satisfies cravings while nourishing your body. It’s versatile enough for a solo snack yet impressive enough for a crowd.
Don’t be intimidated by the cheese pull—once you master the technique of gentle melting and fresh shredding, you’ll replicate that viral moment every time. Grab your cast iron, invite some friends (or enjoy it all yourself—we won’t judge), and experience the joy of homemade, veggie-loaded cheesy goodness. If you try this recipe, leave a comment below with your favorite variation or pairing. Happy cooking!