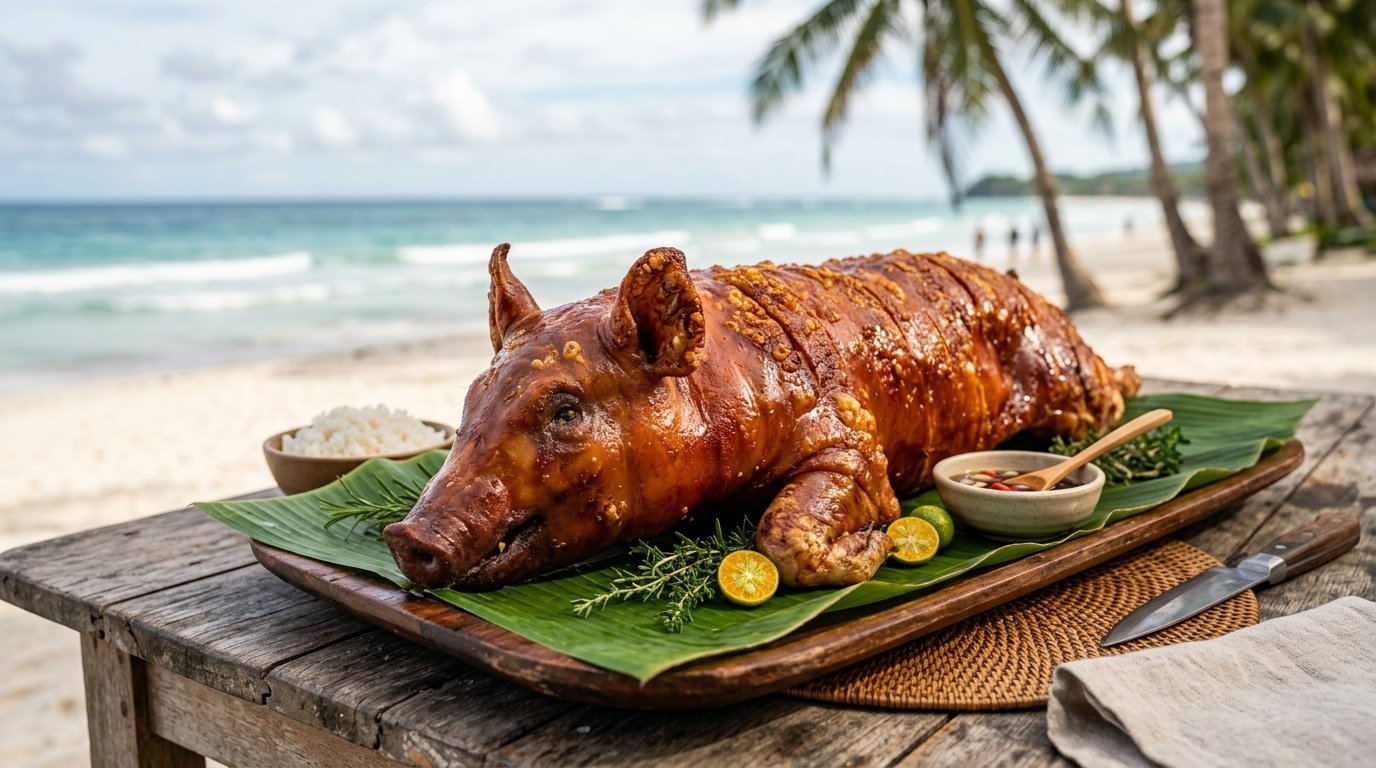
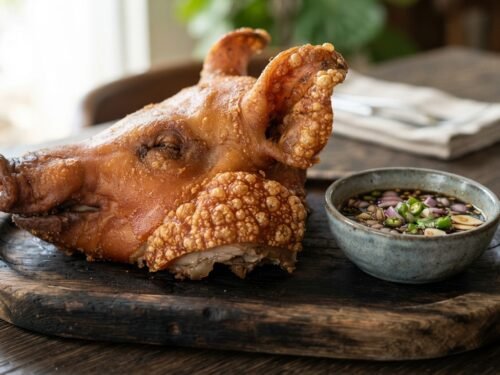
There is perhaps no greater celebration centerpiece than a perfectly roasted whole pig, known in many cultures as lechon. Watching that golden, blistered skin crackle under a knife while juicy meat steams beneath is a sensory experience that defines festive gatherings. Whether you are hosting a beach party, a wedding, or a holiday feast, mastering the art of roasting a whole pig over open coals transforms a simple meal into an unforgettable event.
This guide isn’t just about cooking meat; it’s about understanding heat management, moisture control, and patience. While the video shows the stunning result on a tropical beach, the technique applies anywhere you have space for a spit roast. We will break down exactly how to achieve that signature bubbly, glass-like skin and tender interior without burning the outside or leaving the inside raw. If you’ve ever been intimidated by the size of the task, this comprehensive guide will give you the confidence to fire up the coals and create your own masterpiece.
Why This Recipe Works
The secret to exceptional lechon lies in the physics of rendering fat and dehydrating skin simultaneously. By roasting vertically or horizontally over indirect heat, we allow the subcutaneous fat to slowly render out, basting the meat from the inside while the dry heat of the coals evaporates surface moisture. This dual action creates the “crackling” effect seen in the video—where the skin puffs up into distinct blisters rather than just hardening.
Furthermore, the rotisserie method ensures even cooking. Unlike static oven roasting, constant rotation prevents hot spots and allows gravity to help distribute juices throughout the muscle fibers. The open coal setup provides a radiant heat source that mimics traditional earth ovens but offers better temperature control for the home cook or outdoor enthusiast.
Why You’ll Love This Recipe
Unmatched Texture: Achieves the holy grail of roast pork: skin so crisp it shatters like glass, contrasting with melt-in-your-mouth meat.
Visual Spectacle: A whole roasted pig is a conversation starter and a stunning focal point for any outdoor gathering.
Flavor Depth: Slow roasting over wood or charcoal imparts a smoky complexity that gas ovens simply cannot replicate.
Crowd Pleaser: Naturally feeds a large group, making it cost-effective per serving for big events.
Versatile Base: The neutral, savory flavor profile pairs perfectly with acidic sauces, fresh herbs, and spicy condiments.
Ingredient Notes
Since the video focuses on the technique of roasting a whole pig, the ingredient list below reflects standard culinary practices for achieving the results shown.
The Pork (Whole Suckling or Small Hog)
Purpose: The canvas for the dish. A suckling pig (20-30 lbs) is ideal for beginners as it cooks faster and has more tender skin. Larger hogs (50+ lbs) require significantly more time and fire management.
Buying Tips: Order from a specialty butcher at least one week in advance. Ensure it is dressed (cleaned) but leave the skin intact. Ask them to split the backbone if you plan to butterfly it, though traditional spit roasting keeps it whole.
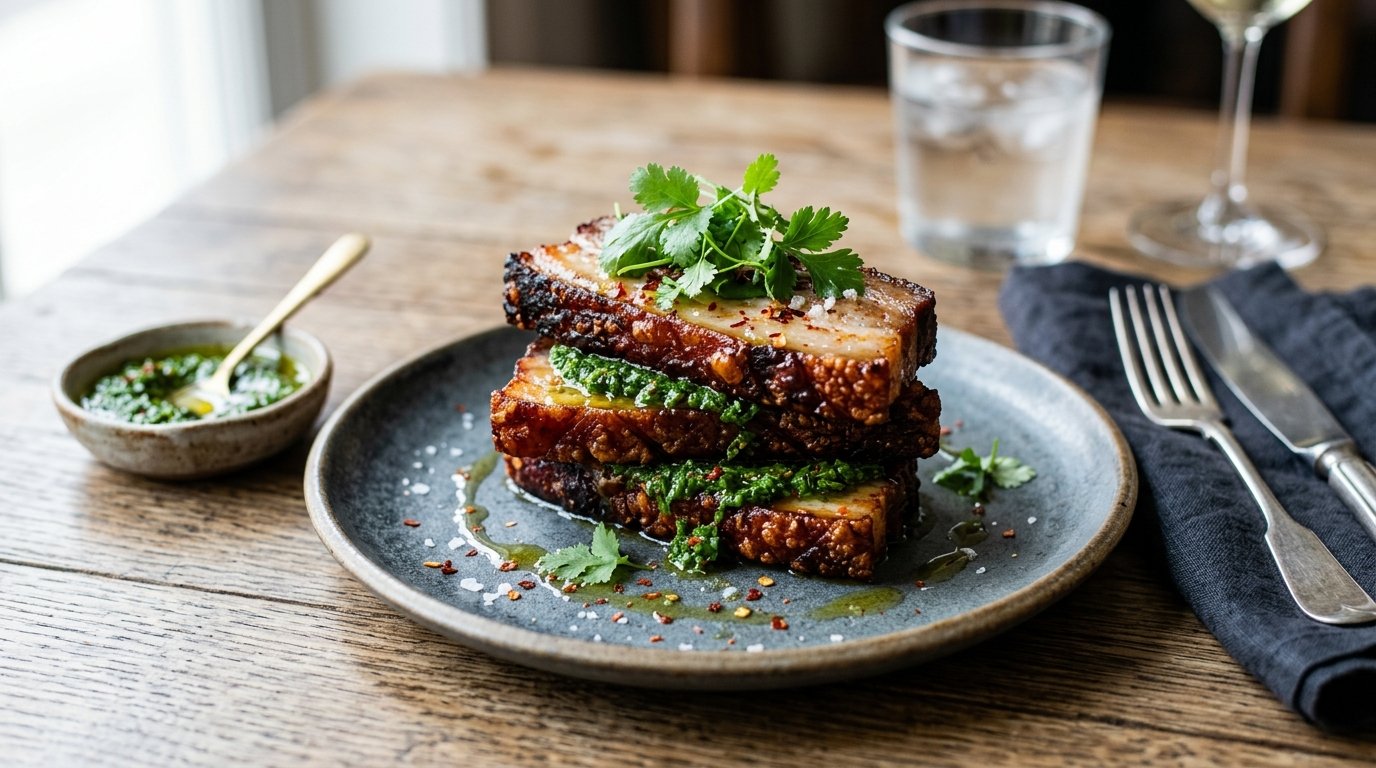
Substitutions: If a whole pig is impossible, use a pork belly slab (for just the crackling) or a bone-in pork shoulder (for the meat texture), adjusting cook times drastically.
Kosher Salt
Purpose: Essential for drawing moisture out of the skin (dehydration) and seasoning the meat deeply.
Why It Matters: Table salt is too fine and can make the skin salty without penetrating. Kosher salt’s coarse grain creates a brine effect on the surface.
White Vinegar or Calamansi Juice
Purpose: Acid helps break down proteins slightly and acts as a preservative against bacteria during the long prep. It also balances the richness of the fat.
Usage: Often used in the cavity rub or as a finishing splash.
Purpose: Stuffing the cavity infuses the meat with fragrance from the inside out as steam circulates within the body cavity.
Tip: Bruise the lemongrass and garlic cloves before stuffing to release essential oils.
Oil or Lard (Optional for Basting)
Purpose: Helps conduct heat to the skin and encourages blistering in the final stages.
Note: Some purists avoid oil, relying solely on rendered fat. Others swear by a vinegar-oil mop for extra crunch.
Kitchen Equipment
Roasting a whole pig requires specific gear. Do not attempt this without proper safety equipment.
Heavy-Duty Rotisserie Spit & Motor: Must be rated for the weight of your pig. A manual crank is possible but exhausting; electric is recommended.
Fire Pit or Drum Grill: As seen in the video, a 55-gallon drum cut in half or a dedicated fire pit works best. It needs to hold enough coal for 4+ hours.
Meat Thermometer (Dual Probe): One probe for the deepest part of the ham/shoulder, one for ambient pit temperature.
Heat-Resistant Gloves: Mandatory for adjusting the spit or moving coals.
Sharp Carving Knife & Tongs: For testing doneness and serving.
Aluminum Foil: For protecting ears/tail from burning.
Basting Brush/Mop: For applying liquids during the cook.
Preparation Information
Prep Time: 4 Hours (Cleaning, drying, seasoning, setting up fire)
Cook Time: 3–4 Hours (Depending on weight and heat intensity)
Total Time: 7–8 Hours
Servings: 20–25
Target Internal Temp: 165°F (74°C) for food safety, though connective tissue breaks down best closer to 180°F-190°F (82°C-88°C).
Step-by-Step Instructions
Phase 1: Prep and Dry the Skin
The most critical step for crispy skin happens before the fire is even lit. Moisture is the enemy of crispiness.
Clean Thoroughly: Rinse the pig inside and out. Pat completely dry with paper towels.
Air Dry: Place the pig uncovered in the refrigerator for 12-24 hours prior to cooking. This desiccates the skin surface.
Score (Optional): Some chefs score the skin in a diamond pattern to help fat render, while others leave it whole to prevent juice loss. For the bubbly look in the video, leaving it whole often yields better “puffing.”
Phase 2: Seasoning and Trussing
Cavity Rub: Generously season the inside cavity with salt, crushed garlic, peppercorns, and aromatics. The skin side should generally remain unseasoned or lightly salted only right before cooking to prevent drawing out moisture too early.
Trussing: Tie the legs securely to the spit forks. Ensure the pig is balanced on the spit. An unbalanced pig will strain the motor and cook unevenly.
Protect Extremities: Wrap ears and tail in foil. These thin parts burn long before the thick loin is done. Remove foil in the last 30 minutes to crisp them up.
Phase 3: The Fire Setup
As demonstrated in the beach setting, fire management is key.
Build a Two-Zone Fire: Pile coals in the center or to the sides, depending on your pit design. You want radiant heat, not direct flames licking the meat.
Temperature Target: Aim for a consistent 300°F–325°F (150°C–165°C) at the cooking grate level. Too hot = burnt skin/raw inside. Too cool = rubbery skin.
Fuel Type: Charcoal provides steady heat. Adding fruit woods (apple, cherry) or coconut husks (traditional in the Philippines) adds aromatic smoke.
Phase 4: Rotisserie Roasting Technique
Start Low and Slow: Begin roasting with the pig further from the coals if possible. Cook for the first 2 hours focusing on internal temperature rise.
Monitor Rotation: Ensure the motor is turning steadily (approx. 4-6 RPM). Watch for grease dripping onto coals causing flare-ups. Have a spray bottle of water ready to tame flames instantly.
Check Doneness: Insert a thermometer into the thickest part of the thigh and shoulder, avoiding bone. When it hits 160°F, move to the finishing phase.
Phase 5: Achieving the Perfect Crackling
This is where the magic in the video happens.
Increase Heat: Move the pig closer to the coals or add more fuel to raise temp to 375°F-400°F.
Watch the Bubbles: The skin will begin to blister. This is the moisture escaping rapidly.
Rotate Manually if Needed: If one side is browning faster, pause the motor and rotate manually to ensure even color.
The Test: Tap the skin with tongs. It should sound hollow and hard, like tapping a ceramic tile.
Rest: Remove from heat. Let rest for 20-30 minutes before carving. This allows juices to redistribute. Cutting immediately causes dry meat.
Expert Tips for Ultimate Crispiness
The Vinegar Mop: During the last hour, mop the skin with a 50/50 mix of vinegar and water. The acid reacts with the proteins to enhance puffing.
Salt Timing: Apply heavy salt to the skin only 30 minutes before high-heat blasting. Early salting draws moisture into the skin via osmosis initially, which can hinder crisping if not dried properly later.
Fan Assistance: If roasting outdoors on a still day, a small fan directed at the coals can increase oxygen flow and heat intensity, helping to blast the skin at the end.
Avoid Sugar in Rubs: Sugar burns at 300°F. Since we need high heat for crackling, sugary marinades will turn black and bitter before the skin crisps. Stick to salt and spices.
Common Mistakes to Avoid
Flare-Ups: Grease hitting coals causes flames that soot the meat. Fix: Use a drip pan under the pig or keep a water spray bottle handy. Never let flames touch the pig directly.
Uneven Cooking: Pig shoulders are thicker than loins. Fix: Shield the loin with foil if it’s getting too dark while the shoulder finishes. Or, start with the shoulder facing the heat source more directly.
Soggy Skin: Usually caused by steaming rather than roasting. Fix: Ensure the cavity is open or vented so steam escapes. Don’t cover the pig with foil during cooking.
Motor Failure: Overloading a cheap motor. Fix: Balance the pig perfectly. Counterweight the spit if necessary. Have a backup hand-crank plan.
Recipe Variations
Lechon Kawali Style (Stovetop): Boil pork belly with aromatics until tender, dry thoroughly, then deep fry until crisp. Great for smaller batches.
Cuban Lechon Asado: Marinate the pig in a mojo criollo (sour orange, garlic, cumin, oregano) for 24 hours before roasting. Results in tangier, more seasoned meat.
Chinese Siu Yuk: Focuses purely on the belly. Prick the skin thousands of times with a needle cluster, salt heavily, and roast in a very hot oven.
Spicy Adobo Glaze: In the last 30 minutes, brush with a soy-vinegar-pepper glaze for a sticky, savory-spicy crust.
Herb-Crusted: Press fresh rosemary, thyme, and fennel seeds into the skin before roasting for an aromatic, Mediterranean twist.
What to Serve With This Recipe
Lechon is rich and fatty; it demands acidic and fresh accompaniments.
Mang Tomas Sauce: The classic Filipino sweet and savory liver-based sauce.
Spiced Vinegar Dip: Sukang Iloko with chili, garlic, and pepper. Cuts through the fat instantly.
Atchara: Pickled green papaya relish. Provides crunch and acidity.
Steamed Jasmine Rice: Essential for soaking up juices and balancing salt.
Grilled Pineapple: The sweetness and char complement the smoky pork.
Light Lager or Cider: Carbonation and bitterness cleanse the palate between bites.
Make Ahead and Storage Tips
Prep Ahead: You can clean, dry, and season the pig up to 24 hours in advance. Keep refrigerated.
Leftovers: Lechon is arguably better the next day. Store meat and skin separately if possible to maintain skin texture.
Freezing: Meat freezes well for up to 3 months. Skin does not freeze well (becomes chewy). Freeze meat only; re-crisp fresh skin if needed.
Reheating Instructions
Oven (Best for Skin): Preheat to 375°F. Place skin-side up on a rack. Bake 10-15 mins until skin re-crisps.
Air Fryer: Excellent for reheating chunks with skin. 350°F for 5-8 minutes.
Stovetop (Skinless Meat Only): Sauté leftover meat in a pan with a little oil to revive texture. Add to fried rice.
Microwave: Avoid if possible. It turns skin rubbery. If necessary, use low power and finish under a broiler.
Nutritional Information
Values are approximate per 4oz serving of meat + skin.
Calories: 650
Protein: 45g
Carbohydrates: 2g
Fat: 50g
Fiber: 0g
Sugar: 0g
Sodium: 800mg (varies by seasoning)
Troubleshooting Guide
Problem
Cause
Solution
Skin is tough/chewy, not crisp
Heat too low; moisture trapped.
Blast with high heat (400°F+) at end. Ensure cavity vents steam.
Skin is burnt/black
Fire too close; sugar in rub.
Move pig away from coals. Use salt-only rub. Cover burnt spots with foil.
Meat is dry
Overcooked; rested improperly.
Pull at 165°F-170°F. Rest 30 mins. Baste during cook.
Pig spinning unevenly
Unbalanced load.
Adjust spit forks. Add counterweights. Check motor alignment.
Smoke is acrid/bitter
Fat dripping on coals.
Use drip pan. Clean grease tray. Switch to cleaner burning wood/charcoal.
Frequently Asked Questions
1. How long does it take to roast a whole pig? Rule of thumb: 1 hour per 10 lbs of pig at 300°F-325°F. A 50lb pig takes roughly 5 hours. Always rely on internal temperature, not just time.
2. Can I roast a whole pig in a regular backyard grill? Yes, but only small pigs (under 30 lbs). Standard kettle grills fit suckling pigs. Larger pigs require a custom spit setup or a large barrel smoker.
3. Why is my skin not bubbling like in the video? Bubbling requires rapid moisture evaporation. Your skin might be too moist, or the heat isn’t intense enough at the finish. Try drying longer in the fridge and increasing heat to 400°F for the last 20 minutes.
4. Do I need to stuff the pig? Stuffing isn’t mandatory for safety, but it adds flavor and helps cook the cavity evenly. Aromatic bundles are standard. Avoid dense bread stuffings which can harbor bacteria in a large cavity.
5. What wood is best for smoking lechon? Fruit woods like apple, cherry, or peach provide mild sweetness. Coconut husks are traditional in the Philippines. Avoid mesquite or hickory for whole pig as they can overpower the delicate pork flavor.
6. How do I know when the pig is done? Internal temperature of 165°F in the deepest muscle is safe. However, for pull-apart tenderness, aim for 180°F-190°F in the shoulder/ham. Skin should be golden brown and hard to the tap.
7. Can I brine the pig overnight? Yes, wet brining ensures juicy meat but makes skin crisping harder. If you brine, you MUST air dry the skin uncovered in the fridge for 12-24 hours after brining to reverse surface moisture.
8. Is it safe to roast a pig on the beach? Yes, provided you follow local fire regulations, use a contained fire pit (like the drum in the video), and fully extinguish coals afterward. Sand can insulate heat, so monitor ground temperature.
Final Thoughts
Mastering lechon is a rite of passage for any serious outdoor cook. The process teaches you respect for ingredients, patience with fire, and the joy of communal dining. While the setup seems daunting, the reward—a table full of smiling faces tearing into crispy, succulent pork—is worth every minute of preparation. Remember, perfection comes with practice. Even if your first attempt isn’t exactly like the video, the flavor will be incredible. Gather your friends, build that fire, and embrace the beautiful chaos of roasting a whole pig. Don’t forget to share your results and tag us—we love seeing your crackling creations!