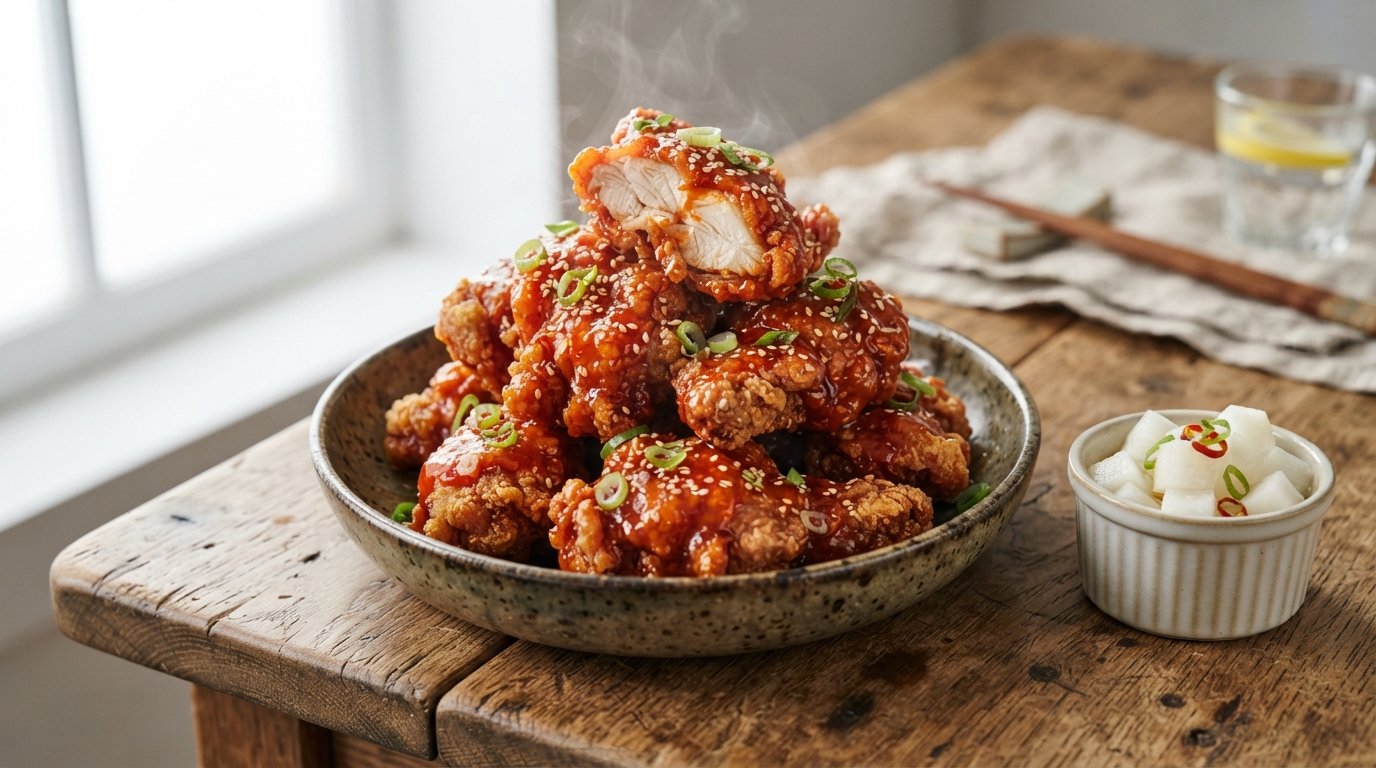
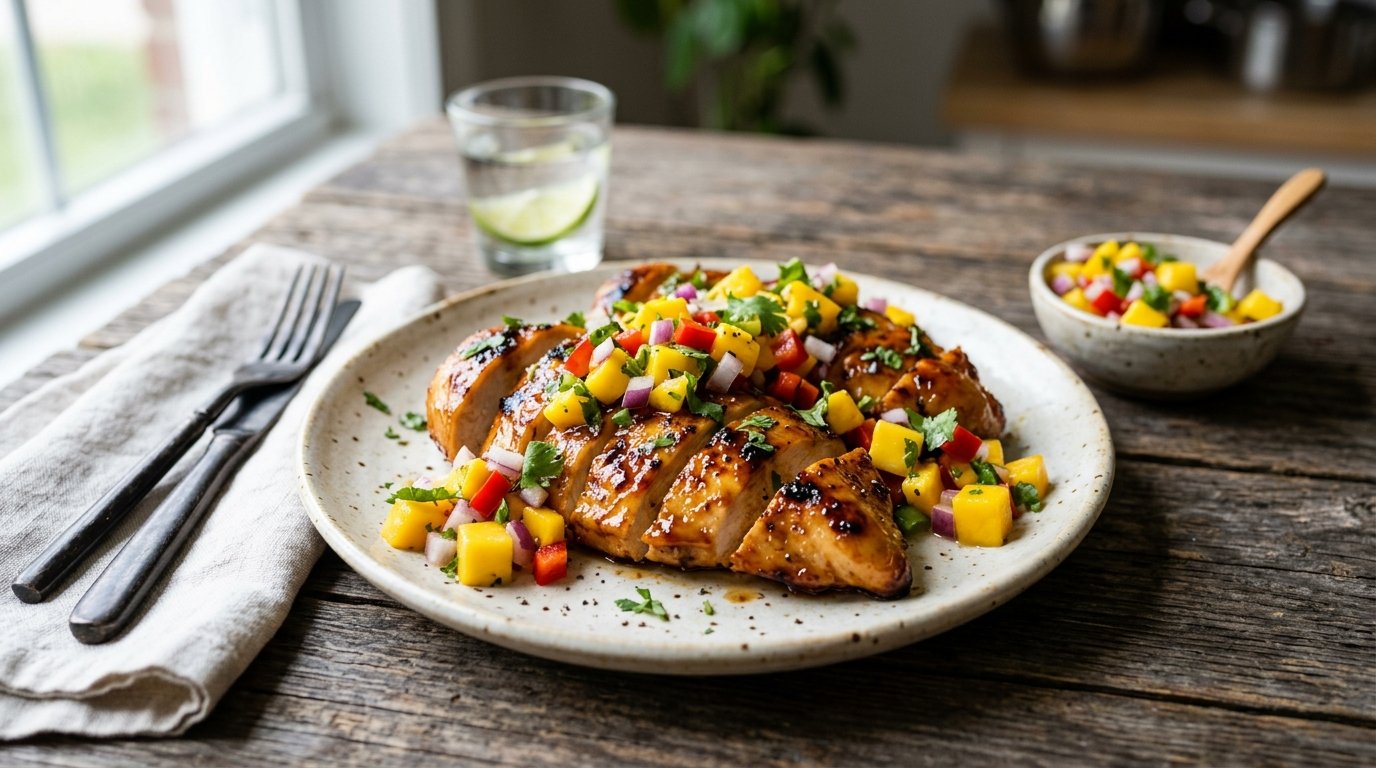
There is a specific sound that defines culinary perfection in the world of fried chicken: the audible crack when you bite into a piece of Crispy Korean Fried Chicken. It is not just about the crunch; it is about the shattering crust giving way to juicy, steaming meat coated in a glossy, sweet, and spicy glaze that clings perfectly without making the coating soggy. If you have ever wondered how restaurants achieve that glass-like crispness that lasts even after saucing, this recipe is your definitive guide.
This dish transforms humble chicken pieces into golden-brown treasures through a double-frying technique and a potato starch coating that creates a lighter, airier crust than traditional flour. Paired with a vibrant sauce made from gochujang, soy sauce, and garlic, and finished with toasted sesame seeds and fresh scallions, it is an explosion of texture and flavor. Whether you are hosting a game night or treating yourself to a weekend indulgence, mastering this Korean fried chicken technique will elevate your cooking repertoire instantly. Let’s get that oil hot.
Why This Recipe Works
The secret to this recipe lies in two critical scientific principles: starch gelatinization and moisture management. Unlike wheat flour, which can become bread-like and heavy, potato starch (or cornstarch) creates a thin, brittle shell that fries up incredibly crispy. When mixed directly with the wet chicken and minced garlic, it forms a batter that adheres tightly to the meat, preventing the “sliding off” issue common with dredging methods.
Furthermore, the double-fry method is non-negotiable. The first fry at a lower temperature cooks the chicken through and sets the crust structure while driving out surface moisture. The second fry at a higher temperature rapidly dehydrates the outer layer, creating that signature shatteringly crisp texture. Finally, tossing the hot chicken in the reduced sauce immediately before serving ensures the glaze coats the exterior without having time to penetrate and soften the crust. The result is a harmonious balance of crispy, juicy, sweet, savory, and spicy elements.
Why You’ll Love This Recipe
Shatteringly Crisp Texture: Achieves a glass-like crunch that stays crispy even when sauced, thanks to potato starch and double frying.
Perfect Sauce Adhesion: The sticky-sweet glaze clings to every nook and cranny without pooling or making the chicken soggy.
Flavor Complexity: Balances heat from gochujang, umami from soy sauce, sweetness from syrup, and aromatics from garlic and ginger.
Visually Stunning: The glossy amber-red finish sprinkled with white sesame seeds and green scallions is Instagram-worthy.
Versatile Protein: Works equally well with bone-in wings, drumettes, or boneless thighs.
Ingredient Notes
Success starts at the grocery store. Here is what you need and why quality matters.
For the Chicken & Coating
Chicken Pieces: Bone-in wings or drumettes are traditional and stay juicier. Boneless thighs work for a quicker eat but require careful timing to avoid dryness.
Buying Tip: Ask your butcher to split wings if buying whole. Uniform size ensures even cooking.
Potato Starch: The gold standard for Korean fried chicken. It creates a lighter, crispier crust than cornstarch or flour.
Substitution: Cornstarch is an acceptable alternative if potato starch is unavailable, though the crust may be slightly heavier.
Minced Garlic: Freshly minced is essential. Jarred garlic lacks the pungency needed to flavor the meat and coating.
Salt & Black Pepper: Basic seasoning that penetrates the meat during the marinating phase.
For the Sauce
Gochujang (Korean Chili Paste): The soul of the sauce. Provides fermented depth, mild heat, and umami. Do not substitute with sriracha or chili flakes; the flavor profile is entirely different.
Buying Tip: Look for brands like Sempio or Chung Jung One. Store in fridge after opening.
Soy Sauce: Adds salinity and dark color. Use regular or light soy sauce; avoid dark mushroom soy which can be too overpowering.
Rice Syrup or Corn Syrup: Provides the sticky gloss and mild sweetness that balances the heat. Honey works but has a distinct floral note.
Garlic & Ginger: Freshly minced. They add aromatic brightness that cuts through the richness of the fried chicken.
Toasted Sesame Seeds: Essential garnish. Adds nutty flavor and visual contrast. Toast them lightly in a dry pan for maximum aroma.
Scallions: Thinly sliced green parts only. Adds fresh oniony bite and vibrant color.
Kitchen Equipment
Heavy-Bottomed Pot or Dutch Oven: Essential for maintaining stable oil temperature during deep frying.
Deep-Fry Thermometer: Critical safety and quality tool. Guessing oil temp leads to greasy or burnt chicken.
Wire Rack: For draining fried chicken. Never drain on paper towels; steam gets trapped and softens the crust.
Large Mixing Bowls: One for marinating/coating, one for tossing in sauce.
Tongs: Long-handled metal tongs for safe handling in hot oil.
Skillet or Wok: For reducing and simmering the sauce.
Fine Mesh Sieve: Optional, for straining sauce if you want a smoother glaze.
Preparation Information
Prep Time: 20 Minutes
Cook Time: 35 Minutes
Total Time: 55 Minutes
Servings: 4 as Main / 6-8 as Appetizer
Step-by-Step Instructions
Follow these steps precisely to replicate the crispy results shown in the video.
H3: Marinate and Coat the Chicken
Prepare the Chicken: Pat chicken pieces completely dry with paper towels. Moisture on the surface prevents proper adhesion of the coating.
Season: In a large bowl, combine chicken with minced garlic, salt, and black pepper. Massage gently to ensure even distribution. Let sit for 10 minutes.
Why this matters: Salt begins to denature surface proteins, helping the coating stick. Garlic infuses flavor directly into the meat.
Add Starch: Sprinkle potato starch over the chicken. Toss vigorously with hands until each piece is evenly coated and looks matte/powdery.
Visual Cue: No wet spots should remain. The coating should look like a thin, dry dusting, not a thick batter. Shake off excess.
Rest Briefly: Let coated chicken sit on a wire rack for 5-10 minutes. This allows the starch to hydrate slightly and adhere better, preventing it from falling off in the oil.
H3: First Fry – Cook Through
Heat Oil: Fill pot with 2-3 inches of neutral oil (vegetable, canola, or peanut). Heat to 325°F (160°C).
Safety Note: Never leave hot oil unattended. Keep a lid nearby to smother potential flames.
Fry in Batches: Carefully lower chicken into oil using tongs. Do not overcrowd; this drops oil temp and causes steaming.
Cook Gently: Fry for 5-7 minutes, turning occasionally, until pale golden and cooked through (internal temp 165°F/74°C).
Aroma Cue: You should smell cooking chicken, not burning oil. If oil smokes, reduce heat immediately.
Drain & Rest: Transfer to wire rack. Let rest for 5-10 minutes. This resting period is crucial for the second fry to work effectively.
H3: Second Fry – Crisp the Crust
Increase Heat: Raise oil temperature to 375°F (190°C). This high heat is what creates the shattering crunch.
Flash Fry: Return rested chicken to hot oil. Fry for 1-2 minutes until deep golden brown and rigid.
Visual Cue: Chicken should look darker and feel hard to the touch of tongs. Bubbles around chicken should be smaller and faster.
Drain Immediately: Transfer back to wire rack. Do not let sit in oil or on paper towels.
Keep Warm: If frying multiple batches, keep finished chicken in a 200°F oven on a wire rack to maintain crispness while you finish the rest.
H3: Make the Sauce & Toss
Simmer Sauce: In a skillet or wok, combine gochujang, soy sauce, rice syrup, minced garlic, and ginger. Bring to a bubble over medium heat.
Reduce: Cook for 2-3 minutes, stirring constantly, until sauce thickens slightly and becomes glossy. It should coat the back of a spoon.
Texture Cue: Sauce should be sticky but still pourable. If too thick, add splash of water. If too thin, simmer longer.
Toss Quickly: Add hot fried chicken to the sauce. Toss vigorously for 10-15 seconds to coat evenly. Work fast to prevent sogginess.
Plate & Garnish: Transfer to serving platter immediately. Sprinkle generously with toasted sesame seeds and sliced scallions. Serve within 2 minutes for peak crispness.
Expert Tips for Maximum Crunch
Oil Temperature is King: Invest in a thermometer. Below 325°F for first fry = greasy chicken. Above 375°F for second fry = burnt outside, raw inside. Precision matters.
Don’t Skip the Rest: The 5-10 minute rest between fries allows internal steam to escape and the crust to set. Skipping this step results in a softer, less durable crunch.
Sauce Timing is Everything: Have your sauce ready and hot BEFORE the second fry finishes. The chicken should go from oil → rack → sauce → plate in under 60 seconds.
Use Potato Starch: I cannot stress this enough. Wheat flour makes a bready crust. Potato starch makes a glass-like crust. It’s worth finding at an Asian market.
Toast Your Sesame Seeds: Raw sesame seeds are bland. Toast them in a dry pan over medium heat for 2-3 minutes until fragrant and lightly golden. Watch closely—they burn fast.
Common Mistakes to Avoid
Mistake
Why It Happens
How to Fix/Prevent
Soggy Chicken After Saucing
Sauce applied too early; chicken not hot enough; sauce too watery.
Toss immediately before serving. Ensure sauce is reduced to sticky consistency.
First fry at 325°F. Cut large pieces smaller. Use thermometer.
Greasy Chicken
Oil temp dropped too low; overcrowded pan.
Wait for oil to recover between batches. Fry in small batches.
Bland Sauce
Under-seasoning; didn’t reduce enough.
Taste sauce before adding chicken. Reduce until glossy and sticky.
Recipe Variations
Adapt this classic to suit different tastes and dietary needs.
Spicy Yangnyeom: Increase gochujang to 3 tbsp and add 1 tsp gochugaru (Korean chili flakes) for extra heat.
Soy Garlic (Non-Spicy): Omit gochujang. Use 3 tbsp soy sauce, 2 tbsp honey, 1 tbsp minced garlic, 1 tsp ginger. Finish with extra scallions.
Snow Cheese: Toss fried chicken in melted butter, then toss in powdered cheese (like Cheetos powder or parmesan) and sugar. No sauce needed.
Vegan Cauliflower: Replace chicken with cauliflower florets. Same coating and double-fry method. Sauce adheres beautifully.
Low-Carb/Keto: Use almond flour + egg wash instead of potato starch. Air fry at 400°F for 12-15 mins. Use sugar-free syrup in sauce.
Lemon Pepper: Skip gochujang sauce. Toss fried chicken in melted butter, lemon zest, cracked pepper, and salt. Bright and zesty.
Extra Cheesy: Add 1/4 cup melted mozzarella to the hot sauce before tossing. Creates a cheesy, stringy glaze.
What to Serve With This Recipe
Balance the richness with fresh, acidic, and starchy elements.
Pickled Radish (Chikin-Mu): The traditional pairing. Crunchy, sweet-sour pickled daikon cuts through the fat perfectly.
Steamed Rice: Simple jasmine or short-grain rice soaks up extra sauce and balances the meal.
Cucumber Salad: Sliced cucumbers with rice vinegar and sesame oil provide cooling crunch.
Drinks: Ice-cold lager beer (the classic “chimaek” combo) or sparkling soju cocktail. For non-alcoholic, try barley tea or citrus soda.
Kimchi: Fermented cabbage adds probiotic tang and spice that complements the sweet-savory chicken.
Dessert: Keep it light. Mango sorbet or green tea ice cream cleanses the palate.
Make Ahead & Meal Prep Tips
Marinate Ahead: Chicken can be seasoned and coated up to 4 hours ahead. Store covered in fridge. Bring to room temp before frying.
First Fry Ahead: Complete the first fry up to 2 hours ahead. Let cool completely, then store at room temp on wire rack. Do second fry just before serving.
Sauce Prep: Make sauce base (gochujang, soy, syrup, garlic, ginger) up to 3 days ahead. Store in fridge. Reheat and reduce just before tossing.
Freeze Unfried: Coat chicken and freeze on baking sheet. Once frozen, bag and store up to 1 month. Fry from frozen, adding 2-3 mins to first fry time.
Storage & Reheating Instructions
Refrigerator
Store leftover chicken in airtight container for up to 3 days. Sauce will soften crust over time.
Freezer
Freeze cooked chicken (without sauce) on wire rack until solid, then bag. Keeps 2 months. Thaw in fridge before reheating.
Reheating Methods
Air Fryer (Best): 375°F for 3-5 minutes. Restores 90% of original crunch. Add fresh sauce after reheating.
Oven: 400°F on wire rack for 8-10 minutes. Better than microwave but slower.
Stovetop: Dry pan over medium heat, toss for 2-3 minutes. Risk of burning if not careful.
Microwave (Avoid): Will make chicken rubbery and soggy. Only use if desperate, and finish under broiler for 1 min.
Nutritional Information
Approximate values per serving (based on 6 servings, including sauce):
Calories: 480 kcal
Protein: 28g
Carbohydrates: 32g
Fat: 26g
Saturated Fat: 5g
Cholesterol: 95mg
Sodium: 720mg
Note: Values vary based on chicken cut, oil absorption, and sauce amount.
Troubleshooting Guide
Problem: Coating is gummy, not crispy.Solution: Oil temperature was too low during second fry, or chicken wasn’t rested between fries. Next time, verify temp with thermometer and respect the resting period.
Problem: Sauce makes chicken soggy within minutes.Solution: Sauce wasn’t reduced enough, or chicken cooled too much before tossing. Reduce sauce until sticky-glossy. Toss while chicken is piping hot.
Problem: Chicken is dry inside.Solution: Overcooked during first fry or pieces too small. Aim for 165°F internal temp during first fry. Larger pieces retain moisture better.
Problem: Sauce is too salty/sweet/spicy.Solution: Always taste sauce before adding chicken. Balance with water (if too salty), vinegar (if too sweet), or honey (if too spicy). Adjust gradually.
Frequently Asked Questions
1. Can I use cornstarch instead of potato starch? Yes, but the crust will be slightly heavier and less shattery. Potato starch is ideal, but cornstarch works in a pinch. Avoid all-purpose flour—it makes a breading, not a crisp crust.
2. Why do I need to fry twice? The first fry cooks the chicken and sets the crust structure. The second fry at higher heat rapidly dehydrates the outer layer, creating the signature crunch. Single-fried chicken is never as crispy, especially when sauced.
3. What is gochujang and where do I find it? Gochujang is fermented Korean chili paste. It’s available in the Asian aisle of most supermarkets or at Asian grocery stores. Don’t substitute with sriracha—the flavors are completely different.
4. Can I bake this instead of frying? Baking won’t achieve the same crunch. For a healthier version, air fry at 400°F for 12-15 mins, flipping halfway. Spray generously with oil. Expect a chewier, less crispy result.
5. How do I know when the oil is ready without a thermometer? Drop a small cube of bread or pinch of starch into the oil. If it sizzles vigorously and turns golden in 30-45 seconds, you’re at ~325°F. If it sinks or barely bubbles, it’s too cold. If it instantly blacks, it’s too hot.
6. Can I reuse the frying oil? Yes, 2-3 times if strained and stored properly. Cool completely, strain through cheesecloth to remove bits, and store in a sealed container in the fridge. Discard if oil smells rancid or smokes at normal temps.
7. Why did my coating fall off in the oil? Chicken surface was too wet, or you didn’t let the coated chicken rest before frying. The resting period allows the starch to hydrate and bind. Also, don’t move the chicken for the first 60 seconds of frying—let the crust set.
8. Can I make this gluten-free? Potato starch is naturally GF. Ensure your soy sauce is tamari or labeled GF. Gochujang sometimes contains wheat—check the label. Most brands are GF, but always verify.
Final Thoughts
Making Crispy Korean Fried Chicken at home is a rewarding challenge that pays off with every crunchy, juicy bite. It teaches you patience with oil temperature, respect for ingredient balance, and the joy of creating restaurant-level textures in your own kitchen. The combination of that glass-like crust with the bright, fiery-sweet sauce is something that lingers in memory long after the meal is done.