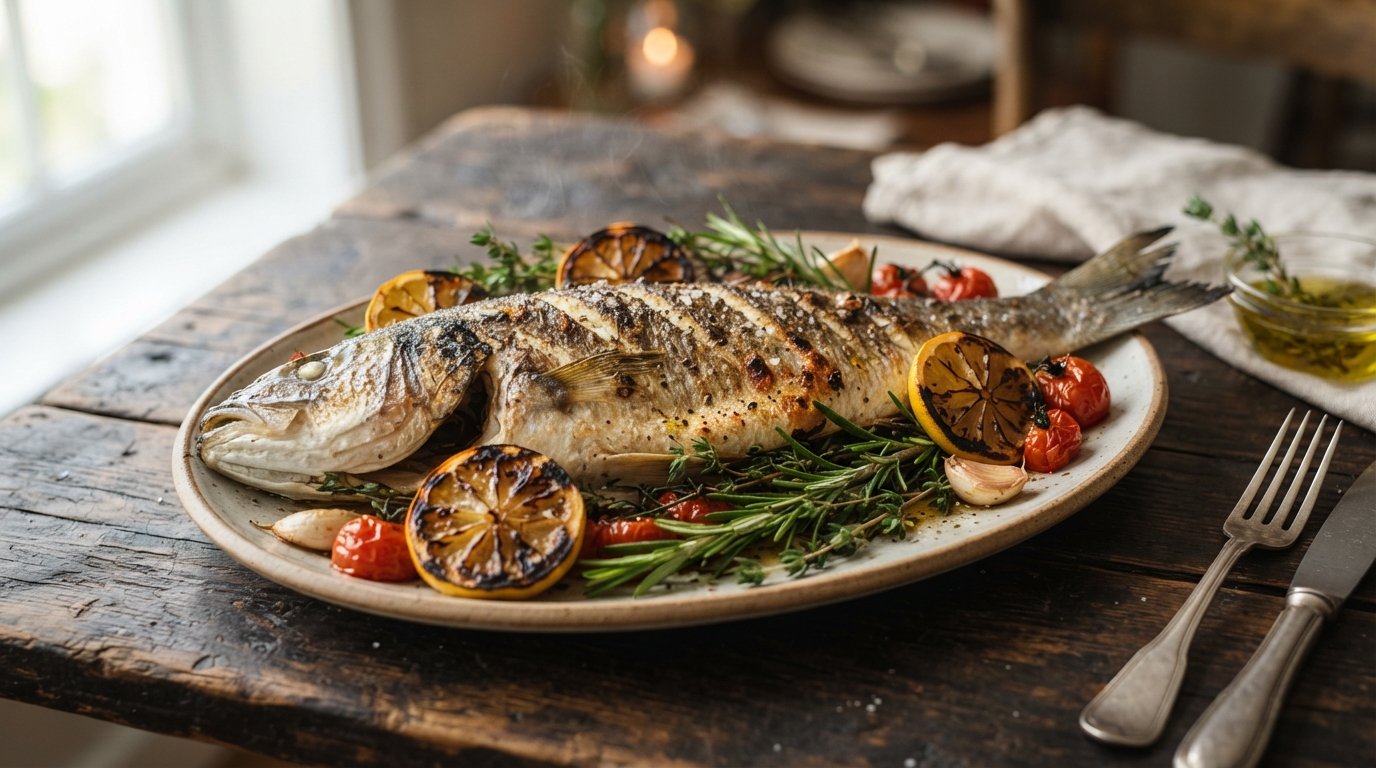
There is a distinct moment of culinary triumph when you lift the entire skeletal structure from a whole roasted fish in one pristine piece, leaving behind two perfect, boneless fillets ready to serve. Learning how to debone a whole roasted fish is not just a party trick; it is an essential skill that transforms a rustic, intimidating centerpiece into an elegant, accessible dining experience. Whether you have prepared a delicate sea bass, a hearty snapper, or a flavorful trout, this technique ensures your guests can enjoy every bite without navigating a minefield of tiny bones.
Unlike raw filleting, which requires razor-sharp knives and significant practice, post-roast deboning relies on heat and gravity. Cooking loosens the connective tissues holding the skeleton to the flesh, making the process surprisingly forgiving. By understanding the anatomy of the fish and using the right tools—primarily tongs and a small knife—you can achieve restaurant-quality presentation at home. This guide will walk you through the precise movements needed to separate meat from bone cleanly, preserving the integrity of your beautifully cooked protein.
Why This Technique Works
The science behind easy post-cook deboning lies in protein denaturation and collagen breakdown. When fish is roasted, the heat causes the muscle fibers to contract and the collagen connecting the skin, flesh, and bones to gelatinize and weaken. This natural separation means that the skeleton is no longer rigidly fused to the meat but is instead held in place by residual moisture and softened tissue.
By leveraging this structural change, we use mechanical force (tongs) rather than cutting force (knives) to do the heavy lifting. The spine acts as a central hinge; once the top fillet is removed, the rib cage becomes exposed and pliable. Lifting the head and tail creates tension along the backbone, allowing the entire frame to peel away from the bottom fillet like a zipper. This method minimizes waste and keeps the delicate flesh intact, something that is nearly impossible to achieve with a knife on a hot, slippery surface.
Why You’ll Love Mastering This Skill
Elegant Presentation: Serving boneless fillets looks professional and thoughtful, elevating a simple roast dinner to fine-dining status.
Stress-Free Dining: Removes the anxiety of choking hazards, making whole fish safe and enjoyable for children and elderly guests.
Zero Waste: Keeps the skeleton intact for making instant, flavorful fish stock or broth.
Forgiving Process: Much easier than raw filleting; the heat does 90% of the work for you.
Versatility: Works on almost any round fish species, from small trout to large branzino.
Impressive Party Trick: A guaranteed conversation starter that showcases culinary confidence.
Better Texture: Prevents the “mashing” effect that happens when people try to pick meat off a bony fish themselves.
Ingredient & Equipment Notes
While this is a technique rather than a recipe, having the right setup is crucial for success.
The Fish
Purpose: The subject of our technique. Round fish with a central spine work best.
Buying Tips: Choose fish with clear eyes, red gills, and firm flesh. For deboning practice, medium-sized fish (1.5–2 lbs) like sea bass, snapper, or porgy are ideal. Too small = fiddly; too large = heavy and unwieldy.
Cooking Note: Ensure the fish is fully cooked but not falling apart. Overcooked fish shatters; undercooked fish sticks to the bone. Aim for opaque flesh that flakes gently.
Kitchen Tongs
Purpose: The primary tool for gripping and lifting.
Buying Tips: Use metal tongs with scalloped or serrated edges for grip. Silicone tips can slip on hot fish skin. Long handles keep hands away from steam and heat.
Why it matters: Fingers are too clumsy and burn easily. Tongs provide precision leverage to grab the spine without crushing the meat.
Small Paring Knife or Butter Knife
Purpose: For freeing stubborn connections near the head, tail, and belly.
Buying Tips: A duller edge is often better here; you want to separate tissue, not slice meat. A butter knife or offset spatula works wonders for sliding under the spine.
Why it matters: Sometimes the connective tissue at the extremities hasn’t fully released. A gentle nudge prevents tearing the fillet when lifting.
Rimmed Baking Sheet
Purpose: Catchment for juices and stability.
Why it matters: Fish releases liquid during deboning. A rimmed sheet contains the mess and provides a flat, stable surface. Avoid glass dishes which can shatter if the hot fish touches cold spots or if you press too hard.
Step-by-Step Instructions
H3: Step 1 – Assess and Stabilize
Place the roasted fish on a rimmed baking sheet. Allow it to rest for 2-3 minutes after removing from the oven. Check doneness by inserting a fork into the thickest part; it should slide in easily and meet little resistance.
Why this matters: Resting allows juices to redistribute and proteins to relax slightly, making the flesh less fragile. Immediate deboning risks breaking the flaky meat.
Visual Cue: Steam should be rising steadily but not violently. Flesh should look opaque and moist, not translucent or dry.
Common Mistake: Trying to debone a fish that is still sizzling aggressively. Wait for the steam to settle slightly.
H3: Step 2 – Remove the Top Fillet
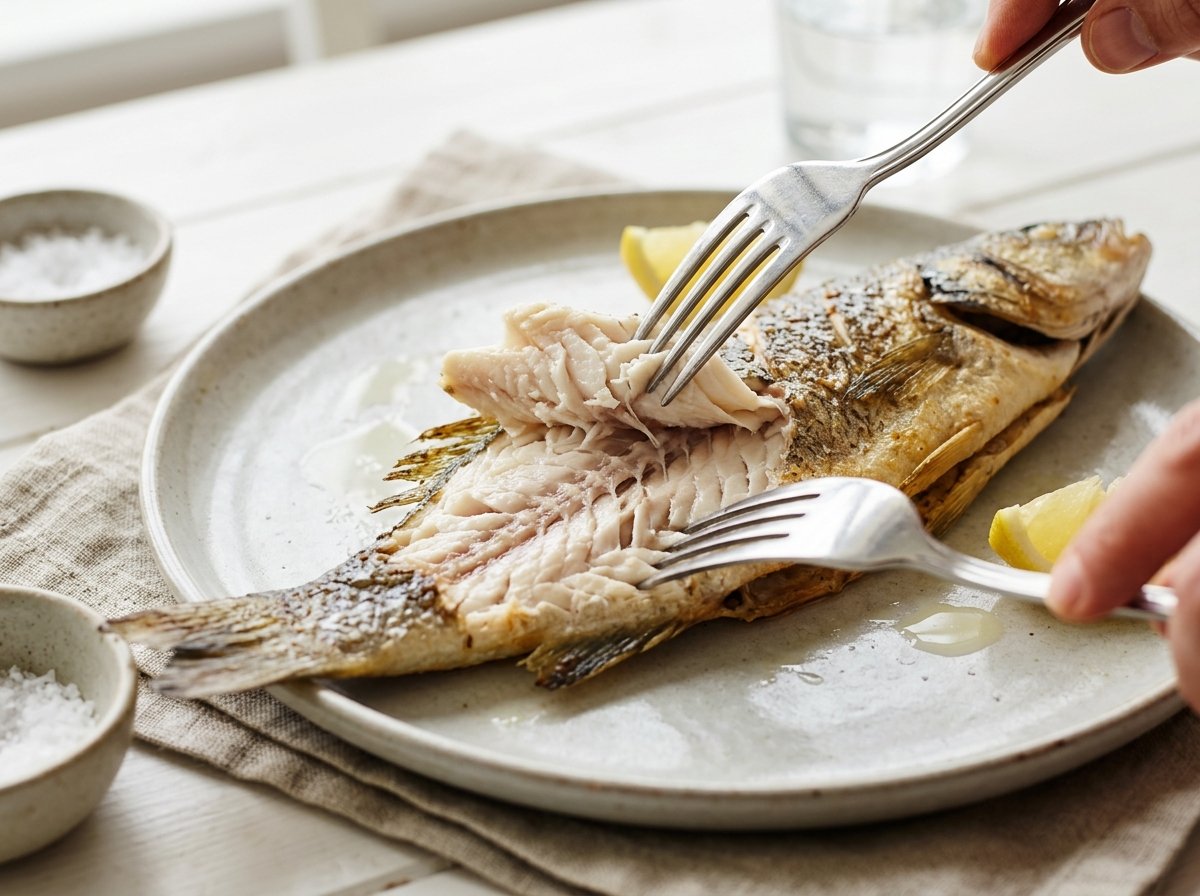
Using tongs, grip the fish firmly at the center of the back, near the dorsal fin area. Gently lift and pull the top half of the fish away from the spine, peeling it back towards the tail. If it resists, use your paring knife to gently sever any remaining connective tissue at the head and tail ends. Transfer the top fillet to a warm serving plate.
Why this matters: Removing the top layer exposes the rib cage and spine, giving you access to the structural “handle” needed for the next step.
Texture Cue: The meat should release in a cohesive sheet. If it crumbles, the fish may be overcooked.
Professional Tip: Don’t worry about perfection. Even if the top fillet breaks slightly, it doesn’t ruin the process. Just get it off cleanly.
H3: Step 3 – Expose the Spine
With the top fillet removed, you will see the rib bones and central spine clearly. Use the tongs to gently push aside any large rib bones that might obstruct your grip on the main backbone. Locate the solid spine running from head to tail.
Why this matters: Rib bones are flexible and can poke through the bottom fillet if not managed. Clearing them ensures a smooth lift.
Visual Cue: The spine should look white/pale against the darker cooked flesh. It should appear distinct from the meat below.
Aroma Cue: Intense savory fish aroma is released now that the interior is exposed. This is normal and indicates freshness.
H3: Step 4 – Lift the Skeleton
Grip the spine firmly with tongs at the tail end. Simultaneously, use your other hand (or a second pair of tongs) to hold the fish’s head steady. Gently lift the spine upwards and towards the head, peeling it away from the bottom fillet. Use the paring knife to cut the final connection at the head if necessary. Discard or save the skeleton for stock.
Why this matters: The spine is the anchor. Lifting it vertically separates the bottom fillet cleanly because the connective tissue has already been weakened by heat.
Visual Cue: The bottom fillet should remain flat on the pan while the skeleton rises away. You should see clean, unbroken flesh underneath.
Common Mistake: Pulling horizontally instead of vertically. Horizontal pulling drags the meat with the bone. Always lift UP first.
H3: Step 5 – Final Inspection and Plating
Inspect the bottom fillet for any stray pin bones or rib fragments. Run your finger (carefully!) or the back of a knife along the center line to feel for irregularities. Remove any found bones with tweezers or tongs. Slide the bottom fillet onto the serving plate alongside the top fillet. Drizzle with pan juices.
Why this matters: Safety first. Even with perfect technique, a rogue bone can hide. Verification ensures a pleasant eating experience.
Texture Cue: Flesh should be uniform and smooth. No jagged holes where bones were stuck.
Professional Tip: Warm your serving plates beforehand. Hot fish on cold plates cools rapidly and congeals fats, diminishing flavor and texture.
Expert Tips for Clean Fillets
Score Before Roasting: Making diagonal slashes in the fish before cooking not only seasons the interior but also creates natural break lines that make post-cook deboning significantly easier. The cuts weaken the structural integrity intentionally.
Don’t Overcook: This is the golden rule. Fish continues to cook from residual heat. Pull it from the oven when it’s just done. Overcooked fish loses its structural cohesion and turns to mush, making clean deboning impossible.
Use Two Pairs of Tongs: If you struggle with stabilization, use one pair to hold the head/tail and another to lift the spine. Four hands are better than two for delicate work.
Leverage Gravity: Work on a flat surface. Tilting the pan causes the fish to slide and the juices to pool unevenly, complicating the lift.
Save the Bones: Never throw away the skeleton immediately. Simmer it with water, onion, carrot, and celery for 30 minutes to create a light, delicious fish fumet for soups or risottos.
Skin-Side Down Finish: If possible, roast the fish skin-side down for the last few minutes. This crisps the skin and firms up the bottom fillet, making it more resistant to breaking during the bone removal process.
Common Mistakes to Avoid
Using a Sharp Chef’s Knife: Large knives are dangerous and imprecise for this task. They slice through meat instead of separating tissue. Fix: Use tongs for lifting and a small paring/butter knife for nudging.
Pulling Too Hard: Force tears flesh. If the bone doesn’t come free easily, it’s still attached. Fix: Stop. Use the knife to cut the specific attachment point, then try lifting again gently.
Deboning Cold Fish: As fish cools, proteins tighten and re-adhere to bones. Fix: Always debone while the fish is still warm (but not scorching).
Ignoring the Belly Cavity: Sometimes viscera or stuffing sticks to the spine. Fix: Clean the cavity thoroughly before roasting. If stuffed, remove stuffing before attempting to lift the spine.
Breaking the Tail First: The tail is fragile. Gripping there often snaps it off. Fix: Always grip the spine at the thickest, strongest part (center or head-end) for leverage.
Rushing the Rest: Skipping the 2-minute rest period results in falling-apart fish. Fix: Patience yields cleaner fillets. Use this time to warm plates and prepare garnishes.
Recipe Variations & Serving Ideas
While the deboning technique is universal, how you serve the fish can vary wildly:
Classic Lemon-Herb: After deboning, drizzle with extra virgin olive oil, fresh lemon juice, and chopped parsley. Simple and bright.
Asian-Style Ginger Scallion: Top deboned fillets with julienned ginger, scallions, and hot sesame oil. Pour sizzling oil over aromatics for fragrance.
Mediterranean Tapenade: Spoon olive tapenade or romesco sauce over the warm fillets. The bold flavors complement the delicate meat.
Creamy Dill Sauce: Serve with a side of yogurt-dill or beurre blanc sauce. The richness pairs beautifully with lean white fish.
Taco Style: Flake the deboned meat into warm tortillas with cabbage slaw and chipotle crema. Great for casual entertaining.
Salad Topper: Place warm fillets over a bed of bitter greens (arugula/radicchio) with citrus vinaigrette. A light, healthy main.
Spicy Thai Curry: Add deboned chunks to a simmering coconut curry base. The fish absorbs the sauce without disintegrating.
What to Serve With Deboned Fish
Balance the delicate protein with complementary sides:
Roasted Potatoes: Crispy potatoes provide textural contrast to soft fish. Rosemary or garlic seasoning bridges the flavors.
Steamed Green Beans: Blanch and shock beans to retain crunch. Toss with almonds or brown butter.
Rice Pilaf: Absorbs pan juices and sauces. Saffron or herb-infused rice adds elegance.
Grilled Vegetables: Zucchini, asparagus, or peppers add smoky char that mirrors the roasted fish.
Crusty Bread: Essential for soaking up oils and sauces. Sourdough or baguette works best.
White Wine: Sauvignon Blanc, Pinot Grigio, or Albariño. High acidity cuts through richness and cleanses the palate.
Light Dessert: Sorbet or fruit salad. Avoid heavy creams after a rich fish meal.
Storage & Reheating Instructions
Storage
Refrigerator: Store deboned fillets in an airtight container for up to 2 days. Place parchment paper between layers to prevent sticking.
Freezer: Not recommended for cooked fish. Texture becomes watery and grainy upon thawing. Freeze raw fish instead.
Stock: Freeze the saved skeleton in a ziplock bag for up to 3 months. Make stock whenever convenient.
Reheating
Oven (Best): 300°F (150°C) for 8-10 minutes covered with foil. Low heat prevents drying. Add a splash of water or broth to create steam.
Stovetop: Gentle steam in a covered skillet with a tablespoon of liquid. 3-5 minutes. Preserves moisture better than dry heat.
Microwave (Last Resort): 50% power in 30-second bursts. Cover with damp paper towel. High risk of rubbery texture.
Cold Service: Many deboned fish dishes are excellent at room temperature or chilled (e.g., salads, tacos). Reheating isn’t always necessary.
Nutritional Information
Estimates per 4oz fillet (varies by species):
Calories: 200-280 kcal
Protein: 25-30g
Carbohydrates: 0g
Fat: 8-15g (depends on fish fat content)
Fiber: 0g
Sugar: 0g
Sodium: 60-100mg (naturally occurring; increases with seasoning)
Note: Values are approximate. Fatty fish like mackerel/salmon have higher calories/fat than lean fish like cod/tilapia.
Troubleshooting Guide
Problem
Cause
Solution
Fish Falls Apart
Overcooked or handled too roughly.
Next time: Reduce cook time. Handle with wider tongs. Accept “rustic” presentation; flavor is still good.
Bone Won’t Release
Undercooked or connective tissue tough.
Return to oven 2-3 mins. Use knife to carefully cut attachments. Don’t force it.
Fillets Stick to Pan
Insufficient oil or wrong pan.
Next time: Oil pan well or use parchment. To fix: Slide thin spatula under fillet gently to release.
Pin Bones Remain
Incomplete inspection.
Run finger/knife along center line. Use tweezers to pull out stragglers. Better safe than sorry.
Skin Tears Off
Skin not crispy enough or lifted wrong.
Next time: Crisp skin thoroughly before deboning. Lift flesh, not skin, when removing top fillet.
Bitter Taste
Gall bladder ruptured during cleaning.
Trim affected area generously. Rinse fillet. Mask with acidic sauce (lemon/vinegar).
Frequently Asked Questions
1. Can I debone a fish before cooking? Yes, this is called “filleting.” However, it requires raw fish handling skills and sharp knives. Post-cook deboning is generally easier for home cooks because heat loosens the bones naturally. Choose based on your comfort level.
2. Does this work on flatfish like sole or flounder? Flatfish have different bone structures (two spines). The technique is similar but requires lifting each side separately. Round fish are easier for beginners. Practice on round fish first.
3. What if I break the fillet during removal? Don’t panic! Broken fillets taste exactly the same. Serve them family-style in a bowl with sauce, or use them for fish tacos/salads. Presentation isn’t everything; flavor is.
4. Is it safe to eat fish if I miss a bone? Small pin bones are generally harmless if swallowed, but they’re unpleasant. Always do a thorough check. If serving children/elderly, be extra meticulous. When in doubt, flake the fish manually to inspect.
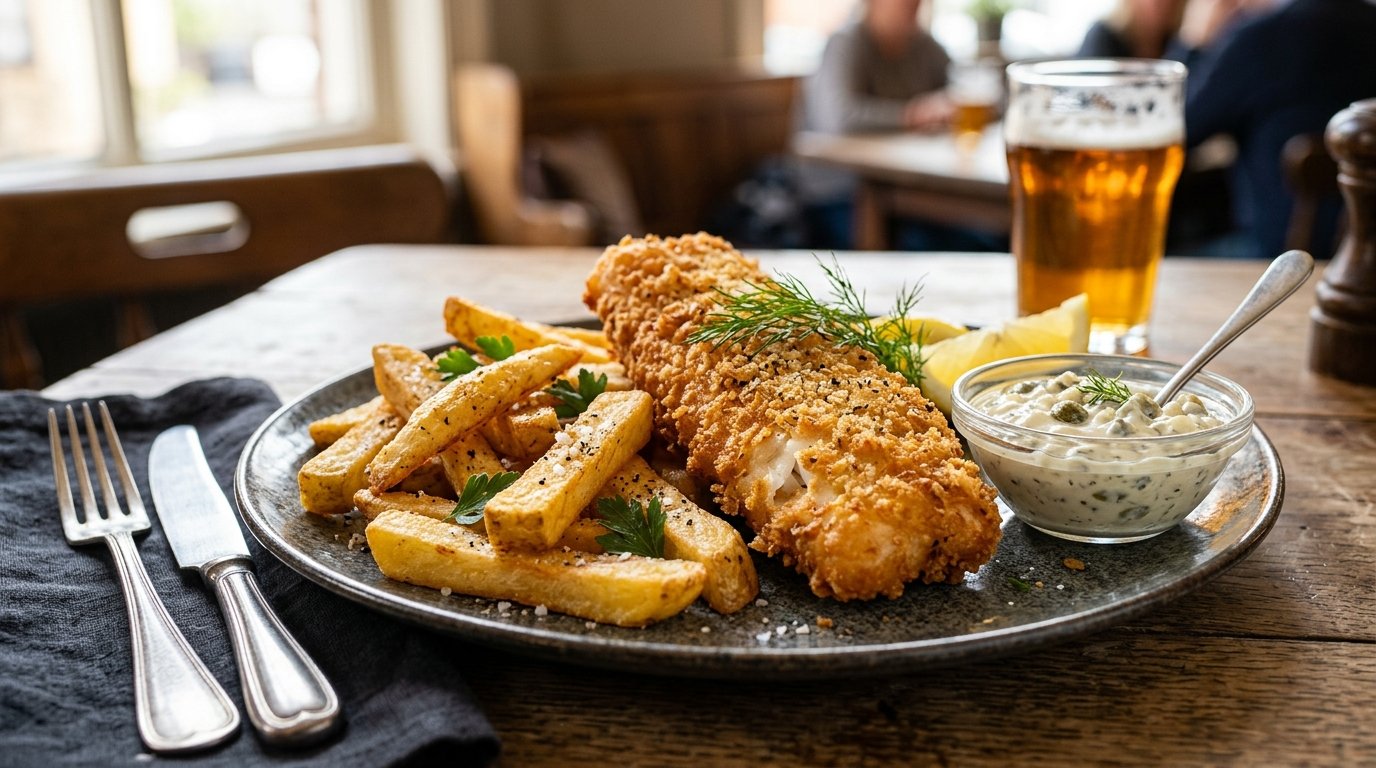
5. Can I use this technique for fried fish? Yes, but be careful of hot oil splatter. Let fried fish drain and cool slightly. The crisp skin may crack, but the bone removal principle remains the same. Tongs are essential for safety.
6. Why does my fish smell “fishy” after cooking? Fresh fish should smell like the ocean, not ammonia. Strong odor indicates age. Debones won’t fix this. Always buy from reputable sources. Acid (lemon/vinegar) can mask mild odors but not spoilage.
7. How do I know when the fish is perfectly cooked for deboning? Internal temp should reach 135-140°F (57-60°C). Flesh should be opaque and flake easily with a fork but still hold together. If it flakes into dust, it’s overdone.
8. Can I debone fish in advance for a party? Yes! Debone while warm, then let fillets cool on the pan. Reheat gently before serving or serve at room temperature. This actually makes party service smoother since you’re not wrestling bones in front of guests.
Final Thoughts
Mastering how to debone a whole roasted fish is a transformative skill that unlocks the full potential of whole-fish cookery. It bridges the gap between rustic preparation and refined dining, allowing you to serve impressive meals with confidence. Remember that perfection comes with practice; even professional chefs occasionally tear a fillet. The key is patience, gentle handling, and respecting the ingredient.



1 thought on “How to Debone a Whole Roasted Fish: The Chef’s Guide to Perfect Fillets”