
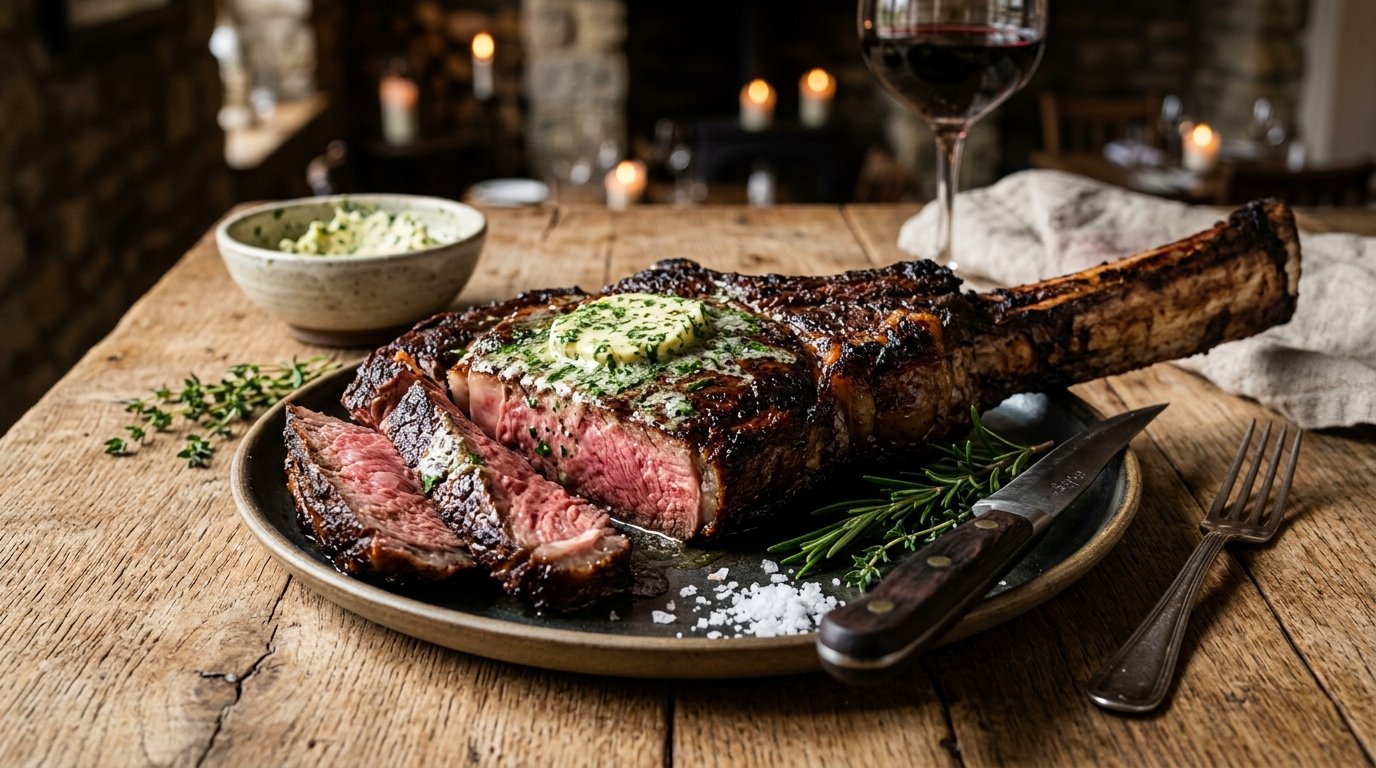
Quick Recipe Summary
| Detail | Information |
|---|---|
| Prep Time | 15 minutes |
| Cook Time | 45–60 minutes (variable) |
| Total Time | ~1 hour 15 minutes |
| Servings | 2–3 (sharing) |
| Cuisine | American Steakhouse / BBQ Fusion |
| Course | Main Course |
| Difficulty | Intermediate |
| Calories | ~850 per serving |
Table of Contents
- Introduction
- Why This Recipe Works
- Why You’ll Love This Recipe
- Ingredient Notes
- Kitchen Equipment
- Preparation Information
- Step-by-Step Instructions
- Expert Tips for Perfect Doneness
- Common Mistakes to Avoid
- Recipe Variations
- What to Serve With This Recipe
- Make Ahead & Meal Prep Tips
- Storage Instructions
- Reheating Instructions
- Nutritional Information
- Troubleshooting Guide
- Frequently Asked Questions
- Final Thoughts
Introduction
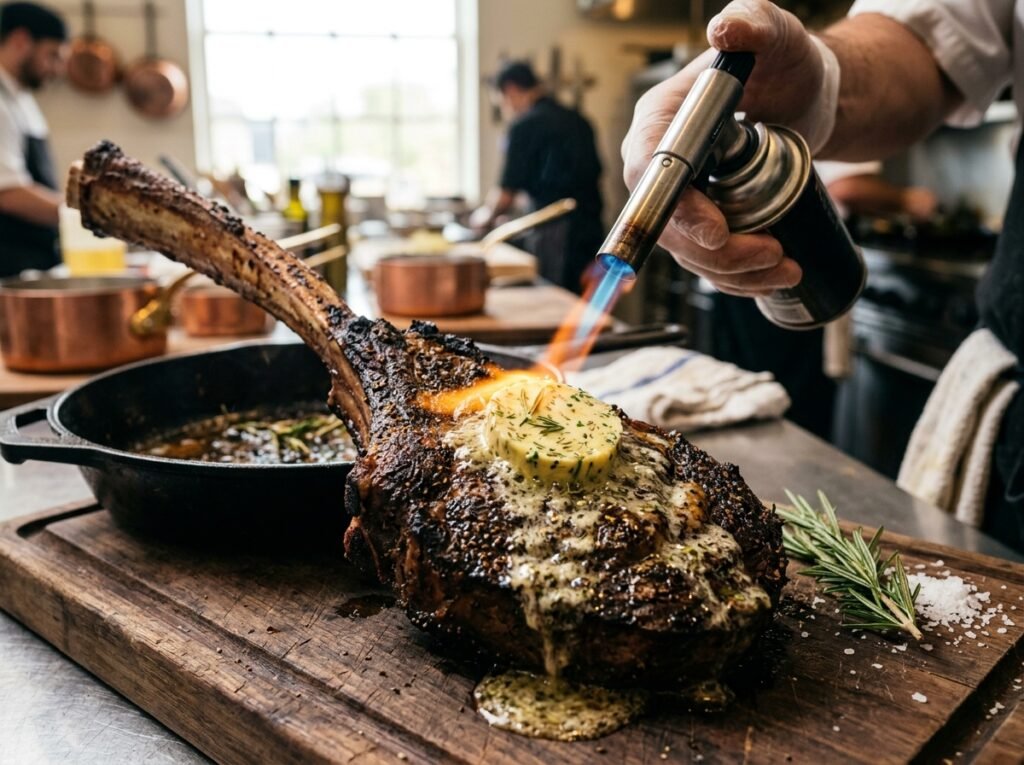
There is a primal satisfaction in cooking a tomahawk steak that few other culinary experiences can match. With its dramatic, frenched rib bone extending like a handle, this cut isn’t just dinner; it’s an event. However, achieving a perfect edge-to-edge medium-rare interior on such a thick cut requires precision. That is where this reverse-sear tomahawk steak method shines. By combining the gentle, smoky heat of a pellet grill with a final, aggressive sear and a theatrical torch finish, we unlock a texture and flavor profile that rivals top-tier steakhouses.
This technique solves the age-old problem of the “gray band”—that overcooked ring of meat just beneath the crust that plagues traditionally grilled thick steaks. Instead, the reverse-sear tomahawk steak cooks gently at a low temperature until it reaches the exact internal doneness you desire. Only then do we introduce high heat to create a shattering crust without sacrificing the juicy, tender center. Topped with melting herb butter torched directly on the meat, this recipe transforms a premium cut into an unforgettable centerpiece for your next gathering.
Why This Recipe Works
The science behind the reverse sear is simple yet profound. Traditional grilling applies high heat immediately, causing the exterior to cook much faster than the interior. For a 2-inch thick tomahawk, by the time the center hits 130°F, the outer inch has often surpassed 150°F. The reverse sear flips this dynamic. By starting at a low temperature (250°F), the thermal gradient between the surface and the core remains minimal. The entire steak rises in temperature almost uniformly.
When you finally apply the high heat sear (420°F+) and the culinary torch, you are only browning the surface proteins via the Maillard reaction. Because the interior is already at target temperature, the intense heat doesn’t have time to penetrate deeply before the crust forms. The result is a steak that is perfectly pink from edge to edge. Additionally, the initial low-temp phase in a smoker allows smoke particles to adhere to the moist surface of the meat for hours, infusing a depth of flavor that a quick 10-minute grill session simply cannot achieve.
Why You’ll Love This Recipe
- Edge-to-Edge Perfection: Eliminates the gray band of overcooked meat found in traditional grilling.
- Smoky Depth: Hours of low-temp smoking infuse the beef with rich wood-fired flavor.
- Theatrical Presentation: The torch finish creates a sizzling, aromatic spectacle right at the table.
- Forgiving Timing: Unlike direct grilling, the low-temp phase gives you a wide window of perfect doneness, reducing stress.
- Juicy Texture: Gentle cooking preserves moisture better than high-heat-only methods.
- Versatile Finishing: The herb butter torch step adds a layer of richness and aroma that elevates the beef.
Ingredient Notes
Tomahawk Ribeye Steak (30-40 oz)
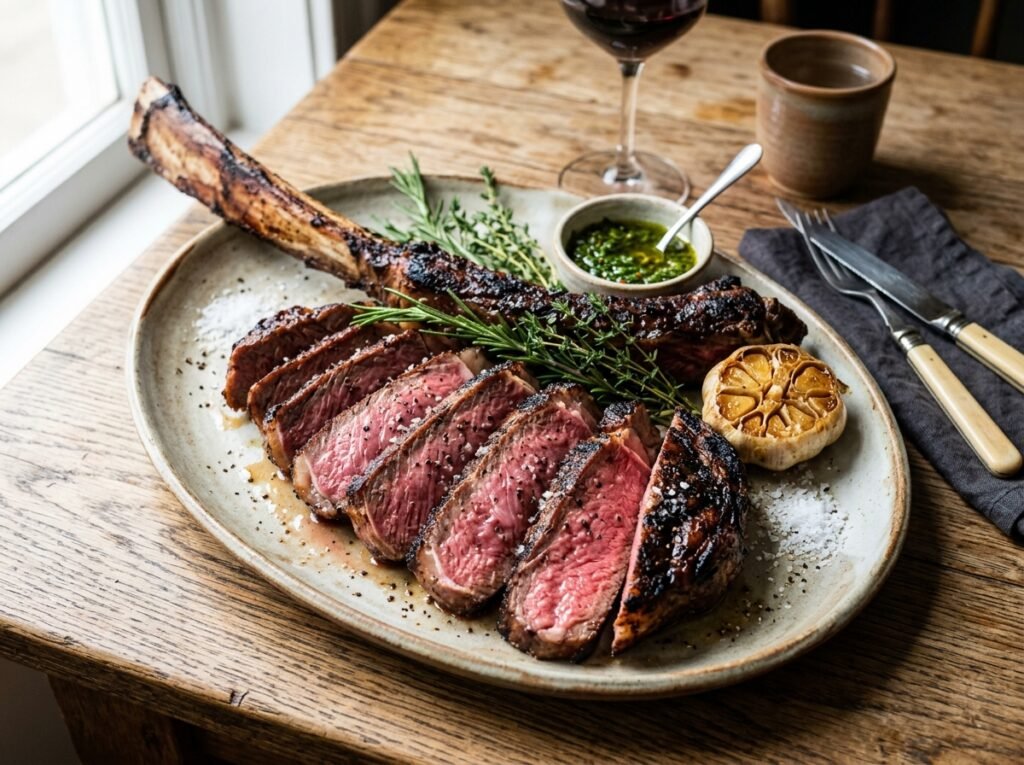
- Purpose: The star protein. The long bone acts as a natural handle and insulator, while the heavy marbling ensures juiciness during the long cook.
- Substitutions: Bone-in ribeye (cowboy steak) if a tomahawk is unavailable. Avoid boneless cuts as they lack the structural integrity for this specific torch finish.
- Buying Tips: Look for bright red color, creamy white fat, and consistent marbling throughout. The bone should be cleanly frenched (meat scraped off). Thickness should be at least 2 inches.
- Storage Tip: Keep refrigerated in original packaging until ready to prep. If freezing, vacuum seal to prevent freezer burn.
Neutral Oil (Avocado or Grapeseed)
- Purpose: Creates a conductive layer for seasoning adhesion and promotes even browning during the sear.
- Substitutions: Canola oil or light olive oil. Avoid extra virgin olive oil or butter for the initial coat as they have low smoke points.
- Buying Tips: Choose oils with smoke points above 400°F. Avocado oil is ideal for its neutral flavor and high heat tolerance.
- Storage Tip: Store in a cool, dark place. Oil can go rancid if exposed to heat and light.
Kosher Salt & Coarse Black Pepper
- Purpose: Fundamental seasoning. Salt enhances flavor and aids in crust formation; pepper adds aromatic heat.
- Substitutions: Sea salt flakes work well. White pepper can be used for a different visual aesthetic but lacks the classic bite.
- Buying Tips: Use flaky kosher salt (like Diamond Crystal) rather than table salt for better control and distribution. Freshly cracked pepper is non-negotiable.
- Storage Tip: Keep salt dry. Store peppercorns whole and grind just before use for maximum volatile oils.
Compound Herb Butter
- Purpose: Adds richness, moisture, and aromatic complexity during the torch finish. The herbs toast slightly, releasing essential oils.
- Substitutions: Garlic butter, blue cheese butter, or truffle butter depending on preference.
- Buying Tips: Use high-fat European-style butter (82%+ fat) for better melting and less water content. Fresh herbs are superior to dried for this application.
- Storage Tip: Make ahead and freeze in logs wrapped in parchment. Slice discs as needed. Keeps frozen for 3 months.
Wood Pellets (Hickory or Oak)
- Purpose: Provides the smoke flavor during the low-temp phase. Hickory offers a strong, bacon-like smoke; oak is milder and versatile.
- Substitutions: Mesquite (stronger, use sparingly), Cherry (sweeter, milder), or Apple (fruity, subtle).
- Buying Tips: Ensure pellets are food-grade and free from additives or fillers. Hardwood pellets burn cleaner than softwoods.
- Storage Tip: Keep absolutely dry. Moisture causes pellets to swell and jam augers. Store in sealed bins.
Kitchen Equipment
- Pellet Grill/Smoker: Essential for maintaining precise low temperatures (250°F) and generating consistent smoke. Brands like Traeger or Camp Chef excel here.
- Instant-Read Meat Thermometer: Non-negotiable for accuracy. Leave-in probe thermometers are ideal for monitoring without opening the lid.
- Culinary Torch: Butane torch for the finishing melt. Provides localized, intense heat that won’t overcook the steak.
- Heavy-Duty Tongs: For safely handling the massive steak during transfers.
- Cast Iron Skillet or Grill Grates: For the high-heat sear phase. Cast iron retains heat best for a uniform crust.
- Cutting Board & Sharp Knife: A sturdy board is crucial for slicing through bone and meat safely.
- Aluminum Foil: For resting the steak to retain heat and juices.
- Basting Brush: Optional, for applying oil evenly before seasoning.
Preparation Information
- Prep Time: 15 minutes
- Cook Time: 45–60 minutes (plus rest)
- Total Time: ~1 hour 15 minutes
- Servings: 2–3 people
Step-by-Step Instructions
Seasoning and Prepping the Beast
Remove the tomahawk from the fridge 30 minutes before cooking to take the chill off. Pat the steak completely dry with paper towels—moisture is the enemy of a good crust. Rub the entire surface lightly with avocado oil. Generously season all sides, including the bone and edges, with kosher salt and coarse black pepper. Press the seasoning into the meat so it adheres.
Why this matters: Drying the surface ensures the Maillard reaction occurs efficiently later. Oil acts as a binder for the salt and helps conduct heat. Seasoning early allows the salt to begin penetrating the muscle fibers, enhancing flavor deep within the cut. Don’t be shy with salt; a steak this size needs significant seasoning to taste balanced.
Visual Cues: The steak should look matte and dry, not glistening with moisture. The seasoning should form a visible, even coating. No bare patches of raw meat should be visible.
The Low-and-Slow Smoke Phase
Preheat your pellet grill to 250°F (120°C). Add your chosen wood pellets (hickory or oak recommended). Place the seasoned tomahawk directly on the grill grates. Insert a leave-in probe thermometer into the thickest part of the meat, avoiding the bone and large fat pockets. Close the lid and let it smoke until the internal temperature reaches 115°F–120°F (46°C–49°C) for medium-rare. This typically takes 45–60 minutes depending on thickness and grill consistency.
Why this matters: This phase is about gentle cooking and smoke infusion. At 250°F, the collagen begins to soften without tightening the muscle fibers excessively. The smoke particles adhere best to the moist, cool surface of the meat during this stage. Pulling at 115°F–120°F accounts for the temperature rise during the subsequent sear (carryover cooking).
Aroma Cues: You should smell a steady, sweet wood smoke. If the smoke smells acrid or bitter, your fire might be too hot or the pellets damp. Adjust airflow or pellet feed rate.
Texture Cues: The steak will feel firm but yielding to the touch, similar to the fleshy part of your palm below the thumb when relaxed. It will not have a crust yet; the surface will be tacky and darkened by smoke (the “pellicle”).
The High-Heat Sear
Once the target internal temp is reached, remove the steak and tent loosely with foil. Crank your pellet grill to its highest setting (usually 450°F–500°F) or preheat a cast iron skillet on a separate burner to screaming hot. When the grill/skillet is maxed out, return the steak to the heat. Sear for 60–90 seconds per side, including the fat cap edge. Watch closely to prevent burning.
Why this matters: This step creates the textural contrast essential to a great steak. The high heat rapidly browns the surface proteins and renders the external fat. Because the interior is already cooked, you only need a minute or two per side. Searing the fat cap is crucial; unrendered fat is chewy and unpleasant.
Visual Cues: Look for a deep mahogany crust forming. Smoke will increase significantly. Fat should bubble and render visibly. If flames flare up excessively, move the steak briefly to avoid soot.
Common Mistakes: Leaving the steak on too long during the sear will overshoot your internal temp. Trust your thermometer. If using a pellet grill, ensure the lid is closed during the sear to maintain max temp; open-lid searing loses too much heat.
The Torch and Butter Finish
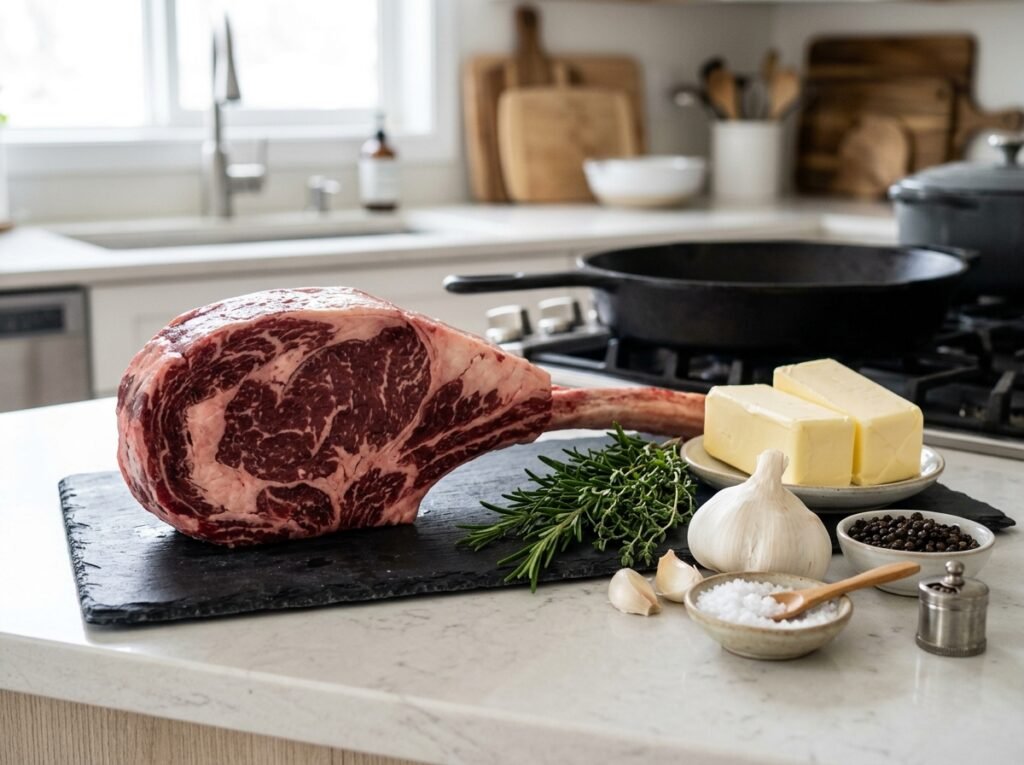
Transfer the seared steak to a cutting board or heat-safe platter. Immediately place 2-3 discs of compound herb butter on top of the hot meat. Ignite your culinary torch and pass the flame evenly over the butter and the surface of the steak. The butter should melt, foam, and sizzle aggressively. The herbs should darken slightly and become fragrant. Let the steak rest for 10 minutes before slicing against the grain.
Why this matters: The torch provides intense, localized heat that melts the butter instantly without further cooking the steak’s interior. The foaming butter bastes the crust, adding gloss and flavor. The toasted herbs release aromatic compounds that perfume the meat. Resting allows the muscle fibers to relax and reabsorb juices; cutting immediately causes them to spill out onto the board.
Aroma Cues: The scent of toasted garlic, herbs, and browned butter should be intoxicating. If you smell burning butter, you’ve held the torch too close or too long in one spot.
Visual Cues: Butter should be fully melted and bubbling, pooling around the steak. Herbs should be vibrant green with slight char marks, not blackened. The crust should glisten with rendered fat and butter.
Expert Tips for Perfect Doneness
- Trust the Probe, Not the Clock: Every tomahawk varies in thickness and density. Your thermometer is the only reliable guide. Calibrate it periodically in ice water (32°F) to ensure accuracy.
- Dry Brine Option: For even deeper seasoning, salt the steak 24 hours ahead and leave it uncovered in the fridge. This dries the surface further and seasons the interior more thoroughly. Bring to room temp before smoking.
- Butter Temperature Matters: Use cold butter discs for the torch finish. Cold butter melts slower, giving you more control over the torching process and preventing it from sliding off instantly.
- Sear the Bone Too: Don’t neglect the bone end. Briefly torch or sear the bone tip; it adds visual appeal and prevents raw-looking bone from detracting from the presentation.
- Slice Against the Grain: Identify the direction of the muscle fibers and cut perpendicular to them. This shortens the fibers, making each bite significantly more tender.
Common Mistakes to Avoid
- Pulling Too Late: Remember carryover cooking. If you want 130°F medium-rare, pull at 115°F–120°F. Pulling at 125°F will result in 135°F+ after resting and searing.
- Skipping the Rest: Cutting immediately releases precious juices. The 10-minute rest is mandatory for a juicy result. Tent loosely with foil to keep warm without steaming the crust.
- Over-Torching: Holding the torch stationary burns the butter and creates bitter flavors. Keep the flame moving constantly in a sweeping motion.
- Crowding the Grill: Ensure adequate space around the steak for airflow. Blocked vents reduce smoke circulation and temperature stability.
- Using Thin Steaks: Reverse sear is designed for thick cuts (1.5″+). Thin steaks will overcook before developing proper smoke flavor or crust. Stick to traditional grilling for thinner cuts.
Recipe Variations
- Spicy Cajun Crust: Replace pepper with a Cajun spice blend containing cayenne, paprika, and garlic powder for a Louisiana twist.
- Coffee-Chocolate Rub: Mix finely ground coffee and unsweetened cocoa powder with salt and pepper for an earthy, complex crust that pairs beautifully with beef.
- Blue Cheese Butter Finish: Substitute herb butter with crumbled blue cheese mixed into softened butter. The pungent cheese melts into a luxurious sauce under the torch.
- Garlic-Herb Baste: During the sear phase, add whole garlic cloves and rosemary sprigs to the skillet/grill and baste the steak with the infused fat before torching.
- Low-Carb/Keto Friendly: This recipe is naturally keto. Ensure your compound butter uses no added sugars and serve with roasted asparagus or cauliflower mash instead of potatoes.
- Boneless Ribeye Adaptation: Use a thick-cut boneless ribeye. Reduce smoke time slightly as it cooks faster, but maintain the same reverse-sear principles.
- Venison or Elk Tomahawk: Apply this method to game meats, but reduce smoke time to 30 minutes to avoid overpowering the delicate flavor. Use milder woods like apple or cherry.
- Umami Bomb Marinade: Briefly marinate (2 hours max) in soy sauce, Worcestershire, and mushroom powder before drying and smoking for an intense savory boost.
What to Serve With This Recipe
A tomahawk demands sides that complement its richness without competing.
- Side Dishes: Creamy mashed potatoes, roasted fingerling potatoes with rosemary, grilled asparagus with lemon, or macaroni and cheese.
- Salads: Arugula salad with shaved Parmesan and balsamic glaze, or a classic wedge salad with blue cheese dressing to cut the fat.
- Sauces: Béarnaise sauce, chimichurri, or a red wine reduction. The herb butter torch finish often makes additional sauce unnecessary.
- Drinks: Bold Cabernet Sauvignon, Malbec, or a smoky Mezcal Old Fashioned. The tannins in red wine stand up to the beef’s richness.
- Desserts: Dark chocolate torte, crème brûlée, or espresso panna cotta. Rich, bitter-sweet desserts balance the savory meal.
Make Ahead & Meal Prep Tips
You can prepare the compound butter up to a week in advance and freeze it for months. Season the steak up to 24 hours ahead (dry brine method) and store uncovered in the fridge. The actual cooking must be done fresh for optimal texture, but having components prepped streamlines the process significantly. If hosting, set up your grill and torch station before guests arrive so the finishing steps are performative rather than stressful.
Storage Instructions
- Refrigerator: Store leftover cooked steak in an airtight container for up to 3 days. Separate from sides to prevent sogginess.
- Freezer: Freeze sliced steak in a single layer on parchment, then transfer to a freezer bag for up to 3 months. Whole leftovers freeze poorly due to texture changes upon reheating.
- Raw Steak: Vacuum-seal and freeze for up to 12 months. Thaw slowly in the fridge for 48 hours before cooking.
Reheating Instructions
- Oven (Best Method): Preheat to 250°F. Place steak on a wire rack over a baking sheet. Heat until internal temp reaches 110°F (about 15-20 mins). Quickly sear in a hot skillet for 30 seconds per side to restore crust.
- Air Fryer: Reheat at 300°F for 3-4 minutes. Check frequently to avoid overcooking. Finish with a quick torch blast if crust has softened.
- Stovetop: Slice cold steak thinly. Warm gently in a skillet over low heat with a pat of butter for 1-2 minutes. Do not boil or fry; just warm through.
- Microwave (Last Resort): Use 30% power in 30-second intervals. Cover with damp paper towel. Expect some texture loss; this method is purely for convenience.
Nutritional Information
Values are approximate per 6oz serving:
- Calories: 850
- Protein: 65g
- Carbohydrates: 2g
- Fat: 62g
- Fiber: 0g
- Sugar: 0g
- Sodium: 980mg
Troubleshooting Guide
- Steak Overcooked: Next time, pull from smoker 5-10 degrees earlier. Carryover cooking is real. For now, slice thinly and serve with extra compound butter to mask dryness.
- No Smoke Flavor: Check pellet hopper for jams. Ensure grill vent is open for airflow. Verify pellets are dry and food-grade. Increase smoke time by 15 minutes next cook.
- Crust Not Forming: Surface was too wet before searing. Pat dryer next time. Ensure searing surface is screaming hot (450°F+). Don’t move steak during sear; let it develop contact.
- Butter Burning During Torch: Flame too close or held too long. Use cold butter discs. Keep torch moving continuously. Increase distance between flame and steak.
- Uneven Cooking: Steak wasn’t uniform thickness. Trim uneven edges before cooking. Rotate steak 180° halfway through smoke phase to compensate for grill hot spots.
- Gray Band Still Present: Smoker temp was too high (>275°F). Lower temp next time. Ensure accurate thermometer placement away from bone/fat.
Frequently Asked Questions
1. Can I reverse sear without a pellet grill? Yes! Use an oven set to 250°F with a smoking box or stovetop smoker for the low phase. Finish with a cast iron sear and torch. You’ll miss some smoke flavor but retain the edge-to-edge perfection.
2. How do I know when the steak is done without cutting it? Use an instant-read thermometer. For medium-rare, pull at 115°F–120°F during smoking. Final temp after sear/rest will be 130°F–135°F. Touch tests are unreliable for thick cuts.
3. Is the torch necessary? Not strictly, but it’s transformative. It melts butter precisely without overcooking and adds theatrical flair. A broiler can substitute but lacks control and risks overheating the steak.
4. Can I reuse the bone for stock? Absolutely! Roast the cleaned bone at 400°F for 30 minutes, then simmer with veggies and water for 4-6 hours. Makes incredible beef stock.
5. Why does my steak taste bitter? Likely burnt butter or over-torched herbs. Keep torch moving. Alternatively, acrid smoke from dirty grill or damp pellets can cause bitterness. Clean grill and use fresh pellets.
6. How thick should the steak be? Minimum 2 inches for reverse sear. Thinner cuts cook too fast for smoke penetration and risk overcooking during sear. Ideal range is 2-2.5 inches.
7. Can I marinate a tomahawk? Briefly (2-4 hours max) in acidic marinades. Longer soaks break down texture mushily. Dry brining with salt is superior for flavor penetration without texture compromise.
8. What wood pellets pair best with beef? Hickory and oak are classics. Mesquite is strong—use sparingly. Fruit woods like cherry or apple add subtle sweetness. Avoid softwoods (pine, cedar) which contain resins toxic when burned.
9. Do I need to trim the fat cap? Score it in a crosshatch pattern to help rendering, but don’t remove it entirely. The fat bastes the meat during cooking and adds flavor. Trim excessive hard fat only.
10. Can I make this indoors? Yes, with caveats. Use oven for low phase (add liquid smoke if desired). Sear in cast iron on stovetop. Torch finish works anywhere. Ensure kitchen ventilation is excellent for searing smoke.
Final Thoughts
Mastering the reverse-sear tomahawk steak is a rite of passage for any serious home cook. It teaches patience, precision, and respect for quality ingredients. The reward—a perfectly pink, smoky, buttery masterpiece—is worth every minute of attention. Don’t be intimidated by the size or the technique; trust the process, rely on your thermometer, and embrace the drama of the torch finish. This isn’t just dinner; it’s a celebration of craftsmanship and flavor. We’d love to hear about your tomahawk triumphs! Share your photos and tips in the comments below, and don’t forget to rate the recipe if it earned a spot in your rotation.