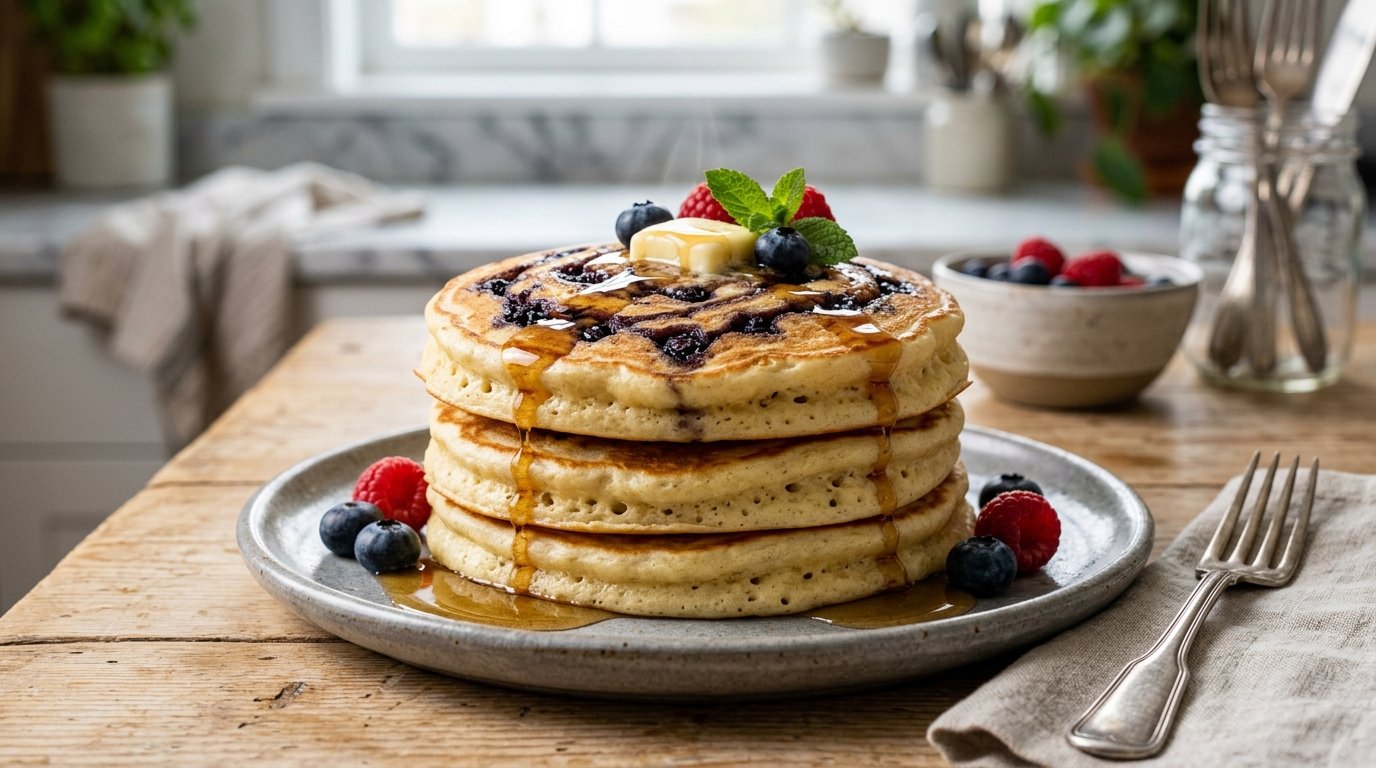
There is something undeniably magical about breakfast food that looks as good as it tastes. If you are looking to elevate your morning routine or impress guests at a weekend brunch, these piped spiral pancakes are the perfect solution. Unlike traditional pancakes that rely on a ladle and often result in uneven shapes, this method uses a piping bag to create uniform, beautiful rosettes with a distinct swirl pattern. The result is a stack of golden-brown discs that are not only visually stunning but also incredibly fluffy, tender, and delicious.
The secret to their superior texture lies in the batter itself. By incorporating yogurt and honey into the mix, we achieve a moisture level that keeps the pancakes soft long after they leave the griddle. The yogurt adds a subtle tang and reacts with the baking powder for extra lift, while the honey promotes even browning and adds a delicate sweetness. Whether you serve them simply dusted with sugar, stacked high with maple syrup, or filled with fresh berries, these swirl pancakes are guaranteed to become a family favorite. Let’s dive into how you can master this technique in your own kitchen.
Quick Recipe Summary
| Feature | Details |
|---|---|
| Prep Time | 15 minutes |
| Cook Time | 20 minutes |
| Total Time | 35 minutes |
| Servings | 8-10 Pancakes |
| Cuisine | American / International |
| Course | Breakfast / Brunch |
| Difficulty | Easy |
| Calories | ~180 kcal per pancake |
Table of Contents
| Section | Description |
|---|---|
| Introduction | Why these pancakes are special |
| Why This Recipe Works | The science behind the fluffiness |
| Why You’ll Love This Recipe | Key benefits and features |
| Ingredient Notes | Detailed breakdown of components |
| Kitchen Equipment | Tools needed for success |
| Step-by-Step Instructions | From mixing to plating |
| Expert Tips | Professional advice for perfection |
| Common Mistakes | Troubleshooting your batter |
| Recipe Variations | Flavor twists and dietary swaps |
| What to Serve With This Recipe | Toppings and sides |
| Make Ahead & Storage | Keeping them fresh |
| Reheating Instructions | Restoring the fluff |
| Nutritional Information | Approximate macros |
| Troubleshooting Guide | Fixing common issues |
| Frequently Asked Questions | Reader Q&A |
| Final Thoughts | Encouragement to cook |
Introduction
Breakfast is often the most rushed meal of the day, but it doesn’t have to be boring. These piped spiral pancakes transform a simple staple into an elegant culinary experience. The technique of piping batter directly onto the pan might seem like a novelty, but it serves a functional purpose: it creates consistent thickness and surface area, ensuring every pancake cooks evenly and develops that signature caramelized swirl.
I first encountered this method while researching international street foods, where vendors use precision to maximize efficiency and presentation. Bringing this technique home allows you to replicate that professional quality without specialized equipment. All you need is a standard plastic bag or piping bag and a non-stick skillet. The batter comes together in minutes, relying on pantry staples like flour, eggs, milk, and yogurt. The addition of honey isn’t just for flavor; its hygroscopic nature helps retain moisture, preventing the dreaded dry pancake syndrome. Whether you are a seasoned home cook or a beginner looking for a fun project, this recipe delivers reliable, restaurant-quality results that will make your mornings brighter.
Why This Recipe Works
The success of any pancake recipe hinges on the balance of wet and dry ingredients and the leavening agents used. In this recipe, the combination of yogurt and baking powder is the powerhouse duo. Yogurt is acidic, which activates the baking powder more effectively than milk alone, creating larger air bubbles during cooking. This chemical reaction is what gives these swirl pancakes their impressive rise and cloud-like interior.
Furthermore, the viscosity of the batter is crucial for the piping technique. A batter that is too thin will spread into a puddle, losing the spiral definition. A batter that is too thick won’t pipe smoothly. The specific ratio of flour to liquid here creates a “ribbon-stage” consistency—thick enough to hold its shape when piped, yet fluid enough to settle slightly into a perfect circle. The honey also plays a structural role; it interferes with gluten formation slightly, ensuring the pancakes remain tender rather than chewy. This scientific balance means you aren’t just making pretty pancakes; you’re making chemically optimized ones.
Why You’ll Love This Recipe
- Visual Appeal: The spiral pattern is naturally Instagram-worthy and adds a touch of elegance to any breakfast table.
- Consistent Results: Piping eliminates the guesswork of ladling, giving you uniform pancakes every single time.
- Superior Texture: The yogurt-honey base ensures a moist, fluffy crumb that stays soft even as they cool.
- Kid-Friendly Activity: Kids love helping squeeze the piping bag, making breakfast prep a fun family bonding moment.
- Versatile Base: The mild sweetness pairs perfectly with both fruity toppings and rich chocolate sauces.
- Quick Prep: No yeast, no rising time, no waiting. Mix and cook immediately.
- Customizable Size: You control the diameter of the pancake by how much batter you pipe.
Ingredient Notes
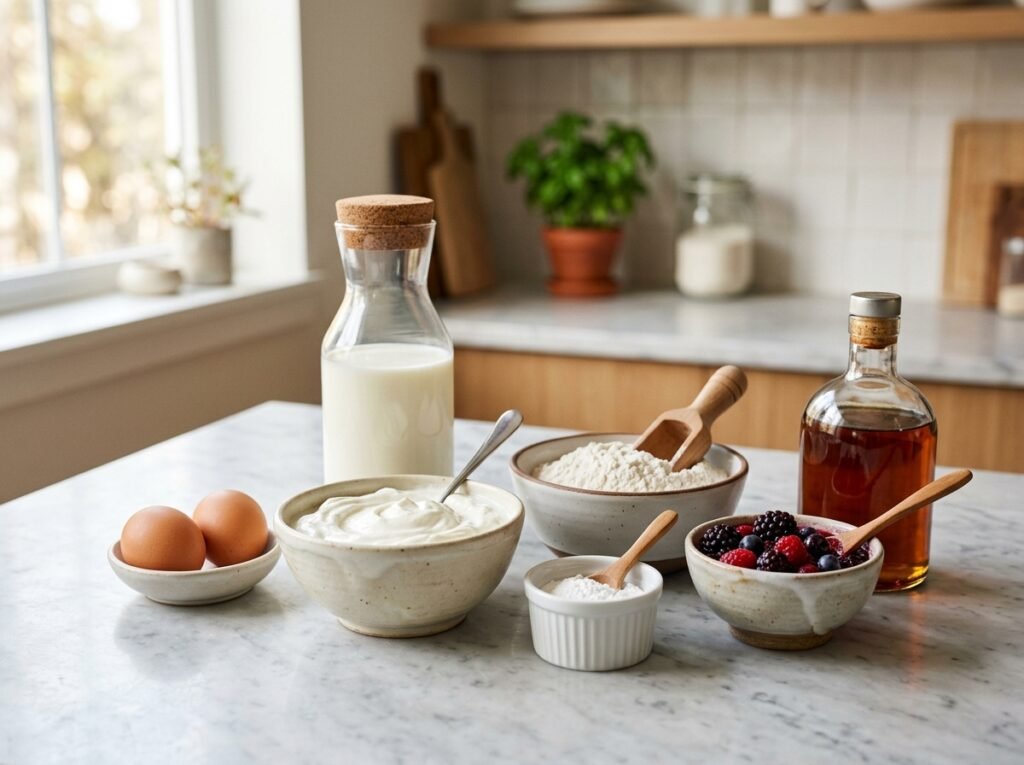
Eggs
- Purpose: Provide structure, richness, and emulsification. They bind the fat and liquid together.
- Substitutions: For eggless pancakes, use 1/4 cup unsweetened applesauce or a flax egg (1 tbsp ground flax + 3 tbsp water) per egg. Note that texture may be slightly denser.
- Buying Tips: Look for Grade A large eggs with clean shells. Room temperature eggs incorporate better into cold dairy.
Granulated Sugar
- Purpose: Sweetens the batter and aids in browning via caramelization.
- Substitutions: Coconut sugar or brown sugar work well but will darken the batter color. Liquid sweeteners like maple syrup can replace sugar but require reducing other liquids slightly.
- Tip: Don’t reduce sugar too much; it affects the Maillard reaction that creates that golden crust.
Vanilla Extract
- Purpose: Enhances overall flavor profile and masks any “eggy” taste.
- Substitutions: Almond extract (use half amount), lemon zest, or orange zest for a citrus twist.
- Quality Matters: Use pure vanilla extract, not imitation, for a depth of flavor that permeates the cooked pancake.
Milk
- Purpose: Hydrates the flour and dissolves sugar/salt. Provides necessary liquid volume.
- Substitutions: Buttermilk (adds extra tang/fluffiness), oat milk, almond milk, or coconut milk. Whole milk yields the richest result.
- Temperature: Cold milk is fine here since there’s no yeast to activate, but room temp mixes faster.
Plain Yogurt
- Purpose: Adds acidity for leavening, fat for tenderness, and protein for structure.
- Substitutions: Sour cream or Greek yogurt (thin with a little milk if using thick Greek style). Avoid flavored yogurts as they alter sweetness.
- Why It Works: The lactic acid weakens gluten strands, resulting in a softer bite.
Honey
- Purpose: Natural sweetener, humectant (retains moisture), and browning agent.
- Substitutions: Maple syrup, agave nectar, or corn syrup.
- Note: Honey makes the batter stickier; ensure your pan is well-greased to prevent sticking.
All-Purpose Flour
- Purpose: The main structural component providing gluten network.
- Substitutions: Cake flour (for lighter pancakes), whole wheat pastry flour (for nuttier flavor/fiber). Avoid heavy bread flour which makes them tough.
- Measurement: Spoon and level your flour. Scooping packs it down and leads to dense pancakes.
Baking Powder
- Purpose: Chemical leavening agent that creates gas bubbles for rise.
- Freshness Check: Test by dropping 1/2 tsp into hot water. If it fizzes vigorously, it’s active. Old baking powder = flat pancakes.
- Storage: Keep in a cool, dry place. Replace every 6 months once opened.
Oil (for greasing)
- Purpose: Prevents sticking and promotes even heat transfer/crisping.
- Type: Neutral oils like vegetable, canola, or grapeseed are best. Butter burns too quickly at pancake temps.
- Application: Use a silicone brush or paper towel for a thin, even coat. Too much oil causes greasy edges.
Kitchen Equipment
- Large Mixing Bowl: Wooden or glass preferred for whisking stability.
- Whisk: Essential for aerating eggs and smoothing batter without lumps.
- Measuring Cups & Spoons: Accuracy is key for chemical leavening balance.
- Piping Bag (or Ziploc Bag): The star tool for the spiral technique. A reusable silicone bag is eco-friendly; a disposable plastic bag works perfectly.
- Non-Stick Skillet or Griddle: Crucial for easy flipping and release. Cast iron works if well-seasoned.
- Silicone Spatula: For scraping bowls and gentle flipping.
- Tall Glass or Cup: To hold the piping bag upright while filling (prevents mess).
- Plate for Finished Pancakes: Keep warm in a 200°F oven if cooking in batches.
Step-by-Step Instructions
1. Combine Wet Ingredients
Crack two eggs into a large wooden bowl. Add granulated sugar and vanilla extract. Whisk vigorously for 1-2 minutes until the mixture is pale yellow and slightly frothy. Pour in the milk and plain yogurt. Whisk again until fully combined and smooth. Finally, drizzle in the honey and whisk until incorporated.
- Why it matters: Dissolving sugar in the eggs first ensures even sweetness. Frothing incorporates air early.
- Visual Cue: Mixture should be uniform yellow, no streaks of white yogurt.
- Aroma Cue: Sweet, creamy vanilla scent.
2. Incorporate Dry Ingredients
Sift the all-purpose flour and baking powder directly into the wet mixture. Sifting prevents lumps and aerates the flour. Begin whisking gently from the center outward. As the flour hydrates, the batter will thicken significantly. Continue whisking until just combined.
- Texture Cue: Batter will look thick and shaggy initially.
- Common Mistake: Overmixing at this stage develops gluten, leading to rubbery pancakes. Stop when no dry streaks remain.
3. Adjust Consistency
If the batter is too stiff to pipe (like cookie dough), add a splash of milk (1 tbsp at a time). Whisk gently to incorporate. The goal is a thick but flowable consistency—similar to heavy cream or cake batter. Lift the whisk; the batter should fall in a slow, continuous ribbon that holds its shape briefly before melting back into the bowl.
- Why it matters: This “ribbon stage” is critical for holding the spiral shape in the pan.
- Pro Tip: Let the batter rest for 5 minutes. This allows the flour to fully hydrate and baking powder to start activating.
4. Prepare Piping Bag
Place your piping bag (or Ziploc bag with corner snipped off) inside a tall glass to hold it open and stable. Pour the batter into the bag, filling it no more than 2/3 full to allow room for twisting/sealing. Twist the top of the bag to create pressure. Snip a small hole (approx. 1/2 inch) in the tip if using a Ziploc.
- Safety Tip: Test squeeze over the bowl first to check flow rate. Adjust hole size if needed.
5. Pipe and Cook
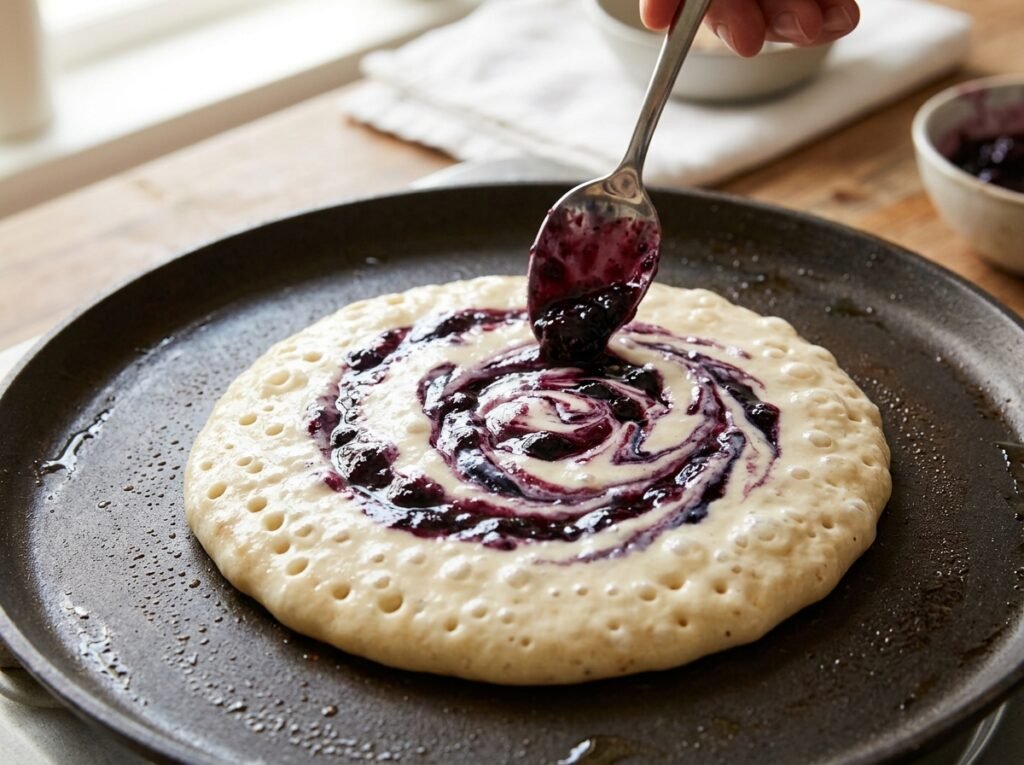
Heat your non-stick skillet over medium-low heat. Brush lightly with oil. Hold the piping bag vertically about 2 inches above the pan. Squeeze steadily while moving your hand in a tight circular motion, starting from the center and spiraling outward. Release pressure at the edge to stop the flow. Repeat to fill the pan, leaving space between pancakes.
- Visual Cue: Batter should hold distinct ridges initially.
- Cooking Cue: Cook for 2-3 minutes. Watch for bubbles forming on the surface and popping, leaving small holes. Edges should look set and matte, not shiny/wet.
- Flip: Slide spatula underneath confidently. Flip in one smooth motion. Cook second side for 1-2 minutes until golden brown.
6. Finish and Serve
Transfer cooked pancakes to a plate. For a classic finish, dip the top of each warm pancake into a bowl of granulated sugar. The residual heat melts the sugar slightly, creating a sparkling, crunchy-sweet crust. Alternatively, serve immediately with butter and syrup.
- Texture Cue: Sugar-dipped pancakes have a delightful textural contrast: crisp exterior, soft interior.
- Serving Tip: Stack them while warm to trap steam and keep them fluffy.
Expert Tips
- Pan Temperature is King: Medium-low is usually ideal. Too hot = burnt outside, raw inside. Too cool = pale, tough pancakes. Do a test pancake to calibrate your stove.
- Grease Between Batches: Even non-stick pans benefit from a light re-grease every 2-3 pancakes to maintain that perfect golden crust.
- Don’t Press Down: Never press pancakes with the spatula after flipping. This squeezes out the air bubbles you worked so hard to create, making them dense.
- Batter Resting: That 5-minute rest isn’t optional. It relaxes the gluten and ensures maximum fluffiness. Use this time to heat your pan.
- Piping Practice: If your spirals look messy, practice on a plate first. Consistent pressure and speed are key. It gets easier with each pancake.
Common Mistakes
- Lumpy Batter: Caused by adding flour all at once or under-whisking. Fix: Sift flour and whisk thoroughly but gently. Small lumps are okay; big clumps are not.
- Flat Pancakes: Usually old baking powder or overmixing. Fix: Test leavening freshness. Mix wet/dry separately then combine gently.
- Sticking to Pan: Pan not hot enough, not greased enough, or flipped too early. Fix: Ensure pan is properly preheated and oiled. Wait for edges to set before flipping.
- Burnt Spirals: Heat too high. The raised ridges cook faster than the valleys. Fix: Lower heat. The spiral needs gentle, even cooking to brown uniformly.
- Dense Texture: Too much flour or not enough leavening. Fix: Measure flour correctly (spoon & level). Ensure baking powder is fresh.
Recipe Variations
- Blueberry Burst: Fold 1/2 cup fresh or frozen blueberries into the batter right before piping. Press a few onto the surface after piping for visual appeal.
- Chocolate Chip Swirl: Add 1/3 cup mini chocolate chips to the batter. The chips melt slightly during cooking, creating gooey pockets.
- Lemon Poppy Seed: Add zest of 1 lemon and 1 tbsp poppy seeds. The acid in the zest brightens the yogurt flavor beautifully.
- Banana Bread Style: Mash 1 ripe banana into the wet ingredients. Reduce milk by 2 tbsp to compensate for banana moisture. Add pinch of cinnamon.
- Vegan Version: Substitute eggs with flax eggs, milk with oat milk, yogurt with coconut yogurt, and honey with maple syrup. Works surprisingly well!
- Protein Power: Replace 1/4 cup flour with unflavored protein powder. Add an extra splash of milk to maintain consistency. Great for post-workout breakfast.
- Savory Herb: Omit sugar, vanilla, and honey. Add 1 tsp dried herbs (chives, dill) and 1/4 cup grated cheese. Serve with sour cream instead of syrup.
What to Serve With This Recipe
These piped spiral pancakes are versatile canvases for toppings:
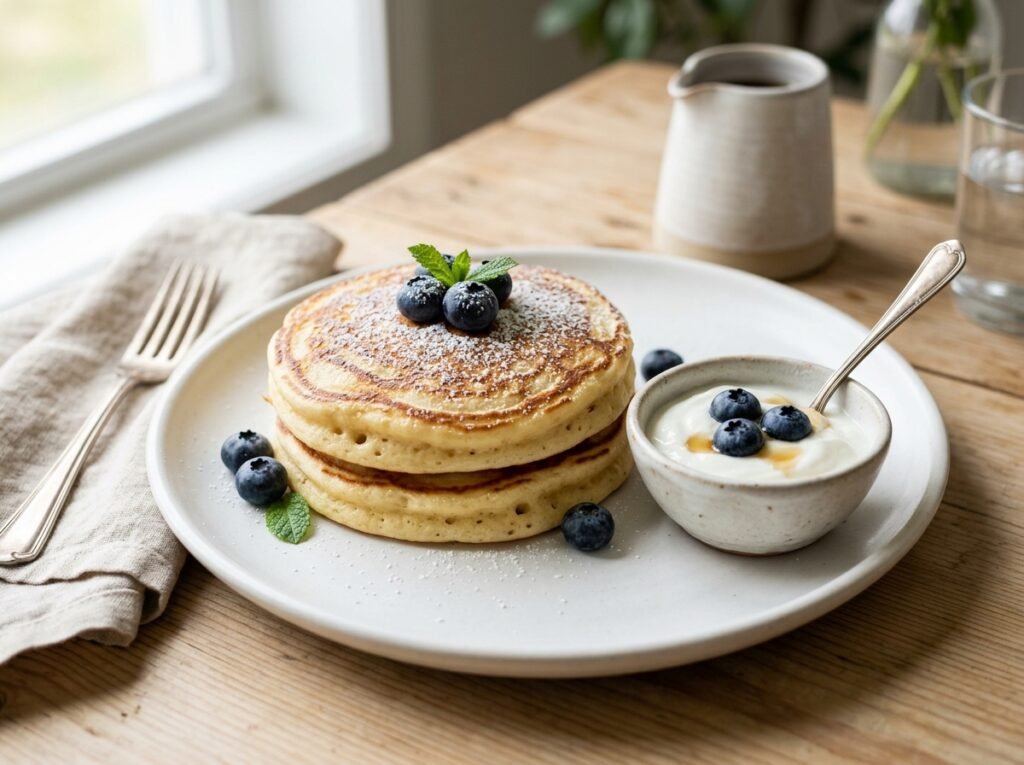
- Classic: Warm maple syrup and a pat of salted butter. The salt cuts the sweetness perfectly.
- Fresh Fruit: Sliced strawberries, bananas, or mixed berries. The acidity balances the rich batter.
- Creamy Dollops: Whipped cream, Greek yogurt, or mascarpone cheese. Adds protein and tang.
- Indulgent: Nutella, peanut butter, or caramel sauce drizzled over the stacks.
- Crunch Factor: Toasted nuts (pecans, walnuts), granola, or shredded coconut.
- Beverage Pairing: Strong black coffee, chai latte, or fresh orange juice. The bitterness of coffee contrasts nicely with the sweet pancakes.
Make Ahead & Storage
- Dry Mix: Combine flour, sugar, baking powder, and salt in a jar. Store at room temperature for up to 3 months. Just add wet ingredients when ready to cook.
- Batter: Can be refrigerated in an airtight container for up to 24 hours. The baking powder will lose some potency, so expect slightly less rise. Stir gently before using.
- Cooked Pancakes: Cool completely on a wire rack. Store in an airtight container or ziplock bag in the fridge for 3 days, or freeze for up to 3 months. Place parchment paper between layers to prevent sticking.
Reheating Instructions
- Toaster: Best for restoring crispness. Pop frozen or refrigerated pancakes directly in on medium setting.
- Oven: Preheat to 350°F (175°C). Place pancakes on a baking sheet. Heat for 5-8 minutes (10-12 if frozen). Keeps them fluffy without drying out.
- Microwave: Fastest but risks sogginess. Place on microwave-safe plate with a damp paper towel over top. Heat 20-30 seconds. Good for quick meals, not ideal texture.
- Air Fryer: 320°F (160°C) for 2-3 minutes. Excellent for reviving crisp edges while keeping interior soft.
Nutritional Information
(Per pancake, approx. 4-inch diameter)
- Calories: 180
- Protein: 5g
- Carbohydrates: 28g
- Fat: 5g
- Fiber: 1g
- Sugar: 9g
- Sodium: 120mg
Note: Values are estimates based on standard ingredients. Actual nutrition varies by brand, portion size, and toppings.
Troubleshooting Guide
| Problem | Likely Cause | Solution |
|---|---|---|
| Pancakes are tough/chewy | Overmixed batter or too much flour | Mix until just combined. Measure flour accurately. |
| Spiral shape spreads out | Batter too thin | Add 1-2 tbsp flour. Chill batter 10 mins to thicken. |
| Center is raw/gummy | Heat too high / flipped too soon | Lower heat. Wait for bubbles/holes before flipping. |
| Pale color, no browning | Heat too low / insufficient sugar | Increase heat slightly. Ensure sugar/honey are in batter. |
| Bitter taste | Too much baking powder | Measure carefully. 1 tsp per cup flour is standard max. |
| Sticking despite non-stick pan | Pan damaged / not enough fat | Re-season pan or use more oil/butter. Ensure pan is hot before adding batter. |
Frequently Asked Questions
1. Can I use self-rising flour instead? Yes! Self-rising flour already contains baking powder and salt. Omit those from the recipe. You may need slightly less liquid as self-rising flour absorbs differently. Start with same amount and adjust if batter is too thick.
2. Why did my piping bag burst? Usually caused by overfilling or a weak seam. Fill only 2/3 full. Twist the top securely. If using a Ziploc, reinforce the seal with tape or use a dedicated pastry bag for durability.
3. Can I make these gluten-free? Absolutely. Use a 1:1 gluten-free flour blend (like King Arthur Measure for Measure). GF batters often benefit from resting 10-15 minutes to hydrate fully. Texture may be slightly different but still delicious.
4. How do I keep pancakes warm while cooking batches? Preheat oven to 200°F (95°C). Place cooked pancakes on a wire rack set over a baking sheet in the oven. The rack prevents steaming/sogginess. They’ll stay warm and fluffy for up to 30 minutes.
5. Can I freeze the batter? Not recommended. The baking powder activates upon contact with liquid and loses effectiveness over time. Freeze cooked pancakes instead—they reheat beautifully.
6. My spirals look uneven. Any tips? Practice makes perfect! Try piping onto parchment paper first to get muscle memory. Keep wrist steady, move at constant speed. Imperfect spirals still taste amazing—don’t stress!
7. Can I add mix-ins like nuts or fruit to the batter? Yes, but chop them finely. Large chunks can clog the piping tip. Fold in gently at the end. Alternatively, press mix-ins onto the surface after piping for better distribution and visuals.
8. Is there a dairy-free yogurt substitute? Coconut yogurt or soy yogurt work well. Choose plain, unsweetened varieties. Coconut yogurt adds subtle flavor; soy is more neutral. Both provide the necessary acidity for leavening.
Final Thoughts
Mastering these piped spiral pancakes is simpler than it looks, and the payoff is immense. You’re not just making breakfast; you’re creating a moment of joy and beauty on a plate. The combination of visual artistry and genuine flavor makes this recipe a standout in any repertoire. Whether you’re treating yourself to a lazy Sunday morning or feeding a crowd, these pancakes deliver consistently.